This tutorial has been updated as of December 15th. You can choose to follow the latest official documentation for operations. The specific tutorial in the official documentation can be found at this link. If you need URDF or other files, please refer to this link. The code for SO-ARM101 and SO-ARM100 is mutually compatible.
Pro version: The black active arm can use a 5V6A power adapter, while the white passive arm requires a 12V5A power adapter.
Servo installation and servo angle calibration should be done in advance. Please refer to the official assembly tutorial.
If the servos are not configured or the robotic arm is not assembled, please first follow the instructions in this README. It includes a bill of materials, links to obtain parts, instructions for 3D printed parts, and suggestions if you are printing for the first time or do not have a 3D printer.
For Ubuntu X86:
- Ubuntu 22.04
- CUDA 12+
- Python 3.10
- Torch 2.6+ For Jetson Orin:
- Jetson Jetpack 6.0+
- Python 3.10
- Torch 2.5.0a0+872d972e41
Installing the LeRobot Environment
- Install the Miniconda environment: Miniconda official installation You need to install the pytorch, torchvision, and other environments according to your CUDA version. For Jetson:
wget https://repo.anaconda.com/miniconda/Miniconda3-latest-Linux-aarch64.sh
chmod +x Miniconda3-latest-Linux-aarch64.sh
bash ~/Miniconda3-latest-Linux-aarch64.sh
source ~/.bashrc
Or, for X86 Ubuntu 22.04:
mkdir -p ~/miniconda3
cd miniconda3
wget https://repo.anaconda.com/miniconda/Miniconda3-latest-Linux-x86_64.sh -O ~/miniconda3/miniconda.sh
bash ~/miniconda3/miniconda.sh -b -u -p ~/miniconda3
rm ~/miniconda3/miniconda.sh
source ~/miniconda3/bin/activate
conda init --all
- In the
directory where you want to deploy (create, for example: lerobot) preferably in the D: or E: drive directory, create and activate a new conda environment for lerobot:
Please do not create or import the lerobot project in the ~/miniconda3 directory.
conda create -y -n lerobot python=3.10
- Then activate your conda environment (you need to do this every time you open a terminal to use lerobot!):
conda activate lerobot
- Clone LeRobot:
git clone -b 2025-12-15 https://github.com/JuxiTechnology/lerobot.git
You can choose to follow the latest version: https://github.com/huggingface/lerobot.git Note: The command code in the latest version may be inconsistent!
- Install ffmpeg in your environment: When using miniconda, install ffmpeg in your environment:
conda install ffmpeg -c conda-forge
This usually installs ffmpeg 7.X compiled with the libsvtav1 encoder for your platform. If libsvtav1 is not supported (you can check supported encoders via
ffmpeg -encoders), you can: 【For all platforms】Explicitly install ffmpeg 7.X: conda install ffmpeg=7.1.1 -c conda-forge To install without graphical dependencies (gdk-pixbuf, librsvg), use this command: conda install ffmpeg=7.1.1 -c conda-forge --no-deps 【Linux only】Install ffmpeg's build dependencies and compile ffmpeg from source with libsvtav1 support, and ensure the correct ffmpeg executable is used, which can be confirmed viawhich ffmpeg. If you encounter the following error, you can also use the above commands to resolve it.

- Navigate to the lerobot directory and install LeRobot with feetech motor dependencies:
cd ~/lerobot && pip install -e ".[feetech]"
For Jetson Jetpack 6.0+ devices (please ensure you have installed Pytorch-gpu and Torchvision according to this official link tutorial before this step):
conda install -y -c conda-forge "opencv>=4.10.0.84"  # Install OpenCV and other dependencies via conda, only for Jetson Jetpack 6.0+
conda remove opencv   # Uninstall OpenCV
pip3 install opencv-python==4.10.0.84  # Install the specified version of OpenCV using pip3
conda install -y -c conda-forge ffmpeg
conda uninstall numpy
pip3 install numpy==1.26.0  # This version needs to be compatible with torchvision
- Check Pytorch and Torchvision Since installing the lerobot environment via pip will uninstall the original Pytorch and Torchvision and install the CPU version, you need to check in Python.
import torch
print(torch.cuda.is_available())
If the output is False, you need to reinstall Pytorch and Torchvision according to the official tutorial.
- Intel RealSense Depth Camera SDK dependency environment installation (if you have an Intel RealSense depth camera)
If you need to use a RealSense depth camera, install pyrealsense2 in
lerobot/src/lerobot/:
pip install pyrealsense2
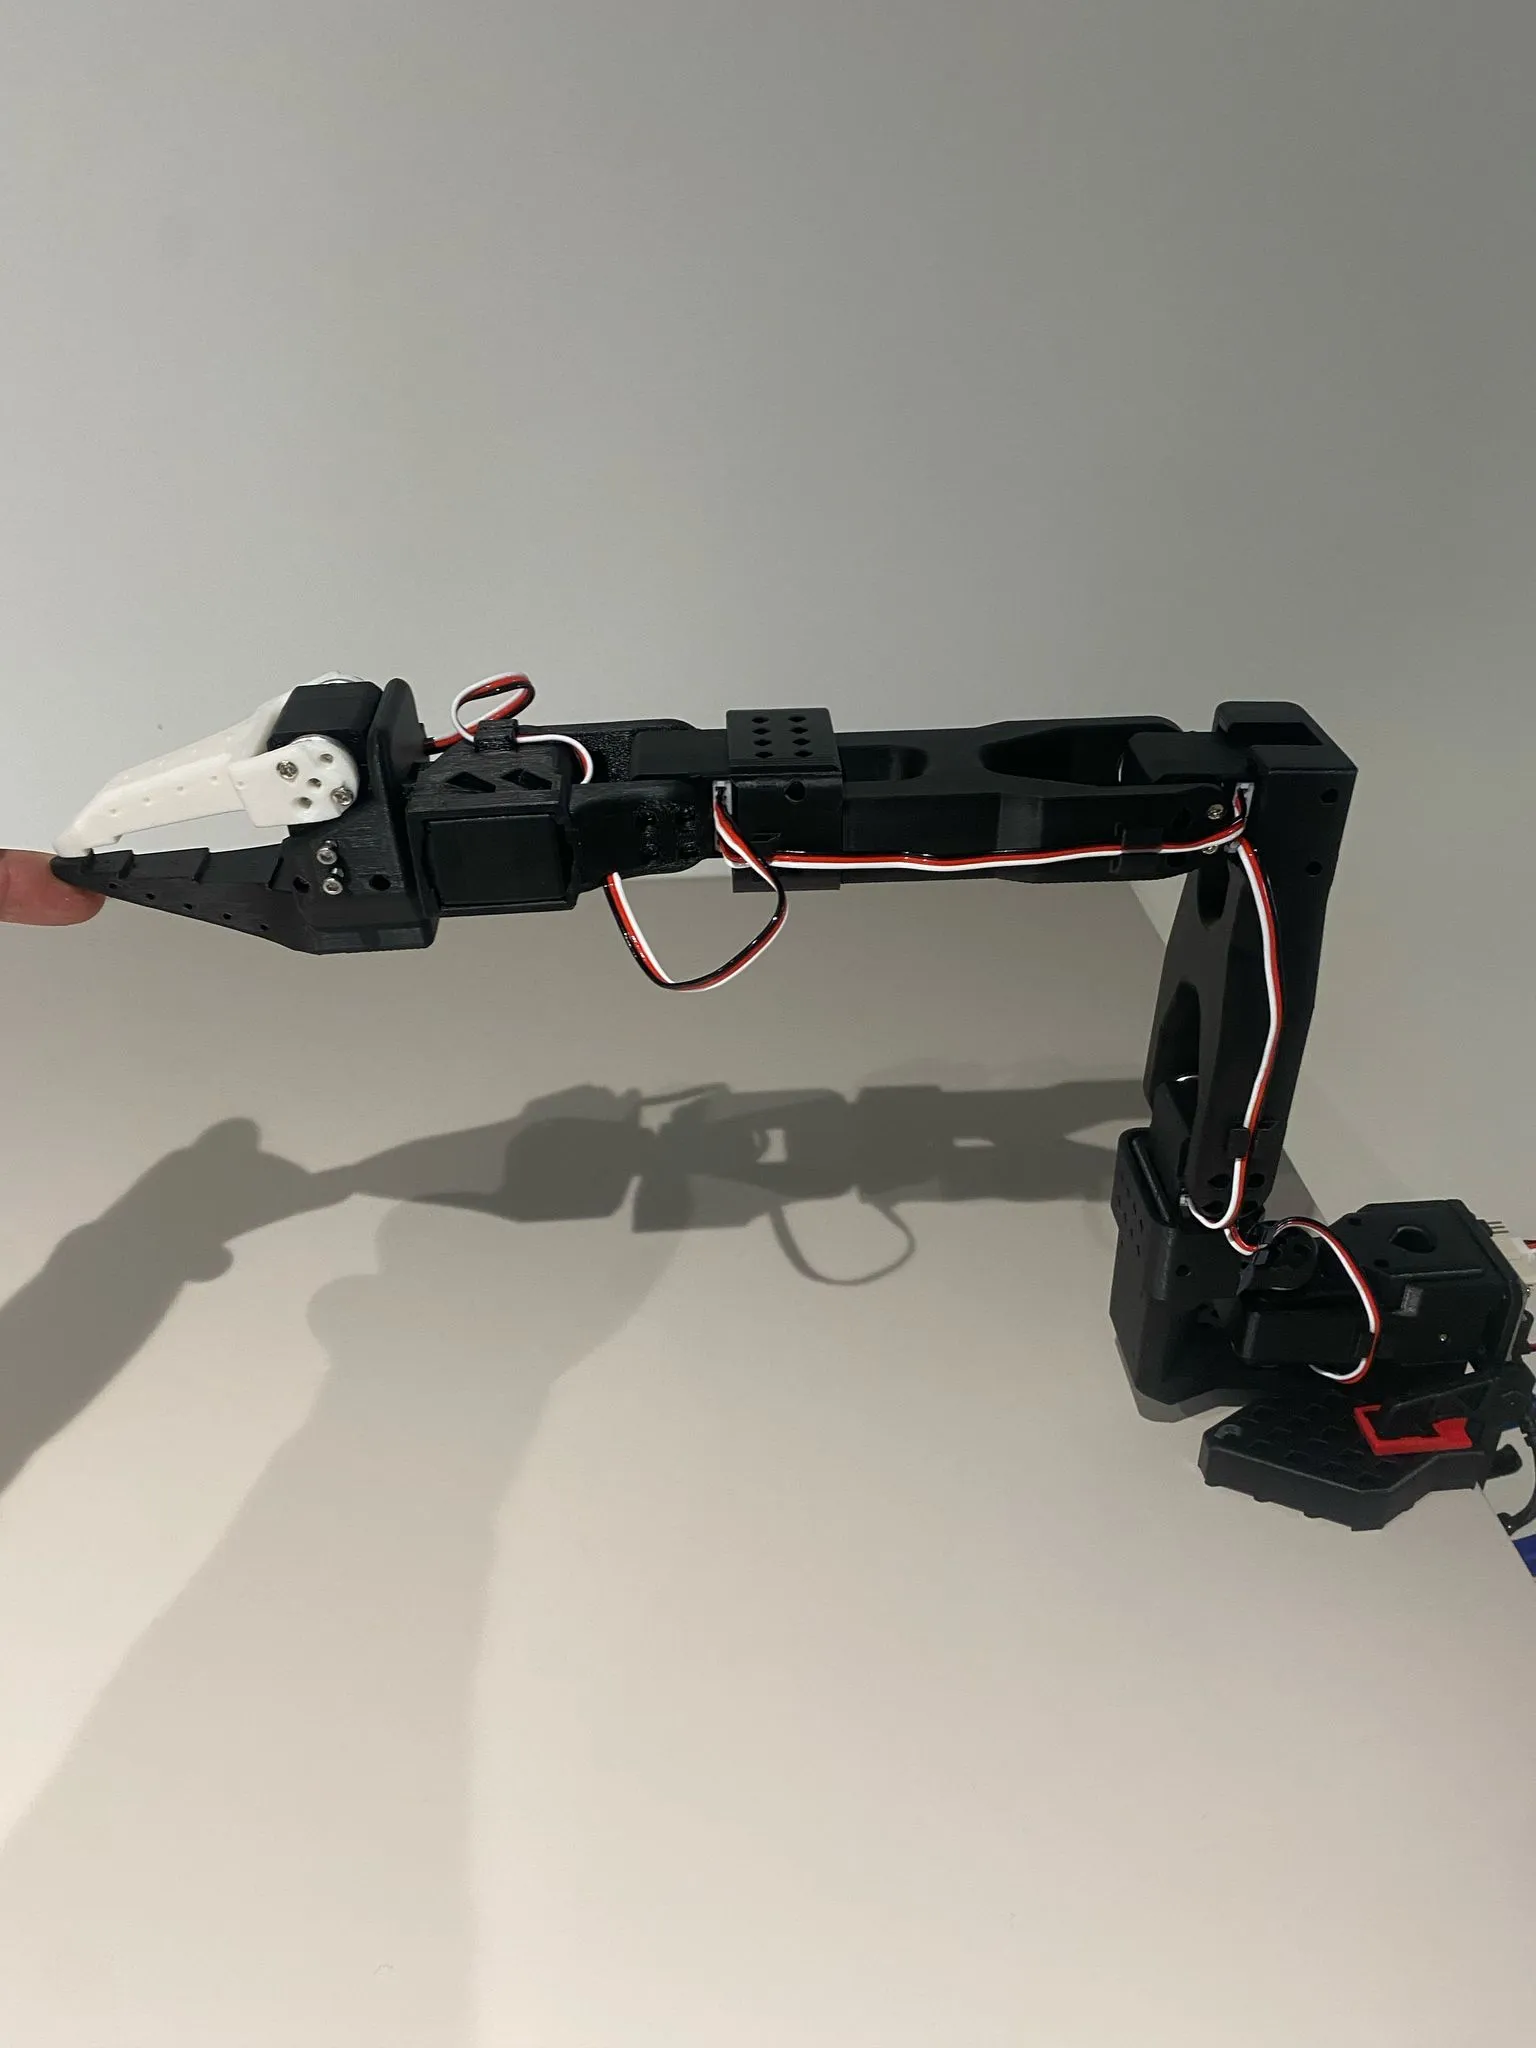
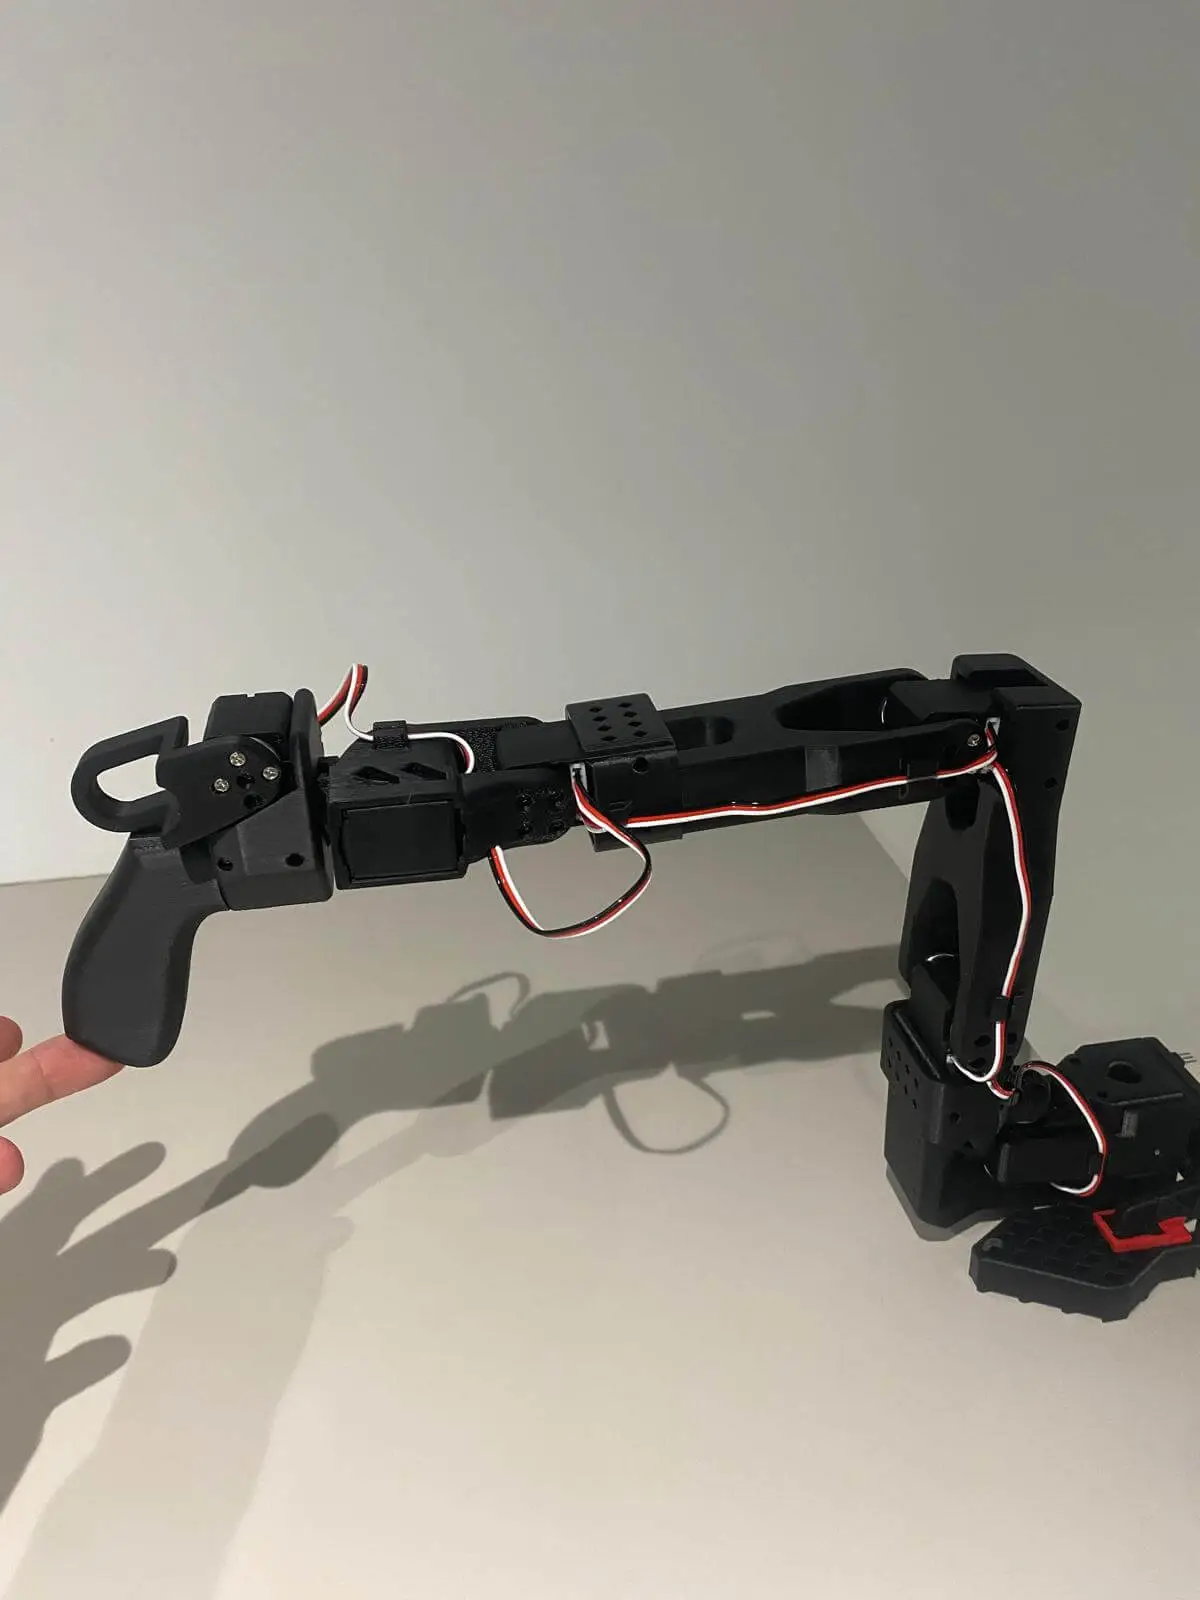
After connecting the power cables (the black leader arm uses a 5V6A power adapter, the white follower arm uses a 12V5A power adapter), and connecting the servo driver board to the host computer via data cable.
First, navigate to the lerobot/src/lerobot/ directory:
cd ~/lerobot/src/lerobot/
Then activate your conda environment (this needs to be done every time you open a terminal to use lerobot!):
conda activate lerobot
- Run the script to find ports To find the correct USB port for each robotic arm, run the utility script twice:
lerobot-find-port
- Example Output
Example output when identifying the Leader arm port (e.g.,
/dev/tty.usbmodem575E0031751on Mac, or possibly/dev/ttyACM0on Linux):
Finding all available ports for the MotorBus.
['/dev/ttyACM0', '/dev/ttyACM1']
Remove the usb cable from your MotorsBus and press Enter when done.

[...Disconnect corresponding leader or follower arm and press Enter...]

The port of this MotorsBus is /dev/ttyACM1
Reconnect the USB cable.
Example output when identifying the Follower arm port (e.g., /dev/tty.usbmodem575E0032081, or possibly /dev/ttyACM1 on Linux):
Finding all available ports for the MotorBus.
['/dev/ttyACM0', '/dev/ttyACM1']
Remove the usb cable from your MotorsBus and press Enter when done.

[...Disconnect corresponding leader or follower arm and press Enter...]

The port of this MotorsBus is /dev/ttyACM0
Reconnect the USB cable.
Remember to unplug the USB connector, otherwise the interface cannot be detected.
- Troubleshooting On Linux, you need to grant access to the USB ports by running the following commands:
sudo chmod 666 /dev/ttyACM0
sudo chmod 666 /dev/ttyACM1
##Calibrating the Robotic Arm
Next, you need to calibrate your powered-on and connected SO-10x robot to ensure that the position information of the Leader arm and Follower arm is consistent at the same physical location. This calibration process is crucial because it allows a neural network trained on one SO-10x robot to work properly on another robot. If you need to recalibrate the robotic arm, completely delete the files under ~/.cache/huggingface/lerobot/calibration/robots or ~/.cache/huggingface/lerobot/calibration/teleoperators and recalibrate the robotic arm, otherwise an error message will appear. The calibrated robotic arm information will be stored in a json file in that directory.
- Manual Calibration of the Follower Arm Please connect the 6 robot servo interfaces via the 3-pin interface, connect the base servo to the servo driver board, and then run the following command or API example to calibrate the robotic arm:
Taking a PC (Linux) and Jetson board as an example, the first inserted USB interface will be mapped to ttyACM0, and the second inserted USB interface will be mapped to ttyACM1. Before running the code, please note the mapping interface for leader and follower.
- Interface Authorization First, you need to grant interface permissions by running the following command:
sudo chmod 666 /dev/ttyACM*
- Then Calibrate the Follower Arm Next, calibrate the follower arm by running the following Python command:
lerobot-calibrate \
    --robot.type=so101_follower \
    --robot.port=/dev/ttyACM0 \
    --robot.id=my_awesome_follower_arm
First, you need to move the robot to a position where all joints are in the middle of their movable range and keep the robotic arm still. Then, after pressing Enter, you must move each joint through its full range of motion. The calibration file will record the midpoint, maximum, and minimum values of the movable range and save them in a json file in the ~/.cache/huggingface/lerobot/calibration/robots or ~/.cache/huggingface/lerobot/calibration/teleoperators directory.
| Follower Arm Midpoint | Leader Arm Midpoint |
|---|---|
 |
 |
- Calibrate the Leader Arm The steps for calibrating the leader arm are the same as above. Please run the following command or API example:
lerobot-calibrate \
    --teleop.type=so101_leader \
    --teleop.port=/dev/ttyACM1 \
    --teleop.id=my_awesome_leader_arm
[video(video-JEZgW02y-1778726743185)(type-csdn)(url-https://live.csdn.net/v/embed/526329)(image-https://i-blog.csdnimg.cn/img_convert/2ba19f344af1fbde4607c44cd70bcf87.jpeg)(title-Robotic Arm Midpoint Calibration Video)]
If you encounter the following error when calibrating the servo ID:
`Motor ‘gripper’ was not found, Make sure it is connected`
Please carefully check if the communication cable is properly connected to the servo and if the power supply voltage is correct."
- If you encounter:
Could not connect on port "/dev/ttyACM0"
and you see that ACM0 exists by running ls /dev/ttyACM*, then you forgot to grant serial port permissions. Enter sudo chmod 666 /dev/ttyACM* in the terminal.
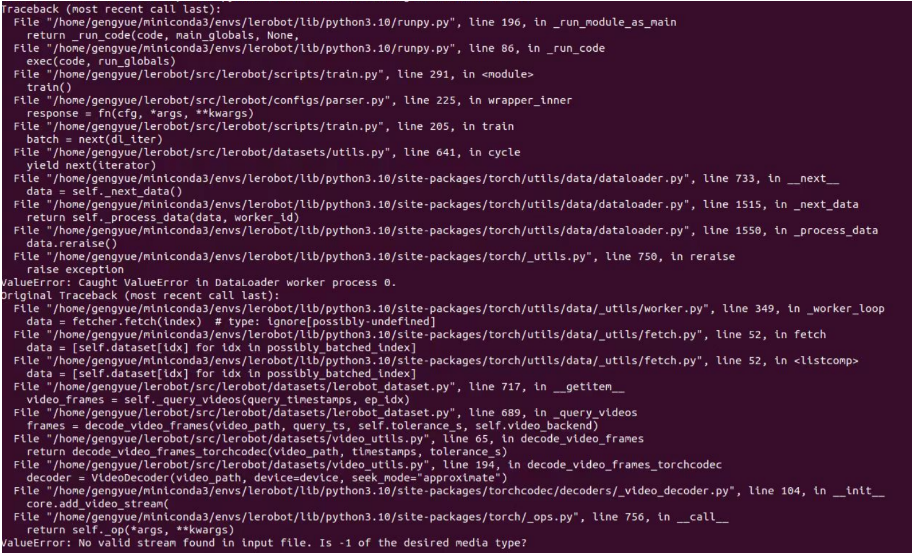
- If you encounter:
No valid stream found in input file. Is -1 of the desired media type?
Please install ffmpeg 7.1.1:
conda install ffmpeg=7.1.1 -c conda-forge
- If you encounter:
ConnectionError: Failed to sync read 'Present_Position' on ids=[1,2,3,4,5,6] after 1 tries. [TxRxResult] There is no status packet!
You need to check if the robotic arm corresponding to the port number is powered on, and if the bus servo data cable is loose or detached. The servo whose light is off indicates that the cable in front of it is loose.
- If you encounter the following error when calibrating the robotic arm:
Magnitude 30841 exceeds 2047 (max for sign_bit_index=11)
Power cycle the robotic arm (turn off and on again) and try calibrating again. If you encounter a MAX angle value reaching tens of thousands during calibration, you can also use this method. If it doesn't work, you need to recalibrate the corresponding servo, i.e., perform midpoint calibration and ID writing.
- Simple Teleoperation Now, you are ready to teleoperate your robot! Run this simple script (it will not connect and display the camera): Note that the ID associated with the robot is used to store calibration files. It is crucial to use the same ID when performing teleoperation, recording, and evaluation with the same setup. First, grant permissions to the serial port:
sudo chmod 666 /dev/ttyACM*
Run teleoperation:
lerobot-teleoperate \
    --robot.type=so101_follower \
    --robot.port=/dev/ttyACM0 \
    --robot.id=my_awesome_follower_arm \
    --teleop.type=so101_leader \
    --teleop.port=/dev/ttyACM1 \
    --teleop.id=my_awesome_leader_arm
The teleoperation command will automatically perform the following steps:
-
Identify any missing calibration files and start the calibration procedure.
-
Connect the robot and the teleoperation device, and begin teleoperation.
-
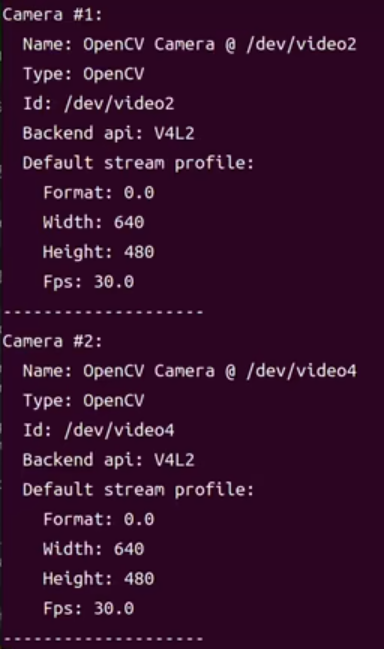
Teleoperation with Camera Display To instantiate a camera, you need a camera identifier. This identifier may change when you restart your computer or reconnect the camera, depending mainly on your operating system. To find the camera index of cameras connected to your system, run the following script:
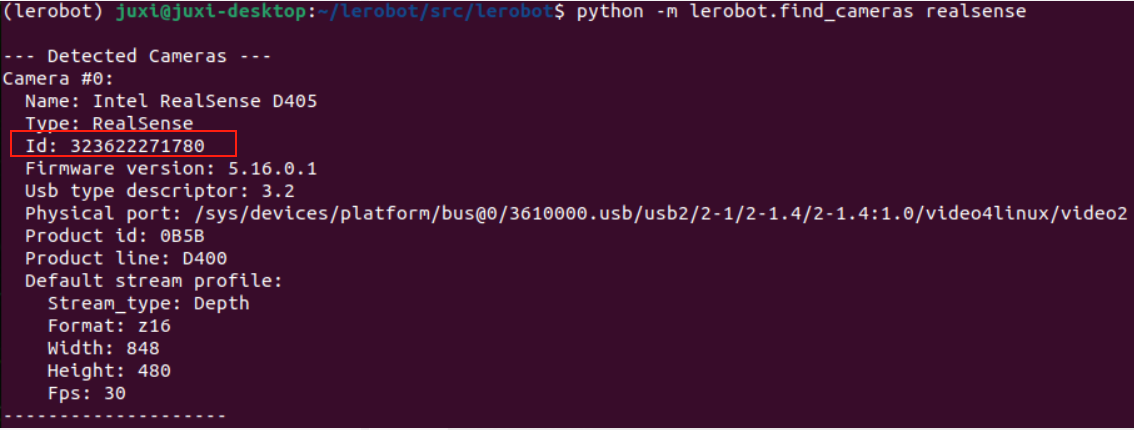
lerobot-find-cameras realsense # or realsense for Intel Realsense cameras
The terminal will print relevant camera information.
~/lerobot/outputs/captured_images directory.
When using Intel RealSense cameras on macOS, you may encounter the error "Error finding RealSense cameras: failed to set power state". This can be resolved by running the same command with sudo privileges. Note that using RealSense cameras on macOS is unstable.
After that, you can display the camera feed on your computer during teleoperation by simply running the following code. This is useful for preparing your setup before recording the first dataset.
lerobot-teleoperate \
    --robot.type=so101_follower \
    --robot.port=/dev/ttyACM0 \
    --robot.id=my_awesome_follower_arm \
    --robot.cameras="{ front: {type: opencv, index_or_path: 0, width: 640, height: 480, fps: 30, fourcc: "MJPG"}}" \
    --teleop.type=so101_leader \
    --teleop.port=/dev/ttyACM1 \
    --teleop.id=my_awesome_leader_arm \
    --display_data=true
The
fourcc: "MJPG"format image is a compressed image. You can try higher resolutions, but you can also try theYUYVformat image, which will result in lower image resolution and FPS, causing the robotic arm operation to lag. Currently, theMJPG formatcan support 3 cameras at1920*1080resolution while maintaining30FPS, but it is still not recommended to connect 2 cameras to the host through the same USB HUB.
If you have more cameras, you can add them by modifying the --robot.cameras parameter. You should pay attention to the format of index_or_path, which is determined by the last digit of the camera ID output by the python -m lerobot.find_cameras opencv command.
For example, if you want to add a camera:
lerobot-teleoperate \
    --robot.type=so101_follower \
    --robot.port=/dev/ttyACM0 \
    --robot.id=my_awesome_follower_arm \
    --robot.cameras="{ front: {type: opencv, index_or_path: 0, width: 640, height: 480, fps: 30, fourcc: "MJPG"}, side: {type: opencv, index_or_path: 2, width: 640, height: 480, fps: 30, fourcc: "MJPG"}}" \
    --teleop.type=so101_leader \
    --teleop.port=/dev/ttyACM1 \
    --teleop.id=my_awesome_leader_arm \
    --display_data=true
If you want to add a RealSense depth camera, first run python -m lerobot.find_cameras realsense to get the Id, and replace the serial_number_or_name: "323622271780" in the robot.cameras parameter of this command with your own depth camera Id, and set use_depth: true to enable the depth stream:
lerobot-teleoperate \
    --robot.type=so101_follower \
    --robot.port=/dev/ttyACM0 \
    --robot.id=my_awesome_follower_arm \
    --robot.cameras="{ front: {type: opencv, index_or_path: 0, width: 640, height: 480, fps: 30, fourcc: "MJPG"}, side: {type: intelrealsense, serial_number_or_name: "323622271780", width: 1280, height: 720, fps: 30, use_depth: true}}" \
    --teleop.type=so101_leader \
    --teleop.port=/dev/ttyACM1 \
    --teleop.id=my_awesome_leader_arm \
    --display_data=true
- If you want to save the dataset locally, you can directly run:
lerobot-record \
    --robot.type=so101_follower \
    --robot.port=/dev/ttyACM0 \
    --robot.id=my_awesome_follower_arm \
    --robot.cameras="{ front: {type: opencv, index_or_path: 0, width: 640, height: 480, fps: 30, fourcc: \"MJPG\"}, side: {type: opencv, index_or_path: 2, width: 640, height: 480, fps: 30, fourcc: \"MJPG\"}}" \
    --teleop.type=so101_leader \
    --teleop.port=/dev/ttyACM1 \
    --teleop.id=my_awesome_leader_arm \
    --display_data=true \
    --dataset.repo_id=juxi/test \
    --dataset.num_episodes=5 \
    --dataset.single_task=\"Put the blue cube on the black box\" \
    --dataset.push_to_hub=false \
    --dataset.episode_time_s=30 \
    --dataset.reset_time_s=30
Where dataset.repo_id and dataset.single_task can be customized. With push_to_hub=false, the dataset will be saved under ~/.cache/huggingface/lerobot in your home directory, creating the folder juxi/test as specified. If using a RealSense depth camera, you can modify the command accordingly.
- If you want to use Hugging Face Hub features to upload your dataset and haven't done so before, ensure you are logged in with a token that has write permissions, which can be generated from Hugging Face settings:
hf auth loginStore your Hugging Face repository name in a variable by running:
hf auth whoamiRecord 5 episodes and upload your dataset to the Hub:
lerobot-record \
    --robot.type=so101_follower \
    --robot.port=/dev/ttyACM0 \
    --robot.id=my_awesome_follower_arm \
    --robot.cameras="{ front: {type: opencv, index_or_path: 0, width: 640, height: 480, fps: 30, fourcc: \"MJPG\"}, side: {type: opencv, index_or_path: 2, width: 640, height: 480, fps: 30, fourcc: \"MJPG\"}}" \
    --teleop.type=so101_leader \
    --teleop.port=/dev/ttyACM1 \
    --teleop.id=my_awesome_leader_arm \
    --display_data=true \
    --dataset.repo_id=${HF_USER}/record-test \
    --dataset.num_episodes=5 \
    --dataset.single_task=\"Put the blue cube on the black box\" \
    --dataset.push_to_hub=true \
    --dataset.episode_time_s=30 \
    --dataset.reset_time_s=30
You will see output similar to:
INFO 2024-08-10 15:02:58 ol_robot.py:219 dt:33.34 (30.0hz) dtRlead: 5.06 (197.5hz) dtWfoll: 0.25 (3963.7hz) dtRfoll: 6.22 (160.7hz) dtRlaptop: 32.57 (30.7hz) dtRphone: 33.84 (29.5hz)
Parameter Explanation
episode_time_s: The duration for each data collection episode.reset_time_s: The preparation time between each data collection.num_episodes: The number of episodes expected to be collected.push_to_hub: Determines whether to upload the data to HuggingFace Hub.
| Key | Action |
|---|---|
| Right Arrow → | Early termination of the current episode/reset; proceed to the next. |
| Left Arrow ← | Cancel the current episode; re-record. |
| ESC | Immediately stop the session, encode the video, and upload the dataset. |
Data Collection Tips
- Task Suggestion: Grasp objects at different positions and place them into a box.
- Scale: Record ≥50 episodes (10 episodes per position).
- Consistency: - Keep the camera fixed. - Maintain the same grasping behavior. - Ensure the manipulated object is visible in the camera frame.
- Progressive Advancement: - Start with reliable grasping, then introduce variations (new positions, grasping techniques, camera adjustments). - Avoid a sharp increase in complexity to prevent failures. 💡 Rule of Thumb: Use only the camera feed as guidance; control the robotic arm based solely on the video feedback from the screen. If you want to delve deeper into this important topic, you can read our blog post on what makes a good dataset.
- In the next chapter, you will train your neural network. After achieving reliable grasping performance, you can introduce more variations during data collection, such as adding grasping positions, different grasping techniques, and changing camera positions.
- Avoid adding too many variations too quickly, as this may hinder your results.
- "If you wish to keep the data locally (
--dataset.push_to_hub=false), replace--dataset.repo_id=${HF_USER}/so101_testwith a custom local folder name, e.g.,--dataset.repo_id=juxi/so101_test. The data will be stored under~/.cache/huggingface/lerobotin your home directory."- If you uploaded the dataset to Hugging Face Hub via
--dataset.push_to_hub=true, you can visualize your dataset online by copying and pasting your repo id.- Pressing the Right Arrow → at any time during episode recording will stop early and enter the reset state. Similarly, during reset, you can stop early and proceed to the next episode recording.
- Pressing the Left Arrow ← at any time during recording or reset to an earlier stage will cancel the current episode and re-record.
- Pressing ESCAPE ESC at any time during recording will immediately end the session, proceeding directly to video encoding and dataset upload.
- You can resume recording by re-running the same command and adding
--resume=true.⚠️ Important: When resuming, set--dataset.num_episodesto the number of additional episodes to record (not the total target number of episodes in the dataset). To start recording from scratch, manually delete the dataset directory.- On Linux, if the arrow keys and Esc key have no effect during data recording, ensure the $DISPLAY environment variable is set. See pynput limitations. If your key presses are not registered, you may need to downgrade your pynput version, e.g., install version 1.6.8.
pip install pynput==1.6.8
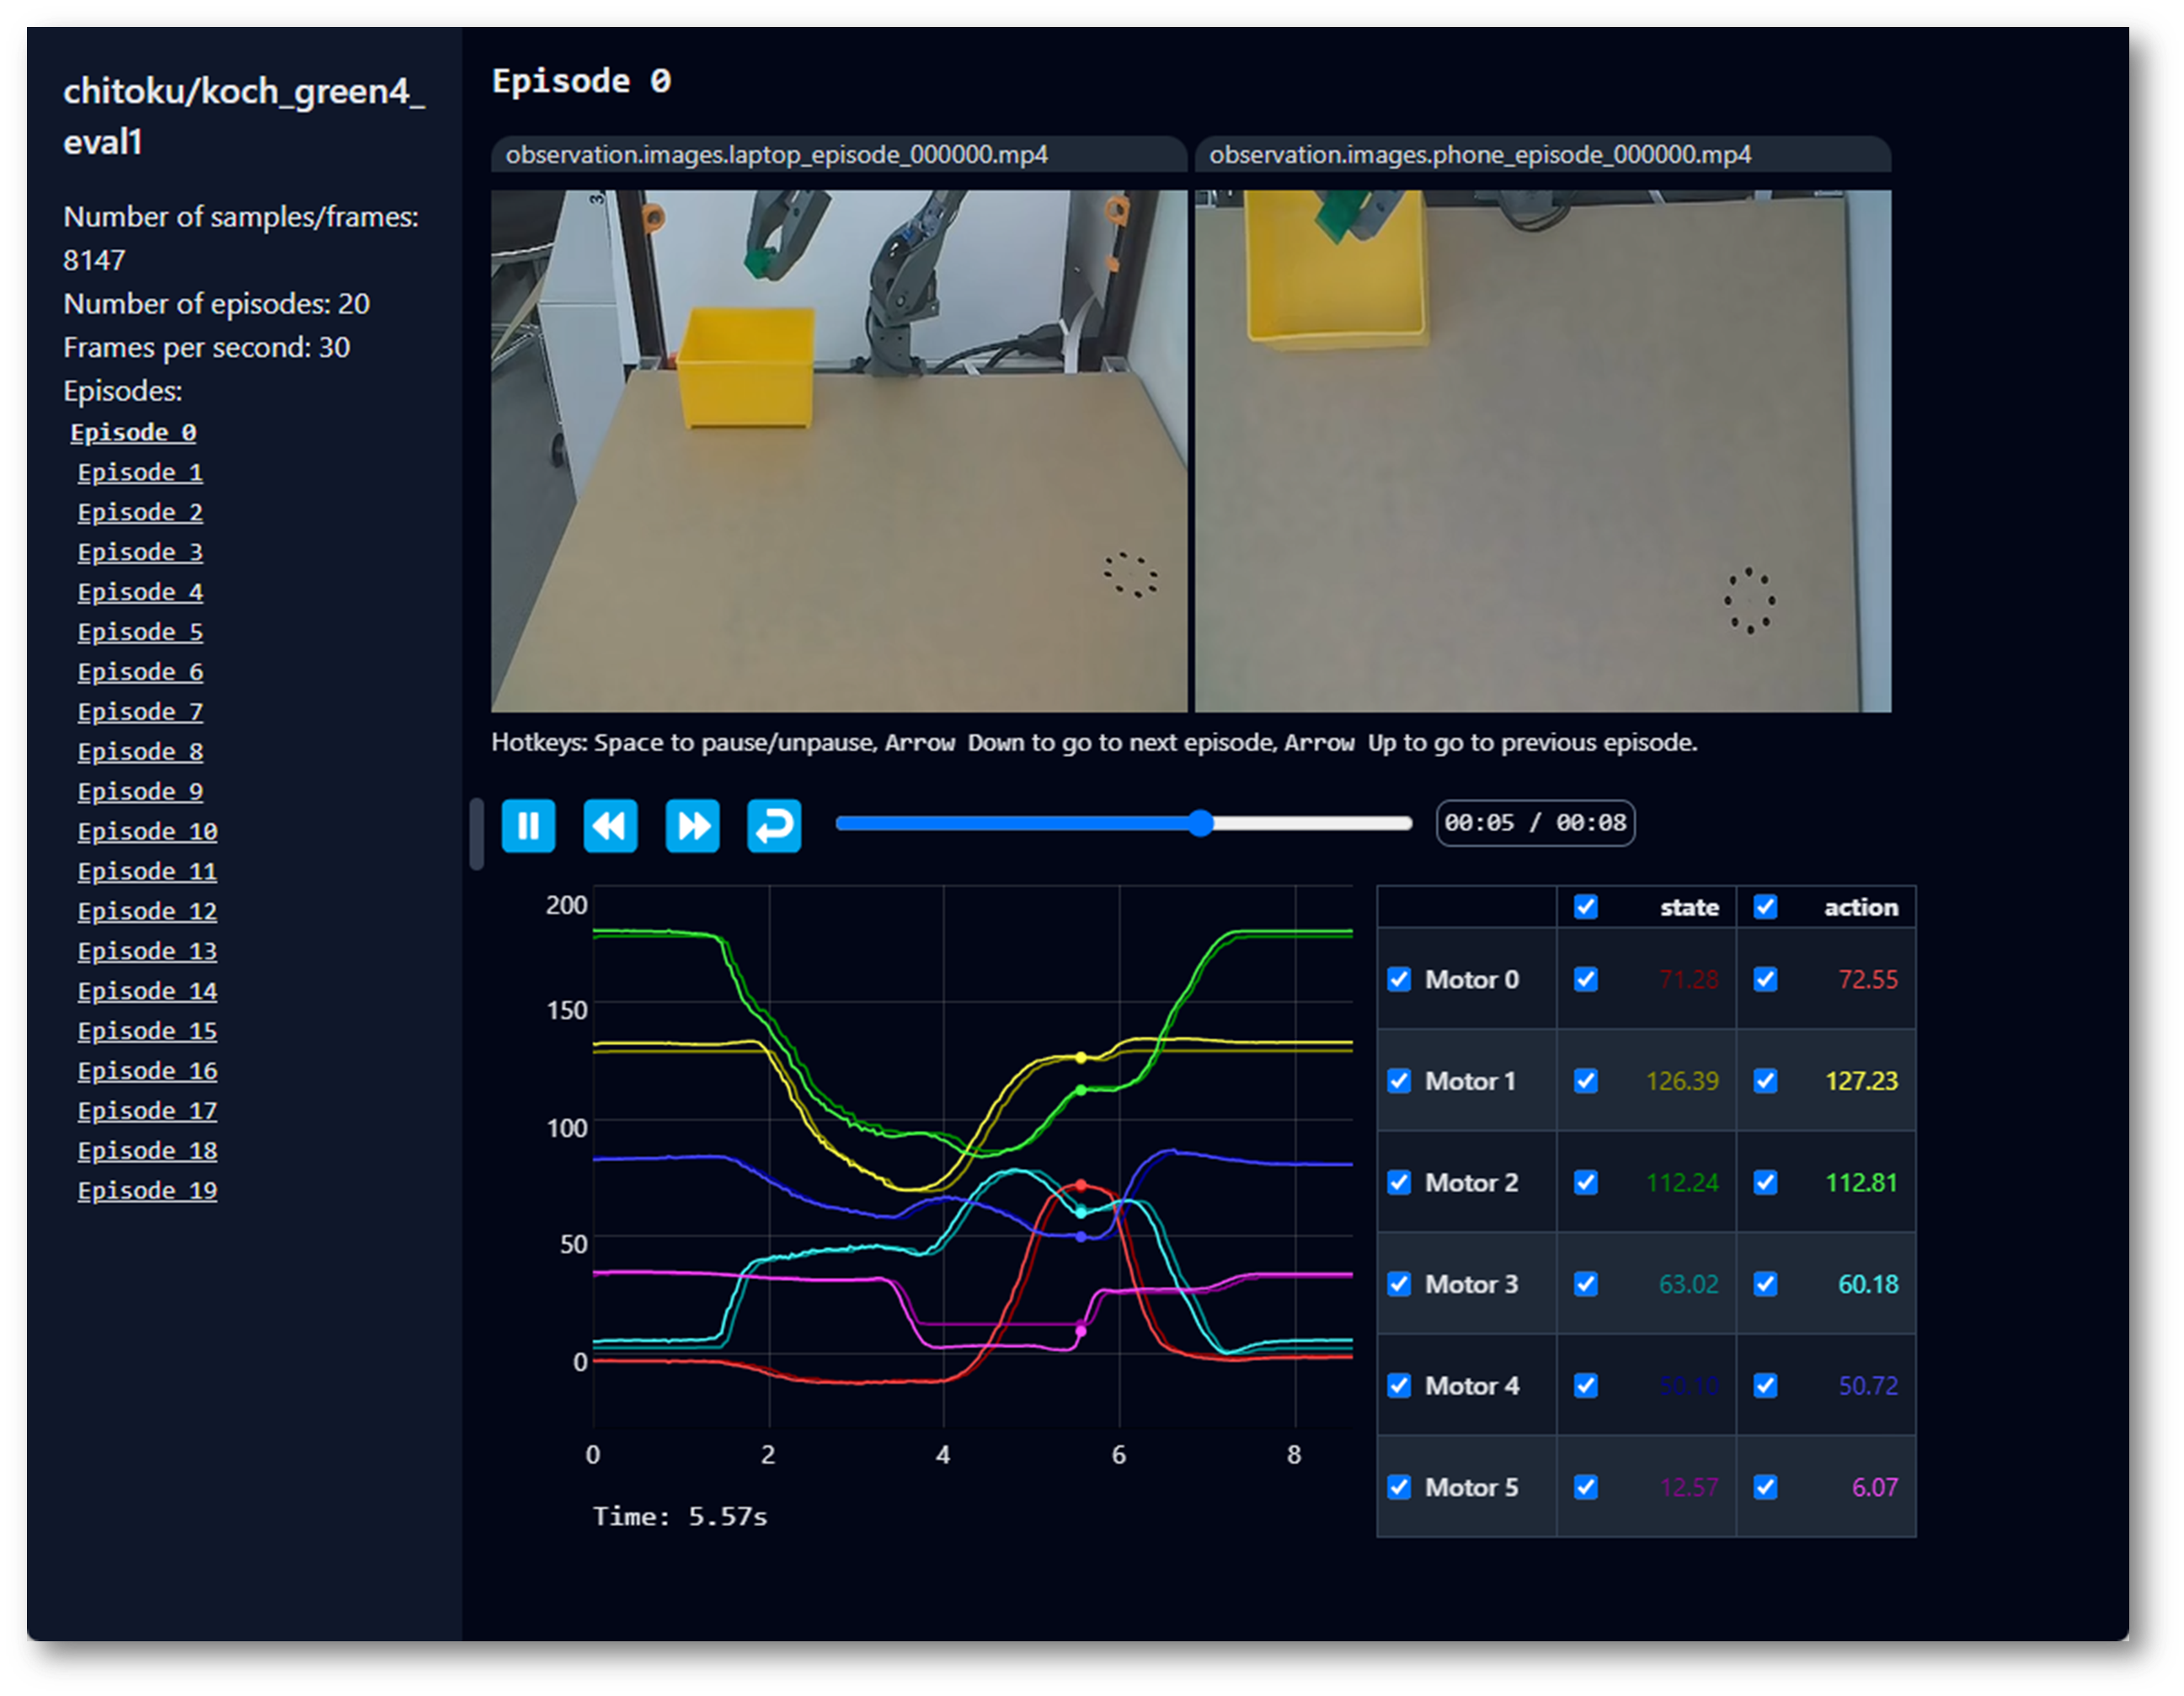
echo ${HF_USER}/so101_testIf you did not use --dataset.push_to_hub=false and uploaded the data, you can also visualize it locally with:
lerobot-dataset-viz \
  --repo-id ${HF_USER}/so101_test
If you used --dataset.push_to_hub=false and did not upload the data, you can also visualize it locally with:
lerobot-dataset-viz \
  --repo-id juxi/test
Here, juxi is the custom repo_id name used during data collection.
Now, try replaying the first dataset on your robot:
lerobot-replay \
    --robot.type=so101_follower \
    --robot.port=/dev/ttyACM0 \
    --robot.id=my_awesome_follower_arm \
    --dataset.repo_id=${HF_USER}/record-test \
    --dataset.episode=0
At this point, the robotic arm should perform the same actions as you recorded during teleoperation.
Refer to the official ACT tutorial.
Training
To train a policy for controlling your robot, use the python -m lerobot.scripts.train script. Some parameters are required. Here is an example command:
lerobot-train \
  --dataset.repo_id=${HF_USER}/so101_test \
  --policy.type=act \
  --output_dir=outputs/train/act_so101_test \
  --job_name=act_so101_test \
  --policy.device=cuda \
  --wandb.enable=false \
  --steps=300000
If you want to train on a local dataset, make sure the repo_id matches the name used during data collection, and add --policy.push_to_hub=false.
lerobot-train \
  --dataset.repo_id=juxi/test \
  --policy.type=act \
  --output_dir=outputs/train/act_so101_test \
  --job_name=act_so101_test \
  --policy.device=cuda \
  --wandb.enable=false \
  --policy.push_to_hub=false\
  --steps=300000
Command Explanation
- Dataset Specification: We provide the dataset via the
--dataset.repo_id=${HF_USER}/so101_testparameter. - Training Steps: We modify the training steps via
--steps=300000. The algorithm defaults to 800,000 steps. Adjust this based on your task difficulty and by observing the training loss. - Policy Type: We provide the policy using
policy.type=act. Similarly, you can switch to other policies like [act, diffusion, pi0, pi0fast, pi0.5, sac, smolvla]. This will load the configuration fromconfiguration_act.py. Importantly, this policy automatically adapts to your robot's motor states, motor actions, and number of cameras (e.g.,laptopandphone), which are already saved in your dataset. - Device Selection: We provide
policy.device=cudabecause we are training on an Nvidia GPU, but you can usepolicy.device=mpsfor training on Apple Silicon. - Visualization Tool: We provide
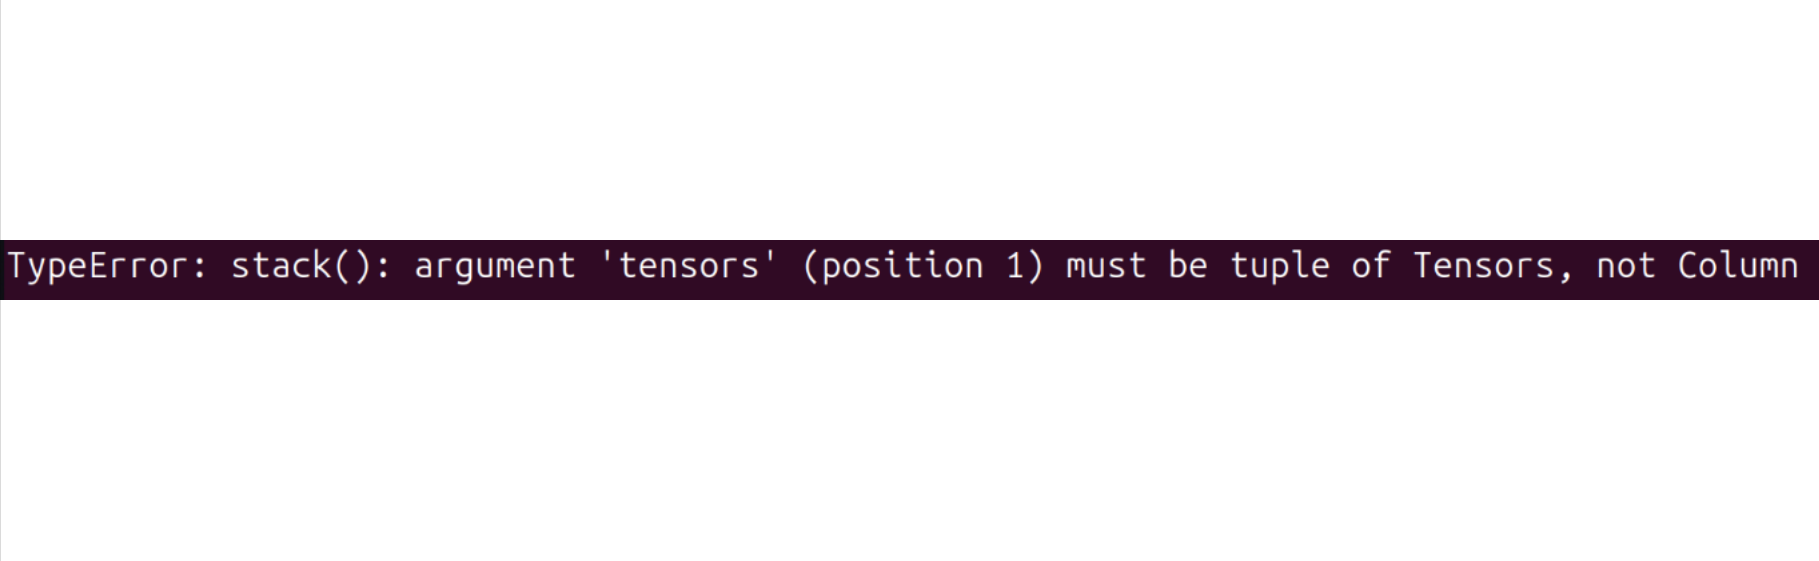
wandb.enable=trueto use Weights and Biases for visualizing training charts. This is optional, but if you use it, make sure you are logged in by runningwandb login. If you encounter the following error:Try running the following command to resolve it:
pip install datasets==2.19
(image-https://i-blog.csdnimg.cn/img_convert/2ba19f344af1fbde4607c44cd70bcf87.jpeg)(title-Robotic)
Training may take several hours. You will find the trained weight files in the outputs/train/act_so101_test/checkpoints directory.
To resume training from a specific checkpoint, here is an example command to resume training from the last checkpoint of the act_so101_test policy:
lerobot-train \
  --config_path=outputs/train/act_so101_test/checkpoints/last/pretrained_model/train_config.json \
  --resume=true
Evaluation
You can use the record function from lerobot/record.py, but you need to provide the trained policy checkpoint as input. For example, run the following command to record 10 evaluation episodes:
lerobot-record \
  --robot.type=so101_follower \
  --robot.port=/dev/ttyACM0 \
  --robot.cameras="{ front: {type: opencv, index_or_path: 0, width: 640, height: 480, fps: 30, fourcc: \"MJPG\"},   side: {type: opencv, index_or_path: 2, width: 640, height: 480, fps: 30,fourcc: \"MJPG\"}}" \
  --robot.id=my_awesome_follower_arm \
  --teleop.type=so101_leader \
  --teleop.port=/dev/ttyACM1 \
  --teleop.id=my_awesome_leader_arm \
  --display_data=false \
  --dataset.repo_id=juxi/eval_test123 \
  --dataset.single_task=\"Put the blue cube on the black box\" \
  --dataset.episode_time_s=30 \
  --dataset.reset_time_s=30 \
  --dataset.num_episodes=5 \
  --policy.path=outputs/train/act_so101_test/checkpoints/last/pretrained_model
  --dataset.push_to_hub=false
- The
--policy.pathparameter indicates the path to your trained policy checkpoint (e.g.,outputs/train/act_so101_test/checkpoints/last/pretrained_model). If you uploaded the model checkpoint to the Hub, you can also use the model repository (e.g.,${HF_USER}/act_so101_test). - The dataset name
dataset.repo_idstarts witheval_. This operation will separately record videos and data during evaluation, saved in a folder starting witheval_, for examplejuxi/eval_test123. - If you encounter
File exists: 'home/xxxx/.cache/huggingface/lerobot/xxxxx/juxi/eval_xxxx'during evaluation, please delete the folder starting witheval_first and run the program again. - When encountering
mean is infinity. You should either initialize with stats as an argument or use a pretrained model, note that keywords likefrontandsidein the--robot.camerasparameter must strictly match those used during data collection.
Refer to the official SmolVLA tutorial.
pip install -e \".[smolvla]\"
Training
lerobot-train \
  --policy.path=lerobot/smolvla_base \
  --dataset.repo_id=${HF_USER}/mydataset \
  --batch_size=64 \
  --steps=20000 \
  --output_dir=outputs/train/my_smolvla \
  --job_name=my_smolvla_training \
  --policy.device=cuda \
  --wandb.enable=true
Evaluation
lerobot-record \
  --robot.type=so101_follower \
  --robot.port=/dev/ttyACM0 \
  --robot.id=my_awesome_follower_arm \ # <- Use your robot id
  --robot.cameras="{ front: {type: opencv, index_or_path: 0, width: 640, height: 480, fps: 30, fourcc: \"MJPG\"},   side: {type: opencv, index_or_path: 2, width: 640, height: 480, fps: 30,fourcc: \"MJPG\"}}" \
  --dataset.single_task=\"Put the blue cube on the black box\" \
  --dataset.repo_id=juxi/eval_test123 \
  --dataset.episode_time_s=30 \
  --dataset.reset_time_s=30 \
  --dataset.num_episodes=5 \
  # <- Teleop optional if you want to teleoperate in between episodes \
  # --teleop.type=so101_leader \
  # --teleop.port=/dev/ttyACM0 \
  # --teleop.id=my_awesome_leader_arm \
  --policy.path=HF_USER/FINETUNE_MODEL_NAME # <- Use your fine-tuned model
Refer to the official Pi0 tutorial.
pip install -e \".[pi]\"
Training
lerobot-train \
  --policy.type=pi0 \
  --dataset.repo_id=juxi/eval_test123 \
  --job_name=pi0_training \
  --output_dir=outputs/pi0_training \
  --policy.pretrained_path=lerobot/pi0_base \
  --policy.compile_model=true \
  --policy.gradient_checkpointing=true \
  --policy.dtype=bfloat16 \
  --steps=20000 \
  --policy.device=cuda \
  --batch_size=32 \
  --wandb.enable=false
Evaluation
lerobot-record \
  --robot.type=so101_follower \
  --robot.port=/dev/ttyACM0 \
  --robot.cameras="{ front: {type: opencv, index_or_path: 0, width: 640, height: 480, fps: 30, fourcc: \"MJPG\"},   side: {type: opencv, index_or_path: 2, width: 640, height: 480, fps: 30,fourcc: \"MJPG\"}}" \
  --robot.id=my_awesome_follower_arm \
  --display_data=false \
  --dataset.repo_id=juxi/eval_test123 \
  --dataset.single_task=\"Put the blue cube on the black box\" \
  --policy.path=outputs/pi0_training/checkpoints/last/pretrained_model
Refer to the official Pi0.5 tutorial.
pip install -e \".[pi]\"
Training
lerobot-train \
    --dataset.repo_id=juxi/eval_test123 \
    --policy.type=pi05 \
    --output_dir=outputs/pi05_training \
    --job_name=pi05_training \
    --policy.pretrained_path=lerobot/pi05_base \
    --policy.compile_model=true \
    --policy.gradient_checkpointing=true \
    --wandb.enable=false \
    --policy.dtype=bfloat16 \
    --steps=3000 \
    --policy.device=cuda \
    --batch_size=32
Evaluation
lerobot-record \
  --robot.type=so101_follower \
  --robot.port=/dev/ttyACM0 \
  --robot.cameras="{ front: {type: opencv, index_or_path: 0, width: 640, height: 480, fps: 30, fourcc: \"MJPG\"},   side: {type: opencv, index_or_path: 2, width: 640, height: 480, fps: 30,fourcc: \"MJPG\"}}" \
  --robot.id=my_awesome_follower_arm \
  --display_data=false \
  --dataset.repo_id=juxi/eval_test123 \
  --dataset.single_task=\"Put the blue cube on the black box\" \
  --policy.path=outputs/pi05_training/checkpoints/last/pretrained_model
Please refer to the official GR00T N1.5 tutorial.
- If you encounter the following during evaluation:
File exists: 'home/xxxx/.cache/huggingface/lerobot/xxxxx/juxi/eval_xxxx'
Please delete the folder starting with eval_ first and run the program again.
- If you encounter the following during evaluation:
`mean` is infinity. You should either initialize with `stats` as an argument or use a pretrained model
Note that keywords like front and side in the --robot.cameras parameter must strictly match those used during data collection.
- If you have repaired or replaced parts of the robotic arm, completely delete the files under
~/.cache/huggingface/lerobot/calibration/robotsor~/.cache/huggingface/lerobot/calibration/teleoperatorsand recalibrate the robotic arm. Otherwise, error messages may appear. Calibration information is stored in JSON files in these directories. - Training ACT on 50 data groups takes approximately 6 hours on an 8GB 3060 laptop, and about 2-3 hours on a 4090 or A100 computer.
- During data collection, ensure the camera position, angle, and ambient lighting are stable, and minimize the camera capturing excessive unstable backgrounds and pedestrians. Excessive environmental changes during deployment can prevent the robotic arm from grasping properly.
- The
num-episodesparameter in the data collection command must ensure sufficient data is collected. Do not manually pause midway, as the mean and variance of the data are calculated only after collection ends, which is necessary for training. - If the program indicates it cannot read image data from the USB camera, ensure the USB camera is not connected via a hub. The USB camera must be directly connected to the device to ensure fast image transfer rates.