When I'm working, I get so focused that I forget to drink water. It's not that I'm not thirsty—oh, I am—but I'll get a glass of water, put it down on my desk, and forget all about it for hours.
The Smart Coaster is meant to help with that bad habit by giving me an easy visualization of how long it's been since I last took a drink. It does this simply by running through a program that changes the color and brightness of LEDs over time, with a momentary switch that is pressed down by the weight of a glass on top of it. When I pick up a glass and put it back down, it resets the timer. If it's been way too long since I last took a sip, the lights will blink until I do something about it.
This device isn't meant to track consumption, log data, or help achieve any quantity goals. It's just here to remind me, once in a while, to reach over and take a sip.
V3 Forked by Rafi This project is a fork of V2 because I wanted the microcontroller and LEDs to react differently than the original designer.
The V2 code seems to always have the leds on and pulsing whether or not the button was pressed. I changed this so when the button is not pressed, ie. no cup placed on the coaster, the leds are off. Only when the button has been depressed for 30 minutes, the blue led will slowly fade on as time progresses. From there the red led fades in while blue fades out to create a purple and continues to glow only red as the time approaches 60 minutes, indicating "hey its been an hour and you haven't lifted up the cup, you should really drink some water now." It will then remain lit red for about an hour and then turn off assuming that you simply left the area and wont return anytime soon.
Another feature of this update is an attempt to reduce power consumption. While yes, leds being fully lit use way more energy than the little mA reductions by using and idle_power mode vs normal mode, its still something and would rather include it, especially since the project isn't doing much besides turn on lets and keep time. ADC is turned off, as well as timer1, since only timer0 is needed for PWM. While the button is not pressed, it goes into a full power down sleep mode, saving the most energy, where only the button being pressed will act as an interrupt to wake up the cpu. The following links are blogs I've used in the past to achieve low power and simply reused the code here and adjusted some registers to conform to the digispark board.
https://www.electro-tech-online.com/articles/achieving-low-power-on-adafruit-trinket.830/
http://www.gammon.com.au/forum/?id=11497
The lights are driven by a small Arduino board, like the Micro or Adafruit ItsyBitsy—it's developed on and tested with Atmel 32U4-based boards, but just about any controller should work.
V1 The first prototype coaster uses four WS2812B RGB LED chips and the Adafruit NeoPixel Arduino library. They're tied into pin 6 of the microcontroller and fed instructions to change color based on the counter value.
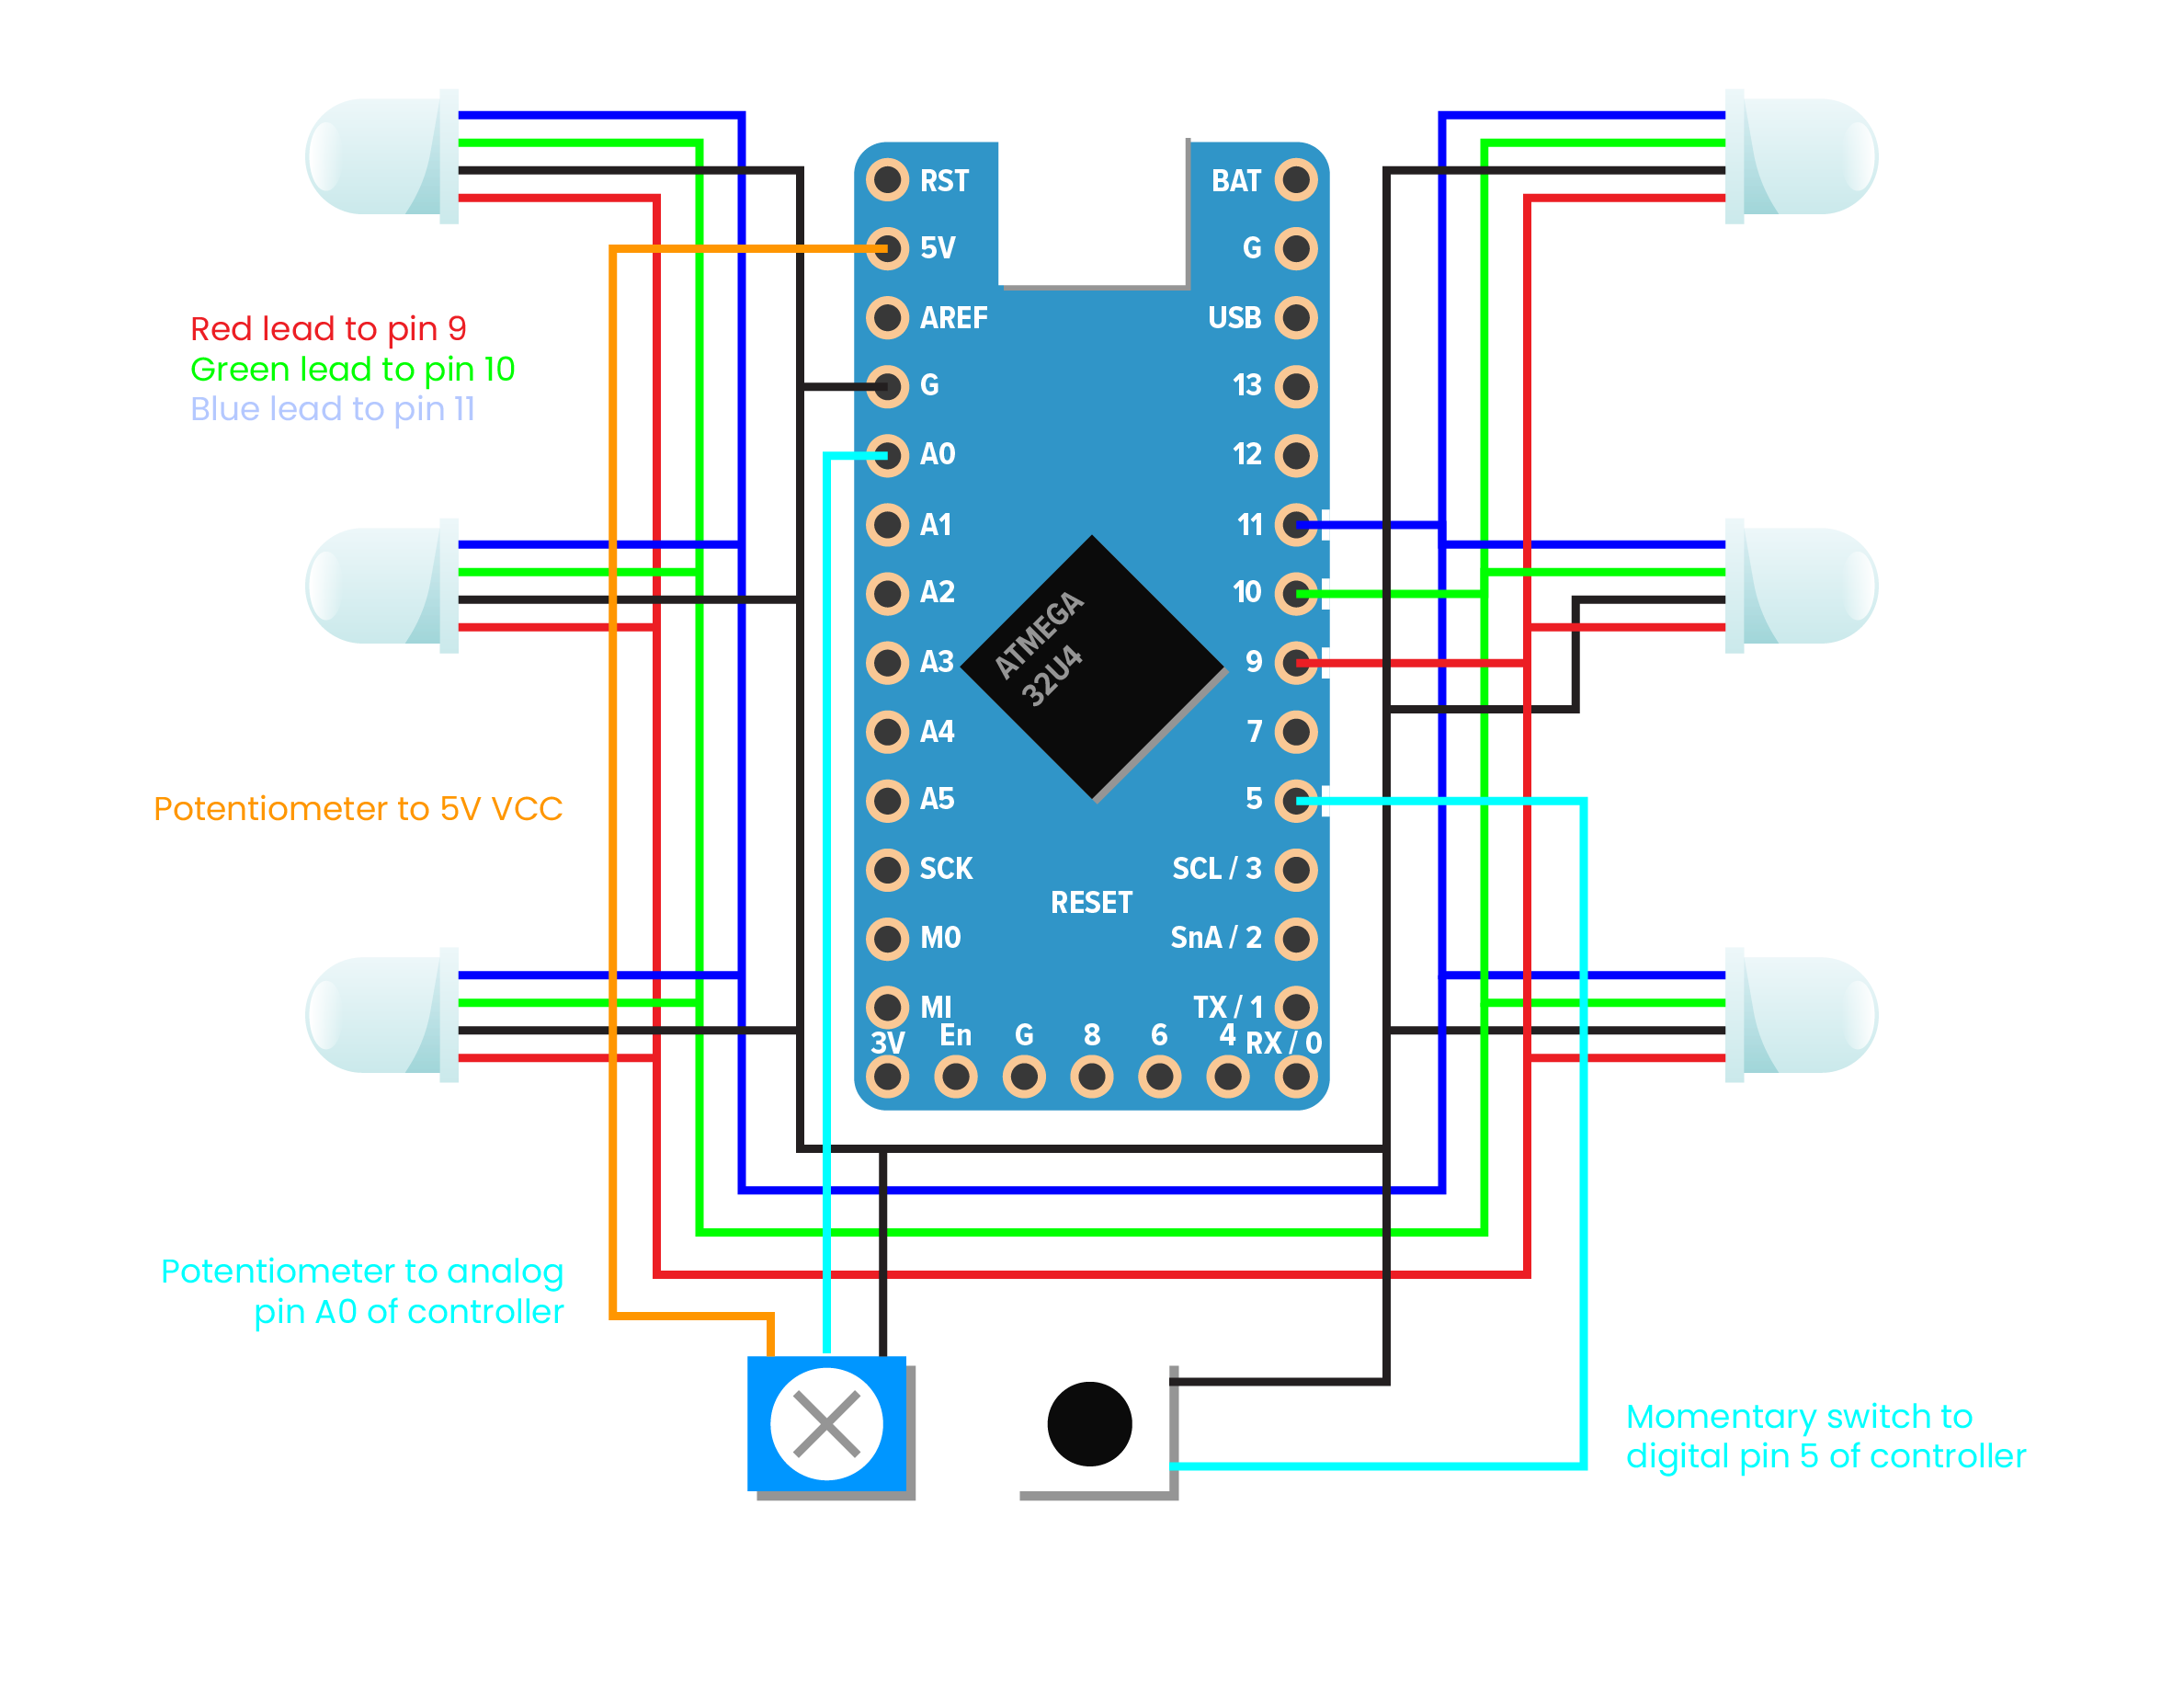
V2 The second prototype uses four-pin common cathode RGB LEDs connected to three PWM pins on the microcontroller. Color values are set by directly analogWriting to the R, G and B pins. Since all the lights are showing the same color value, this seems like a simpler solution.
V2 also introduced a potentiometer control for setting the alert time.
V3 Circuit remained relatively the same except i'm using a DigiSpark board and am not using a potentiometer since I dont want to play with setting an alert time. Rather play around with the desired alert time in code and then leave it alone.
Attaching my STL files I modeled and 3D printed.

A future idea if I were to do it again, would be to use a magnetic switch(Hall Effect Sensor), that way I dont need to precisely measure the height of the button/cap/holder & its switch distance and create the top cover to account for all of those while keeping the differ wall hidden, while also trying to maintain a low profile. Another reason is because the switch and the top cover without any filler/foam will introduce an uneven balance point because of the switch being in contact with both the base and top cover, so I had to use some foam to make it balanced. A magnetic sensor will allow the two pieces slide past each other without being in physical contact.