Welcome to the Restate TypeScript + Deno Deploy template! ✨
- 📦 Deno runtime installed
- 🔧 npm or yarn package manager
- 🌐 Deno account (for deployment)
Launch the local Restate server:
npx @restatedev/restate-serverStart the Deno server locally:
deno task devConnect your local service to Restate:
npx @restatedev/restate dep add http://localhost:9080Iterate! 🔧
This template includes a GitHub Actions workflow setup for automated deployment. To set up:
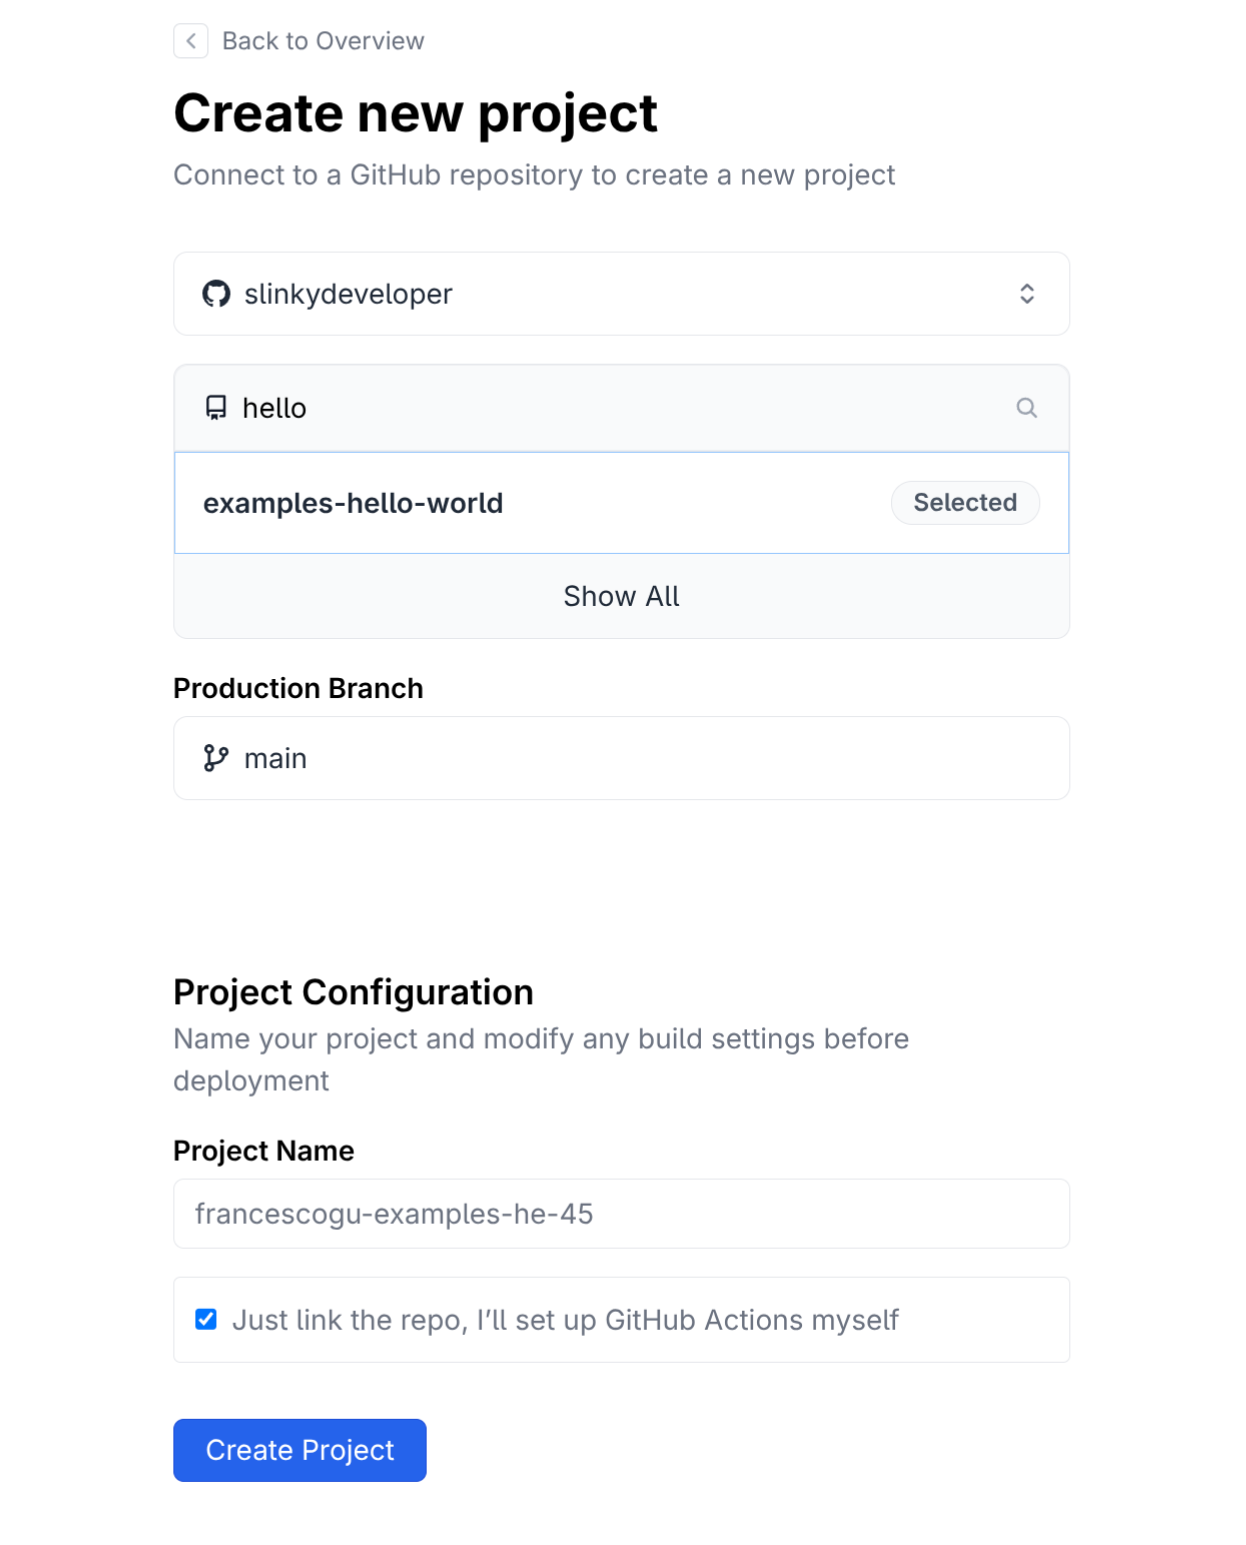
- Create the Deno project by going to https://dash.deno.com/new_project linking this repository, check Just link the repo, I’ll set up GitHub Actions myself.
- Add the following to Github Actions repository secrets:
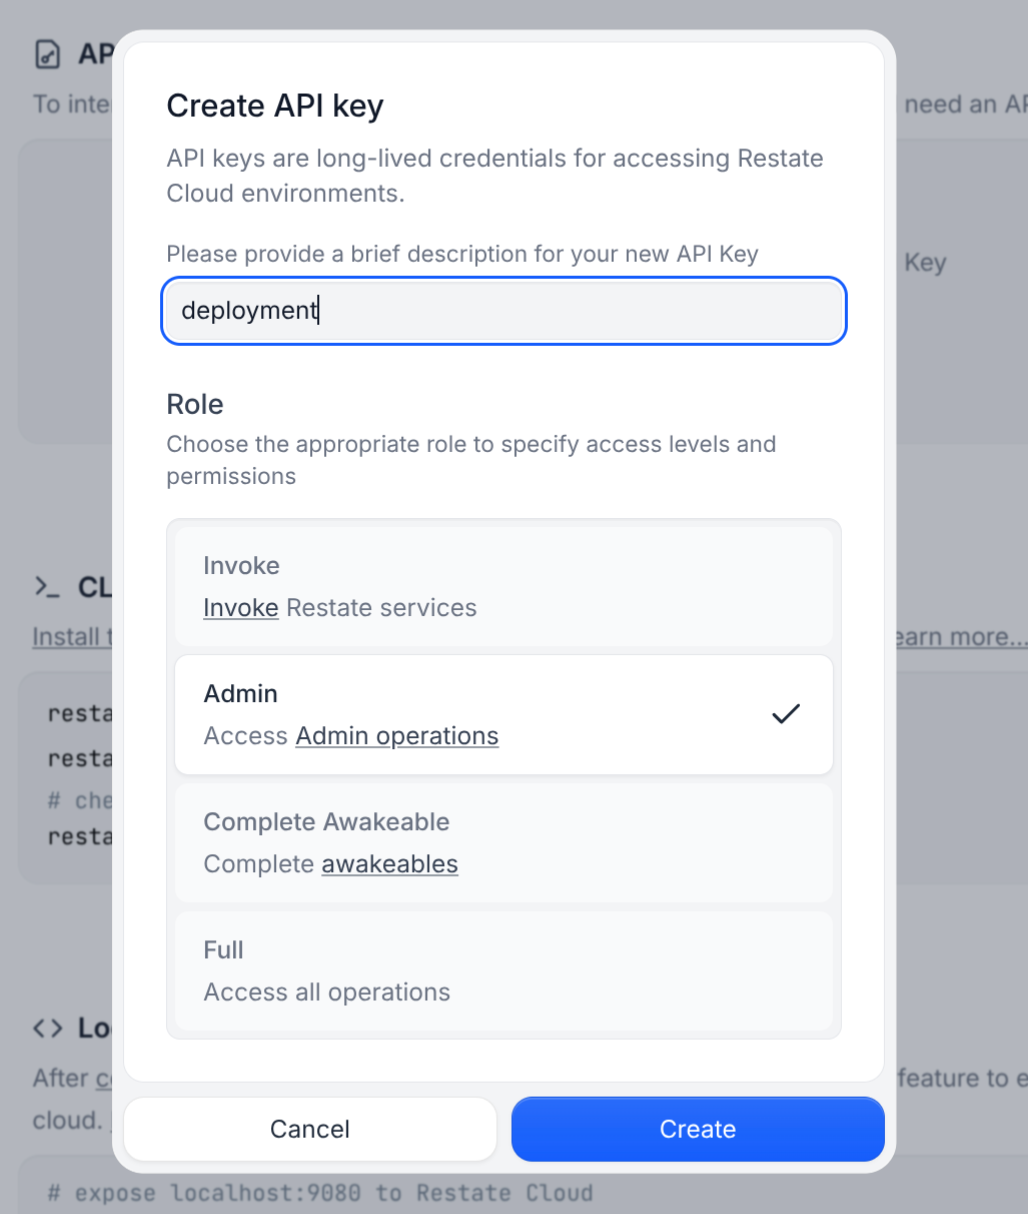
RESTATE_ADMIN_URL: The Admin URL. You can find that out in Developers > Invoke. For example:https://some-environment-private-id.env.us.restate.cloud:9070RESTATE_AUTH_TOKEN: Your Restate Cloud auth token. To get one, go to Developers > API Keys > Create API Key, and make sure to select Admin for role
- Add the following to Github Actions repository variables:
DENO_PROJECT_NAME: Project name of the just created deno project
Once the repo is set up, just push to the main branch and you'll get your services updated.
Check the workflow deploy.yml for more details.
💡 Note: This setup uses Deno deploy classic. For deno deploy EA, refer to their documentation.
For more info on how to deploy manually, check:
- For cloud: https://docs.restate.dev/cloud/connecting-services
- For on-prem Restate deployments: https://docs.restate.dev/services/deploy/deno-deploy
- 🔐 Secure your endpoint as shown in your Restate Cloud Dashboard > Developers > Security
- 📖 Explore the Restate documentation
- 🔍 Check out more examples and tutorials
- 💬 Join the Restate Discord community
Happy building! 🎉