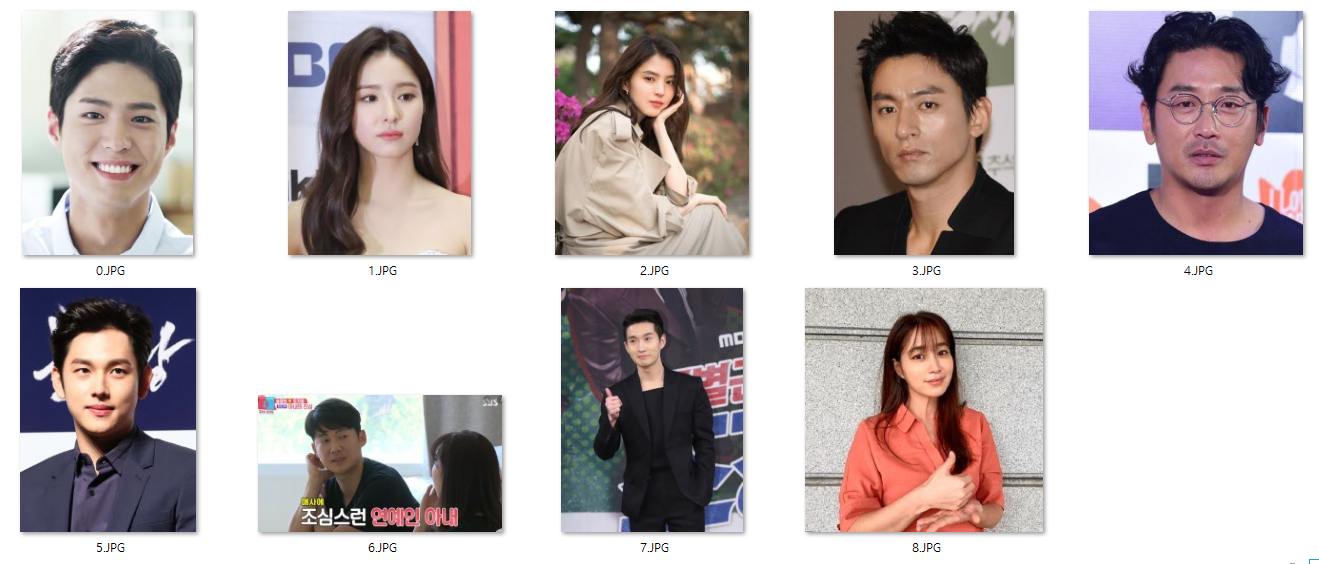
딥러닝 마스크 분류기를 위해서 마스크를 착용한 사람과 착용하지 않은 사람의 데이터가 필요했지만 착용하지 않은 이미지 소스가 많이 없었기 때문에 평범한 얼굴사진에서 마스크를 씌우는 방식으로 데이터를 생성합니다.
MaskGenerator
├─face : 원본 이미지
├─withmask : 마스크 씌운 이미지
├─images : 마스크 이미지
├─images : 마스크 이미지
├─loop_through_folder.py : 각 face 마다 mask 씌우는 작업 호출
├─mask.py : 마스크 씌우는 작업
└─readme.md
영상 처리 및 컴퓨터 비전 관련 오픈 소스. 이번 프로젝트에서는 얼굴 인식을 하는데 사용.
이미지 처리 및 기계 학습, 얼굴인식 등을 할 수 있는 c++ 로 개발된 고성능의 라이브러리. 이번 프로젝트에서는 face_recognition을 사용하여 얼굴의 두드러진 부분(눈,코,입,턱 등)을 지역화하고 나타내는데 사용. 이 외에도 얼굴 정렬, 머리 자세 추정, 얼굴 스와핑, 눈 깜박임 감지의 기능도 사용할 수 있다.
파이썬 인터프리터에 다양한 이미지 파일 형식을 지원하고 강력한 이미지 처리와 그래픽 기능을 제공하는 자유-오픈 소스 소프트웨어 라이브러리이다. 외부 이미지를 입출력 및 관리하기위해서 사용.
마스크 생성시 얼굴을 인식하는 부분과 마스크를 두어야할 position 을 계산하는 작업과 마스크를 얼굴에 위치시키는 작업을 살펴봅니다.
# <mask.py>
class FaceMasker:
...
def mask(self):
import face_recognition
def mask(self):
import face_recognition
# face_location : returns an array of bound boxes of human face
face_image_np = face_recognition.load_image_file(self.face_path)
face_locations = face_recognition.face_locations(face_image_np, model=self.model)
face_landmarks = face_recognition.face_landmarks(face_image_np, face_locations)
self._face_img = Image.fromarray(face_image_np)
self._mask_img = Image.open(self.mask_path)
found_face = False
for face_landmark in face_landmarks:
# check whether facial features meet requirement
skip = False
for facial_feature in self.KEY_FACIAL_FEATURES:
if facial_feature not in face_landmark:
skip = True
break
if skip:
continue
# mask face
found_face = True
self._mask_face(face_landmark)
if found_face:
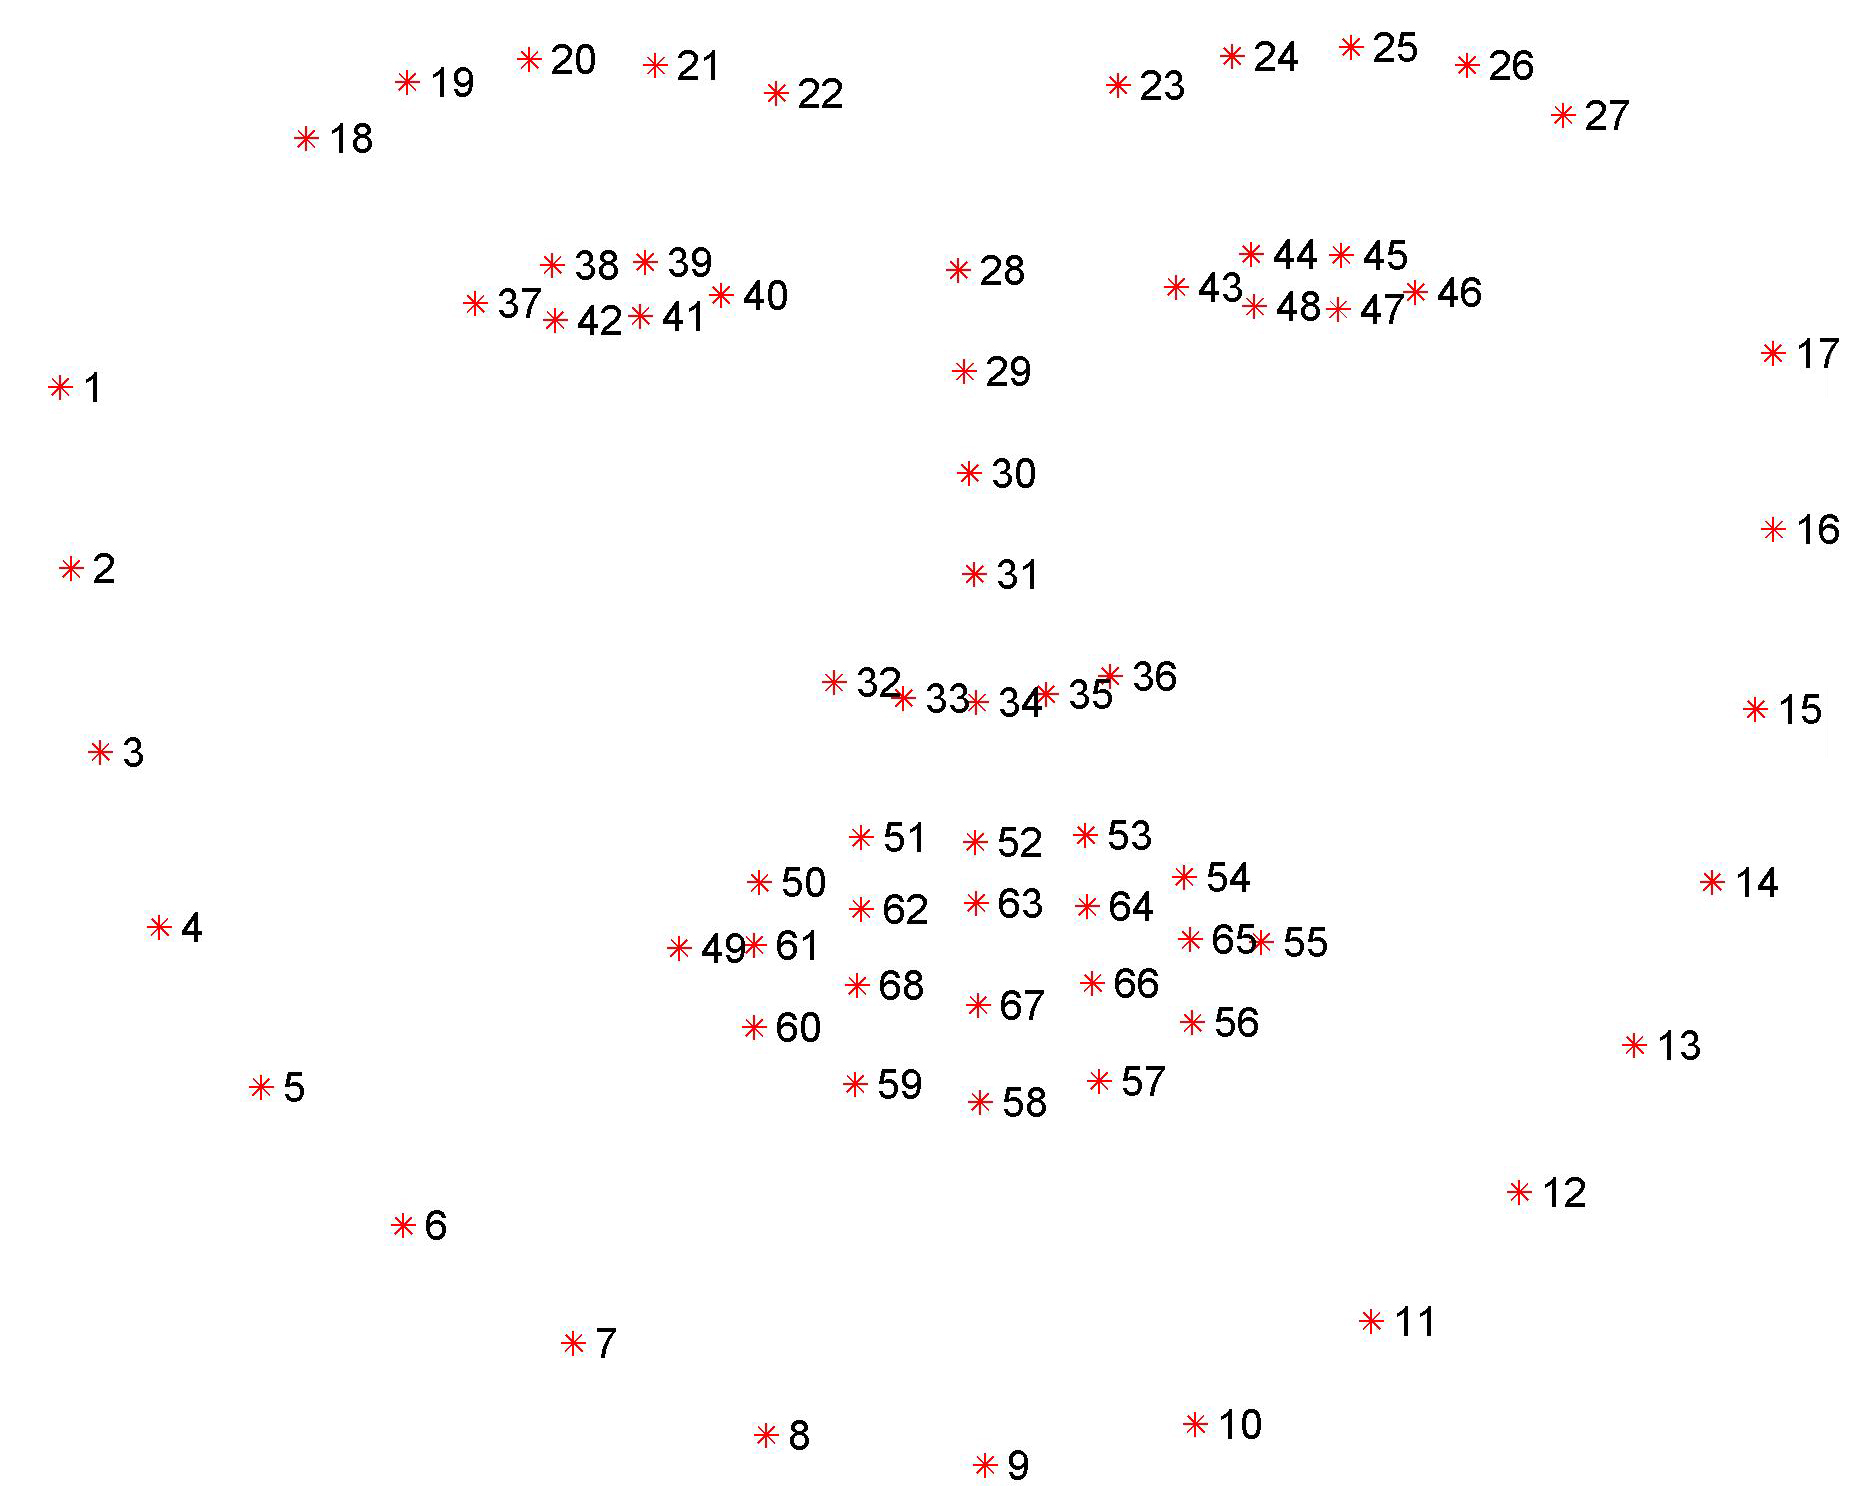
self._save()face_recognition 를 통하여 얼굴의 위치(face_locations) 와 그에 따른 각 부위(face_landmarks)를 찾아 낼 수 있습니다.
face_landmarks 는 0번부터 67번까지의 인덱스로 chin[0:17], left_eyebrow[17:22], ... , bottom_lip[54:60] 와 같이 얼굴 부위를 인덱스로 반환해 주는데 ,이번 프로젝트에서는 chin(0:16), nose_bridge(27:31) 부분을 사용합니다.
# <mask.py>
    def _mask_face(self, face_landmark: dict):
        nose_bridge = face_landmark['nose_bridge']
        nose_point = nose_bridge[len(nose_bridge) * 1 // 4] # 코뼈의 가장 위에 위치한 부분 nose_bridge[1]
        nose_v = np.array(nose_point)

        chin = face_landmark['chin']
        chin_len = len(chin)
        chin_bottom_point = chin[chin_len // 2] # 턱의 중간 [9]
        chin_bottom_v = np.array(chin_bottom_point)
        print(chin_bottom_point)
        chin_left_point = chin[chin_len // 8] # 왼쪽턱 귀밑 [3]
        chin_right_point = chin[chin_len * 7 // 8] # 오른쪽 귀밑[15]
        ...
코뼈와 턱을 찾은 후에 마스크를 올려놓을 코뼈의 가장 윗부분(nose_point), 턱의 중간(chin_bottom_point), 왼쪽 귀밑(chin_left_point), 오른쪽 귀밑 포인트(chin_right_point)를 찾습니다.
<mask.py>
        ...
        # split mask and resize
        width = self._mask_img.width
        height = self._mask_img.height
        width_ratio = 1.2
        new_height = int(np.linalg.norm(nose_v - chin_bottom_v)) # 코뼈와 턱 아래 중심부와의 거리

        # left : to fit the left side of face, resize the mask
        mask_left_img = self._mask_img.crop((0, 0, width // 2, height)) #crop((left, top, right, bottom))
        mask_left_width = self.get_distance_from_point_to_line(chin_left_point, nose_point, chin_bottom_point)
        mask_left_width = int(mask_left_width * width_ratio)
        mask_left_img = mask_left_img.resize((mask_left_width, new_height))

        # right : to fit the right side of face, resize the mask
        mask_right_img = self._mask_img.crop((width // 2, 0, width, height))
        mask_right_width = self.get_distance_from_point_to_line(chin_right_point, nose_point, chin_bottom_point)
        mask_right_width = int(mask_right_width * width_ratio)
        mask_right_img = mask_right_img.resize((mask_right_width, new_height))

        # merge mask
        size = (mask_left_img.width + mask_right_img.width, new_height)
        mask_img = Image.new('RGBA', size)
        mask_img.paste(mask_left_img, (0, 0), mask_left_img)
        mask_img.paste(mask_right_img, (mask_left_img.width, 0), mask_right_img)
        ...
항상 사람이 정면을 바라보고 있지 않기때문에 왼쪽과 오른쪽의 비율을 계산하여 왼쪽마스크, 오른쪽마스크 두 부분으로 나누어 최종적으로 합치는 과정을 수행합니다.
! !
!
<mask.py>
...
# rotate mask : calculate between nose and chin
angle = np.arctan2(chin_bottom_point[1] - nose_point[1], chin_bottom_point[0] - nose_point[0])
rotated_mask_img = mask_img.rotate(angle, expand=True)
# calculate mask location on the center
center_x = (nose_point[0] + chin_bottom_point[0]) // 2
center_y = (nose_point[1] + chin_bottom_point[1]) // 2
offset = mask_img.width // 2 - mask_left_img.width
radian = angle * np.pi / 180
box_x = center_x + int(offset * np.cos(radian)) - rotated_mask_img.width // 2
box_y = center_y + int(offset * np.sin(radian)) - rotated_mask_img.height // 2
# add mask
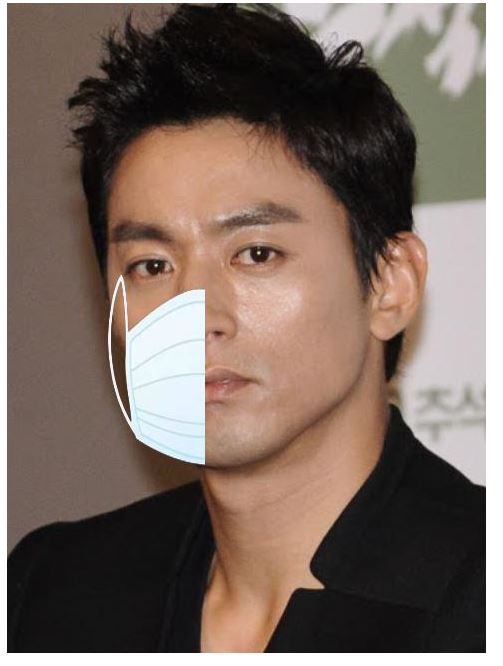
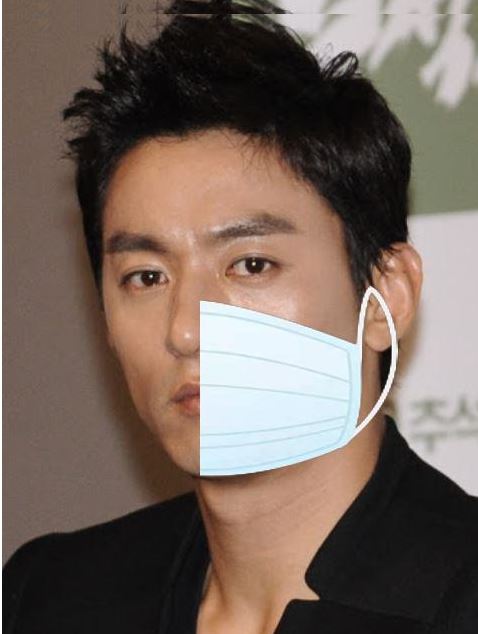
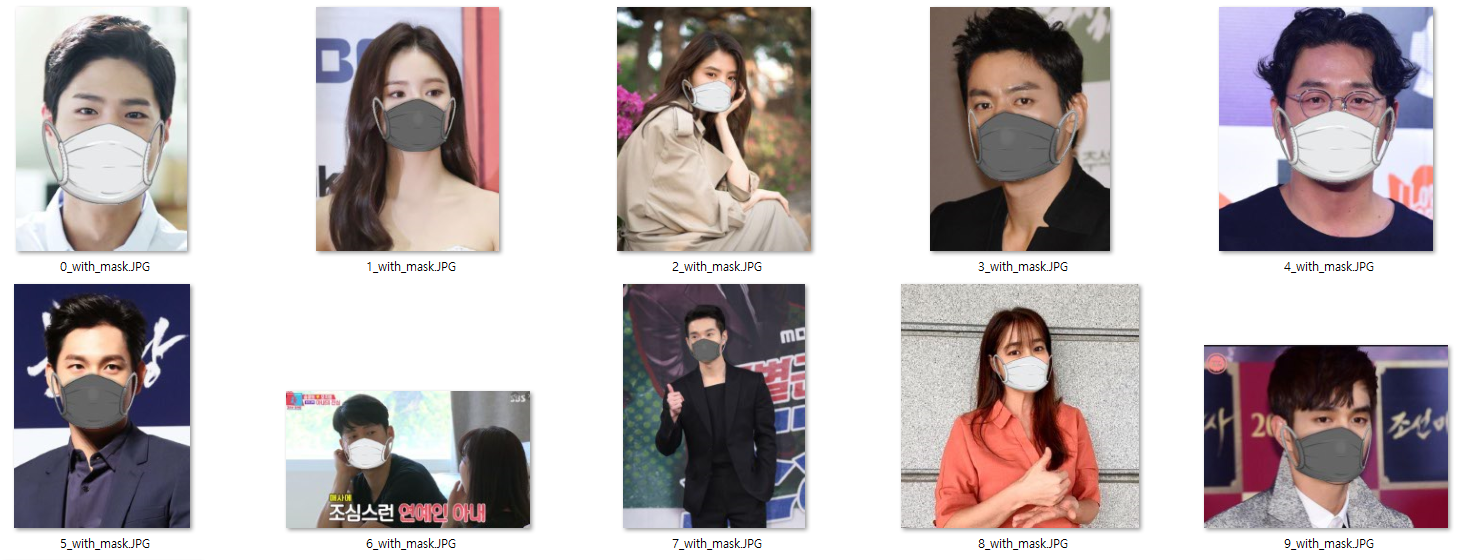
self._face_img.paste(mask_img, (box_x, box_y), mask_img)코와 턱의 각도와 위치를 사용하여 얼굴의 중앙부분에 가능한 휘어지지 않도록 위치시킵니다.
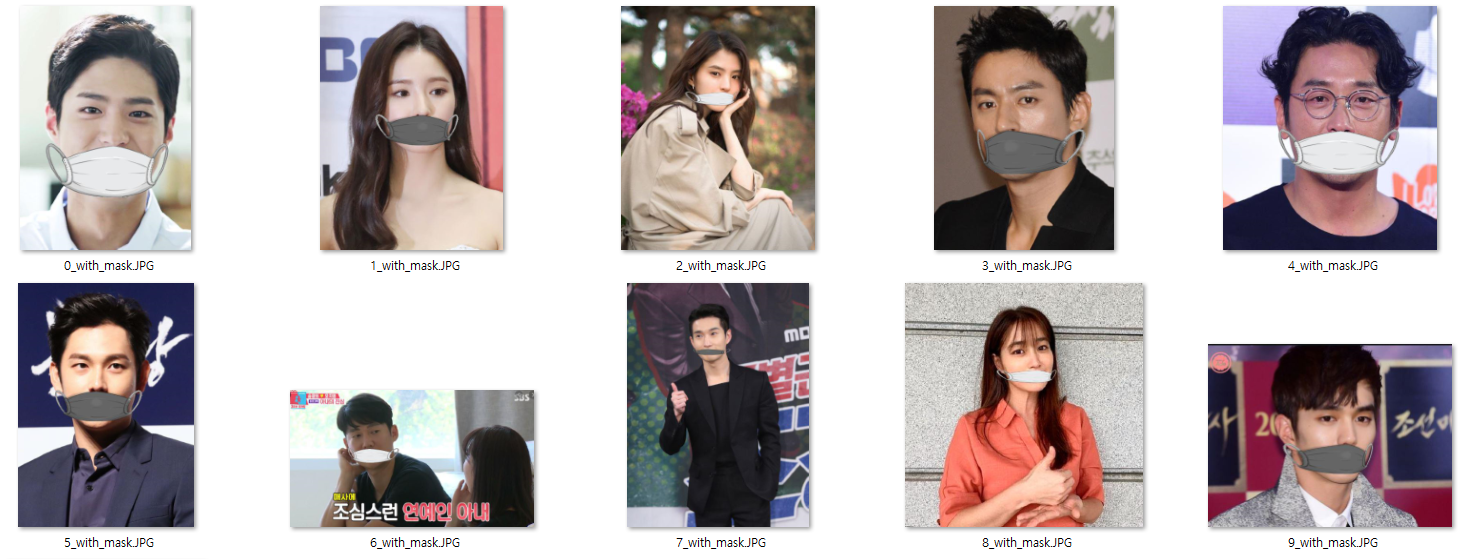
마스크를 제대로 착용한 이미지와 코밑으로 내린 잘못된 이미지를 생성합니다.
https://www.pyimagesearch.com/2018/11/05/creating-gifs-with-opencv/
https://www.pyimagesearch.com/2017/04/03/facial-landmarks-dlib-opencv-python/
https://github.com/prajnasb/observations/tree/master/mask_classifier