- Hassle-Free Physics: Projectile handles all the keyframing so all you have to do is set a speed and click a button! Much faster and more accurate than doing this manually.
- Object Settings: Each object has its own settings tied to it, so don't worry about making a mistake because you can always go back and change something!
- Real-World Units: Projectile will use the same units that are used in the .blend file, so you can use m/s or ft/s so you can truly know how fast your objects will be moving.
- Update All: You can update all changes to all Projectile Objects with one click, and have the animation play automatically!
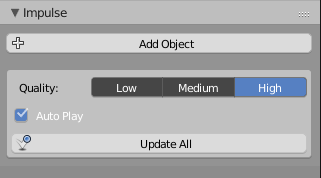
Click Add Object to set an object as an Projectile object. It will set it to be an active rigidbody object, and will set the Initial Location and Initial Rotation to any transforms you have applied.
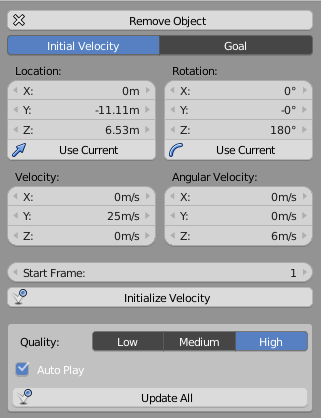
In Initial Velocity Mode, you can set the initial velocity for an object and let it fly! Just simply
Set the Initial Location and Initial Rotation by moving the sliders, or by pressing the Use Current buttons to use the current transforms
Set the Velocity and Angular Velocity to any values you would like!
Choose a Start Frame
Then click Initialize Velocity, then you can play the animation and see the results.
![Set Goal]https://raw.githubusercontent.com/natecraddock/projectile/blender27x/images/Goal.PNG)
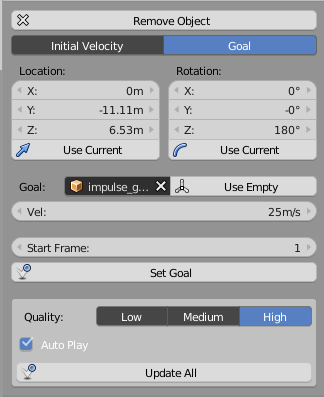
In Goal Mode, you can set a goal object for the Projectile object to reach! Just simply
Set the Initial Location and Initial Rotation by moving the sliders, or by pressing the Use Current buttons to use the current transforms
Choose an Object or click Use Empty to place an empty to use as the goal
Set a Velocity
Then click Set Goal
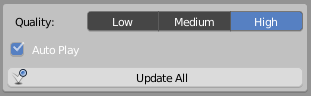
Choose a Quality Level to reduce glitchy physics simulations.
Check Auto Play to automatically start the animation player after running Update All
Click Update All to run the operator for each Projectile object in the scene. Really handy when you have a lot of objects that you change settings on frequently.