This is a personal project which involved training a TensorFlow neural network to recognize hand written digits, deploying the model to the cloud, and creating a frontend user interface which allows people to draw their own digits with a mouse and recieve the model's prediction of what digit it thinks it sees (0-9).
- Usage
- Model Training
- Deploy to Google Cloud Platform (GCP) Function
- Web Application Frontend
- Web Application Backend
- Deploy to Heroku
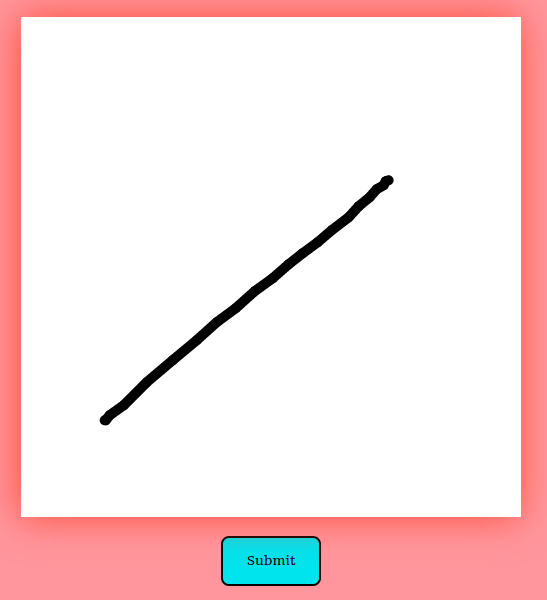
Use the mouse to draw a digit on the canvas and click submit. In a few seconds, the model's prediction of what digit it thinks you drew will pop up in a box at the top of the screen. Try it out here.
hwdDemo.mp4
The tfTest folder contains all the code related to training and testing the model. Below are the steps I took to ensure the model worked properly before deploying it to the cloud.
A TensorFlow sequential model was trained using 70,000 pixel arrays (28x28) which correspond to a 28x28 pixel image of a person's hand written digit. Each array element shows how light or dark a specific pixel is on the 28x28 image, depicted as a value somewhere between 0 and 1.
tfTest/trainModel.py
The training data is split into two randomized sets: a training set of 60,000 arrays and a testing set of 10,000 arrays.
import tensorflow as tf

#Train Model
mnist = tf.keras.datasets.mnist

(X_train, Y_train),(X_test, Y_test) = mnist.load_data()
X_train = tf.keras.utils.normalize(X_train)
X_test = tf.keras.utils.normalize(X_test)
The model is initialized using the 'relu' activation function and form fitted to intake the 28x28 flattened pixel array.
model = tf.keras.models.Sequential()
model.add(tf.keras.layers.Flatten(input_shape=(28,28)))
model.add(tf.keras.layers.Dense(units=128, activation='relu'))
model.add(tf.keras.layers.Dense(units=128, activation='relu'))
model.add(tf.keras.layers.Dense(units=128, activation='relu'))
model.add(tf.keras.layers.Dense(units=10, activation=tf.nn.softmax))
The model is compiled and fit to the training data and then evaluated with the test data.
model.compile(optimizer='adam', loss='sparse_categorical_crossentropy', metrics=['accuracy'])
model.fit(X_train, Y_train, epochs=4)

loss, accuracy = model.evaluate(X_test, Y_test)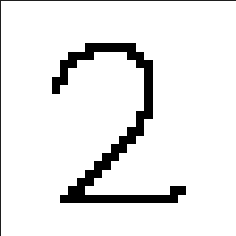
print(accuracy)I drew a digit and resized it to 28x28 using GNU's Image Manipulation Program (GIMP). Using the opencv-python package, the digit image file was read into memory and converted to an np array. The np array is passed to the model and a prediction is made and displayed using pyplot.
tfTest/loadModelTest.py
Draw an image on any drawing software and save it to the project directory. The digit must be black and must have a white background and resized to 28x28.
Add imports and load the model (loading the model allows you to use it without having to train it again).
import tensorflow as tf
import numpy as np
import cv2 as cv
import matplotlib.pyplot as plt
model = tf.keras.models.load_model("model")
Use opencv to read the image into memory and invert it to have black pixels show white, and white pixels show as black.
image = cv.imread('testData/digit.png')[:, :, 0]
image = np.invert(np.array([image]))
The image will now look like this to the computer:
Pass the inverted pixel array to the model and display the prediction.
prediction = model.predict(image)
print('Interpretation: {}'.format(np.argmax(prediction)))
The challenges associated with deploying a custom TensorFlow model to the cloud are discussed here. I started off with a trained and tested model. The end state is a RESTful Web API that can recieve HTTP POST requests containing image pixel data, and returns the model's prediction of what digit that pixel data represents.
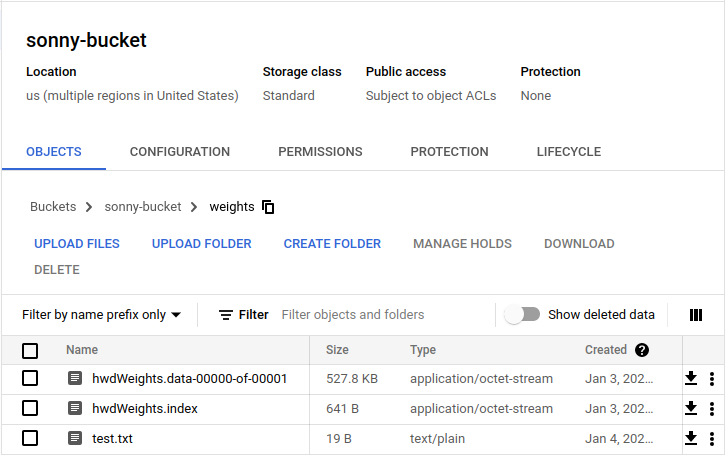
Cloud functions are a great way to bring RESTful functionality to any small script or program. Cloud functions often only have access to small amounts of volatile memory, which can't store a saved model indefinitly. Everytime the function's memory resets (which happens during periods of inactivity) the model needs to be recreated. To achieve this, the weights of the model needed to be saved and stored in non-volatile memory (Google Cloud Storage). This allowed the function to initialize itself by downloading the weights and creating the model after every time the function memory reset.
The weights saved in a Google Cloud Storage Bucket.
This is the function's source code which lives in the cloud. The function's primary objective is to recieve pixel data via an HTTP request, and return the model's prediction.
tfTest/googleCloudFunction.py
Imports and a global model variable which is set to None (it will later be assigned to the actual TF model after it is initialized).
import tensorflow as tf
from google.cloud import storage
import json
import numpy as np
import os
import tempfile

model = None
download_from_bucket function which can download blobs from an associated project bucket. This was very easy to do from a networking stand point because all GCP functions have an environment variable called 'GOOGLE_APPLICATION_CREDENTIALS', which contains all authentication information and is automatically loaded by the google.cloud.storage client. It just works.
def download_from_bucket(bucketName, blobName, fileDestination):
    try:
      storage_client = storage.Client()
      bucket = storage_client.get_bucket(bucketName)
      blob = bucket.blob(blobName)
      blob.download_to_filename(fileDestination)
      print("Blob {} downloaded to {}.".format(blobName, fileDestination))
    except:
      print("Download failed")
Main function that is called when an API request is made. Variables initialized and the model is checked. If there is no model, then download the weighs into the tmp folder and initialize it.
def sonny_hwd(request):
    global model
    response = {}
    if model == None:
      download_from_bucket("sonny-bucket", "weights/hwdWeights.data-00000-of-00001", "/tmp/hwdWeights.data-00000-of-00001")
      download_from_bucket("sonny-bucket", "weights/hwdWeights.index", "/tmp/hwdWeights.index")
      model = tf.keras.models.Sequential()
      model.add(tf.keras.layers.Flatten(input_shape=(28,28)))
      model.add(tf.keras.layers.Dense(units=128, activation='relu'))
      model.add(tf.keras.layers.Dense(units=128, activation='relu'))
      model.add(tf.keras.layers.Dense(units=128, activation='relu'))
      model.add(tf.keras.layers.Dense(units=10, activation=tf.nn.softmax))
      model.compile(optimizer='adam', loss='sparse_categorical_crossentropy', metrics=['accuracy'])
      model.load_weights('/tmp/hwdWeights')
Once there is a working model, retrieve the request payload and covert it to json. Read the string data which is delimited by commas and convert every string to an integer.
    request_json = request.get_json()
    image = request_json['image'].split(",")
    image = [int(x) for x in image]
Convert the python list into an np array and reshape to be 28x28. Pass the np array to the model and return the prediction in a json response. The cloud function will automatically add the return value from the function to the payload of the HTTP response.
    image = np.array(image).reshape((1, 28, 28))
    prediction = np.argmax(model.predict(image))
    response['prediction'] = str(prediction)
return json.dumps(response)The frontend's objective is to inform users of the functionality of the app and the neural network's capabilities. It also provides an interface (an html canvas) which allows users to draw a number with their mouse, and submit the drawing to the model. Below is an explanation of how the canvas interface was created.
templates/home.html HTML canvas element added to homepage.
<canvas id="canvas" style="background-color:white;" class="responsive"></canvas>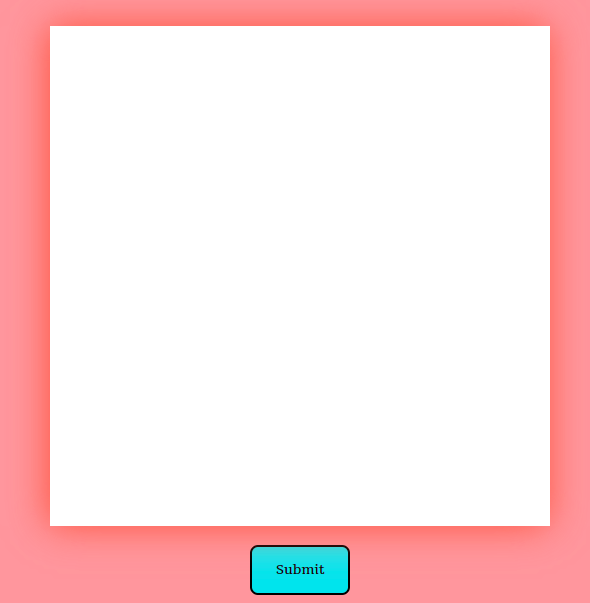
Using javascript select the canvas, and associate it's context with it's height and width (the height and width are hard coded in CSS).
canvas = document.querySelector("#canvas")
var ctx = canvas.getContext('2d');
ctx.canvas.width = 500;
ctx.canvas.height = 500;
Establish a position variable which will be updated whenever the mousemove, mousedown, and mouseenter events occur.
var pos = { x: 0, y: 0 };

document.addEventListener('mousemove', draw);
document.addEventListener('mousedown', setPosition);
document.addEventListener('mouseenter', setPosition);
setPosition is called whenever the mouse button is clicked and updates the pos variable declared earlier. Moving the mouse calls the draw function which causes the canvas to draw on itself at the mouse's current X and Y coordinate. The drawing will only occur if the mouse is located somewhere on the canvas.
function setPosition(e) {
    rect = canvas.getBoundingClientRect();
    x = rect.x;
    y = rect.y;
    pos.x = e.clientX - x;
    pos.y = e.clientY - y;
}

function draw(e) {
  // mouse left button must be pressed
  if (e.buttons !== 1) return;

  ctx.beginPath(); // begin

  ctx.lineWidth = 10;
  ctx.lineCap = 'round';
  ctx.strokeStyle = 'black';

  ctx.moveTo(pos.x, pos.y); // from
  setPosition(e);
  ctx.lineTo(pos.x, pos.y); // to

  ctx.stroke(); // draw it!
}
When the submit button is pressed, three things then happen:
All pixels on the canvas that were not changed to black by the mouse are given the white value. This is very necessary to properly process the data later on.
function createWhiteBackground() {
    var imgData=ctx.getImageData(0,0,canvas.width,canvas.height);
    var data=imgData.data;
    for(var i=0;i<data.length;i+=4){
        if(data[i+3]<255){
            data[i]=255;
            data[i+1]=255;
            data[i+2]=255;
            data[i+3]=255;
        }
    }
    ctx.putImageData(imgData,0,0);
}
The canvas data is saved as a base64 encoded string, which is then passed to the postImageData() function.
function saveImage() {
    toggleLoader()
    createWhiteBackground()
    dataURI = canvas.toDataURL()
    postImageData(dataURI)
}
Using a jQuery, the base64 data is sent back to the webserver for further processing. (Note, the reason this had to be done in the browser and not a seperate javascript file is because Django requires a csrf_token to be passed during all post requests. Here the django template system replaces the {{ csrf_token }} with the actual token, which is necessary for the request to successfully complete.
function postImageData(uri) {
    $.post("", {
        img:uri,
        csrfmiddlewaretoken: String('{{ csrf_token }}'),
    }, function(response){
      $("body").html(response)
    });
}The backend's objective is to serve the static files to users, capture and clean the canvas data, send the cleaned data to the cloud function, and return the model's prediction back to the frontend.
pages/views.py
The Django view, which reads in the base64 encoded string, trims off the header info, and wraps it as a bytes object.
from django.shortcuts import render
import base64
from .utils import saveImage, resizeImage, readImage, sendToCloud
import json


def home_page(request):
    if request.method == "POST":
        image64 = request.POST.get("img")
        imageStringBytes = bytes(image64[22:], 'utf-8')
The bytes are then decoded and saved locally in the same type of temporary storage as the cloud function.
        imageBytes = base64.decodebytes(imageStringBytes)
        saveImage(imageBytes)
The image is resized, read into memory as an np array, inverted, and sent to the cloud. Once the prediction is returned, the view injects it into the html template, which is then displayed as an alert on the web page.
        resizeImage()
        imageData = readImage()
        response = sendToCloud(imageData)
        prediction = json.loads(response.text)['prediction']
        return render(request, 'home.html',{'prediction':prediction})
    return render(request, 'home.html',{})
The souce code for all the functions used are located in pages/utils.py which do basically the same thing as the tfTest/loadModelTest.py functions discussed earlier.
Heroku is the web host used for this application. A custom domain was purchased on namecheap.com which is now directly linked to the project.