Demo Application for integrating Spring Security with Spring Boot Application, that increments gradually from Basic Authentication to Form Based Authentication and finally JWT Authentication.
Follow Commit History to understand the incremental changes made in the application.
- Basic Authentication
- Form Based Authentication
- JWT Based Authentication
- InMemroy Users Authentication
- Database User Authentication
- Ant Matchers
- Java 8
- PostgreSQL (Required only if you wish to use Persistent DB. Else Application works fine with H2 in-memory DB)
- Clone JwtAuthentication Branch
- In Root Directory, Execute
gradlew buildThis will pull all project dependencies and build the Java Executable
- Once Build Completes, Execute
gradlew bootRunto start the application. The application will be hosted at http://localhost:8080
-
The application by default works with in-memory H2 Database. To change this behaviour and use PostgreSQL, steps to follow:
- In build.gradle under dependencies, comment out
- In build.gradle under dependencies, uncomment out
- Inclue Database Configuration in application.yml
runtimeOnly 'com.h2database:h2'
runtimeOnly 'org.postgresql:postgresql'
	datasource:
		url: jdbc:postgresql://localhost:5431/<Database Name>
		username: postgres
		password: Password
Upon Application Statup, the database is seeded with 2 user details. Check resources/data.sql for more details.
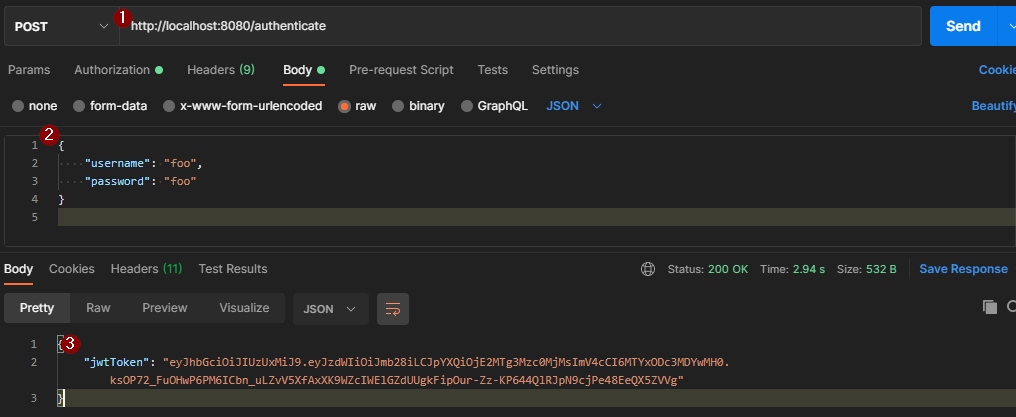
- Step 1: Obtain JWT Token Perform POST Request to http://localhost:8080/authenticate. Returns a JWT Token in Response.
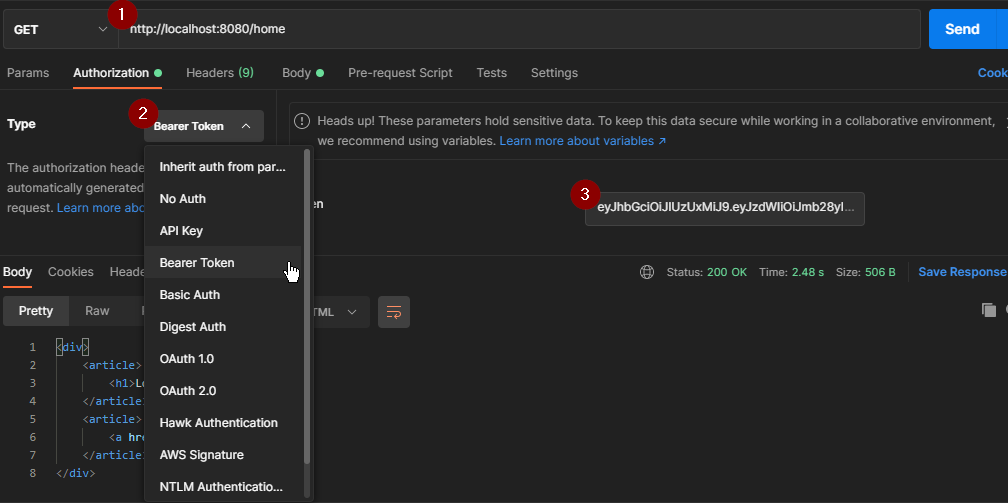
- Step 2: Access Protected Resource with JWT Token Perform GET Request to http://localhost:8080/home. Add JWT Token obtained in previous step, as Bearer Token under Authorization Tab of Postman Request.
- You should get 200OK Response, if you provided the correct JWT Token. Else 403 Forbidden Response.
Manas Acharyya