JuicePassProxy as a Home Assistant add-on app.
This project is NOT affiliated with JuicePassProxy or the JuiceRescue Organization - this is an unofficial add-on app.
You will need to add this repository to Home Assistant to install this app. Here's how to do that:
- Go to Settings > Apps > Install App in Home Assistant
- Open the menu (three dots in the upper-right) and choose "Repositories"
- Enter
https://github.com/jaydeethree/hassio-juicepassproxyinto the text box and click the Add button - Close the "Repositories" window and install the JuicePassProxy app.
To start, read the JuicePassProxy README to learn more about the project and what it's capable of. JuicePassProxy provides three different modes of operation - while the UDPC mode is easiest to set up, it should only be used as a last resort because it's significantly less reliable than the other options. It is strongly recommended that you use either DNS spoofing or NAT since those modes are more reliable.
Most JuicePassProxy options are exposed in this app's configuration page. If you need more information about what an option does, please check the JuicePassProxy README.
If you are using DNS spoofing or NAT to redirect traffic then the following configuration is recommended:
- Ignore EnelX: True
- Update UDPC: False
- Juicebox ID: The serial number of your Juicebox. If you don't know the serial number you can telnet into your Juicebox on port 2000 and run the command
get email.name_addressto retrieve it. Yes, really -get email.name_addressis how you get the serial number.- Note: Home Assistant hides this option by default, so you need to enable "Show unused optional configuration options" to see it.
No matter which mode you use, you will also need to configure the MQTT options so that JuicePassProxy can send data to Home Assistant.
Instructions for setting up NAT redirection for different router platforms are below. Feel free to send PRs to add instructions for your router platform.
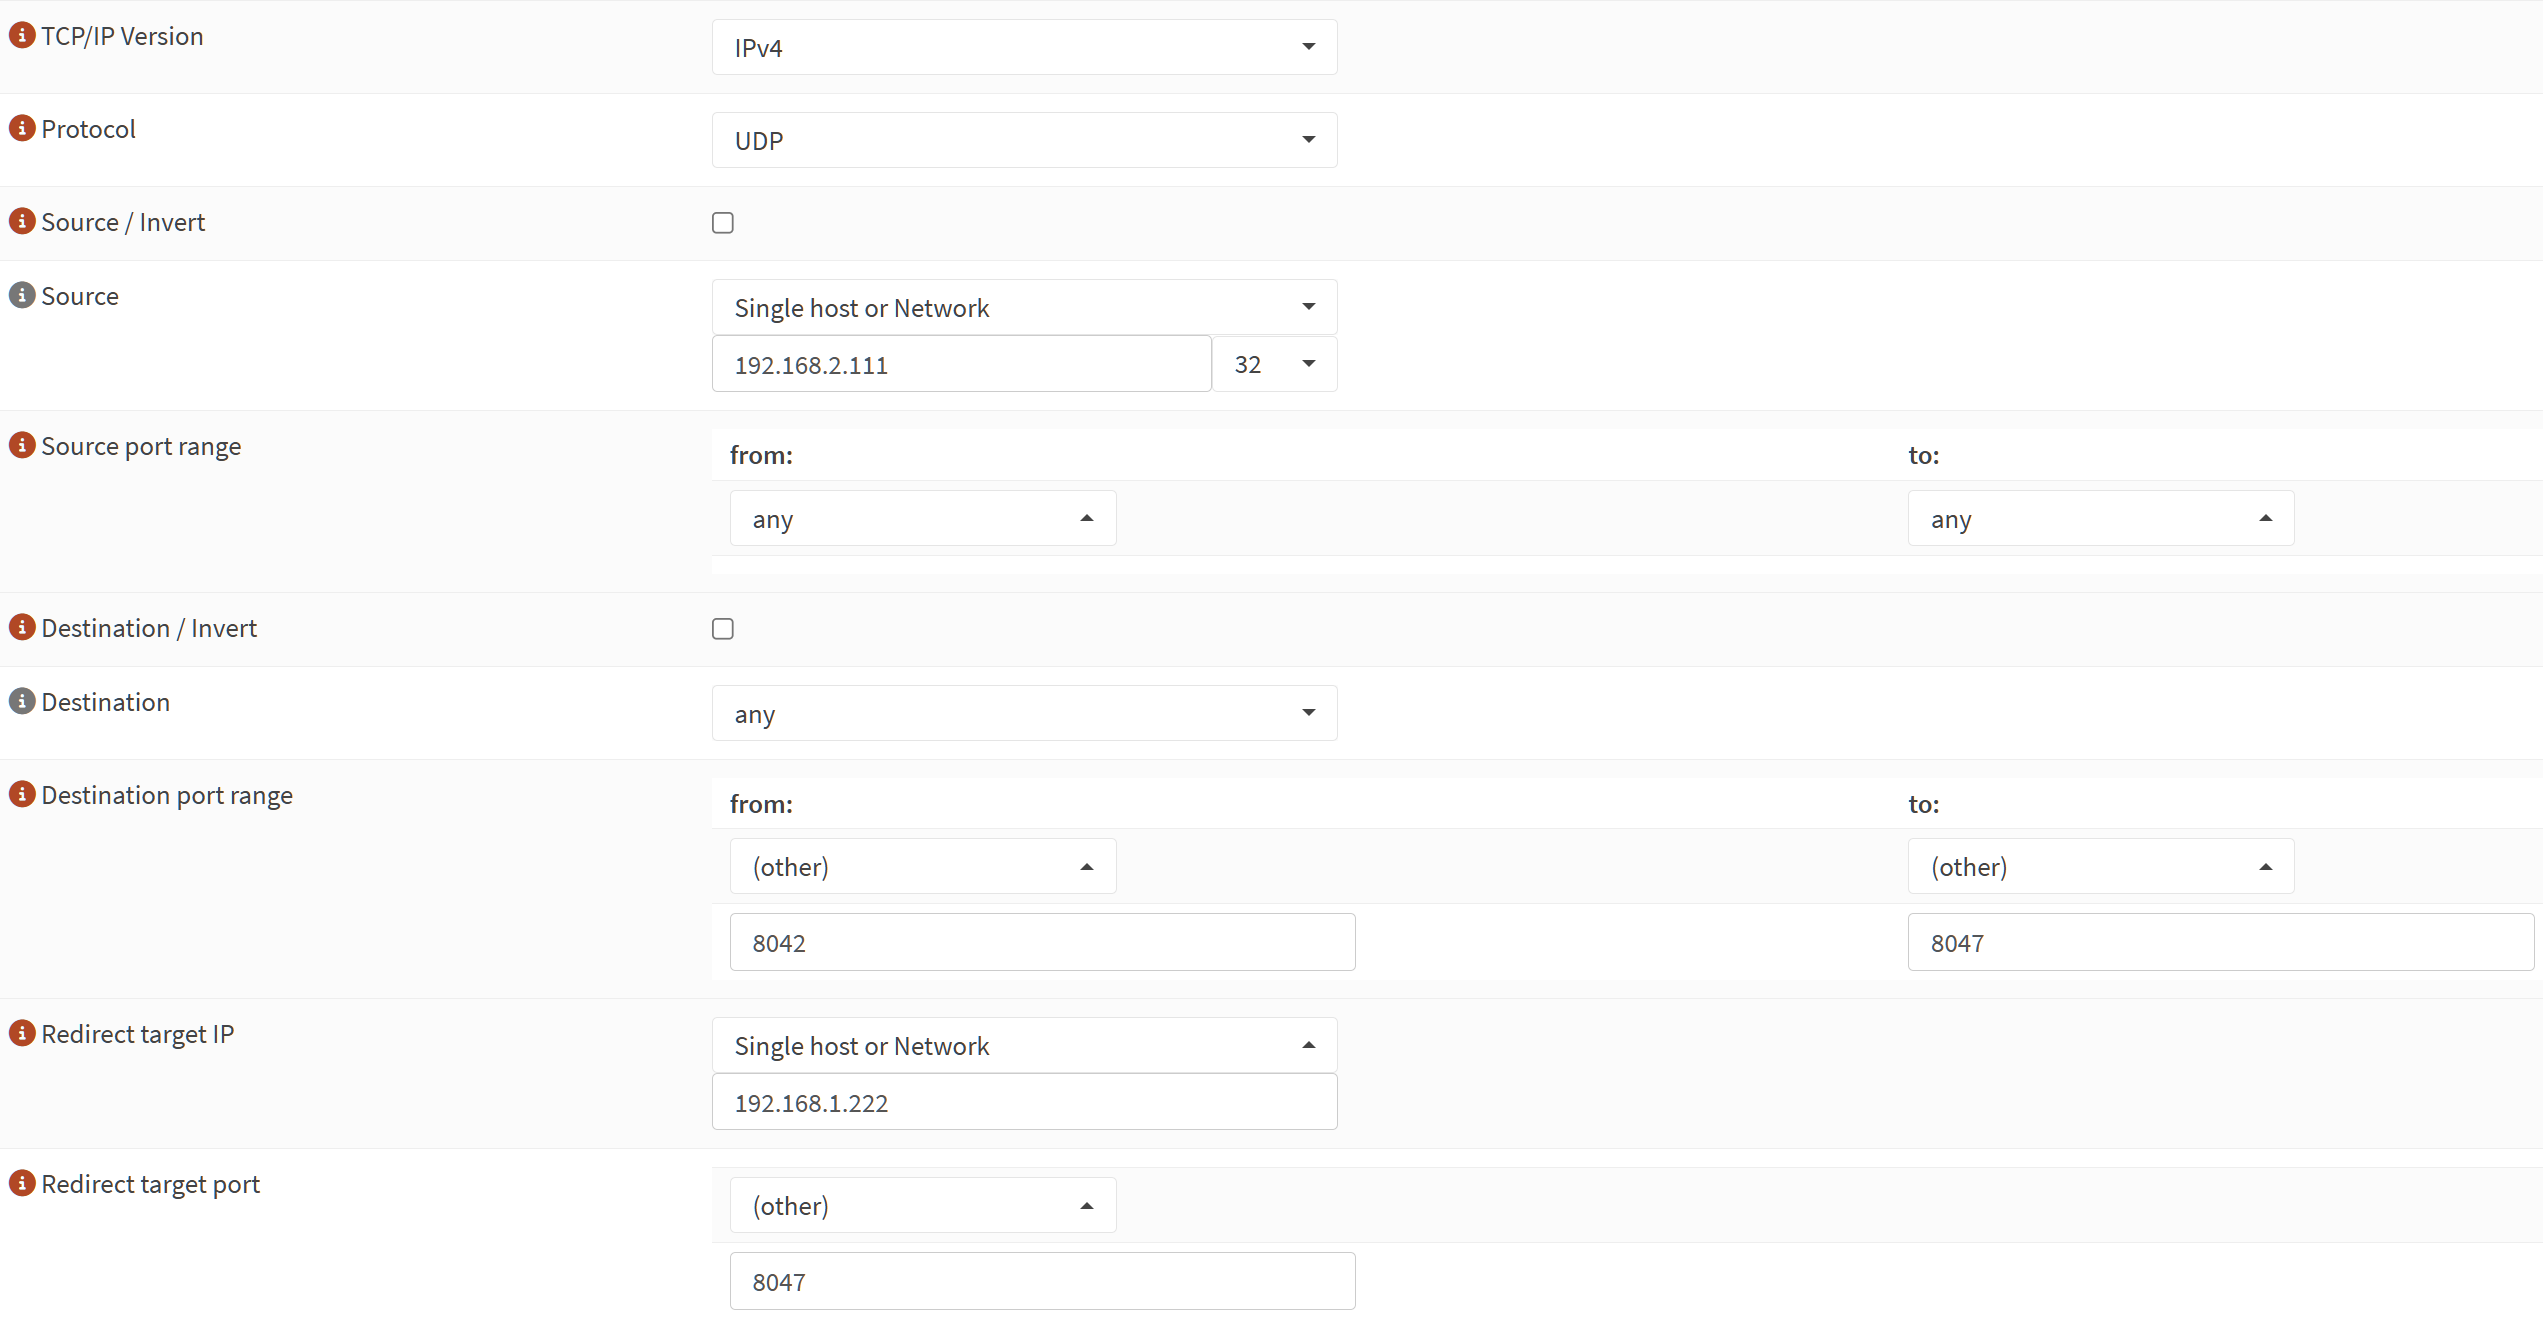
All instructions below use 192.168.2.111 as the IP of the JuiceBox and 192.168.1.222 as the IP of Home Assistant (where this app is running). You will need to change these to match your actual JuiceBox and Home Assistant IPs.
- Go to Firewall > NAT > Port Forward and create a new rule. "Interface" should be the network interface that your JuiceBox is connected to. The rest of the options should be configured like this:
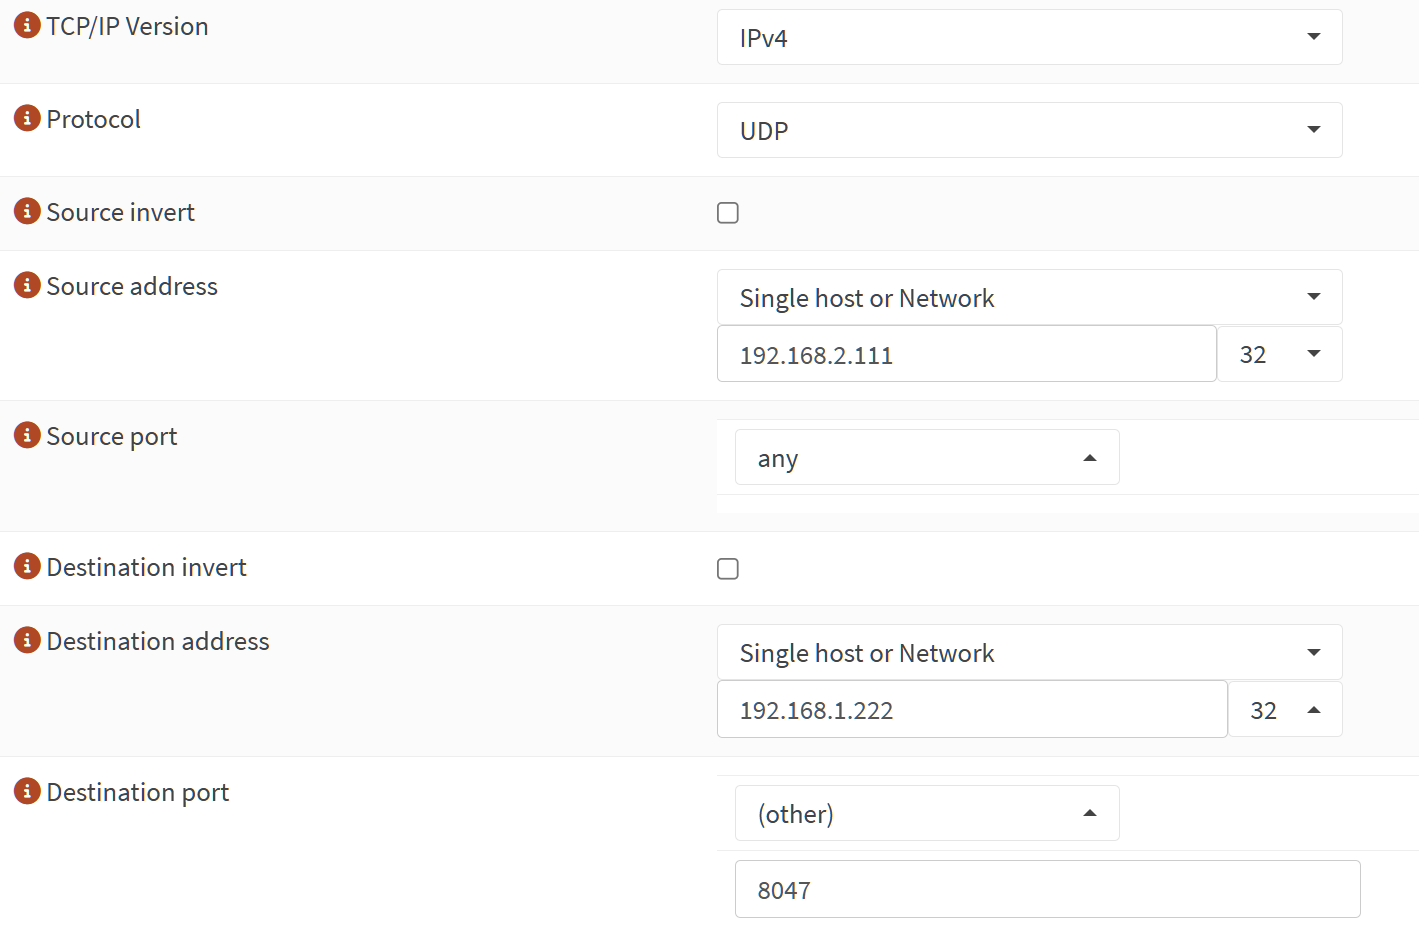
- Now go to Firewall > NAT > Outbound and create a new rule. "Interface" should be the network interface that your JuiceBox is connected to. The rest of the options should be configured like this:
Don't forget to apply the changes!