PipeDoll Tutorial
This tutorial will teach you how to create a simple character animation using PipeDoll. It assumes some basic familarity with Godot's 2D editor; see Godot's documentation to get started with the editor.
System requirements:
- Windows x64
- Godot 4.0
- Webcam
PipeDoll includes both a Godot Extension and a plugin. They can both be installed together by just copying the project files.
- Download the latest PipeDoll release from https://github.com/ectucker1/pipedoll/releases.
- Extract the downloaded PipeDoll.v1.0.0.zip file.
- Copy the contents of the folder to the root of your Godot project.
mediapipe_modelsandmediapipe_graphsshould be in the project root, whilepipedollshould be in theaddonsfolder. - Enable the
PipeDollplugin in your Project Settings.
Rigs use Godot’s built-in Skeleton2D and Bone2D nodes. New properties have been added to Bone2D to specify which pose landmarks the bone should track. The bone will be rotated such that it would point from the average position of all start landmarks to the average position of all target landmarks.
- Create a new 2D scene.
- Add a Skeleton2D node.
- Add a Bone2D node under the Skeleton2D node. Rename it to Chest.
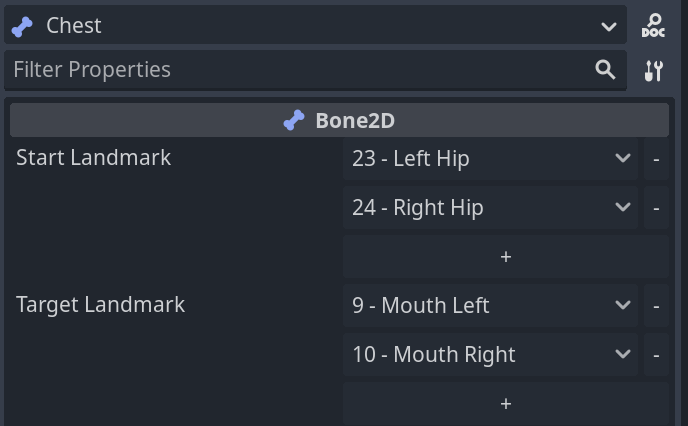
- Select the Chest node. In the inspector, add two landmarks under Start Landmark and Target Landmark. Set the Start Landmarks to “23 – Left Hip” and “24 – Right Hip”. Set the target landmarks to 9 – Mouth Left and 10 – Mouth Right.
- Add a Bone2D node under the Chest node. Rename it to Head.
- Reposition the Head node to be above the Chest node. This sets the length of the Chest bone.
- Set the Start Landmarks on the Head to “11 – Left Shoulder” and “12 – Right Shoulder”. Set the Target Landmarks to “7 – Left Ear” and “8 – Right Ear”.
- Add a Bone2D node under the Head node. Rename it to End.
- Reposition the End node to be above the Head node. This sets the length of the Head bone.
- Add a Bone2D node under the Root node. Rename it to LeftLeg.
- Set the Start Landmarks on the Left Leg to “23 – Left Hip” and “24 – Right Hip.” Set the Target Landmarks to “25 – Left Knee.”
- Add a Bone2D node under the LeftLeg. Rename it to LeftLegLower.
- Reposition the LeftLegLower node to below and to the left of the LeftLeg. This sets the length of the LeftLeg.
- Set the Start Landmarks on the LeftLeg to “25 – Left Knee.” Set the Target Landmarks to “27 – Left Ankle.”
- Add a Bone2D node under LeftLegLower. Rename it to End.
- Reposition the End node below and to the left of LeftLegLower. This sets the length of LeftLegLower.
- Repeat steps 10-16 to add the RightLeg and RightLegLower nodes, using the right-hand versions of landmarks.
- Repeat steps 10-16 to add the LeftArm and LeftArmLower nodes. Use “11 – Left Shoulder” as the Start Landmark for LeftArm. Use “13 – Left Elbow” as the Target Landmark. Use “13 – Left Elbow” as the Start Landmark for LeftArmLower and “15 – Left Wrist” as the Target Landmark.
- Repeat Step 18 to add the RightArm and RightArmLower nodes, using the right-hand versions of landmarks.
- Select the Skeleton2D node and press the Skeleton2D -> Overwrite Rest Pose button on the toolbar.
- Hide all your End nodes.
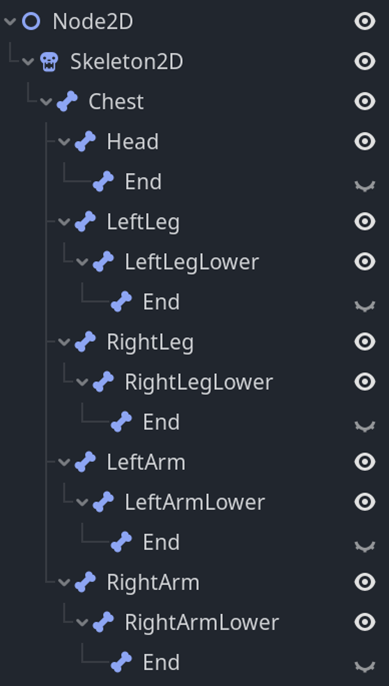
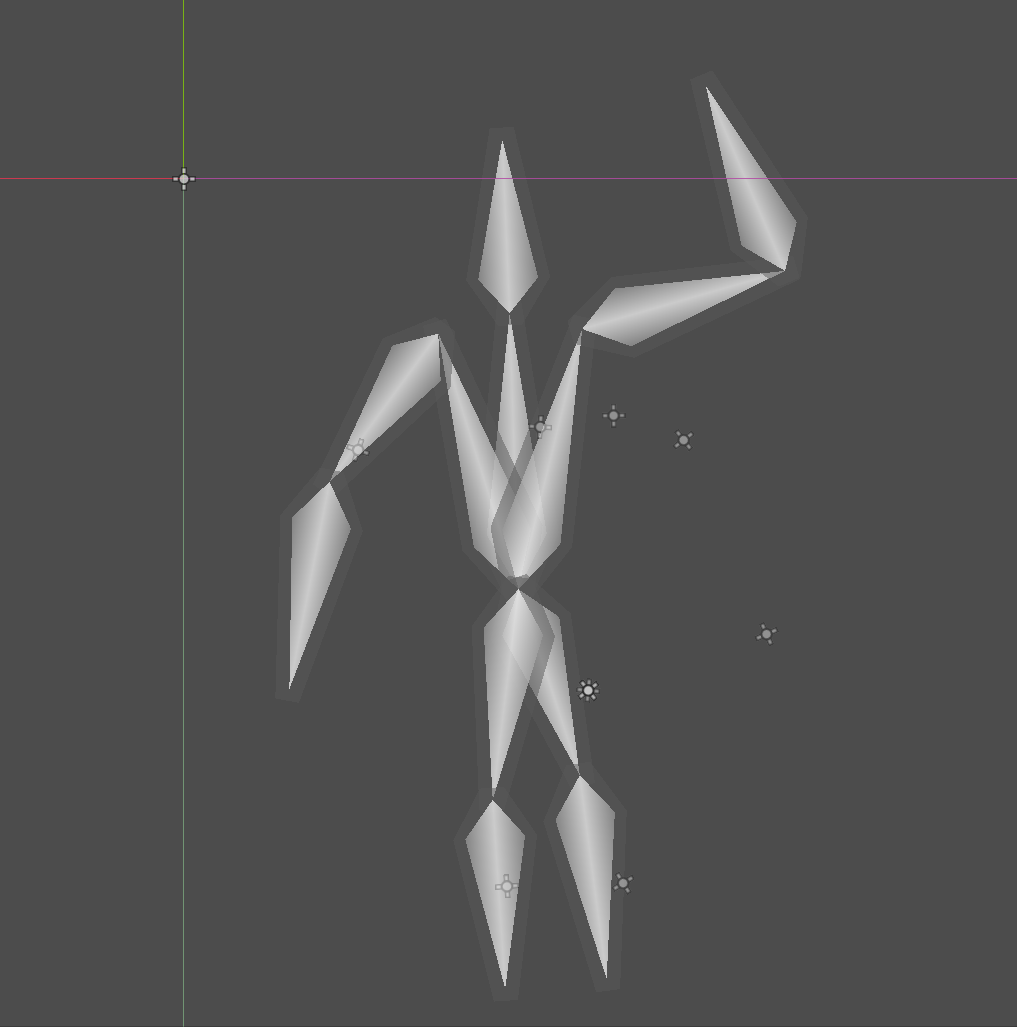
Your completed rig hierarchy should look like:
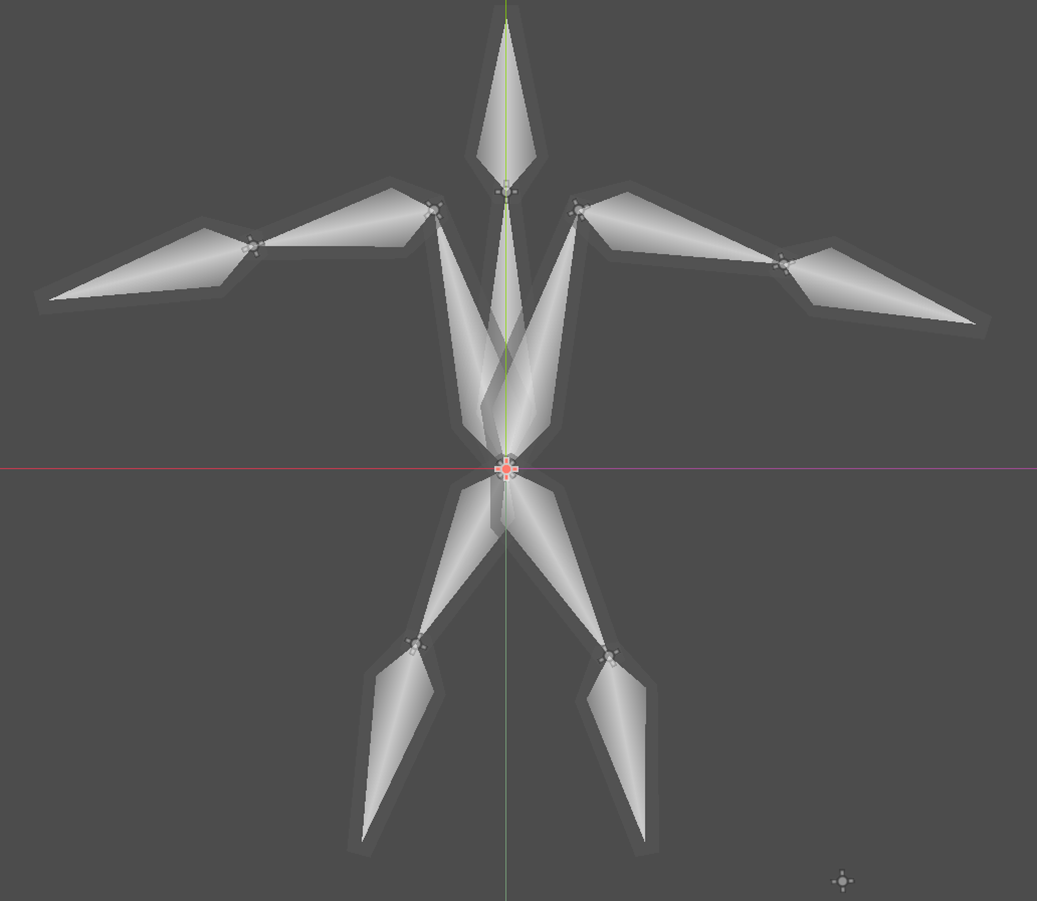
The rig should look like this in the editor:
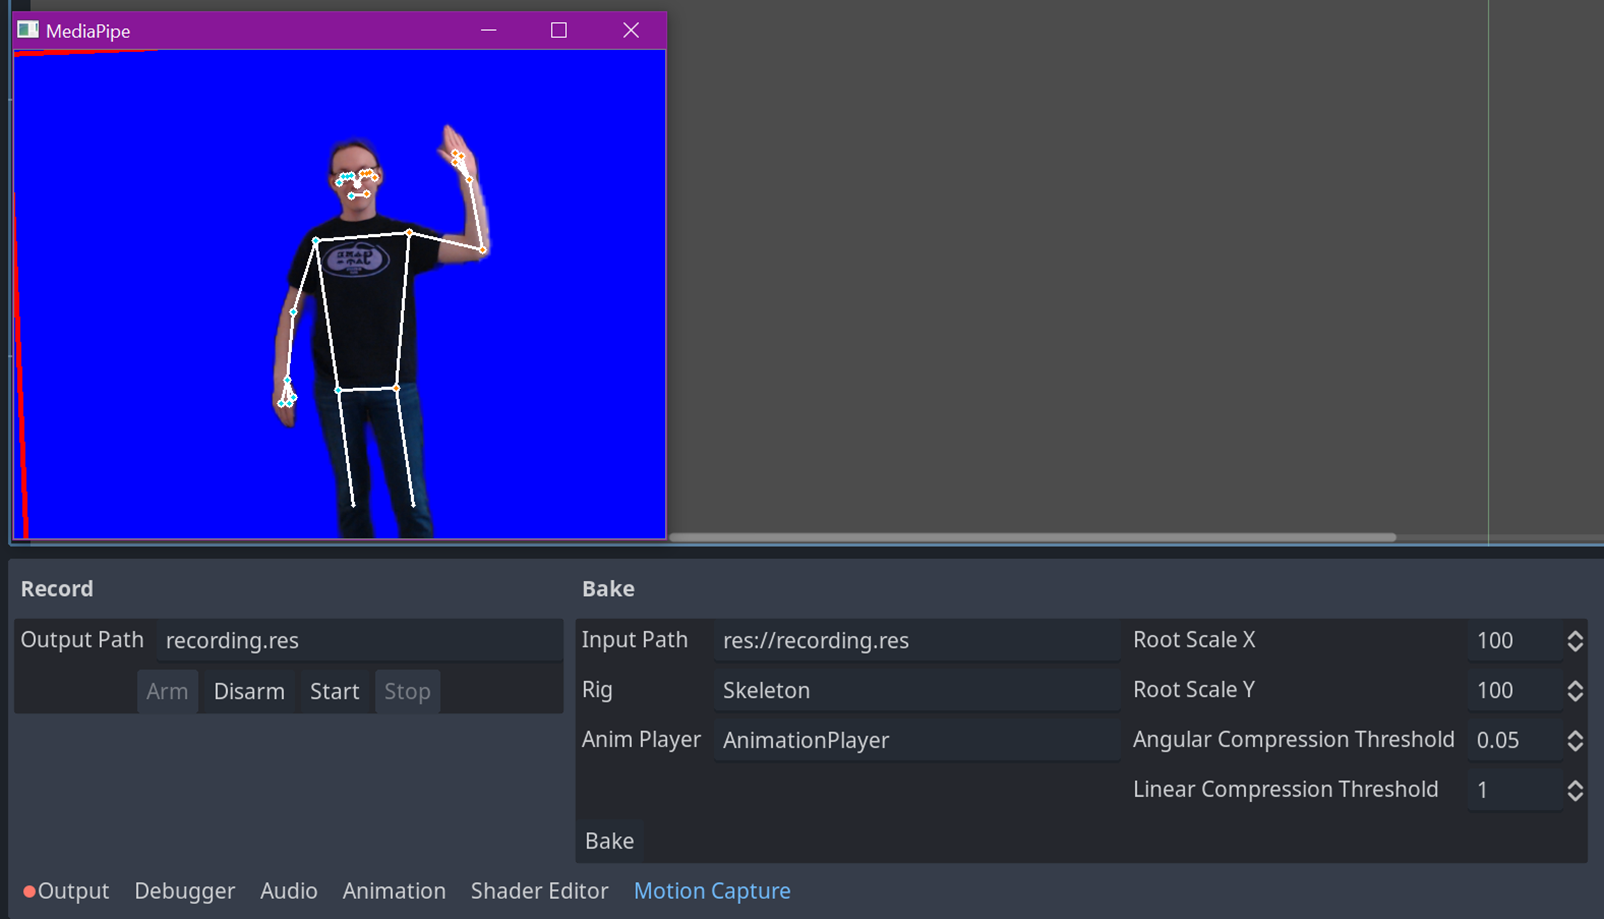
Recorded motion data is saved to a .res file and is independent of your rig.
- Open the Motion Capture tab in the bottom dock.
- Press the Arm button. After several seconds, a window should pop up which shows your webcam with pose landmarks overlayed.
- Press the Start button.
- Perform whatever action in front of the camera.
- Press the Stop button. A
.resfile should be saved as specified.
Baking loads your recorded motion data and applies it to your rig.
- Add an AnimationPlayer node to the scene with your rig.
- Open the Motion Capture tab in the bottom dock.
- Drag your recording file to the Input Path line.
- Drag the root node of your rig to the Rig line.
- Drag your AnimationPlayer to the Anim Player line.
- Press the Bake button.
- Select your AnimationPlayer. It should have a new animation under the Recordings group.
Your final animation may looks something like this:
- You can delete all the DLLs, models, and other components of PipeDoll before publishing your game – they’re not required to playback the animations in game.
- This tutorial focused on a humanoid rig, but there's nothing restricting you to that. Rig something else up to your landmarks and see what you can make!
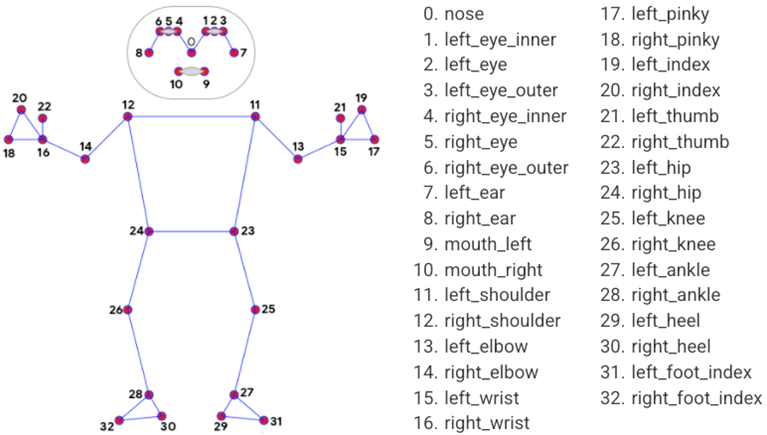
- Available landmarks can be seen in the graphic below, from MediaPipe docs.