Smart Home with AI: Your private AI Agent using LangGraph, LangChain, Ollama to control home appliances which are being controlled via Micro-controllers like ESP32, ESP8266 etc. It is designed to work completely offline & private in nature. Users can interact to the AI with text prompts or voice commands to control the home appliances. This is a prototype which can be improved and modified hugely
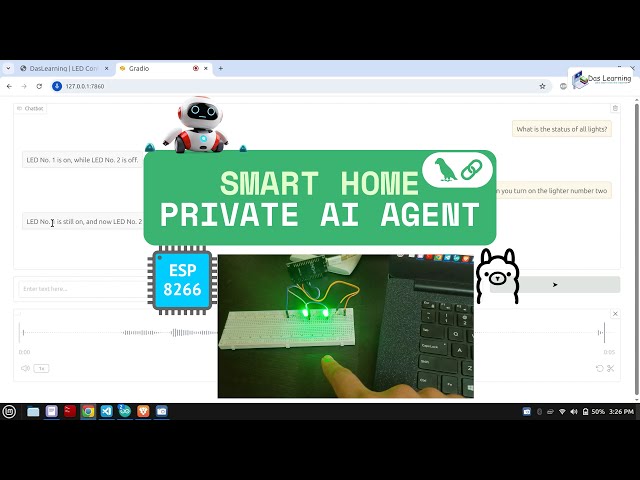
You can click on the below Image or this Youtube Link to see the demo. Please let me know in the comments, how do you feel about this App.
This is the scematic flow diagram

Let's go step by step.
- Below is the scematic connection diagram. Connect your appliances accordingly. You can Checkout my DIY-Video to get more insight.

- Load the Code on ESP8266 using Arduino IDE
- Change the code with your WiFi
SSID&Passwordhere
/* Put SSID & Password of your Router*/
const char* ssid = "daslearning";
const char* password = "123456789";
- You need to install ArduinoJson library explicitly (Other libraries are managed automatically when we install the ESP8266 Board manager)
- Optionally, you can upload the data folder to static memory using any upload tool such as LittleFS-DataUpload to use the direct
HTMLbased website to control the LEDs & bypass theAI. - Finally, upload the sketch (program) from IDE & Volla, your ESP8266 is ready.
- Change the code with your WiFi
- Install Ollama on your system from the official website
- Then Pull the required models
ollama pull llama3.2
# Check the models
ollama list
You can check the App directory to get more insights
-
Steps to run the App
cd ./aiAgents/

# Install the dependencies
pip install -r requirements.txt # virtual environment is recommended

# Set the required enviroment variables (use `setx` command on windows)
export HOME_API_BASE="http://<your-esp8266-ip>" # This is needed for the AI app to connect to ESP8266
export OLLAMA_API_BASE="http://<your-ollama-ip>:<port>" # Optional: defaults to localhost:11434
export AUDIO_MODEL="<other-vosk-model>" # Optional: default to `en-in` (Indian English small)

# Run the APP
python app.py
-
Access the App at
http://localhost:7860from the same device orhttp://<IP>:7860from another device in the local network.
Please note: themicrophoneaccess would be disabled on other devices as the app is not running onHTTPS.
Please visit our contact page 👉🏽 Contact Us