-
Notifications
You must be signed in to change notification settings - Fork 29
MetaLIMS v2.0 Hosted Installation (via AWS Lightsail)
#Table of Contents Note: Installation scripts requires sudo user privileges to run. This requirement is met by Amazon Lightsail default login users
- Sign-up for AWS Lightsail
- Choose From Pre-configured AMI
- Install LAMP Stack
- Create a Self-Signed SSL Certificate for Apache (optional)
- Install MetaLIMS
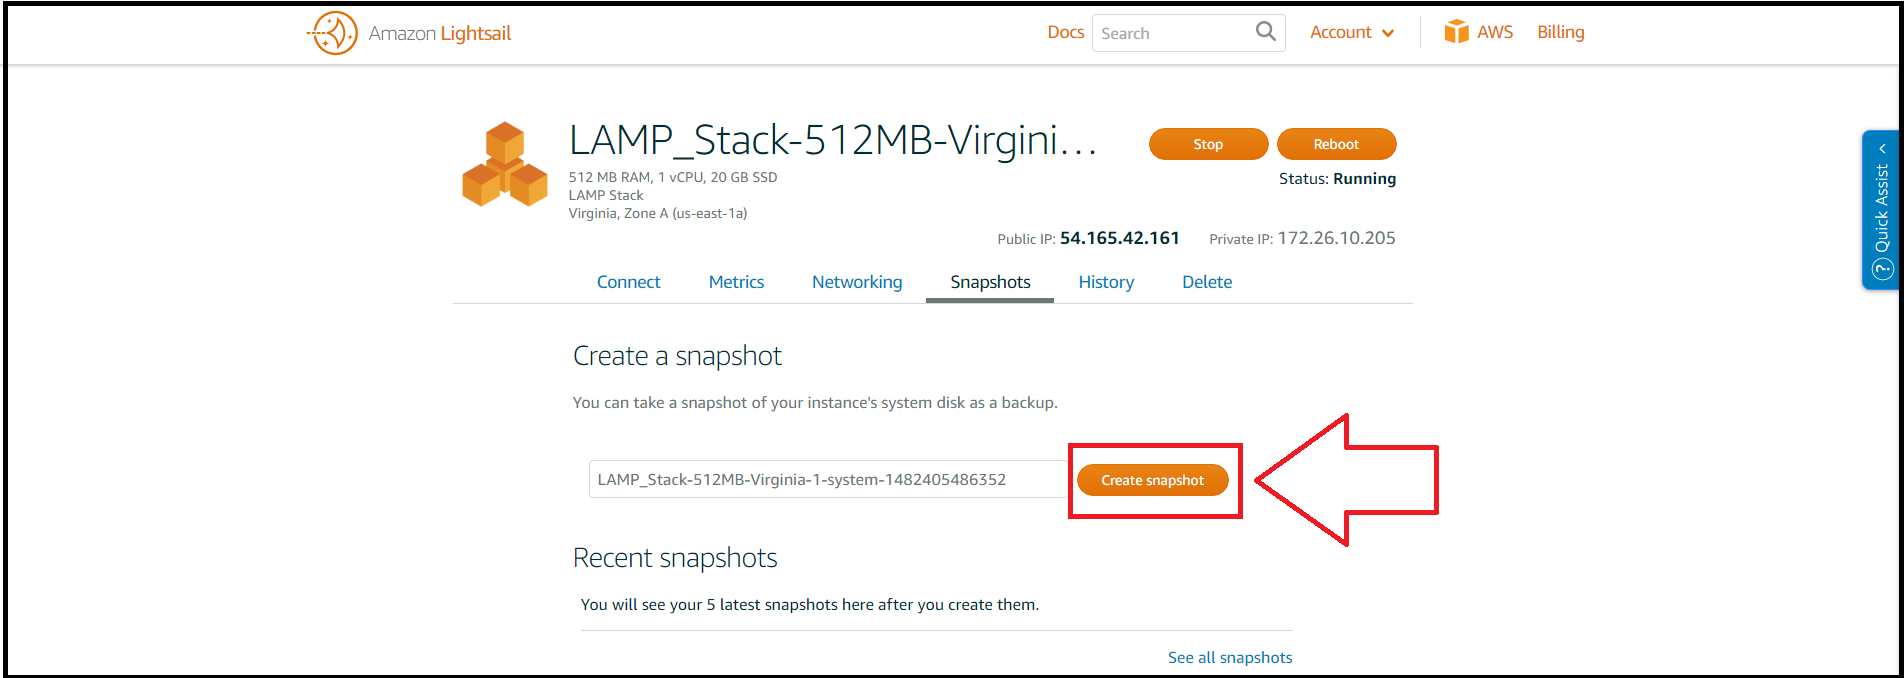
- Back-up Instance
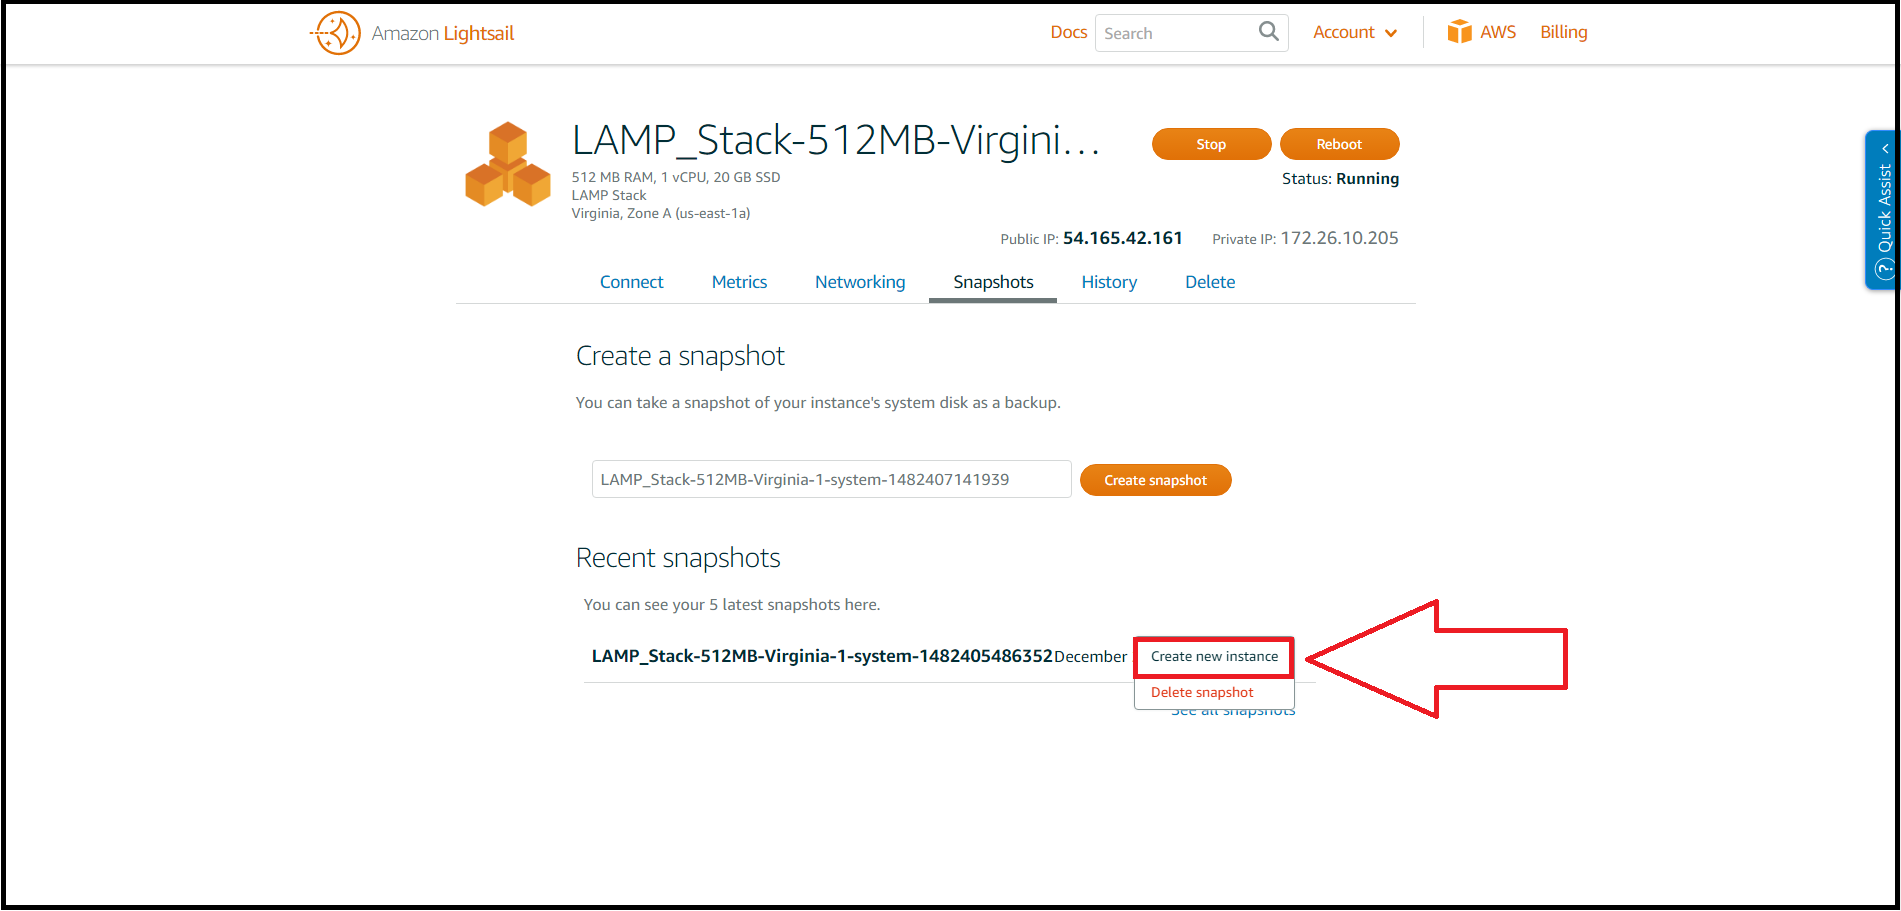
- Restore Instance
- Miscellaneous Information
- Disclaimer
IMPORTANT: Please note that users who wish to install on a Ubuntu 16 or Ubuntu 14 system can also make use of our deployment scripts shown here, regardless of using AWS Lightsail or not. To use on your desired system, please jump to the following instructions for usage :
Both scripts assume installation of PHP5 (Ubuntu14) and PHP7 (Ubuntu 16) and the most current version of sendmail
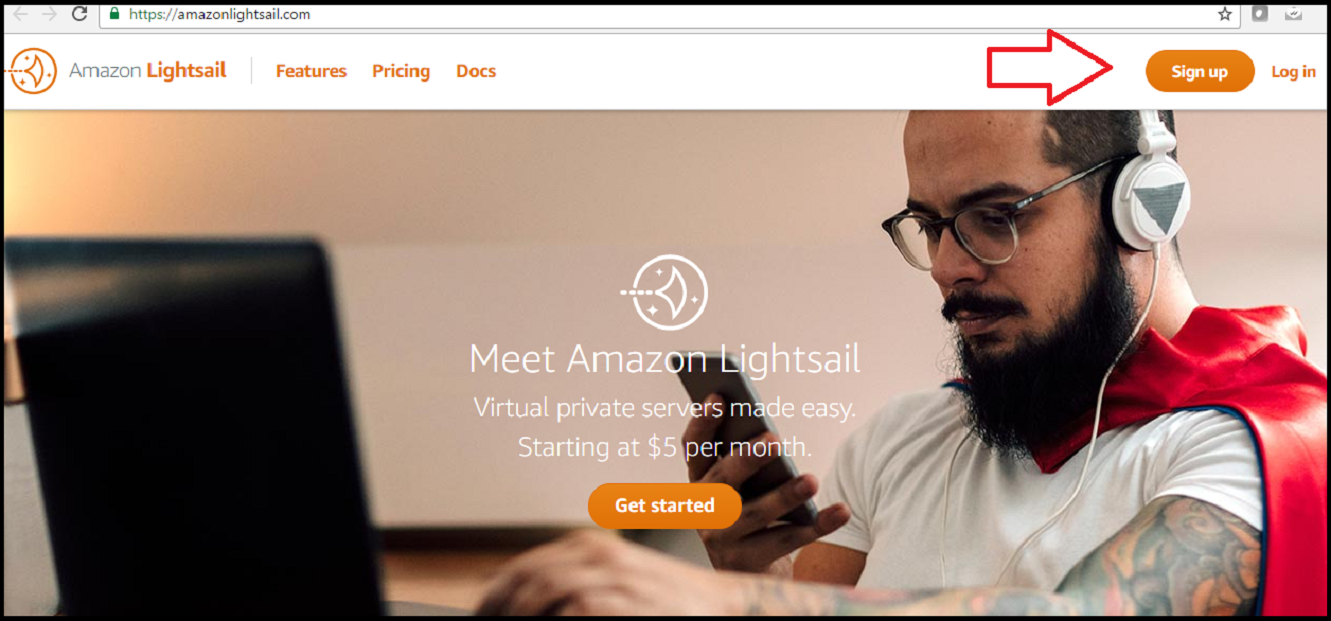
- Go to https://amazonlightsail.com/
- Click on Sign up button
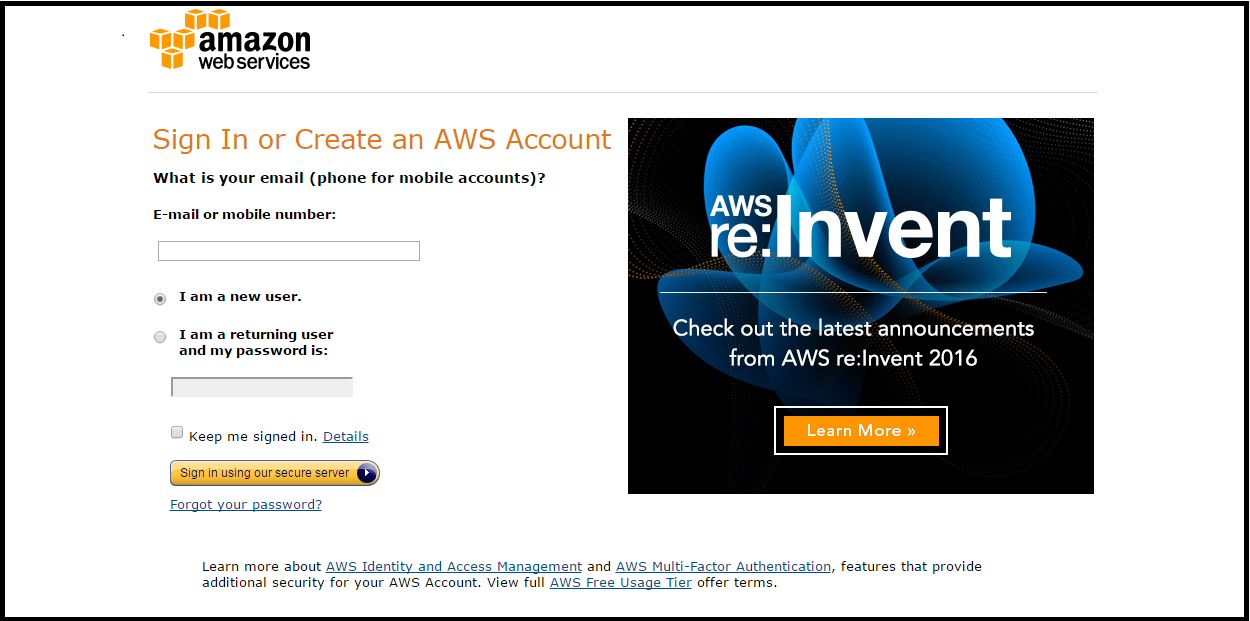
- Choose to either sign-up as a new user or use an existing amazon user (note: this can be any amazon account) and follow prompts for user registration if needed.
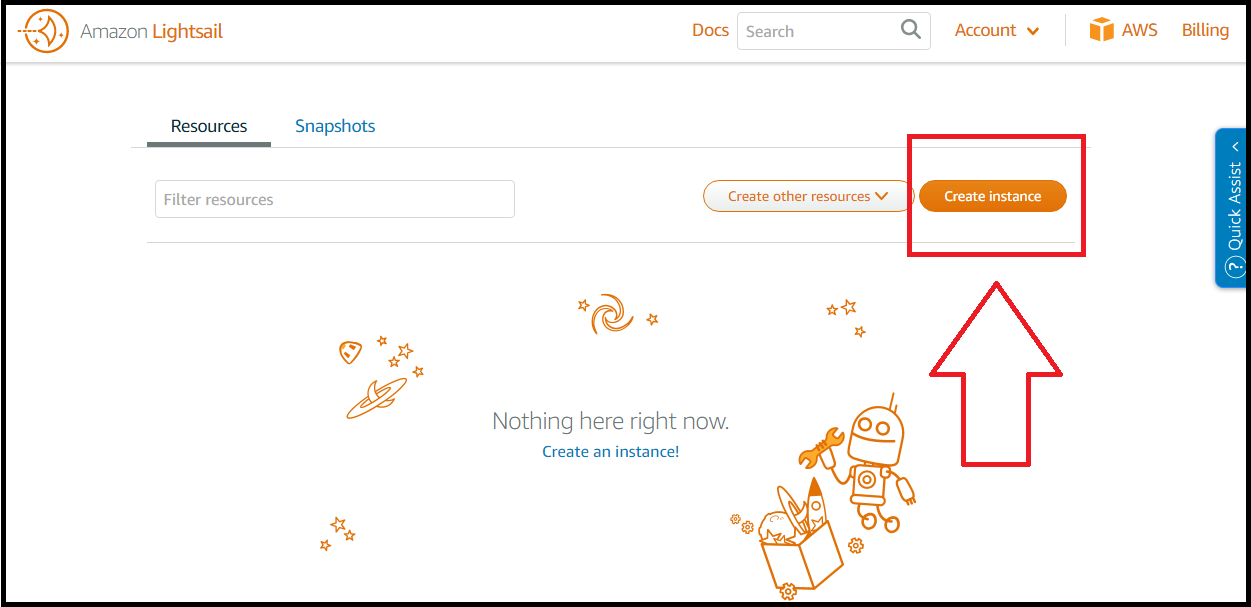
You should now be logged in and on the Amazon Lightsail homepage
- Click Create Instance
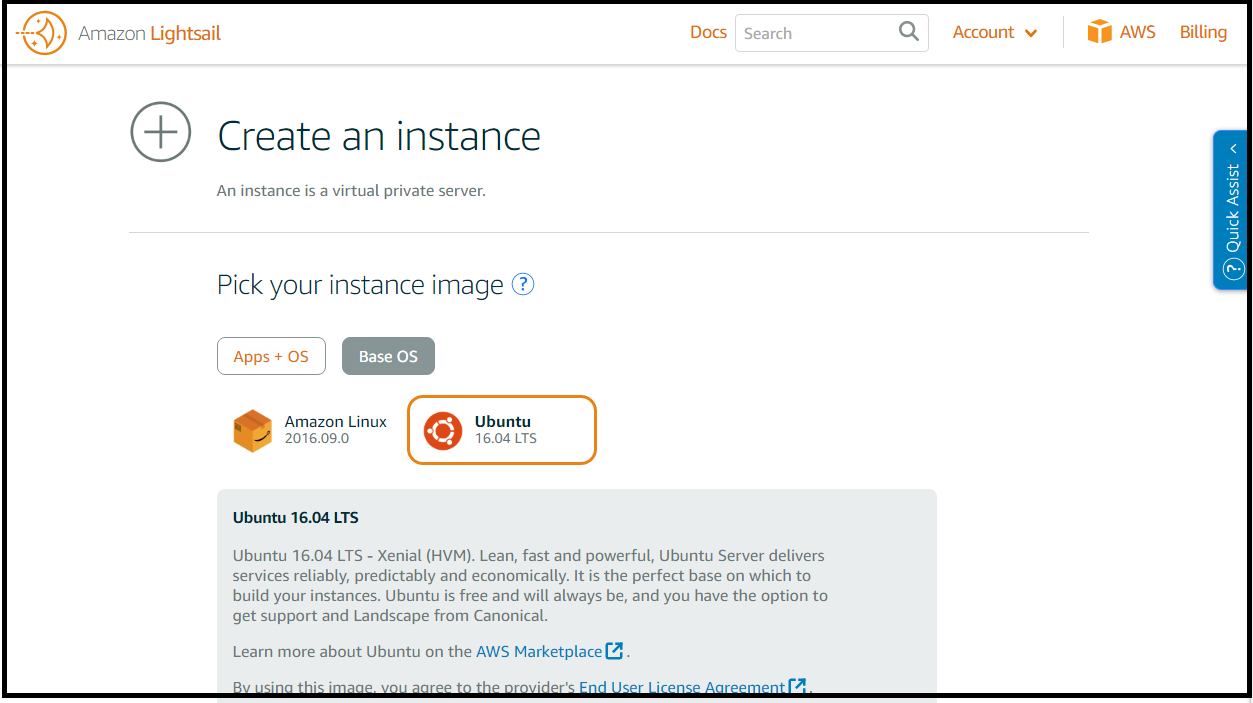
Amazon Lightsail comes with many preconfigured AMI's to choose from to help you quickly get set-up and running. We will only explore Ubuntu 16.04 LTS.
- Ubuntu 16.04 LTS - pre-configured OS using Ubuntu 16.04 LTS. Uses traditional Ubuntu file system. (You will need to install LAMP stack and recommended to use MetaLIMS's lamp.sh script. Instructions in next step Install LAMP Stack)
- Next: Choose your instance plan
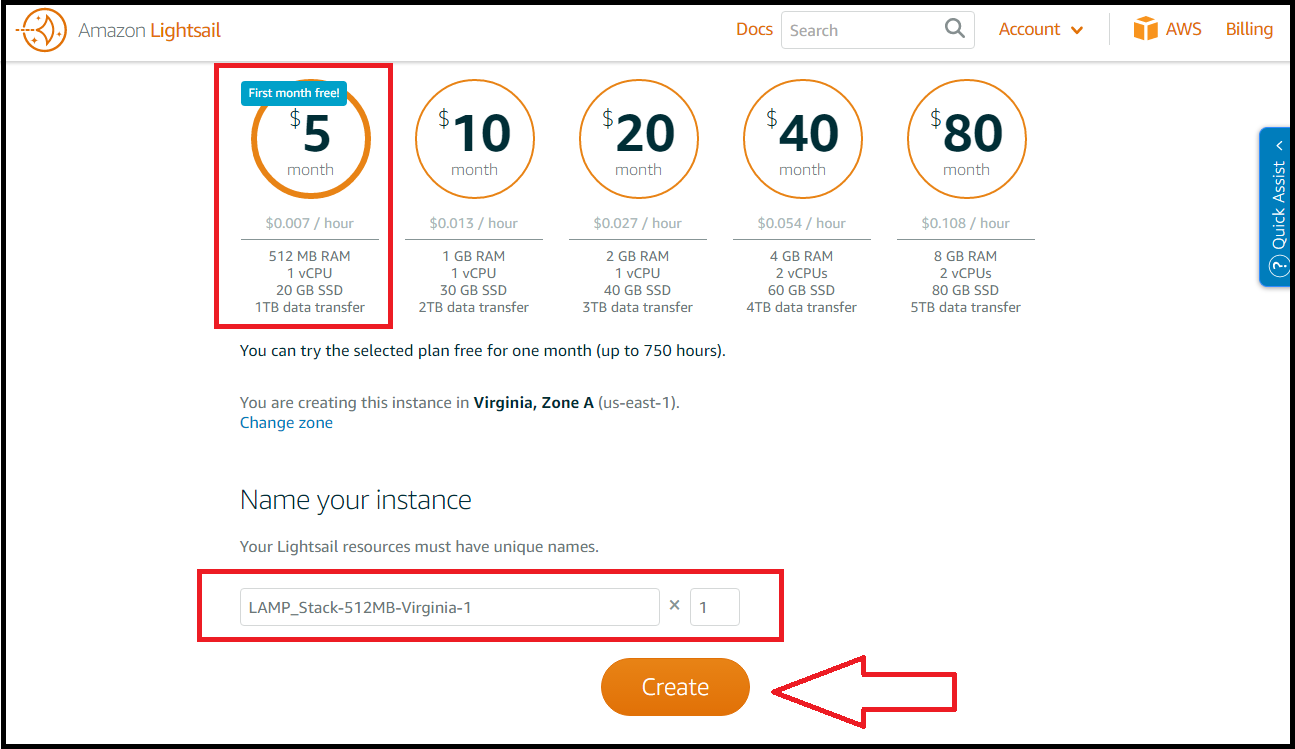
For demo purposes we recommend selecting the cheapest plan at $5/month which will give you a month free (or 750 hours, whichever comes first)
-
Name your instance Suggestion: Use default name.
Currently Lightsail is only available in US regions. However, we did not see any performance issues using in Singapore. -
Click Create
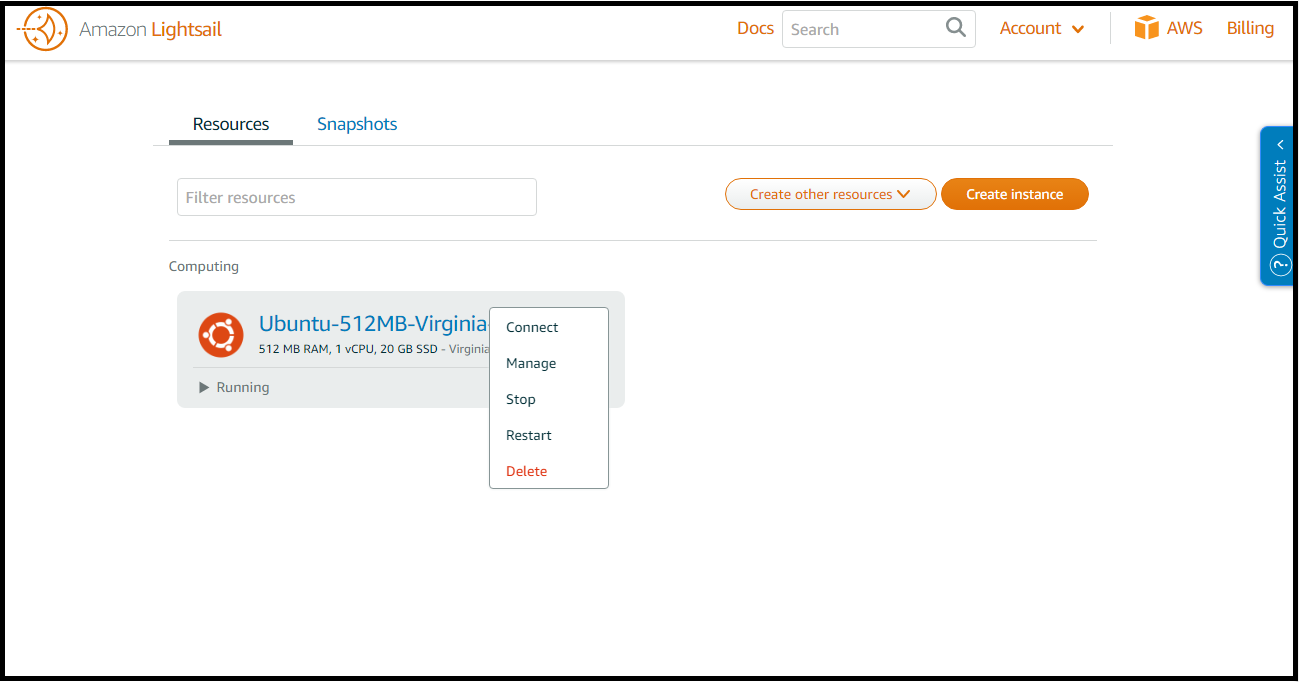
Once you click create you will wait as your instance is created for you. Once it is ready, instance will appear under 'Resources' and text saying that it is running
- Click on vertical ellipses to bring up the menu for your instance
- Click on 'manage'
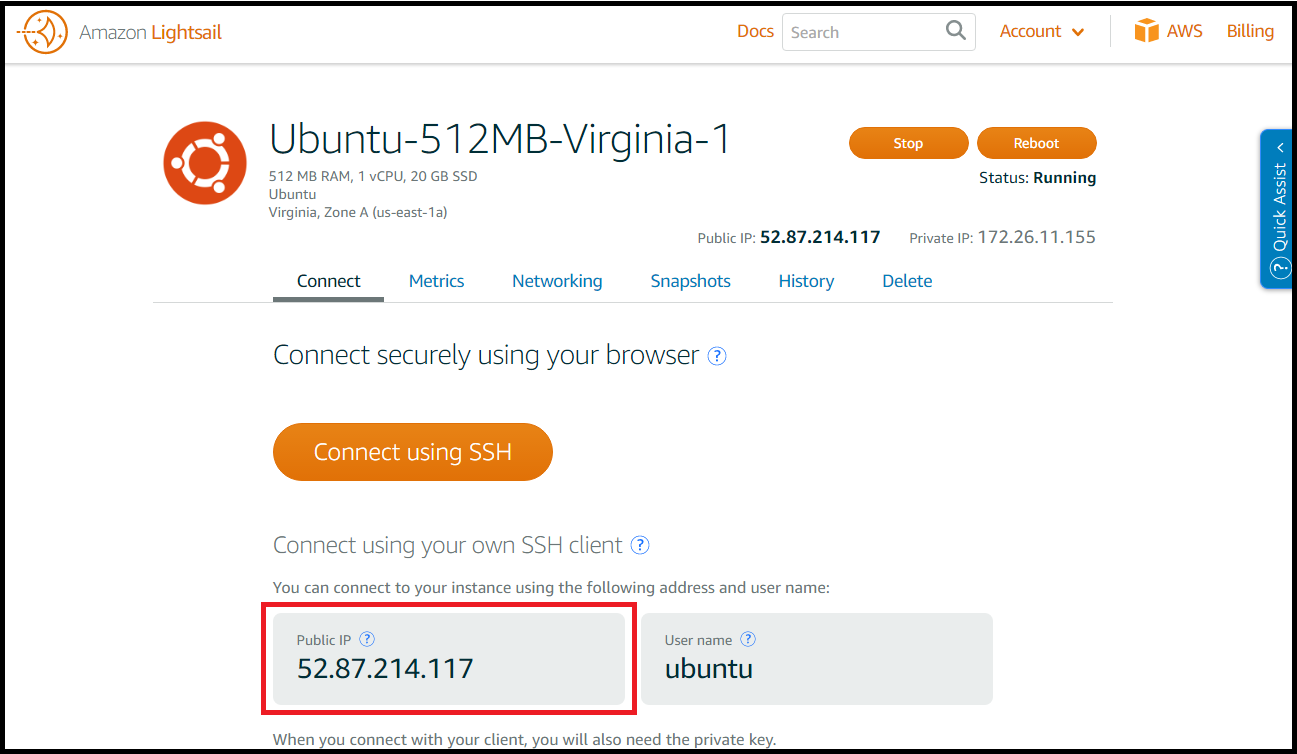
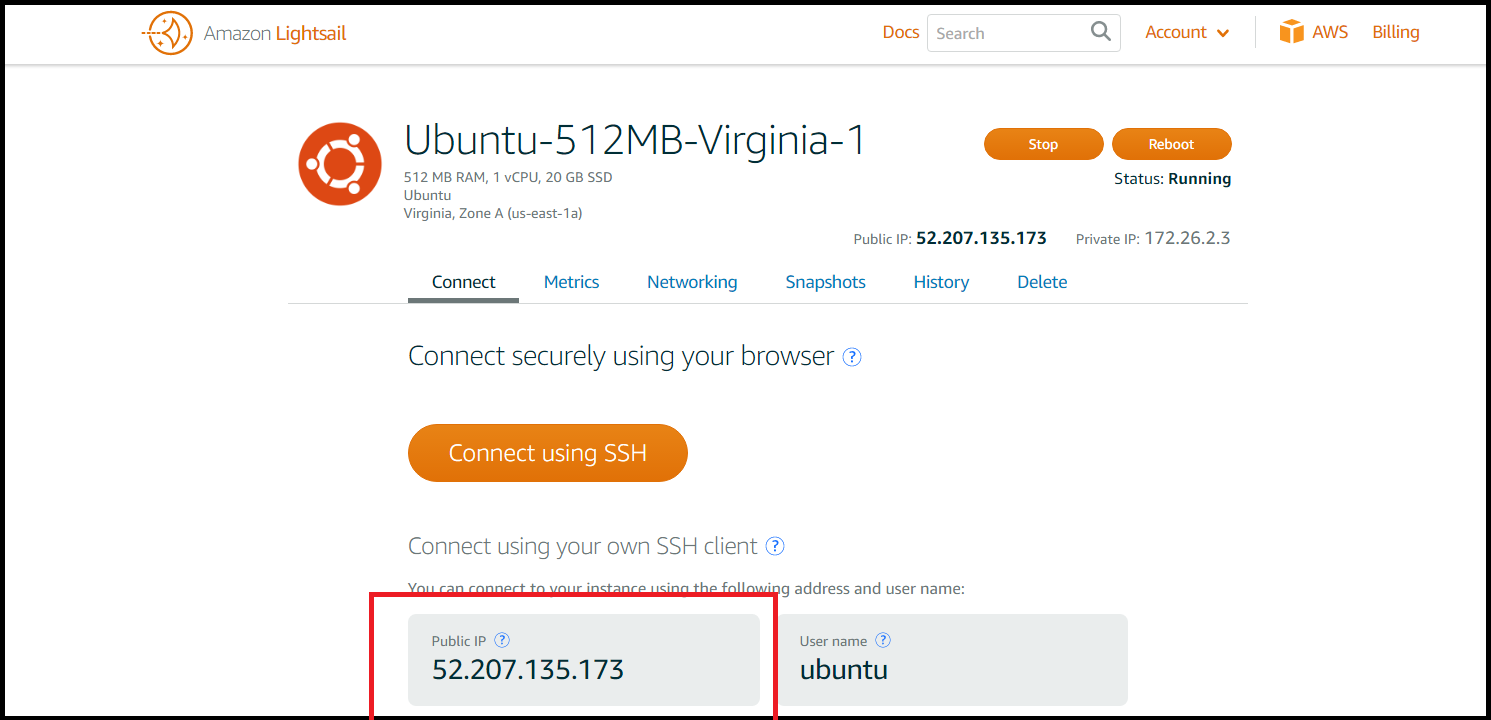
You are now brought to your instance main page where you will note your public IP (Example here: 52.87.214.117). This will be used later to access MetaLIMS in your web browser.
Ex: http://52.87.214.117/MetaLIMS/login.php
To use MetaLIMS on the Ubuntu 16.04 LTS AMI, you must now install build a complete LAMP stack. Suggested install instructions below
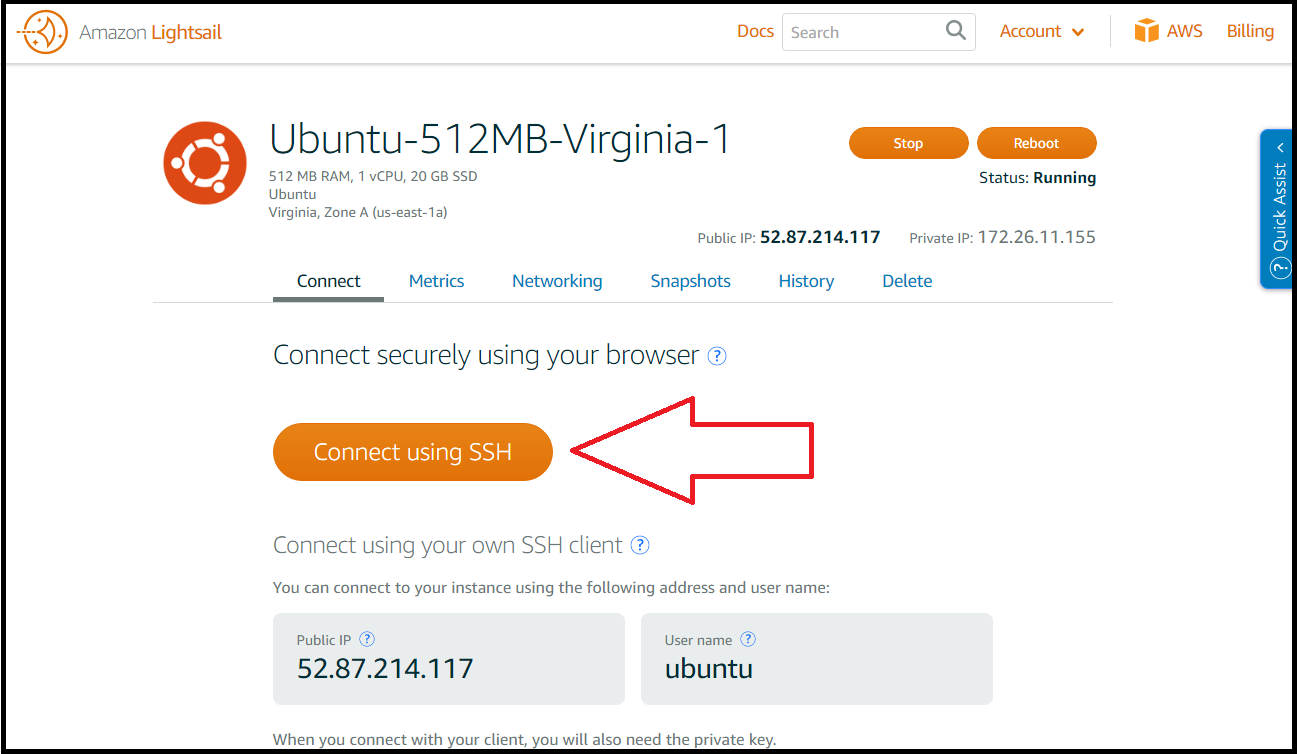
- Connect to your instance through SSH by clicking the orange 'Connect using SSH' button. (This will open a web GUI of your terminal connecting to your instance
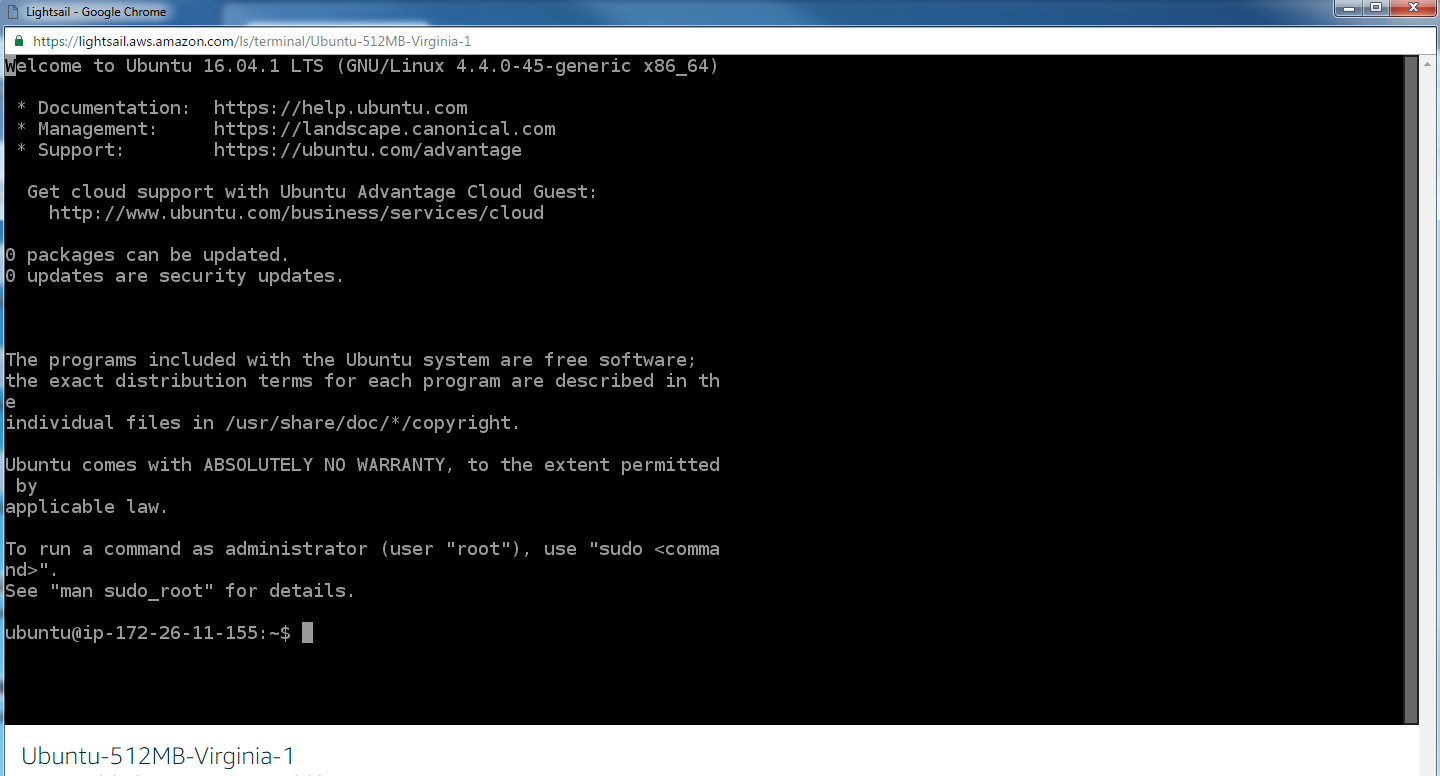
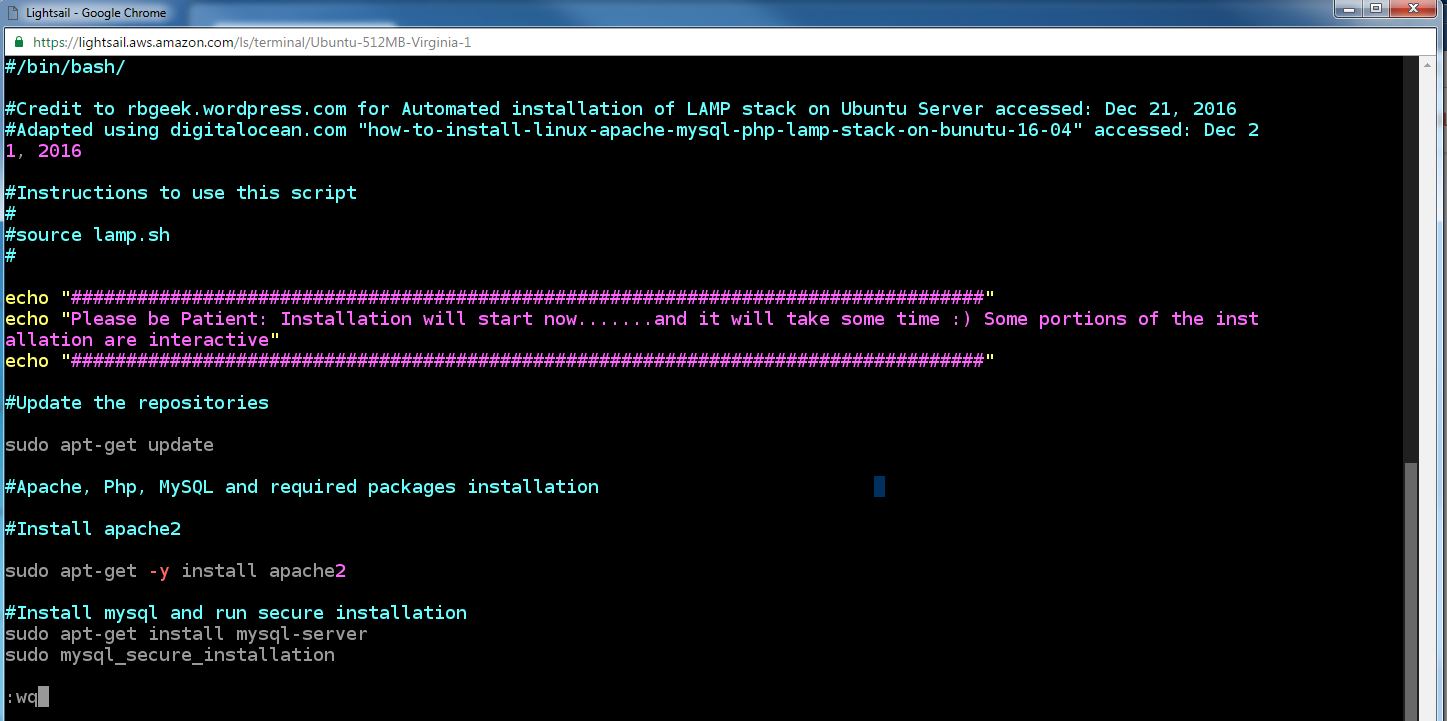
You are now brought to your Ubuntu instance inside the terminal GUI and signed in automatically as user 'ubuntu'. You are currently in your home directory. We will be creating a file named lamp.sh and inputting the contents of the MetaLIMS file of the same name (lamp.sh). This installation is interactive.
- Create a file named lamp.sh
We will be creating a file using the text editor called vi
Note: Some basic vi commands can be found here (http://cc.iiti.ac.in/vicom.pdf)
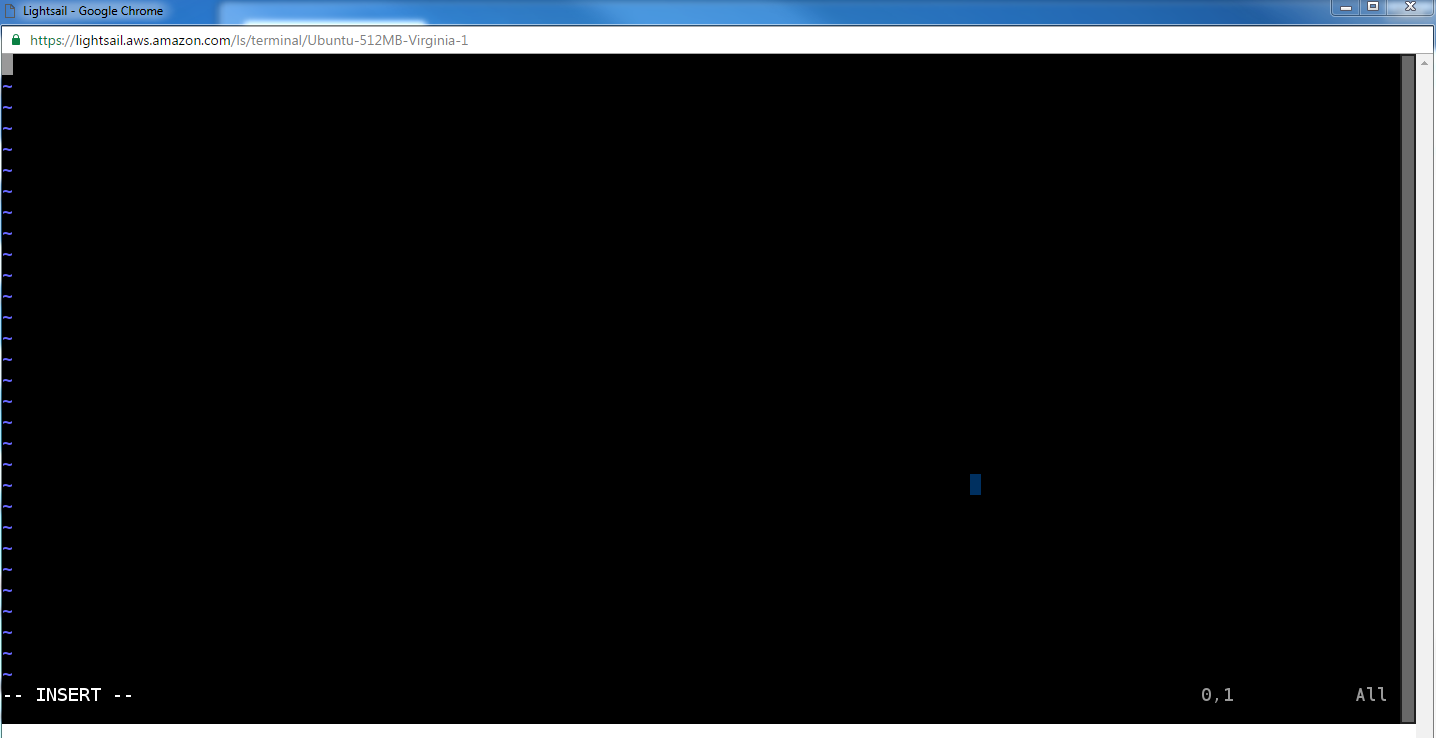
- Type i to turn on insert-mode within the vi text editor
The words --INSERT-- will appear at the bottom of the screen so you know you are now ready and able to insert text to the page
-
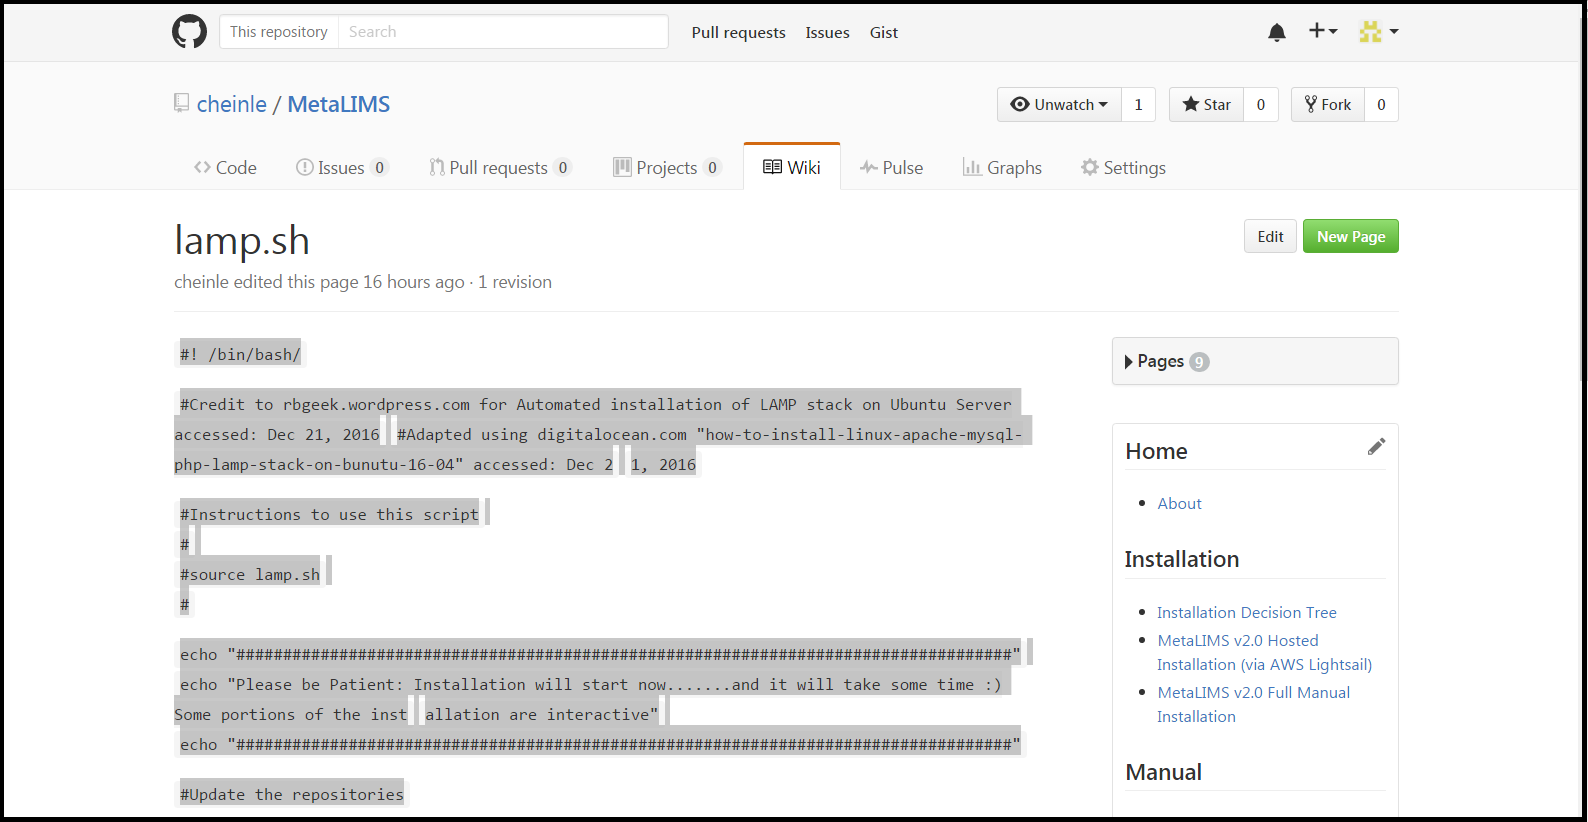
Go to MetaLIMS wiki (https://github.com/cheinle/MetaLIMS/wiki/lamp.sh)
-
Highlight and copy entire contents of lamp.sh wiki page
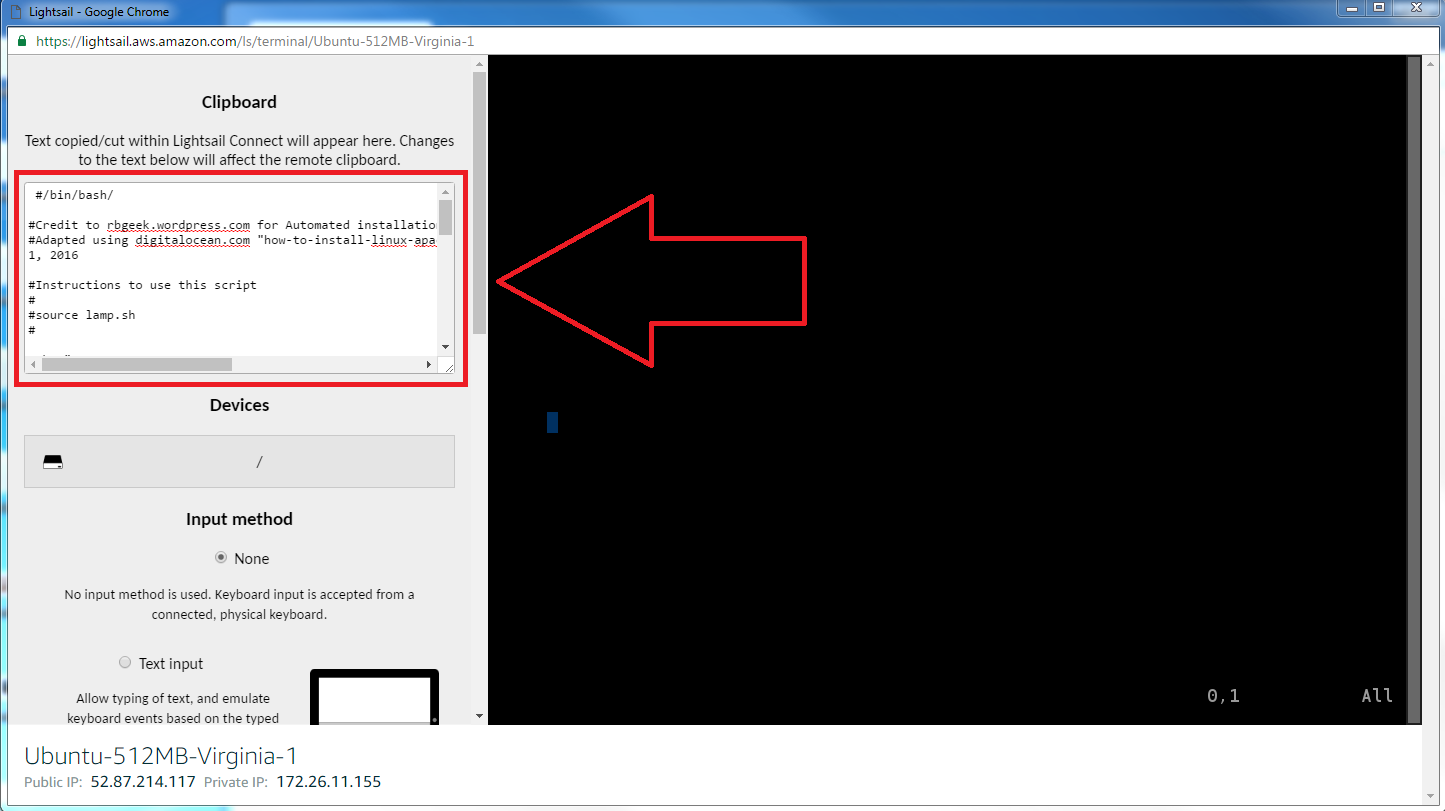
Because Lightsail uses a GUI we must use special key commands to copy and paste text from your desktop to the lightsail terminal.
(Notice: If you are using a regular terminal window, skip steps 2-4)
- Click inside Lightsail terminal*
- Press ctrl key, shift key, and alt key at the same time to bring up Lightsail's copy paste window (i.e. clipboard).
- Right click (and select paste if it is an option) to paste contents of lamp.sh to clipboard area
- Press ctrl key, shift key, and alt key at the same time again to close Lightsail's clipboard
- Click inside terminal window (you should still be in insert mode)
- Right-click on mouse to paste contents into file (select 'paste' option if it appears). Use arrow keys on keyboard to scroll to top. To ensure that entire contents were pasted in, make sure top of file reads '#! /bin/bash/' (If paste was not successful, press esc, then q! to quit. Start over at vi lamp.sh)
- Press Esc, then type wq and enter to save and quit
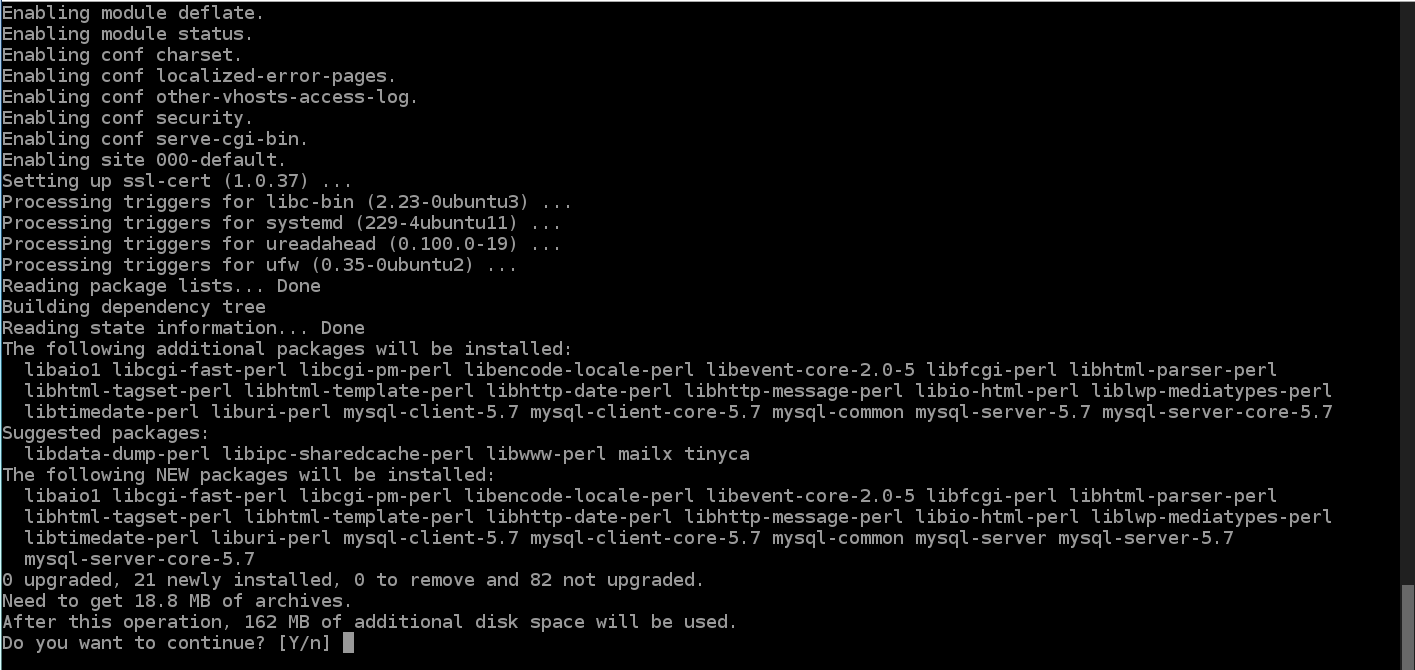
- Type source lamp.sh and press enter
- Answer questions which appear with a [Y/n] option by typing y and pressing enter
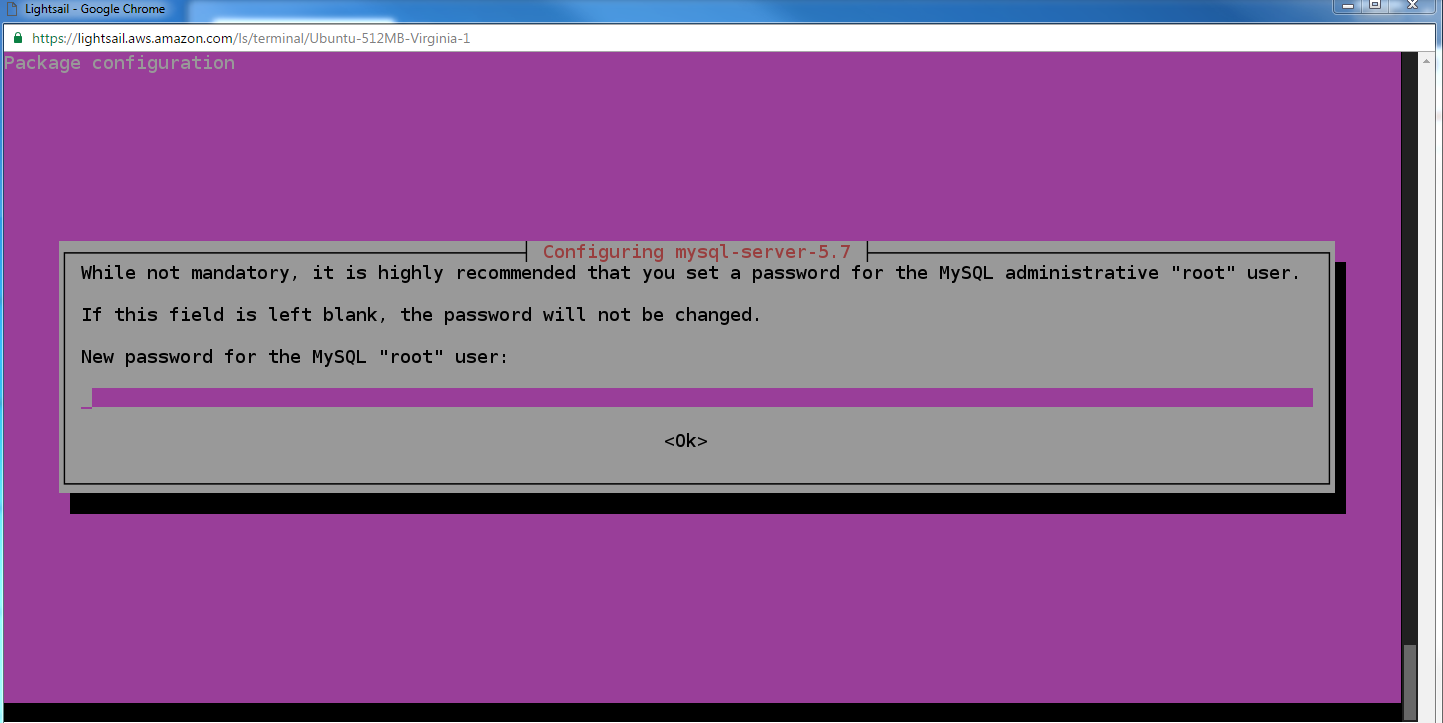
- Type in password for MySQL root user and press enter. You will be asked to confirm password by typing it again in a similar pink screen. (Very Important To Remember)
- Enter password for user root:
Type in the password you just entered in the pink screen and press enter. This will not appear on screen but will be invisible. Do not worry, the password is still being entered.
- Answer No for VALIDATE PASSWORD PLUGIN
- Answer No for Change password for root?
(You will only answer no, because you just set this password on the initial set-up for mysql in pink)
- Answer Y for Remove anonymous Users?
- Answer Y for Disallow root login remotely?
- Answer Y for Remove test database and access to it?
- Answer Y for Reload privilege tables now?
- Answer Y for Do you want to continue? (for php installation)
- Installation Success!!
- Close window using normal Windows or Mac methods
This is optional but recommended for new systems and is meant as an optional addition to the previous LAMP Stack Installation instructions. This allows servers to send traffic safely between the server and clients without the possibility of outside parties intercepting the messages.
Tutorial will contain less screenshots as it assumes you have this knowledge from the previous section.
This information is based on Digital Ocean's tutorials: https://www.digitalocean.com/community/tutorials/how-to-create-a-self-signed-ssl-certificate-for-apache-in-ubuntu-16-04#prerequisites
-
Connect again to your instance through SSH by clicking the orange 'Connect using SSH' button. (This will open a web GUI of your terminal connecting to your instance
-
Create a file named apache_ssl_16.sh
We will be creating a file using the text editor called vi
Note: Some basic vi commands can be found here (http://cc.iiti.ac.in/vicom.pdf)
- Type i to turn on insert-mode within the vi text editor
The words --INSERT-- will appear at the bottom of the screen so you know you are now ready and able to insert text to the page
Because Lightsail uses a GUI we must use special key commands to copy and paste text from your desktop to the lightsail terminal.
(Notice: If you are using a regular terminal window, skip steps 4-7)
- Go to MetaLIMS wiki (https://github.com/cheinle/MetaLIMS/wiki/apache_ssl_16.sh)
- Highlight and copy entire contents of apache_ssl_16.sh wiki page
- Click inside Lightsail terminal
- Press ctrl key, shift key, and alt key at the same time to bring up Lightsail's copy paste window or clipboard
- Right click and select paste to paste contents of apache_ssl_16.sh to clipboard area
- Press ctrl key, shift key, and alt key at the same time again to close Lightsail's clipboard
- Click inside terminal window (you should still be in insert mode)
- Right-click on mouse to paste contents into file (selecting 'paste' option if it appears. Use arrow keys on keyboard to scroll to top. Check file to ensure that entire contents were pasted in. Make sure top of file reads '#! /bin/bash/' (else press esc, then type q! to start again at vi apache_ssl_16.sh)
- Press Esc, then type wq and enter to save and quit
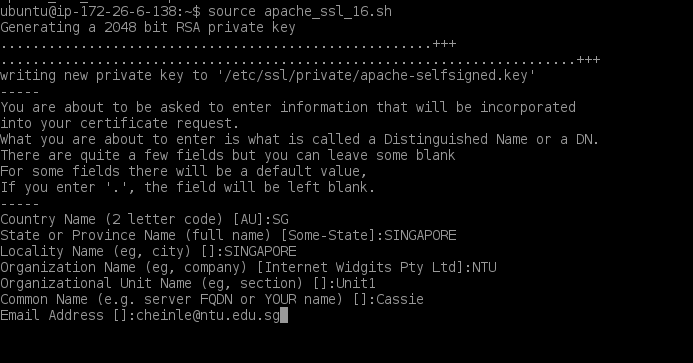
- Type source apache_ssl_16.sh and press enter
- Program will prompt you with the following questions to fill out
-
The following process will take a few minutes...
-
When prompted, enter your email address
- When prompted, enter your server domain or ip address. If you have set-up using the above tutorial for Lightsail, you can use the Public IP address at the bottom of the GUI window
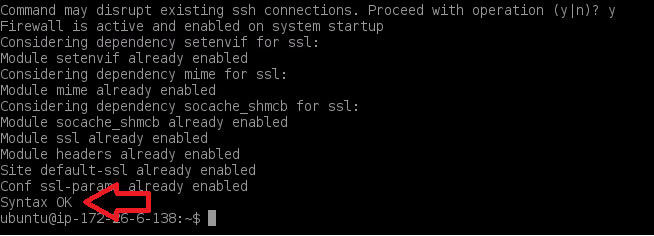
- When asked if you want to proceed with operation, type 'y'
- Script will finish. Please check that message says 'Syntax OK'
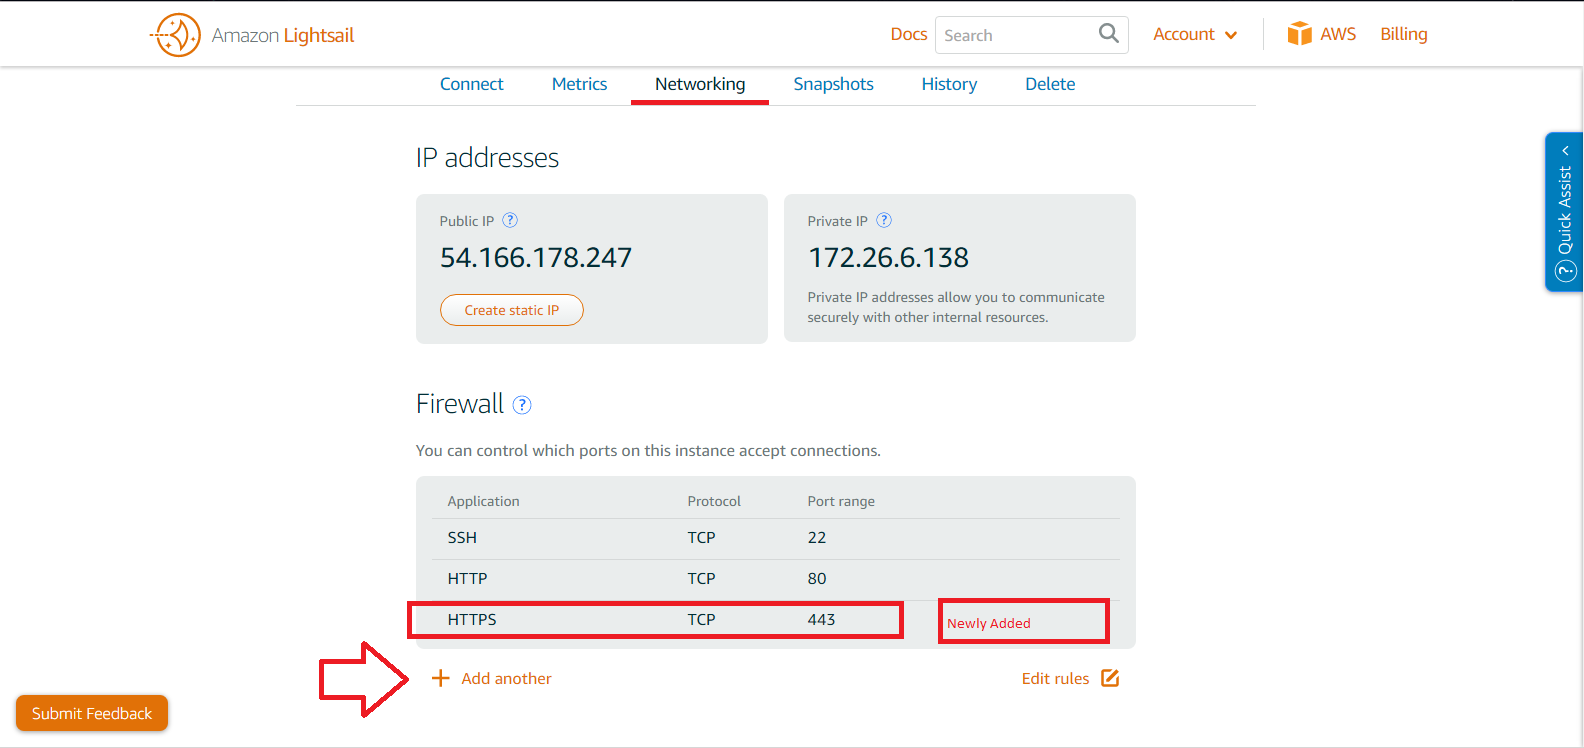
- Go to AWS console and add firewall setting for https
Click on 'Networking' tab
Select '+ Add another' under the Firewall settings
Select 'HTTPS' for applications
Press 'save'
- Check browser
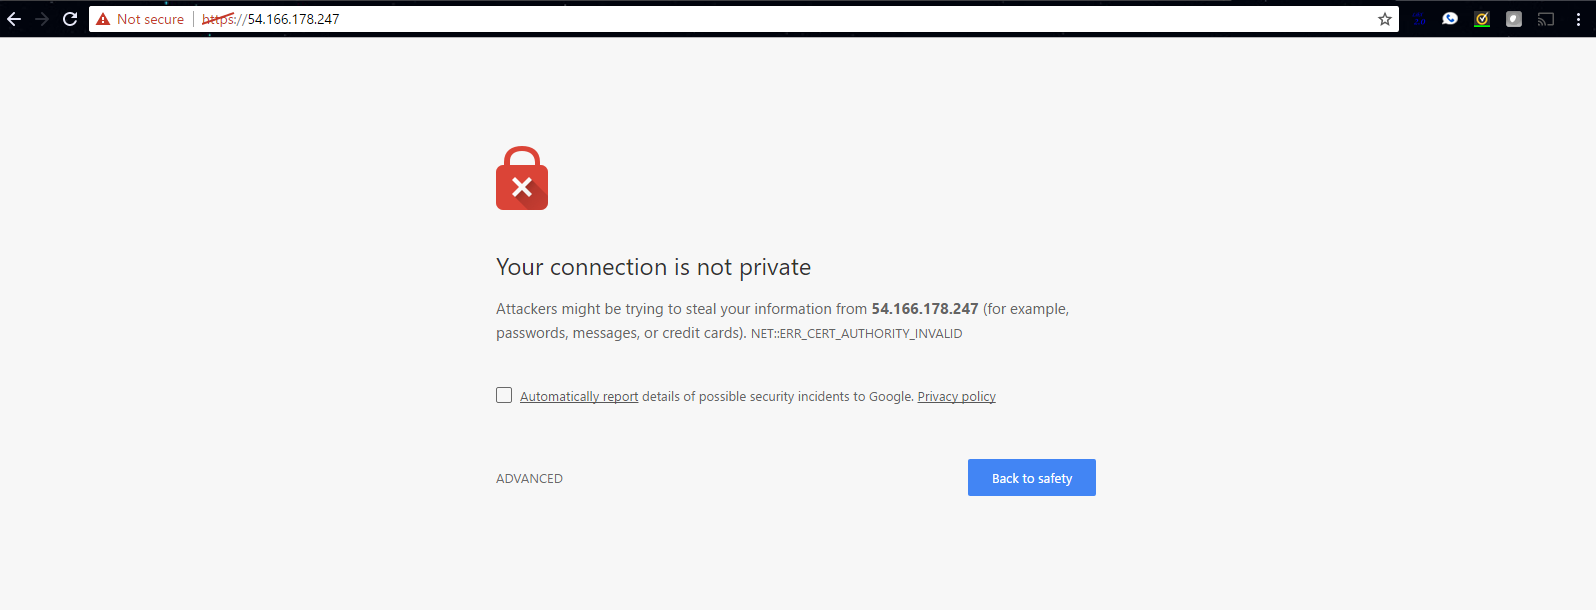
Go to browser and type in domain name or ip address In this example it was the public ip we entered
Notice here you will get a warning. However, this is ok and expected This happens because while we are still encrypted we are not concerned with the third party validation of our host's authenticity. This is how it would look in Chrome
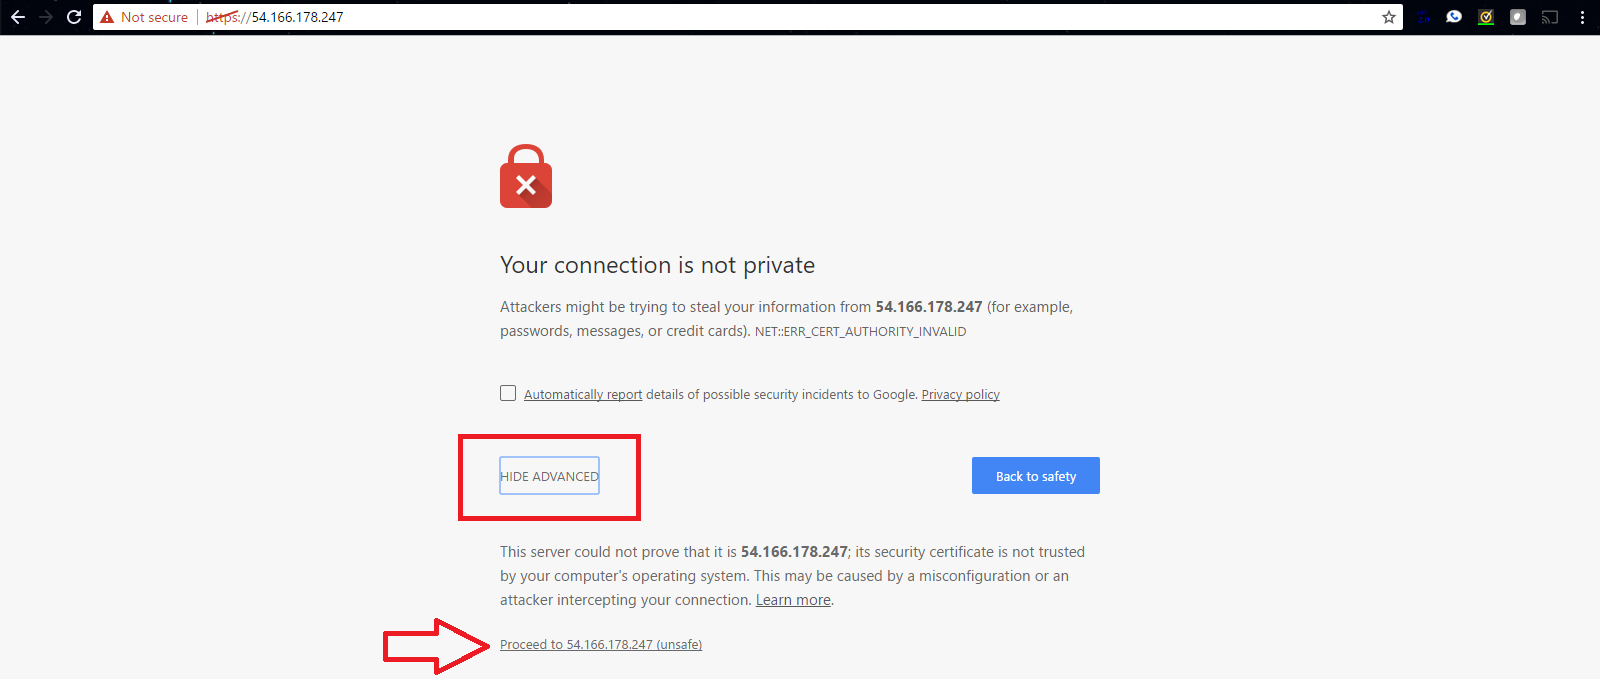
Click the advanced option in the browser and click that it is ok to proceed. If on Firefox, click advanced button and click to add ip to list of exceptions. If Microsoft Edge , click option to continue to website
You will come to the Apache default page as expected. If for some reason your connection now times out, please double check that you have set the firewall setting in the AWS lightsail console to allow for https (in the step above this one)
Success! You have now protected your traffic 👍
Please make sure you installed LAMP stack as noted above before starting this step
- Connect to your instance through SSH by clicking the orange 'Connect using SSH' button. (This will open a web GUI of your terminal connecting to your instance
You are now brought to your Ubuntu instance inside the terminal GUI and signed in automatically as user 'ubuntu'. You are currently in your home directory. We will be creating a file named metalims.sh and inputting the contents of the MetaLIMS file of the same name (metalims.sh). This installation is interactive.
-
Create a file named metalims.sh
We will be creating a file using the text editor called vi
Note: Some basic vi commands can be found here (http://cc.iiti.ac.in/vicom.pdf)
- Type i to turn on insert-mode within the vi text editor
The words --INSERT-- will appear at the bottom of the screen so you know you are now ready and able to insert text to the page
Because Lightsail uses a GUI we must use special key commands to copy and paste text from your desktop to the lightsail terminal.
(Notice: If you are using a regular terminal window, skip steps 4-6)
-
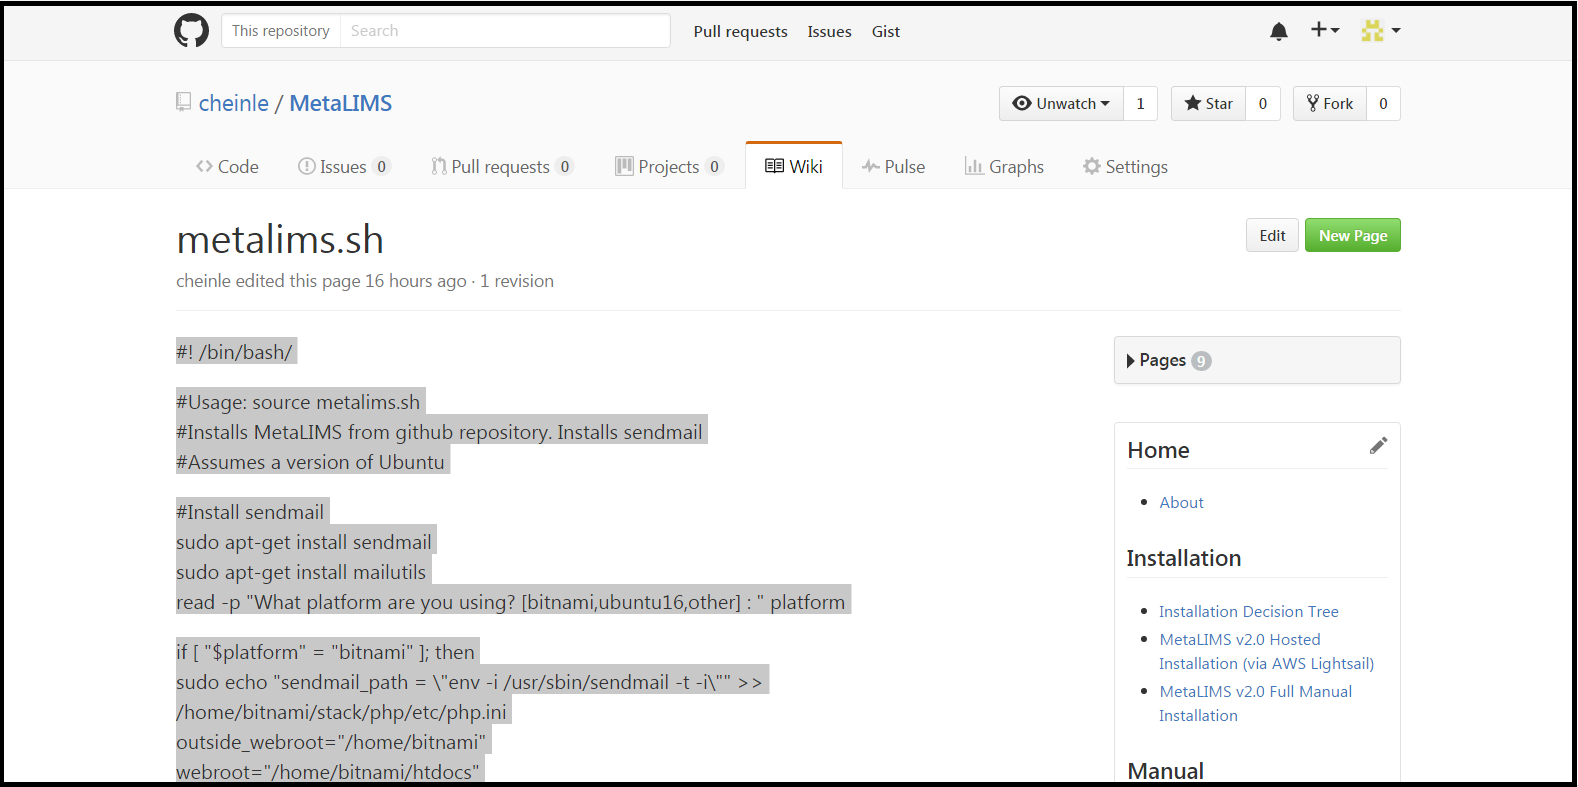
Go to MetaLIMS wiki (https://github.com/cheinle/MetaLIMS/wiki/metalims.sh)
-
Highlight and copy entire contents of metalims.sh wiki page
- Click inside Lightsail terminal
- Press ctrl key, shift key, and alt key at the same time to bring up Lightsail's copy paste window or clipboard
- Right click and select paste to paste contents of metalims.sh to clipboard area
- Press ctrl key, shift key, and alt key at the same time again to close Lightsail's clipboard
- Click inside terminal window (you should still be in insert mode)
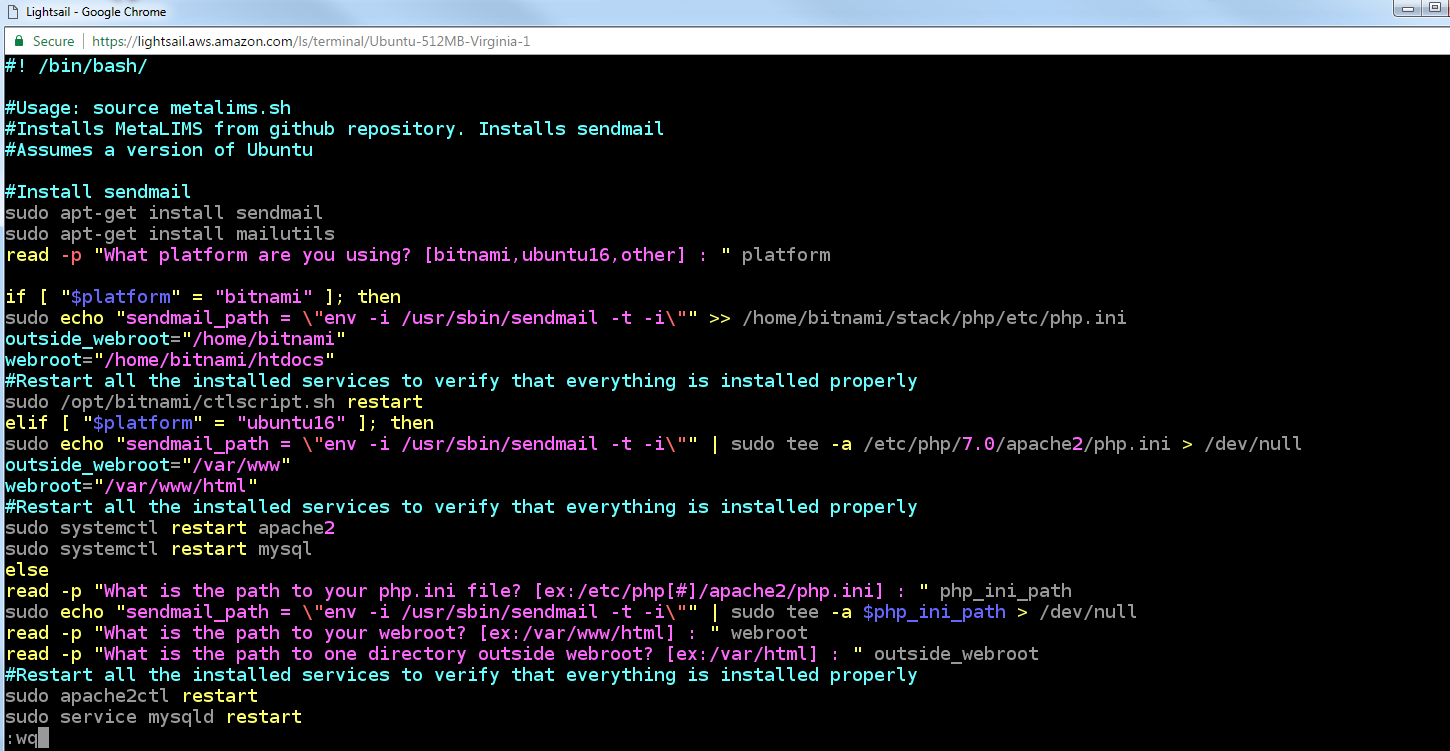
- Right-click on mouse to paste contents into file (selecting 'paste' button if it appears). Use arrow keys on keyboard to scroll to top. To ensure that entire contents were pasted in, use up arrow to scroll to the top of the page and make sure top of file reads '#! /bin/bash/' (else press esc, then type q! to start again at vi metalims.sh)
- Press Esc, then type wq and enter to save and quit
- Type source metalims.sh and press enter
Installation will now proceed. When asked 'Do you want to continue? [Y/n]' type Y and press enter
-
Type Y for all subsequent questions which ask [Y/n]
-
When asked 'What platform are you using? [bitnami, ubuntu16,other]' type in 'ubuntu16' and press enter
-
If asked for mysql root password please supply the root password you created in the previous section while setting up your LAMP stack
(Note : no characters will display when you type (will be invisible))
-
User will be asked, "Would you like to install MetaLIMS Demo [Y/N]"? Please answer with Y or N.
Y - will install MetaLIMS demo which comes pre-populated with example projects and samples.
N - will install the an empty MetaLIMS -
When asked to Please enter a new metalims mysql db password
Select any new password and press enter. This will be your new password for your mysql metalims_test user . (Note : no characters will display when you type (will be invisible)) This password is only for your metalims_test_user and is different from the mysql password you created before which was for your root user. It is strongly suggested that you do not use the same password for both.
Note: You may receive warnings '[Warning] Using a ...' at the end of the script. This is expected and ok
- View MetaLIMS
Using Public IP address found on your instance main page, go to your browser and type -
http://[public ip]/MetaLIMS/login.php
Note: MetaLIMS plays well with Chrome, Firefox, and Microsoft Edge
-
For Regular Set-up: See MetaLIMS v2.0 Manual For Admin to continue set-up
-
For Demo: Use default logins below to login and view pre-populated demo. Reference MetaLIMS v2.0 Manual For Admin and MetaLIMS v2.0 Manual For Basic Usage for more details and instructions.
Default logins for demo:
Username:
admin@metalims.com
Password:
admin
Username:
newuser@metalims.com
Password:
user
- Log onto your AWS lightsail instance
Go to https://amazonlightsail.com/ and login
- Click on the instance you would like to manage
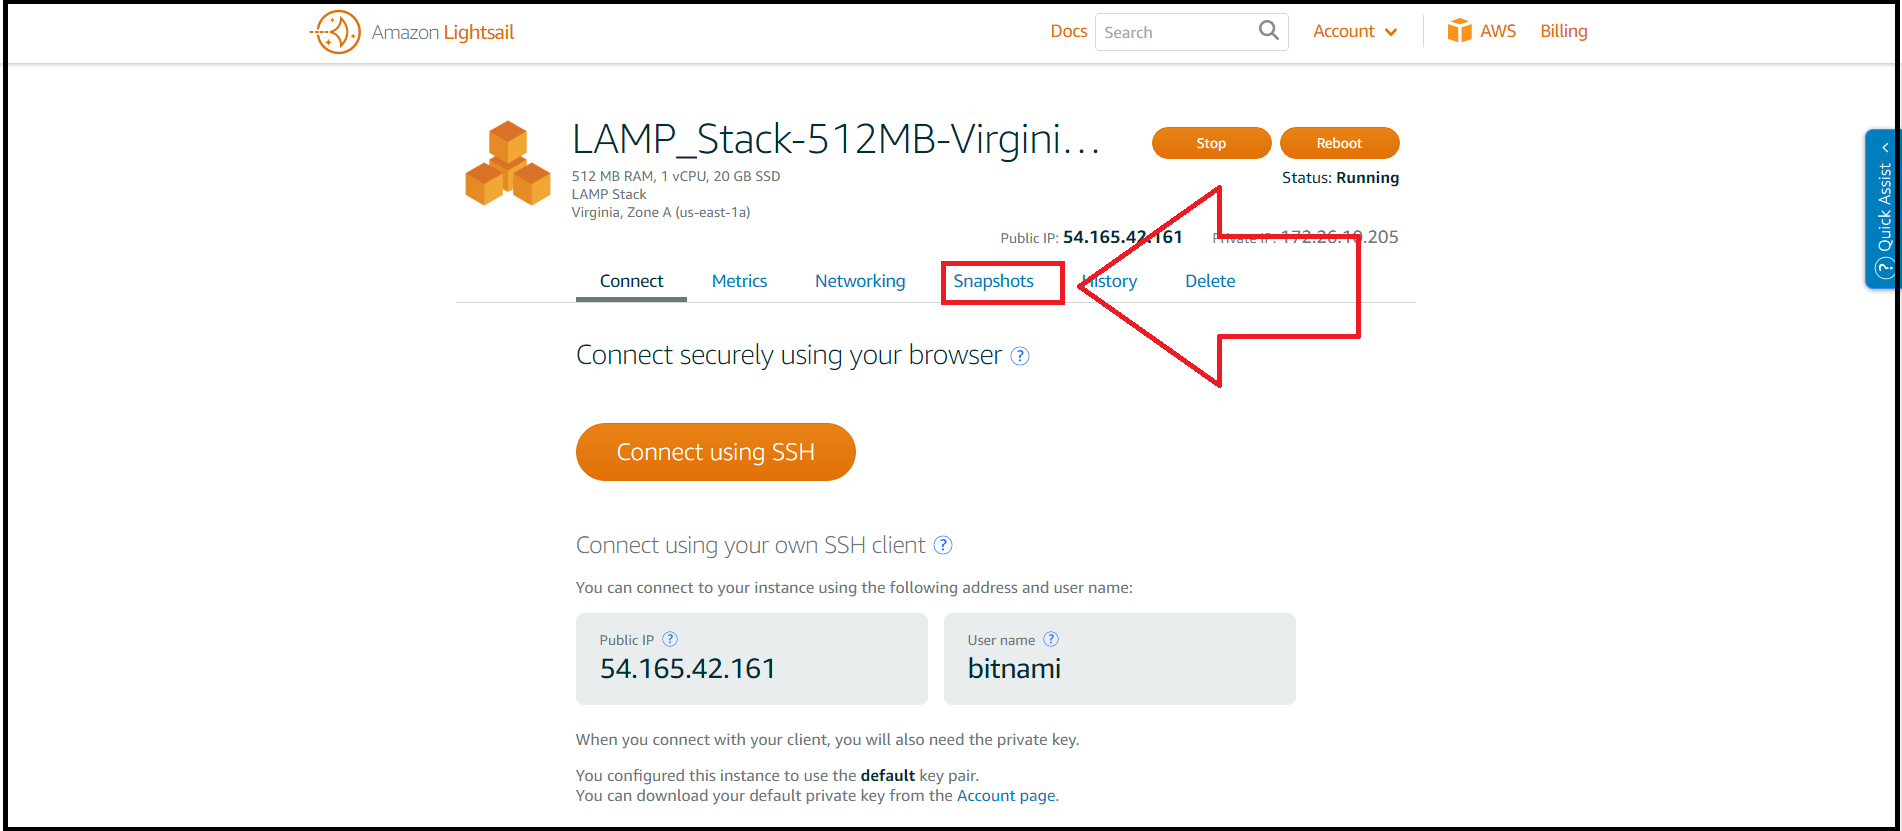
- Select Snapshots from menu
- Click on Create Snapshot
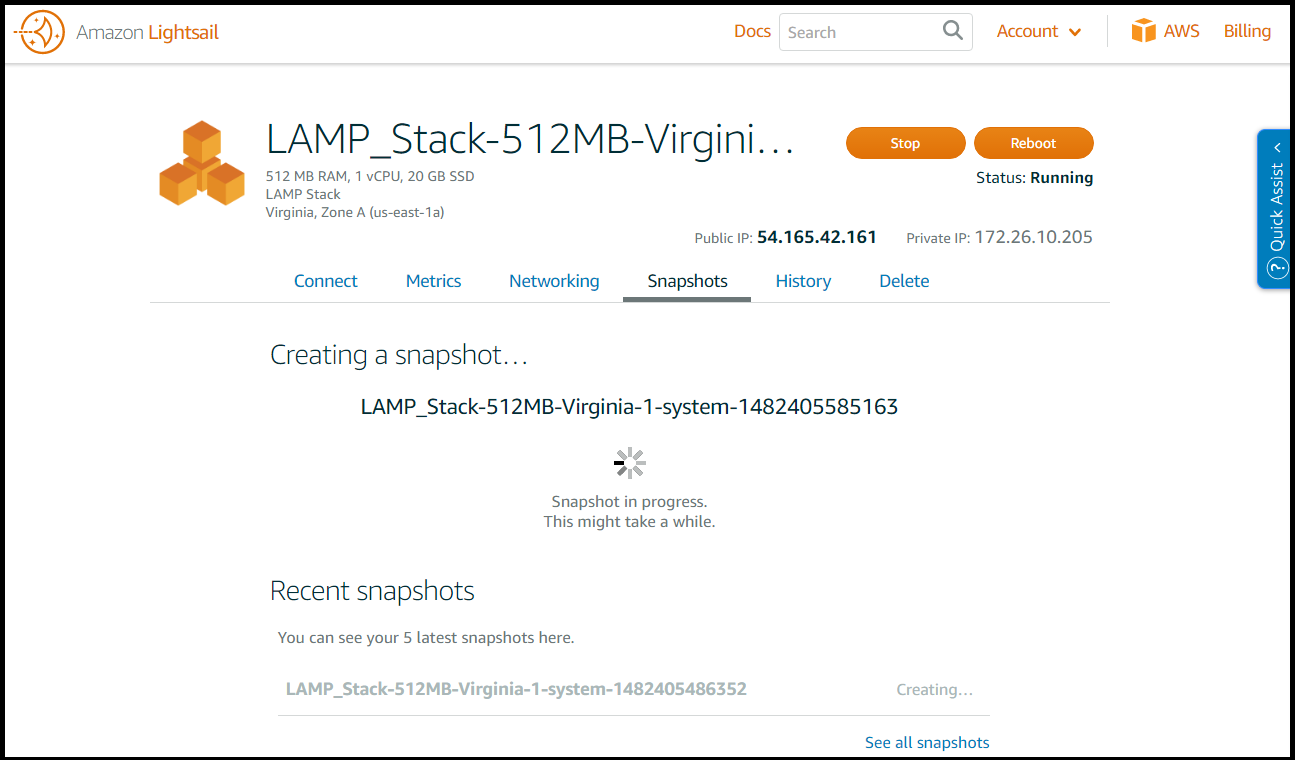
- Wait while snapshot is created
- Log onto your AWS lightsail instance
Go to https://amazonlightsail.com/ and login
- Click on the instance you would like to manage
- Select Snapshots from menu
- Select which Snapshot you want to restore and select 'Create new instance'
Note: Limitations of using AWS Lightsail - Limitation of 200 emails/day
AWS Lightsail Documentation: aws documenation (https://lightsail.aws.amazon.com/ls/docs/all)
All MetaLIMS users are responsible for their own data security. Please take any necessary extra precautions to reduce the inherent risk involved with database exposure to the internet such as SQLi and xxs attacks. MetaLIMS utilizes prepared statements and htmlspecialchars to help protect against these attacks. However, MetaLIMS has been created for a closed internet connection and has not been rigorously tested against these types of attacks Please backup all database information as needed
