This is an example of how to use the Espressif ESP32-C3-DevKitM-1 to drive a WS2812B-64 Led Strip. The WS2812 is a digital RGB LED which integrates a driver circuit and a single control wire. This example will illustrate how to drive an WS2812B-64 LED strip but can be easily adopted to drive a led strip of a different size.
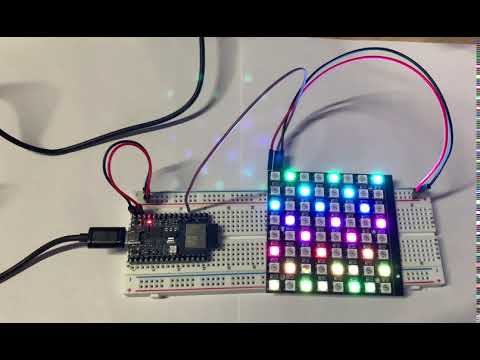
video example

- A development board with an ESP32 SoC, in this case we are using the new ESP32-C3DevKitM1
- A USB cable for Power supply and programming
- A WS2812 LED strip
Connection :
                             --- 5V
                              |
                              +
GPIO2 +-----------------+---|>| (WS2812B-64)
                        DI    +
                              |
                             --- GND
This presumes some version of Linux or MacOS with dev tools installed and a python version 3.8 (as of now 3.9 will not work). Details can be found here
mkdir -p ~/esp cd ~/esp git clone --recursive https://github.com/espressif/esp-idf.git cd ~/esp/esp-idf ./install.sh . $HOME/esp/esp-idf/export.sh
cd ~/esp git clone https://github.com/cashoefman/esp32-c3-rainbow-led-strip.git
Open the project configuration menu (idf.py menuconfig).
In the Example Connection Configuration menu:
- Set the GPIO number used for transmitting the IR signal under
RMT TX GPIOoptin. (Default is 2) - Set the number of LEDs in a strip under
Number of LEDS in a stripoption. (Default is 64)
Run idf.py set-target esp32c3 to set the target for compilation to the ESP32-C3
Run idf.py flash monitor to build, flash and monitor the project.
To exit the serial monitor, type Ctrl-].
Connect the Input signal of WS2812B-64 LED strip to the GPIO you set in menuconfig and connect power to the Led Strip.
When you run the example, you will see a rainbow effect. To change the speed, you can update the EXAMPLE_CHASE_SPEED_MS value in led_strip_main.c file.