Experiments with Orange Pi 6 Plus (CIX P1 SBC) and MIPI-CSI camera (ov13855).
| Soc | Board | Distro | Memory size | Kernel version | Camera | sensor | Max. window size | fps |
|---|---|---|---|---|---|---|---|---|
| CIX P1 | Orange Pi 6 Plus | Debian 12 | 32 GB | 6.1.44-cix | camera1 | ov13855 | 1920x1080 | 30 fps |
| CIX P1 | Orange Pi 6 Plus | Debian 12 | 32 GB | 6.1.44-cix | camera2 | ov13855 | 1920x1080 | 30 fps |
Table of Contents:
- Introduction
- MIPI Camera OV13855
- Gstreamer
- Gstreamer - Display camera content on screen
- GStreamer hardware encoder and decoder
- Record video and display it on the screen
- Real-time streaming
- NPU
- Issues
- Acknowledgments
For the experiments i will use an Orange Pi 6 Plus, 32 GB of ram, and dual camera with ov13855 sensor and Debian 12 with GNOME (wayland).
I'll conduct some experiments with the camera1 and camera2 and the NPU as soon as cix-opencv deb package is available for the Orange Pi 6 Plus (CIX P1 SBC).
The kernel version for these experiments is kernel 6.1-cix ("stock" version) and, if i'm brave enough i will build and rerun the experiments with kernel 6.6.
The board is considered, at the moment of these experiments a developer version, so not ready for an everyday use if you consider stability a premise.
The reason is the v4l2 commands are not truly v4l2 compliant and any attempt to use it can cause the kernel to crash or require a full reboot.
That being said, gstreamer comes to the rescue, but an incorrect pipeline can also cause a reboot.
I would rather use Weston, which is faster than GNOME, but i could not run a Weston session or switch to any TTY and run Weston from there, if someone was able to do this, please advise.
Contents will be added/changed soon. This is a WiP...
A simple v4l2 command will reboot the board:
v4l2-ctl -d /dev/video1 --all
Driver Info:
	Driver name      : arm-china-isp
	Card type        : linlon isp v4l2
	Bus info         : platform:armcb_isp_v4l2-00
	Driver version   : 6.1.44
	Capabilities     : 0x85201000
		Video Capture Multiplanar
		Read/Write
		Streaming
		Extended Pix Format
		Device Capabilities
	Device Caps      : 0x05201000
		Video Capture Multiplanar
		Read/Write
		Streaming
		Extended Pix Format
Media Driver Info:
	Driver name      : imgsensor0
	Model            : armcb_isp_v4l2
	Serial           :
	Bus info         : platform:armcb_isp_v4l2-000
	Media version    : 6.1.44
	Hardware revision: 0x00000000 (0)
	Driver version   : 6.1.44
Interface Info:
	ID               : 0x03000002
	Type             : V4L Video
Entity Info:
	ID               : 0x00000001 (1)
	Name             : armcb-00-vid-cap
	Function         : V4L2 I/O
Priority: 2
Orange Pi 6 Plus has two MIPI-CSI camera interfaces, cam1 and cam2 and can be used at the same time.
The ov13855 sensor is capable of 4224x3136@30fps but for some reason i was able to grab only 1920x1080@30fps, maybe an updated firmware or if the source code is released we can improve things here.
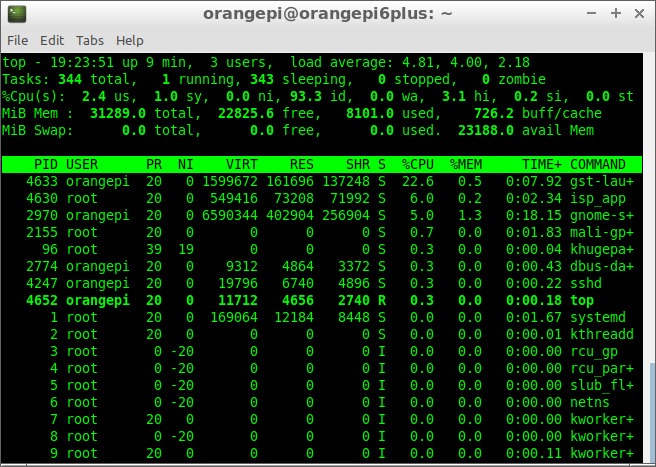
The cameras are attached to cam1 and cam2 connectors near the sd card slot, see the manual for reference. In order to use cam1 and cam2 at the same time you must change the isp service that manage the cameras.
1. Change the line:
ExecStart=/usr/bin/isp_app -s 0 &
to
ExecStart=/usr/bin/isp_app -m 2 &
2. Use mcedit to edit, change the line and Save it with F2 then quit with F10
sudo mcedit /lib/systemd/system/isp-daemon.service
[Unit]
Description=ISP Daemon
After=network.target load-isp-modules.service

[Service]
Type=simple
Environment=LD_LIBRARY_PATH="/usr/share/cix/lib"
ExecStart=/usr/bin/isp_app -m 2 &
Restart=always
RestartSec=1
StartLimitInterval=10
StartLimitBurst=5

[Install]
WantedBy=multi-user.target
3. Reboot the board with:
sudo reboot
Gstreamer is a poweful tool to help grab the frames and display it on screen. It can also utilize the Hardware encoder to record video from the camera(s) or stream videos in real-time across the network. At the other end, you can utilize the Hardware decoder to display the stream in real-time or display the recorded file. Currently only gstreamer can be used.
Available pixel formats for /dev/video1:
  NM12 (32314d4e), Y/UV 4:2:0 (N-C), flags = 0
  RGB3 (33424752), 24-bit RGB 8-8-8, flags = 0
Gstreamer is provided by CIX/RADXA team.
- Pipeline:
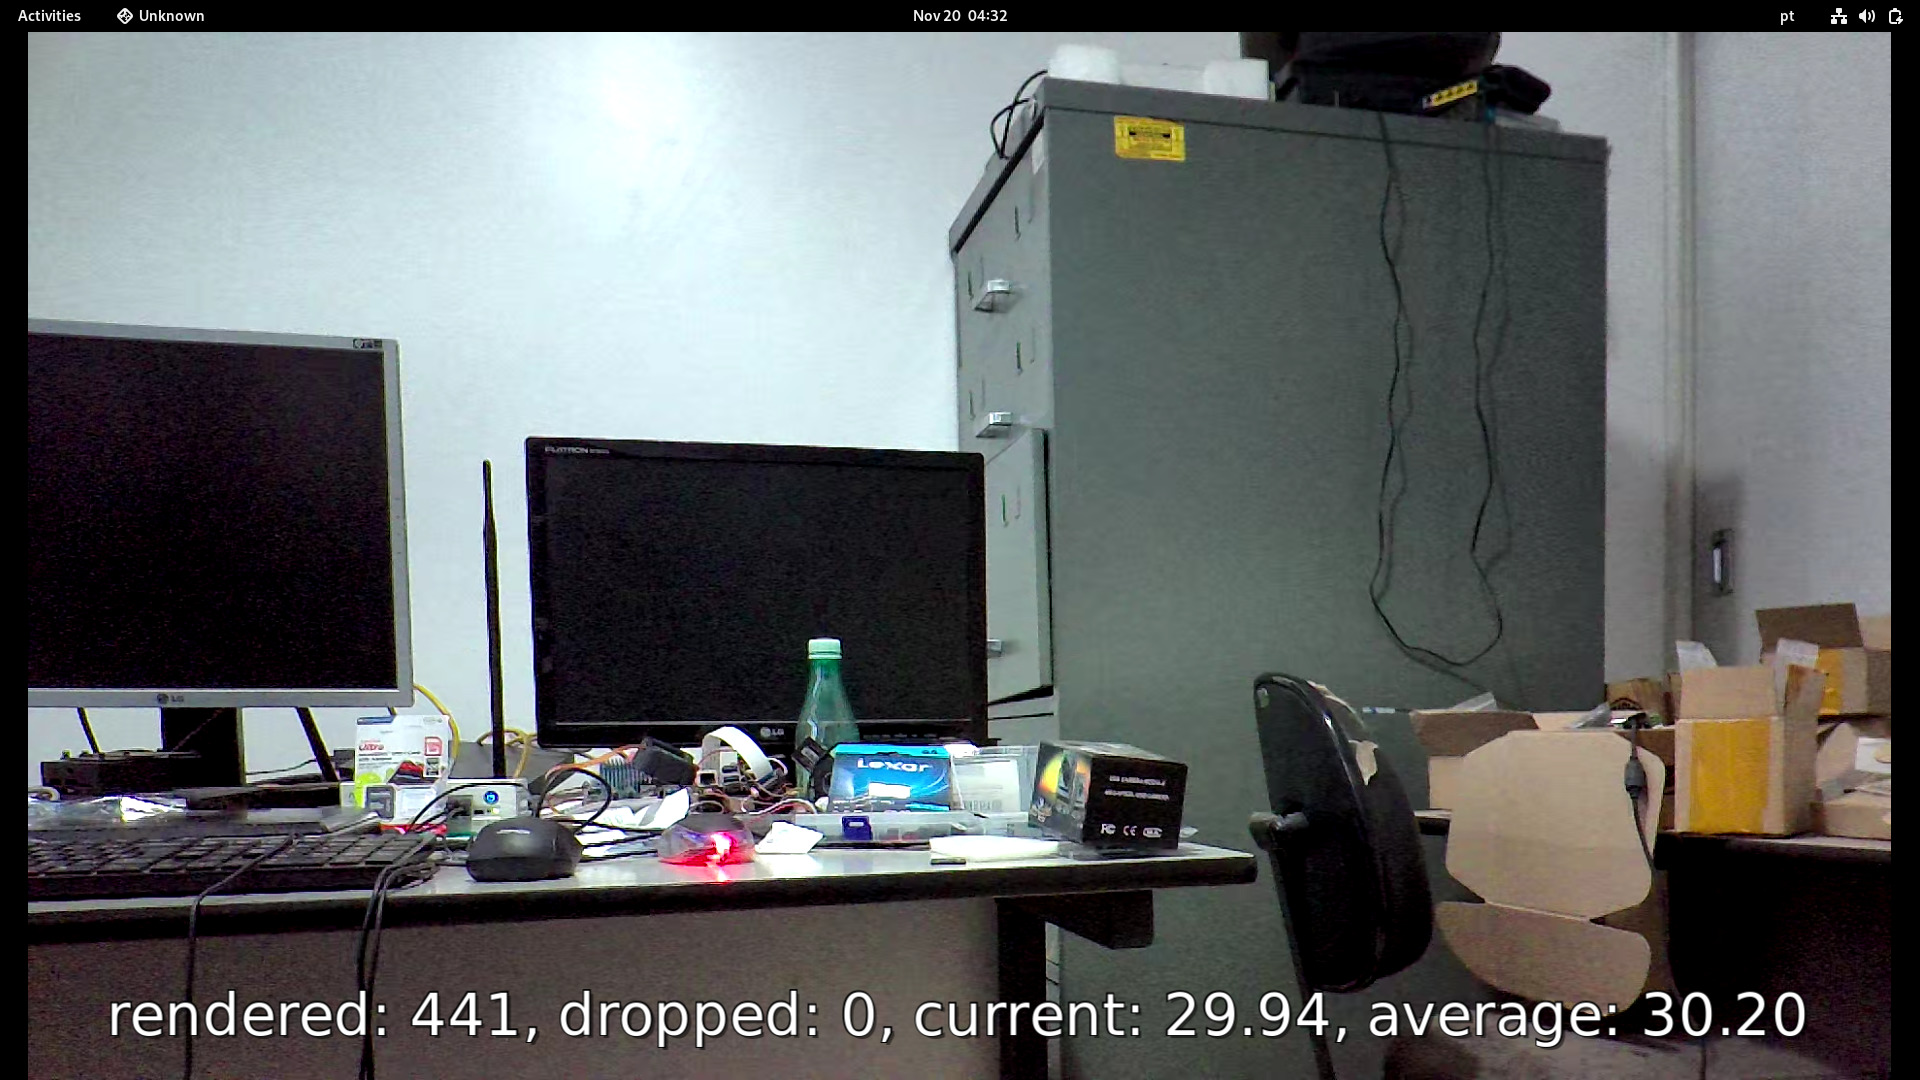
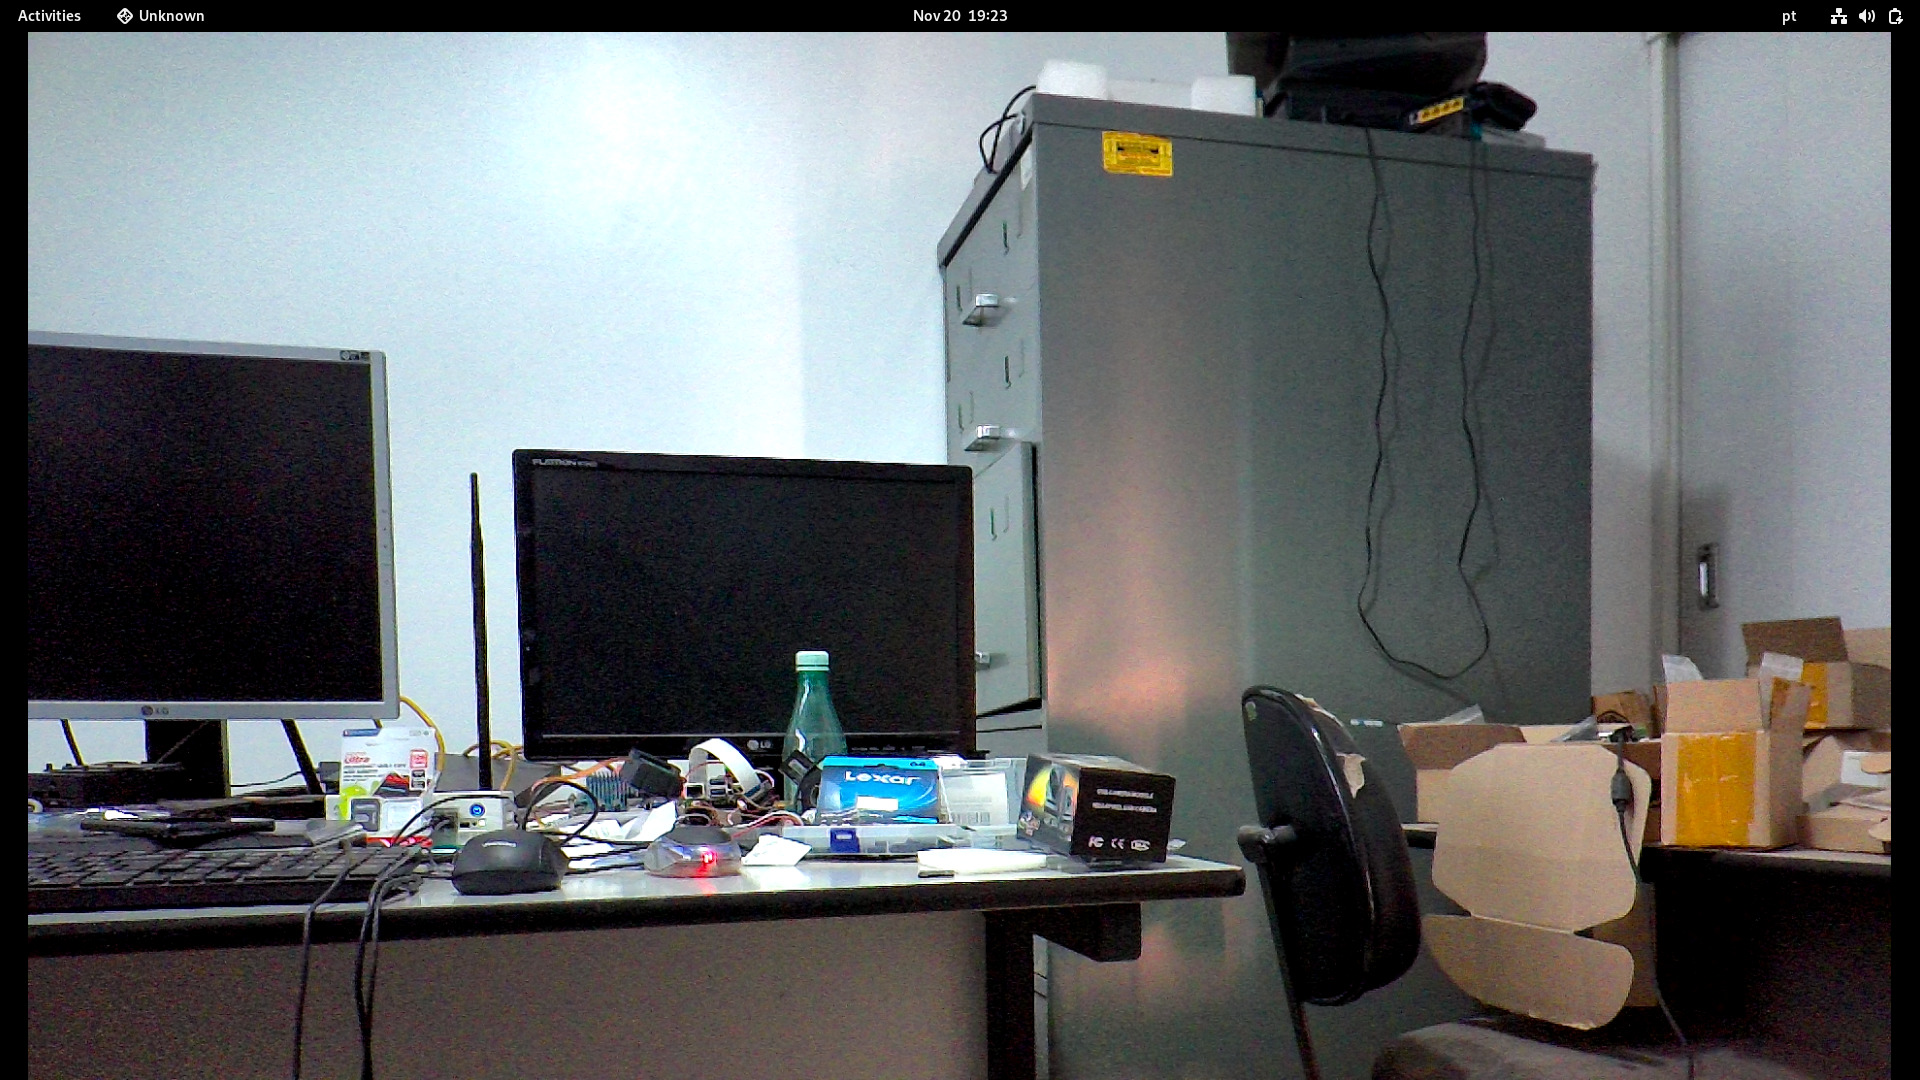
gst-launch-1.0 v4l2src device=/dev/video1 ! video/x-raw,format=NV12, width=1920, height=1080 ! videoconvert ! glimagesink

- Pipeline:
gst-launch-1.0 v4l2src device=/dev/video1 ! video/x-raw,format=NV12, width=1920, height=1080 ! videoconvert ! fakesink v4l2src device=/dev/video3 ! video/x-raw,format=NV12, width=1920, height=1080 ! videoconvert ! glimagesink
-
Pipeline:
Type the command in the Terminal and move the first image on the screen to the side or resize the window with your mouse.
gst-launch-1.0 v4l2src device=/dev/video1 ! video/x-raw,format=NV12, width=1920, height=1080 ! videoconvert ! autovideosink v4l2src device=/dev/video3 ! video/x-raw,format=NV12, width=1920, height=1080 ! videoconvert ! autovideosink
Hardware encoding and decoding are performed by the VPU (Video Processing Unit), which accelerates video encoding and decoding, making video playback more power-efficient and freeing up the CPU for other tasks.
There are several encoders available with Gstreamer, but we will focus on Hardware Encoder: H265 (HEVC).
gst-inspect-1.0 | grep 'video4' | grep 'Encoder'
video4linux2:  v4l2h264enc: V4L2 H.264 Encoder
video4linux2:  v4l2h265enc: V4L2 H.265 Encoder
video4linux2:  v4l2jpegenc: V4L2 JPEG Encoder
video4linux2:  v4l2vp8enc: V4L2 VP8 Encoder
video4linux2:  v4l2vp9enc: V4L2 VP9 Encoder
There are several decoders available with Gstreamer, but we will focus on Hardware Decoder: H265 (HEVC).
gst-inspect-1.0 | grep 'video4' | grep 'Decoder'
video4linux2:  v4l2av1dec: V4L2 AV1 Decoder
video4linux2:  v4l2h263dec: V4L2 H263 Decoder
video4linux2:  v4l2h264dec: V4L2 H264 Decoder
video4linux2:  v4l2h265dec: V4L2 H265 Decoder
video4linux2:  v4l2jpegdec: V4L2 JPEG Decoder
video4linux2:  v4l2mpeg2dec: V4L2 MPEG2 Decoder
video4linux2:  v4l2mpeg4dec: V4L2 MPEG4 Decoder
video4linux2:  v4l2vp8dec: V4L2 VP8 Decoder
video4linux2:  v4l2vp9dec: V4L2 VP9 Decoder
Enable VPU monitoring before running the experiments
echo 3 | sudo tee /sys/kernel/debug/amvx/log/group/perf/enable > /dev/null
For this experiments the Hardware encoder v4l2h265enc will be used.
To record video with H.265 (HEVC) encoder and Matroska (MKV) container, use the following pipelines:
-
Camera1
This pipeline will save the video to the file video_camera1_1920x1080.mkv
gst-launch-1.0 v4l2src device=/dev/video1 ! video/x-raw,format=NV12, width=1920, height=1080 ! videoparse width=1920 height=1080 framerate=30/1 format=nv12 ! video/x-raw,colorimetry=bt709 ! v4l2h265enc capture-io-mode=mmap output-io-mode=dmabuf extra-controls="encode,fixed_qp=28" ! video/x-h265,profile=main,level=\(string\)5 ! h265parse ! matroskamux ! filesink location=video_camera1_1920x1080.mkv -
Camera2
This pipeline will save the video to the file video_camera2_1920x1080.mkv
gst-launch-1.0 v4l2src device=/dev/video3 ! video/x-raw,format=NV12, width=1920, height=1080 ! videoparse width=1920 height=1080 framerate=30/1 format=nv12 ! video/x-raw,colorimetry=bt709 ! v4l2h265enc capture-io-mode=mmap output-io-mode=dmabuf extra-controls="encode,fixed_qp=28" ! video/x-h265,profile=main,level=\(string\)5 ! h265parse ! matroskamux ! filesink location=video_camera2_1920x1080.mkv -
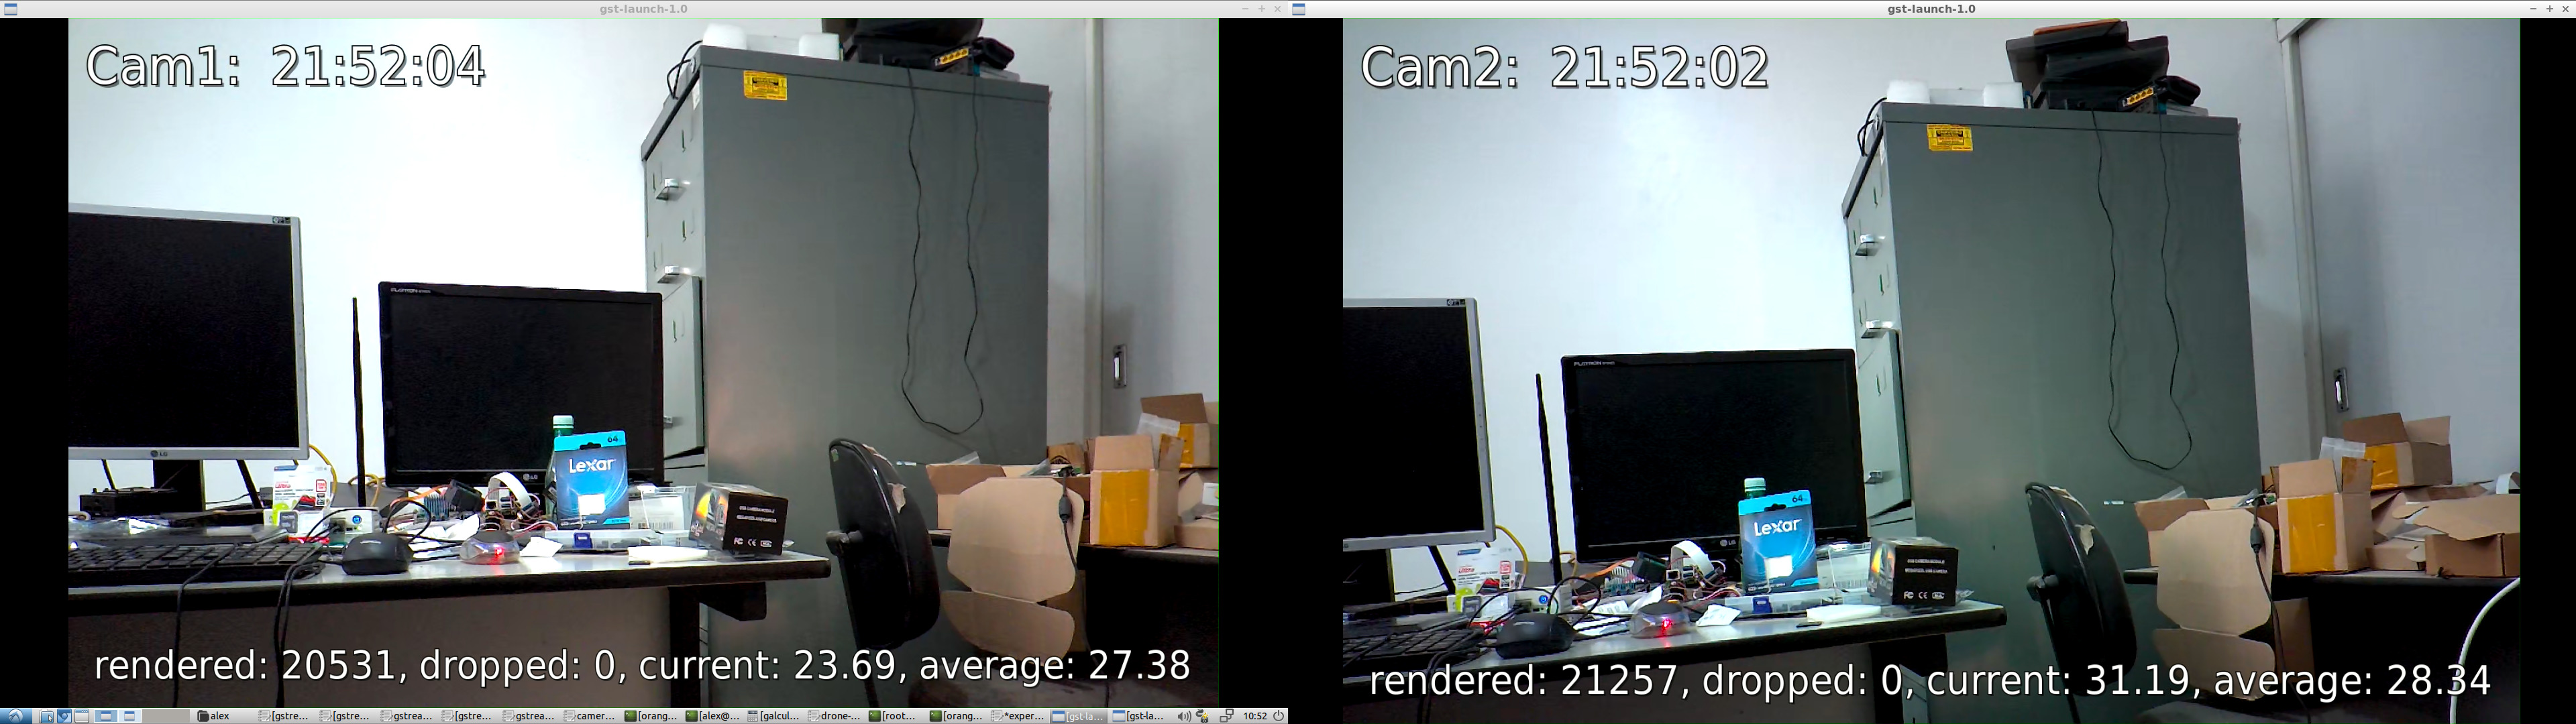
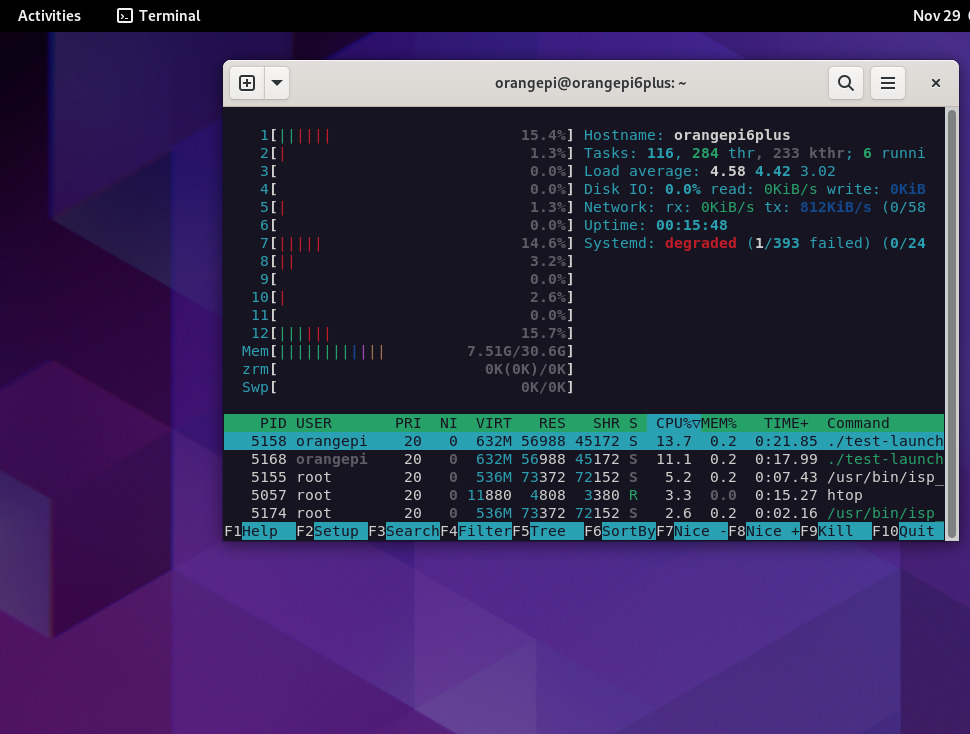
Camera1 and Camera2 at the same time
This pipeline will save the video to the files video_camera1_1920x1080.mkv and video_camera1_1920x1080.mkv at the same time
gst-launch-1.0 v4l2src device=/dev/video1 ! video/x-raw,format=NV12, width=1920, height=1080 ! videoparse width=1920 height=1080 framerate=30/1 format=nv12 ! video/x-raw,colorimetry=bt709 ! v4l2h265enc capture-io-mode=mmap output-io-mode=dmabuf extra-controls="encode,fixed_qp=28" ! video/x-h265,profile=main,level=\(string\)5 ! h265parse ! matroskamux ! filesink location=video_camera1_1920x1080.mkv v4l2src device=/dev/video3 ! video/x-raw,format=NV12, width=1920, height=1080 ! videoparse width=1920 height=1080 framerate=30/1 format=nv12 ! video/x-raw,colorimetry=bt709 ! v4l2h265enc capture-io-mode=mmap output-io-mode=dmabuf extra-controls="encode,fixed_qp=28" ! video/x-h265,profile=main,level=\(string\)5 ! h265parse ! matroskamux ! filesink location=video_camera2_1920x1080.mkv
For this experiments the Hardware decoder v4l2h265dec will be used.
To display the H.265 (HEVC) video recorded above in MKV, the following pipelines can be used:
-
using decodebin for any encoder
gst-launch-1.0 filesrc location=video_camera1_1920x1080.mkv ! decodebin ! glupload ! glcolorconvert ! glcolorbalance ! glimagesink -
using v4l2h265dec for MKV container
gst-launch-1.0 filesrc location=video_camera1_1920x1080.mkv ! matroskademux ! h265parse ! v4l2h265dec ! fpsdisplaysink video-sink=autovideosink text-overlay=true
To record video and display it on screen at the same time, use the following pipeline:
gst-launch-1.0 v4l2src device=/dev/video1 ! video/x-raw,format=NV12, width=1920, height=1080 ! tee name=t t. ! queue ! videoparse width=1920 height=1080 framerate=30/1 format=nv12 ! video/x-raw,colorimetry=bt709 ! v4l2h265enc capture-io-mode=mmap output-io-mode=dmabuf extra-controls="encode,fixed_qp=28" ! video/x-h265,profile=main,level=\(string\)5 ! filesink location=video_camera1_1920x1080.hevc t. ! queue ! videoconvert ! glimagesink
This experiment streams live videos from the Orange Pi 6 Plus to an Intel Box, the encoder used is H.265 (HEVC). It is decoded and displayed on the receiving end (Intel Box).
- Live streaming with TCPIP (client / server)
- Live streaming with RTSP.
- Live streaming with RTMP.
[Client: Orangepi 6 plus] --> [H265 encoder] --> [TCP - localhost] --> [Server: Orangepi 6 plus] --> [H265 decoder] --> [Display it on screen]
Client
gst-launch-1.0 tcpserversrc port=5000 host=0.0.0.0 ! h265parse ! v4l2h265dec ! fpsdisplaysink video-sink=autovideosink text-overlay=true sync=false
Server
gst-launch-1.0 v4l2src device=/dev/video1 ! video/x-raw,format=NV12, width=1920, height=1080 ! videoparse width=1920 height=1080 framerate=30/1 format=nv12 ! video/x-raw,colorimetry=bt709 ! v4l2h265enc capture-io-mode=mmap output-io-mode=dmabuf extra-controls="encode,fixed_qp=28" ! video/x-h265,profile=main,level=\(string\)5 ! tcpclientsink host=localhost port=5000
[Client: Orangepi 6 plus] --> [H265 encoder] --> [TCP - ethernet] --> [Server: Intel Box] --> [H265 decoder] --> [Display it on screen]
Client (Orange Pi 6 Plus)
IP: 192.168.254.75
gst-launch-1.0 v4l2src device=/dev/video1 ! video/x-raw,format=NV12, width=1920, height=1080 ! videoparse width=1920 height=1080 framerate=30/1 format=nv12 ! video/x-raw,colorimetry=bt709 ! v4l2h265enc capture-io-mode=mmap output-io-mode=dmabuf extra-controls="encode,fixed_qp=28" ! video/x-h265,profile=main,level=\(string\)5 ! tcpclientsink host=192.168.254.253 port=5000
Server (Intel Box)
IP: 192.168.254.253
gst-launch-1.0 tcpserversrc port=5000 host=0.0.0.0 ! h265parse ! v4l2h265dec ! fpsdisplaysink video-sink=autovideosink text-overlay=true sync=false
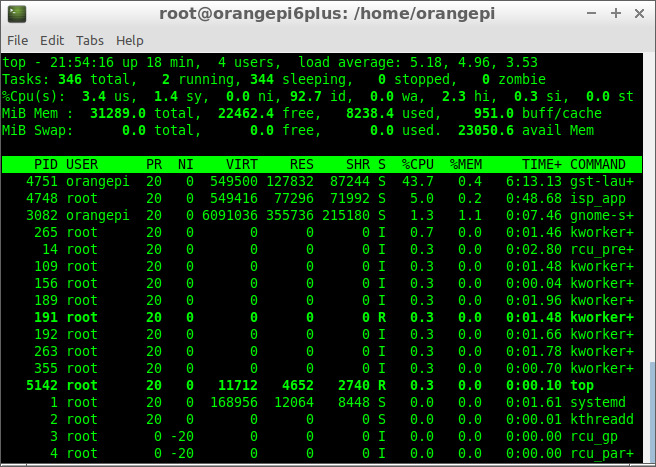
cat /sys/kernel/debug/amvx/log/group/perf/utilization
VPU Utilization: 29.83%

cat /sys/kernel/debug/amvx/log/group/perf/realtime_fps
13:39:44 ~ 13:47:16 [ffff0002886d4138] HEVC encoder 1920x1080 12979 frames, current fps 29.92, average fps 28.27
13:39:45 ~ 13:47:16 [ffff0002886c4138] HEVC encoder 1920x1080 12477 frames, current fps 26.16, average fps 27.23
Real-Time Streaming Protocol (RTSP) works fine. In this experiment, i stream video using RTSP from Orange Pi 6 Plus to an Intel Box (x64). You need to build RTSP Server to stream live videos from the Orange Pi.
-
Orange Pi 6 Plus (Server)
IP: 192.168.254.77
-
Intel Box (Client)
IP: 192.168.254.253
Build the GNU test-launch for the RTSP server experiment:
cd rtsp
LD_LIBRARY_PATH=/usr/share/cix/lib gcc -O2 -o test-launch test-launch.c -I/usr/share/cix/include/gstreamer-1.0/ -I/usr/include/glib-2.0/ -I/usr/lib/aarch64-linux-gnu/glib-2.0/include -L/usr/share/cix/lib -lgstreamer-1.0 -lgstrtspserver-1.0 -lgobject-2.0 -lglib-2.0 -lpthread -lpng -lz -lm -lpthread -ldrm -ltiff -llzma -lssl
ls -la test-launch
-rwxr-xr-x 1 orangepi orangepi 71856 Nov 30 02:35 test-launch
H265 (HEVC)
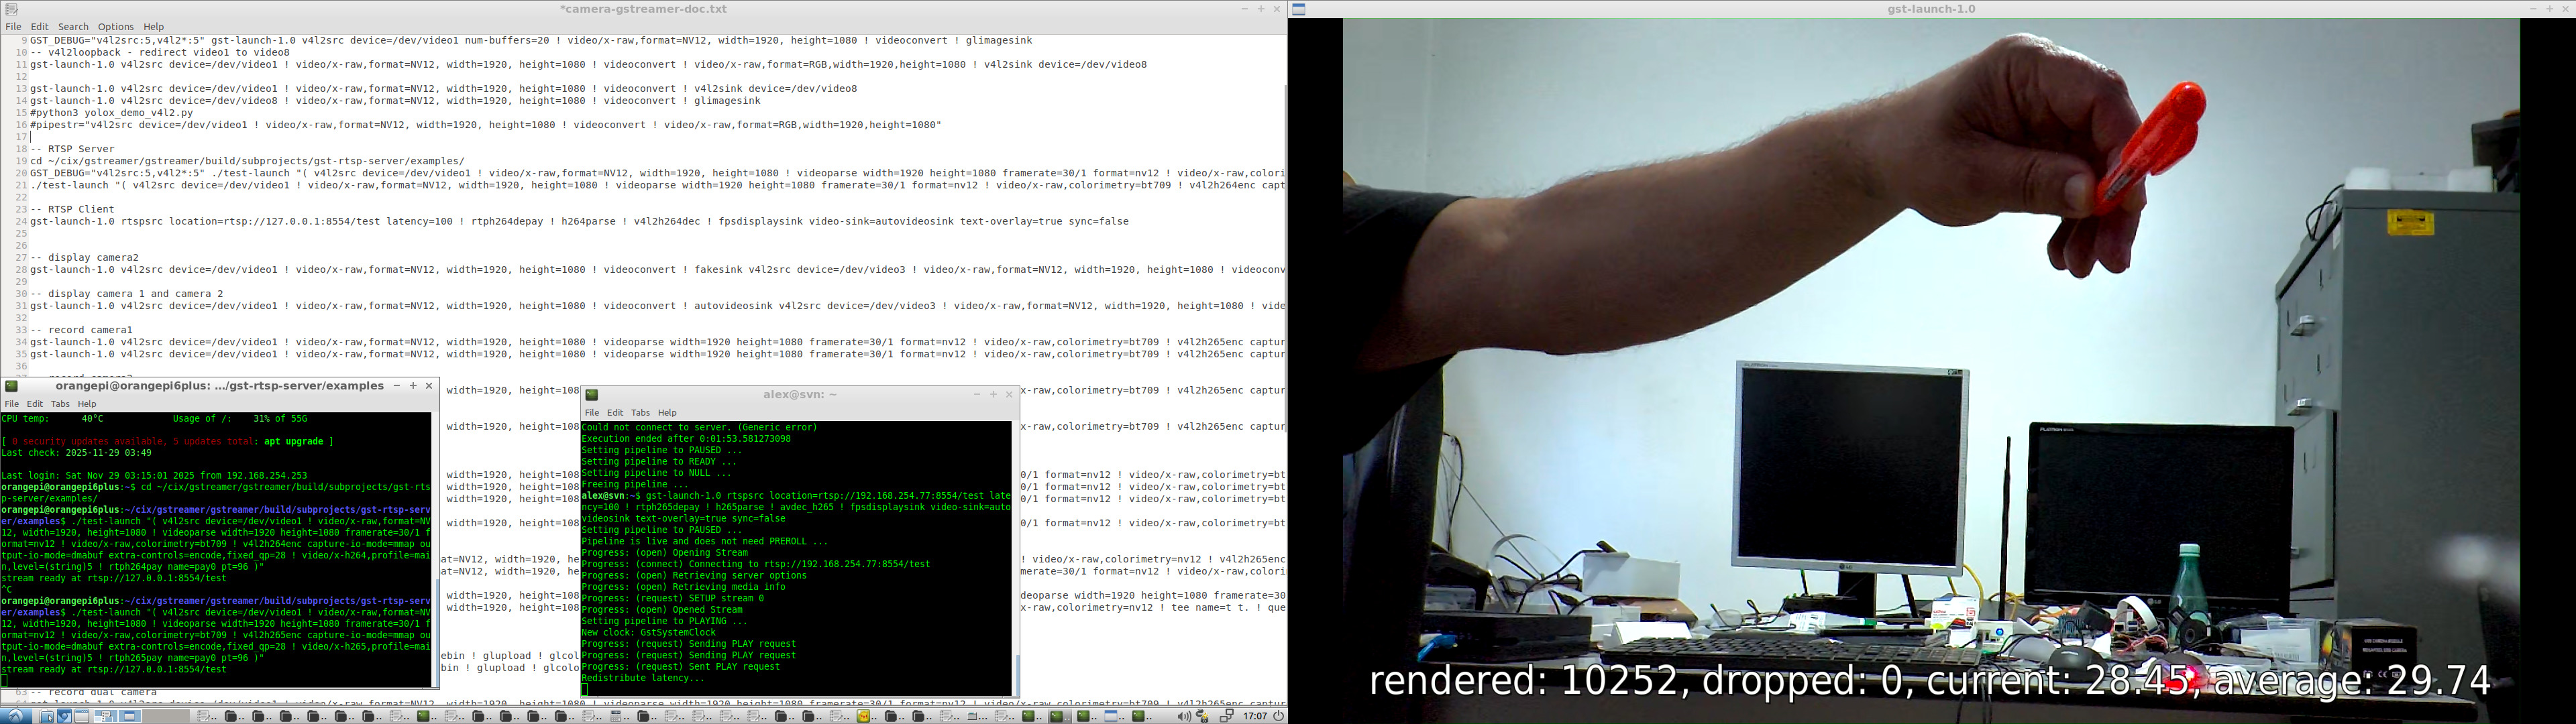
./test-launch "( v4l2src device=/dev/video1 ! video/x-raw,format=NV12, width=1920, height=1080 ! videoparse width=1920 height=1080 framerate=30/1 format=nv12 ! video/x-raw,colorimetry=bt709 ! v4l2h265enc capture-io-mode=mmap output-io-mode=dmabuf extra-controls=encode,fixed_qp=28 ! video/x-h265,profile=main,level=(string)5 ! rtph265pay name=pay0 pt=96 )"
H264

./test-launch "( v4l2src device=/dev/video1 ! video/x-raw,format=NV12, width=1920, height=1080 ! videoparse width=1920 height=1080 framerate=30/1 format=nv12 ! video/x-raw,colorimetry=bt709 ! v4l2h264enc capture-io-mode=mmap output-io-mode=dmabuf extra-controls=encode,fixed_qp=28 ! video/x-h264,profile=main,level=(string)5 ! rtph264pay name=pay0 pt=96 )"
CPU Load
H265 (HEVC)
gst-launch-1.0 rtspsrc location=rtsp://192.168.254.77:8554/test latency=100 ! rtph265depay ! h265parse ! avdec_h265 ! fpsdisplaysink video-sink=autovideosink text-overlay=true sync=false
H264
gst-launch-1.0 rtspsrc location=rtsp://192.168.254.77:8554/test latency=100 ! rtph265depay ! h265parse ! avdec_h265 ! fpsdisplaysink video-sink=autovideosink text-overlay=true sync=false
RTMP (Real-Time Messaging Protocol) streaming can be used with an RTMP server, such as nginx or any other server.
In the experiment, gstreamer is used to push the camera video stream to the rtmp server (orangepi 6 plus) and gstreamer or ffmpeg as a client (x64) to decode and show the live streams.
- rtmp pusher (orange pi 6 plus)
gst-launch-1.0 v4l2src device=/dev/video1 ! video/x-raw,format=NV12, width=1920, height=1080 ! videoparse width=1920 height=1080 framerate=30/1 format=nv12 ! video/x-raw,colorimetry=bt709 ! v4l2h264enc capture-io-mode=mmap output-io-mode=dmabuf extra-controls=encode,fixed_qp=28 ! video/x-h264,profile=main,level='(string)5'! h264parse ! flvmux ! rtmpsink sync=true async=true location=rtmp://127.0.0.1/live/stream
-
rtmp clients (x64)
-
gstreamer
gst-launch-1.0 rtmpsrc location="rtmp://192.168.254.77:1935/live/stream live=1" ! flvdemux ! h264parse ! avdec_h264 ! fpsdisplaysink video-sink=autovideosink text-overlay=true sync=false -
ffmpeg
DISPLAY=:0.0 ffplay -fflags nobuffer -i rtmp://192.168.254.77:1935/live/stream
-
The NPU experiments with the camera will be possible when cix-opencv deb package is available, it might have some Hardware acceleration.
For the experiments i overclocked it to "performance" and in Debian Settings i selected Performance
echo performance | sudo tee /sys/devices/system/cpu/cpu*/cpufreq/scaling_governor
To check if NPU was running fine i used the C++ example from here:
https://github.com/swdee/orion-o6-npu-yolov8
The results:
./yolov8 yolov8n.cix bus.jpg 0.30 0.45
NOE context initialized
Model/Graph loaded
Created Job: 4294967297
Tensor Counts, Input=1, Output=1
Input tensor descriptor:
  id:          0
  size:        1228800
  scale:       255
  zero_point:  0
  data_type:   U8
Output tensor descriptor:
  id:          0
  size:        1411200
  scale:       1
  zero_point:  0
  data_type:   F16
Tensor load time: 0.056068 ms
Inference sync time: 14.2102 ms
Fetch outputs time: 2.99879 ms
person 0.879 (108,236,224,540)
person 0.879 (211,240,284,508)
person 0.844 (476,219,560,516)
bus 0.805 (100,132,552,445)
As the board is small and has the performance governor set, the results can vary across experiments.
I think the results could be improved if they release new optimizations and source code.
I also set tue NPU to "performance" but no real improvement.
echo performance | tee /sys/class/devfreq/14230000.vpu/governor
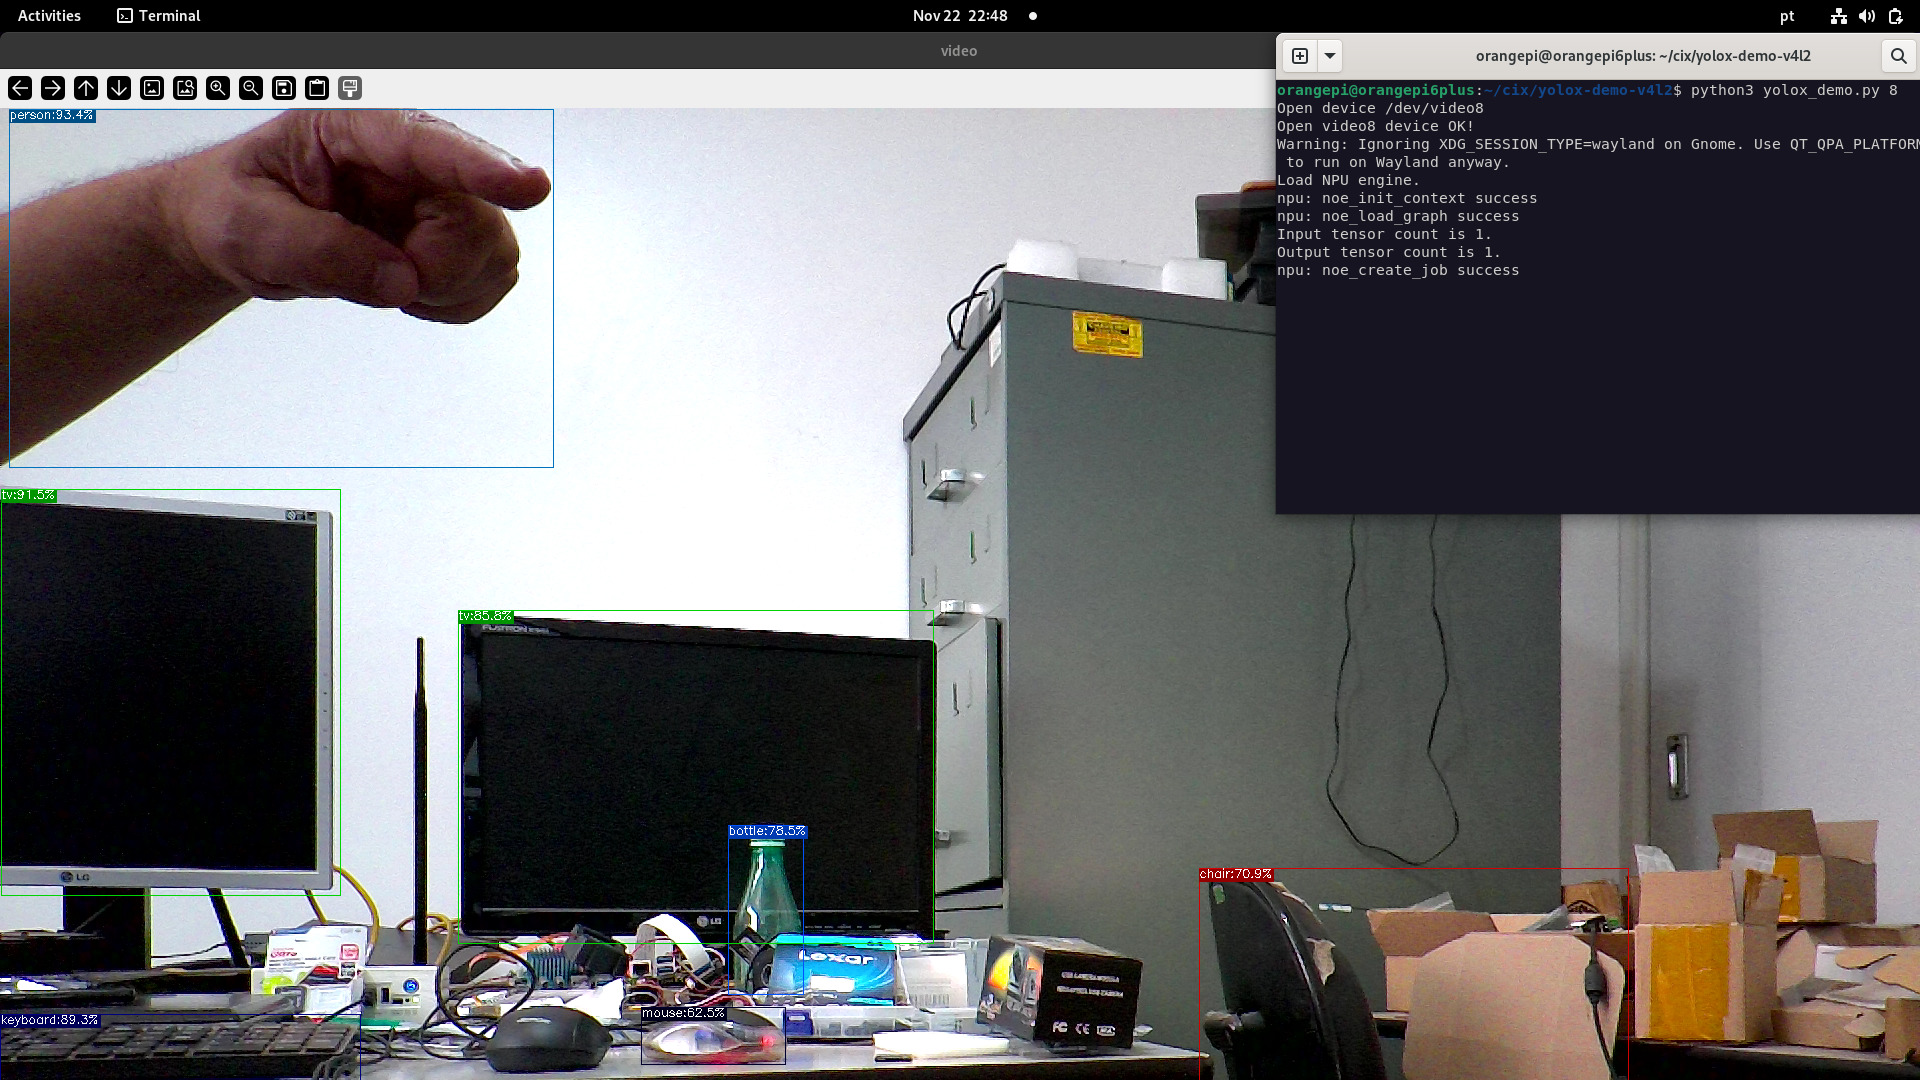
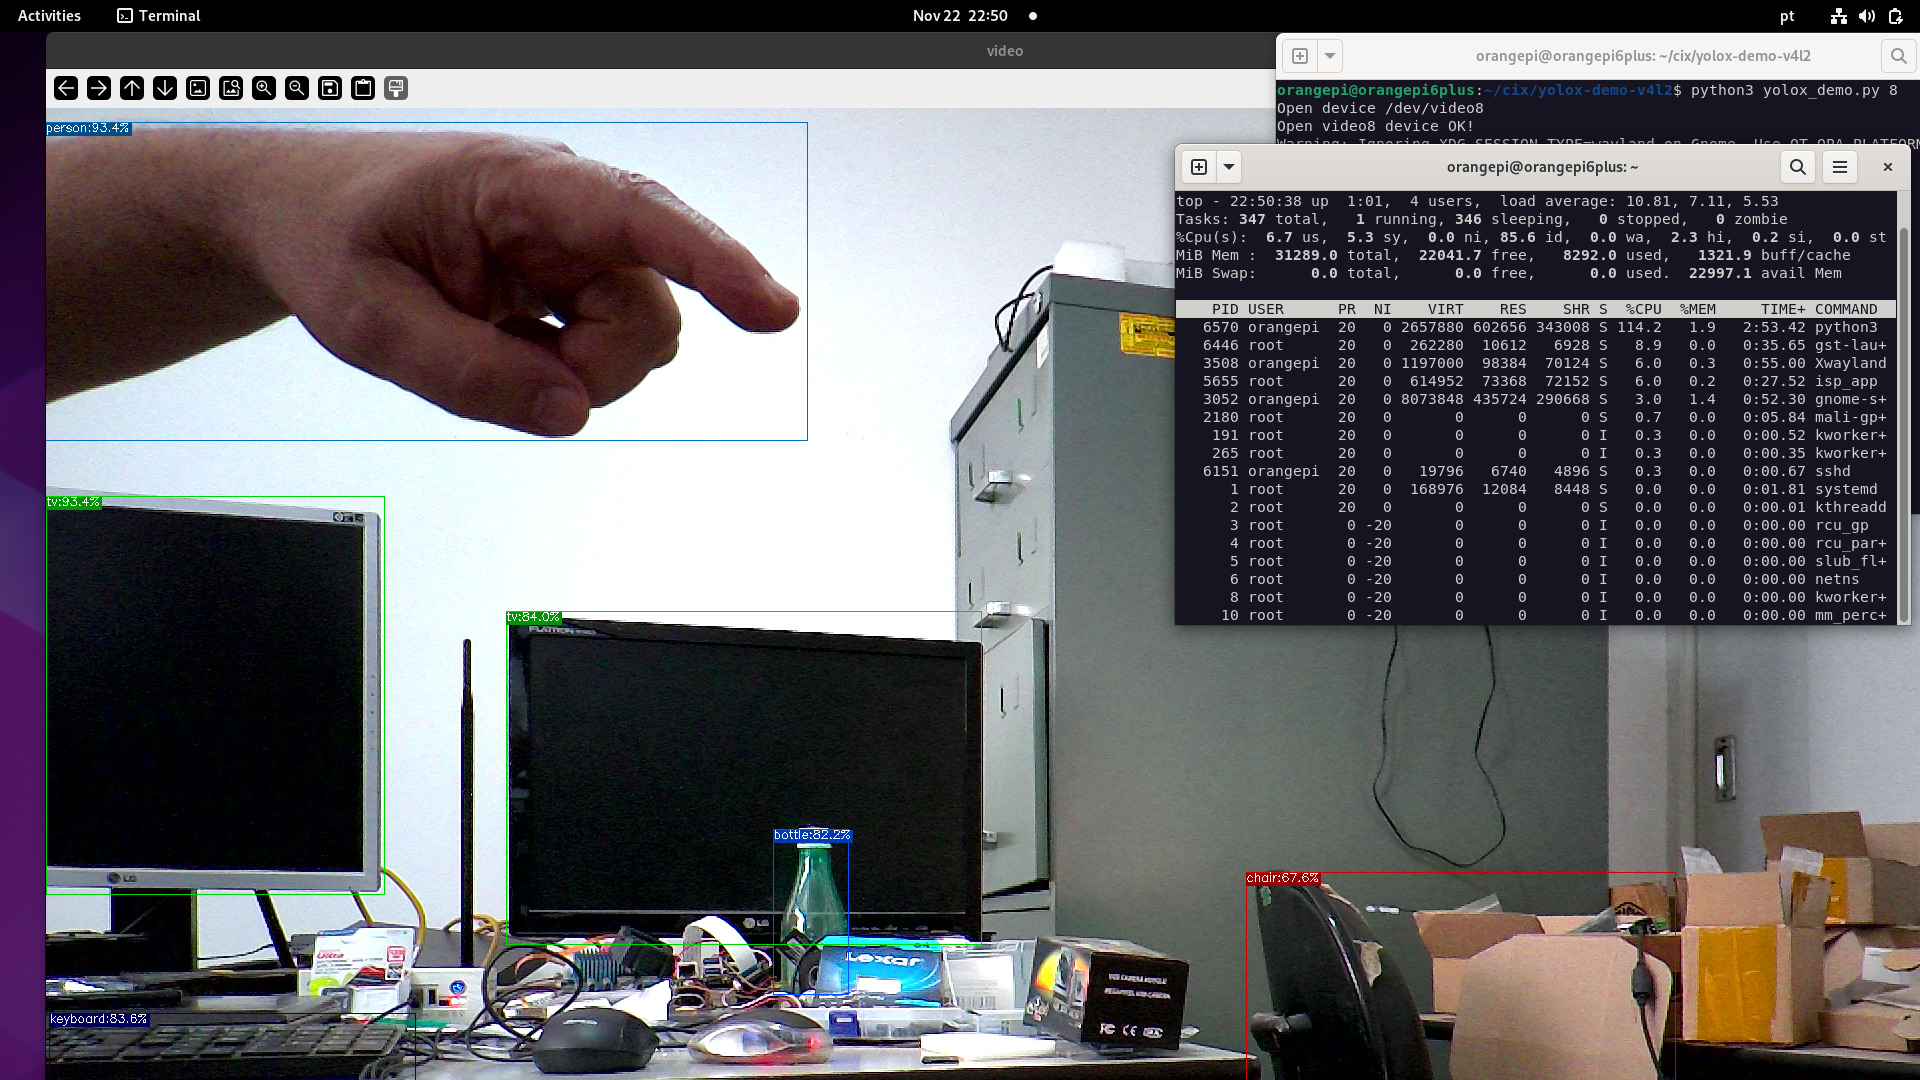
With the help of v4l2loopback i'm able to run python3 yolox demo v4l2 from the SDK.
The trick is to redirect the camera output to an v4l2looback device, in the example below we can see NPU inference with live streaming using a Webcam 720p and mipi-csi ov13855 (1920x1080). Webcam does not require the use of v4l2loopback.
NPU with webcam
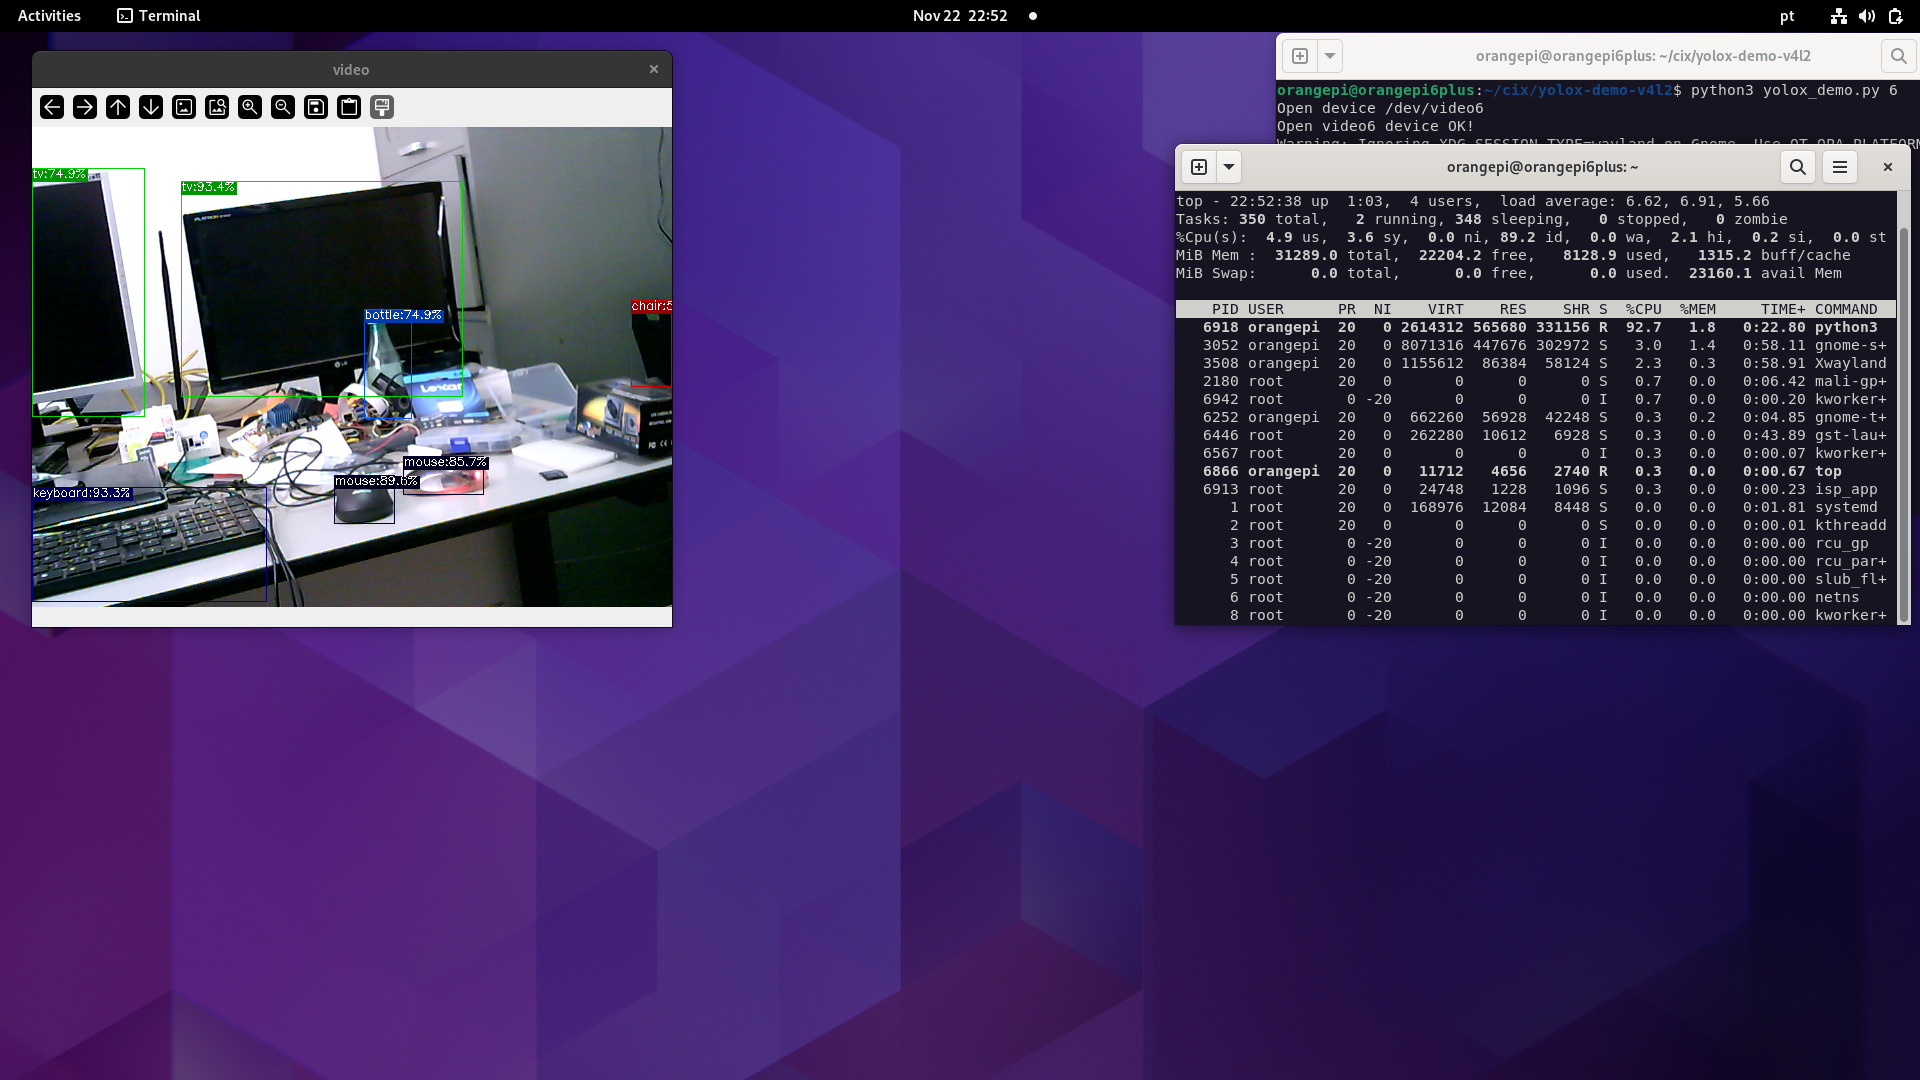
NPU with MIPI-CSI camera (ov13855)
to be completed.
- Once you issue a wrong command, the kernel may crash, or a reboot is needed.
- Camera2 seems to be in preview mode
- Camera2 has some tearings, most likely a DMA buf issue
- Cameras are capped at 1920x1080
- When streaming both Camera1 and Camera2 at the same time, the latency is noticeable (My Intel Box is ancient)
I would like to thank me and myself for taking the time