An example of Web3Auth login and displaying of rNFTs in native iOS.
This demo makes use of Web3Auth's OpenLogin SDK. To run the demo you'll first need to setup a developer account in their system here. Once your account is setup click the "Plug and Play" link on the left side of the page and create a project. Make note of the Client ID you'll need that in a second.
In the dashboard for the new project you'll need to add a redirect url. For now just add "com.rhove.RNFTDemo://auth". This is needed to handle the redirects from the Web3Auth in-app browser that is launched during user authentication.
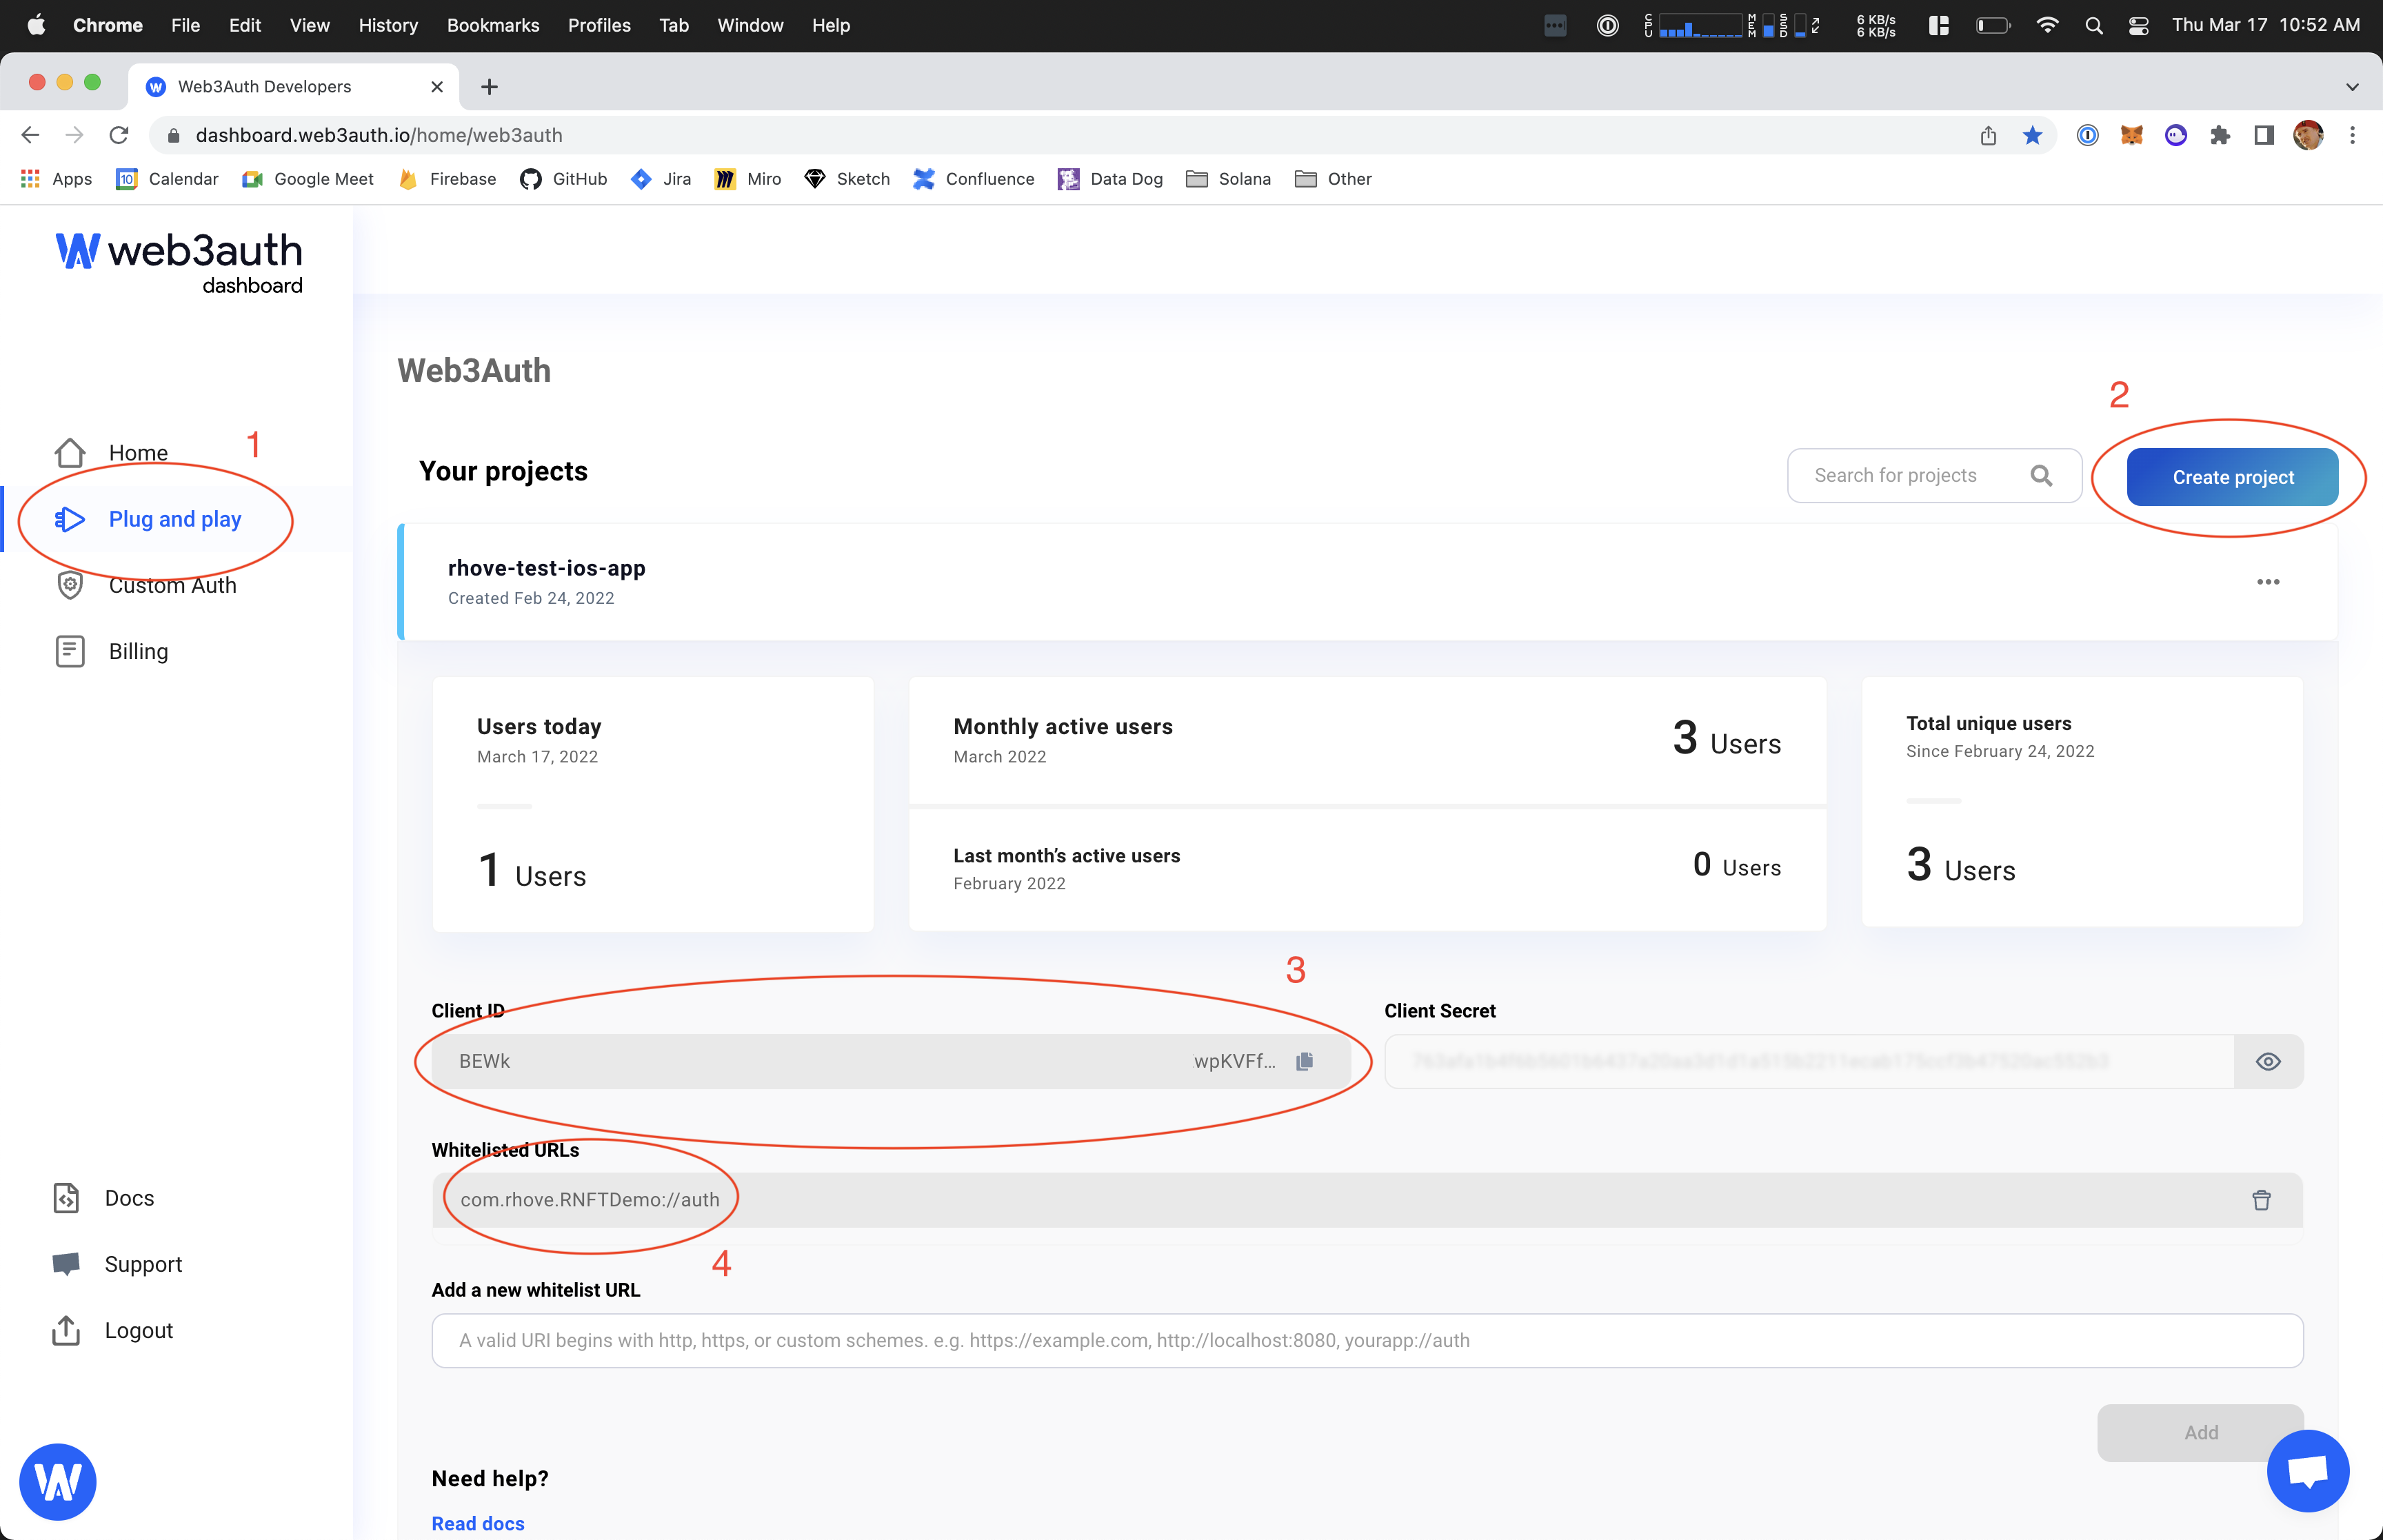 Fig.1 - Web3Auth Console Steps
Head back over to the directory that you've cloned the project in and navigate to RNFTDemo -> RNFTDemo -> Supporting Files. Duplicate the Debug.xcconfig.template file and rename it to Debug.xcconfig. Open this file and replace "YOUR_OPEN_LOGIN_CLIENT_ID" with the client id for the project you just created.
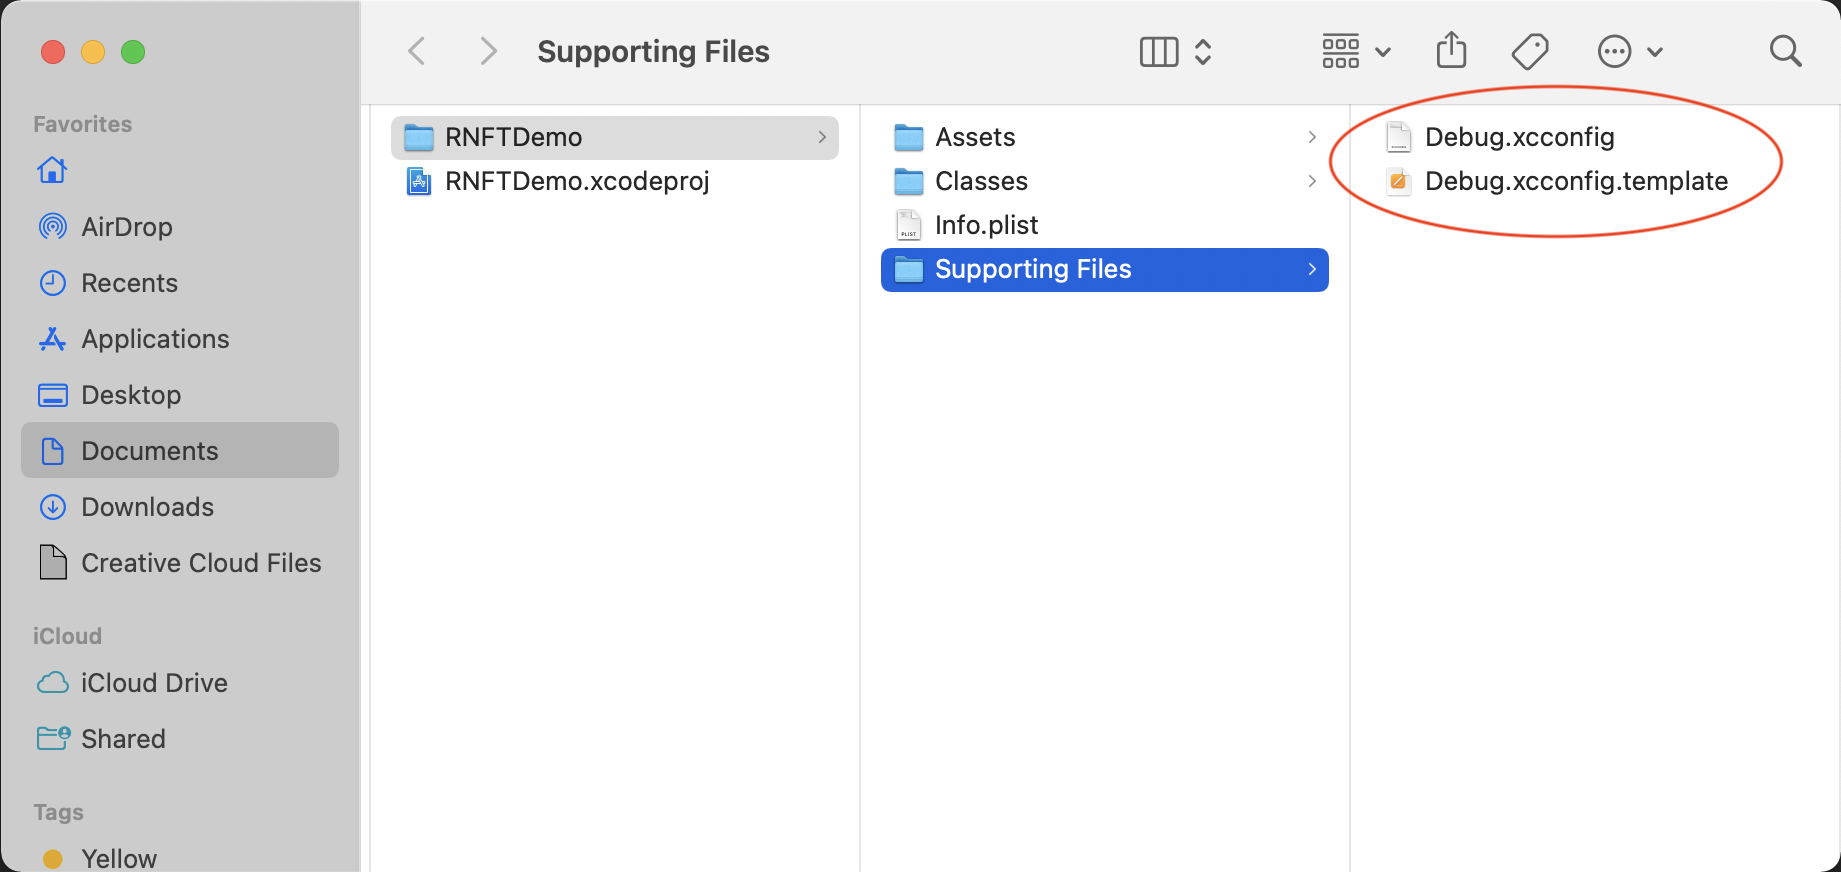 Fig.2 - Duplicate and Rename XCConfig Files
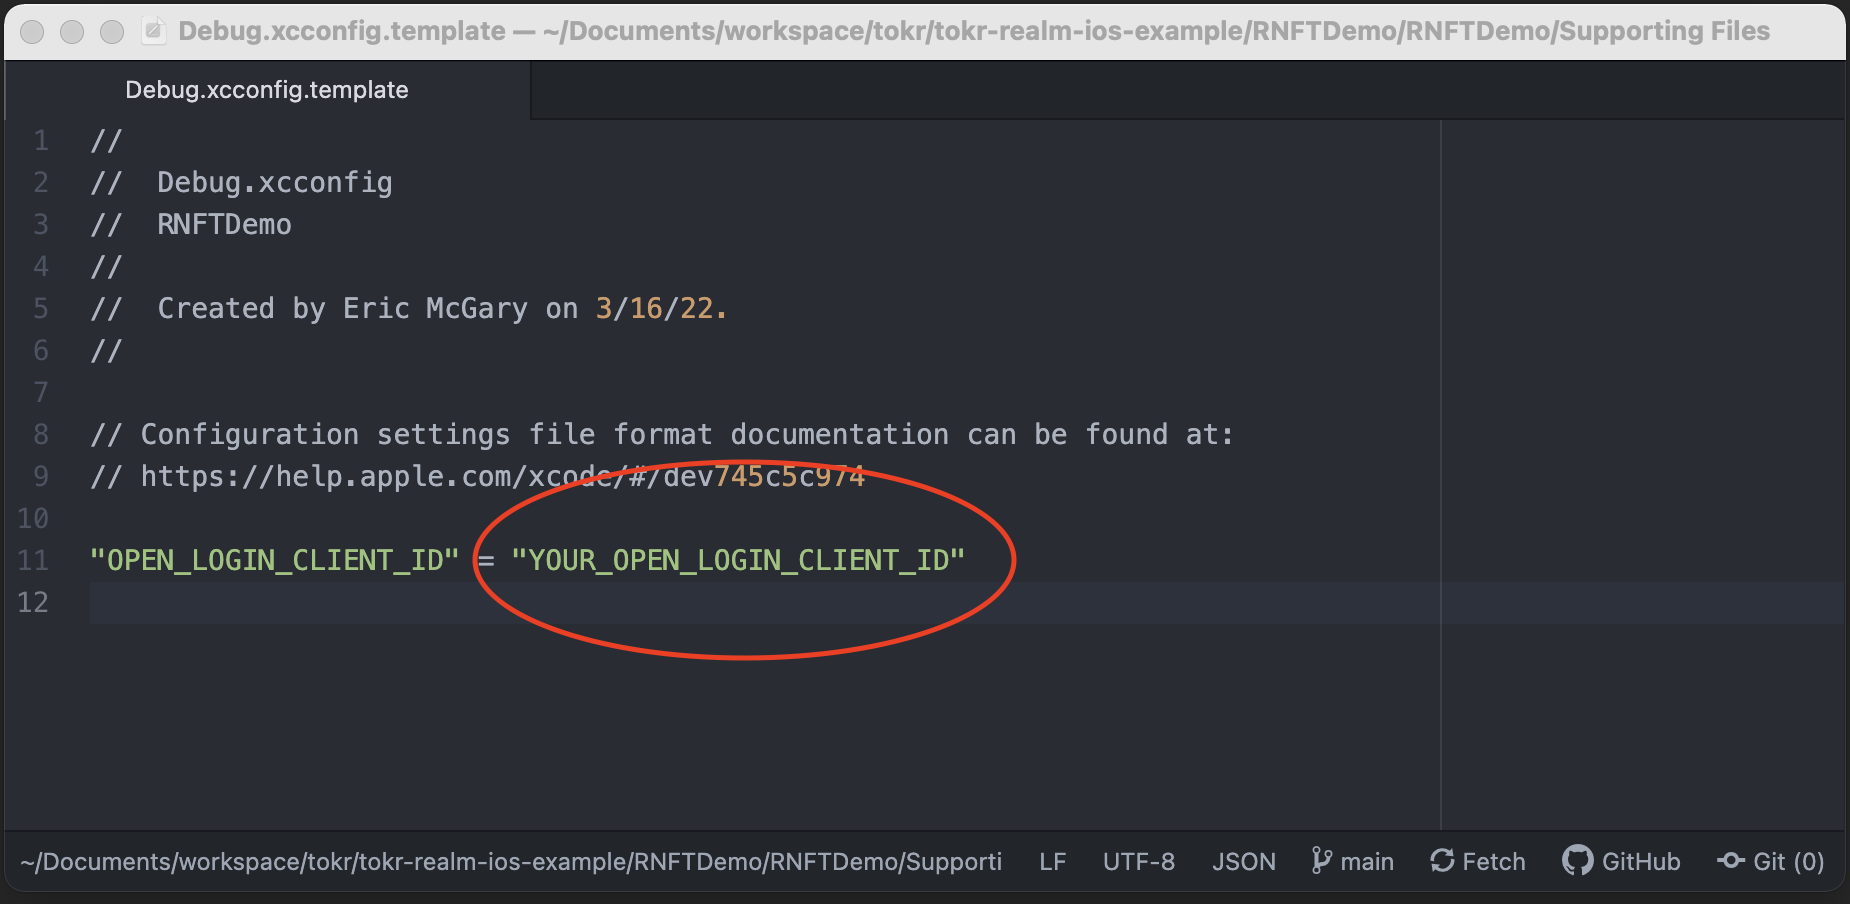 Fig.3 - Replace Open Auth Client ID
IMPORTANT Make sure that you add the Debug.xcconfig file to your project after the previous two steps, otherwise the OpenLogin will fail to instantiate.