Tutorial
First thing to do is the check that the exe SHA-256 checksum is the same as the release has provided - If no, please contact as soon as possible as this may be a virus or dupe aimed to destroy or gather information.
SteamCMDLauncher should NEVER ask for your steam creditionals - despite GSLT token - or computer password/creditionals. Report the application if it asks for anything non-related to the server!
Install the .rar to a location that is easily accessible and has read and write access rights to avoid complications with the program.
Ensure you have installed SteamCMD prior to running the program. SteamCMDLauncher doesn't do this for you for security reasons.
You can download it from Valve directly from here.
I do not take responsibility for any damages taken from this link, ensure your downloading steamcmd from a reliable source. The link here has a chance to be hijacked, so ensure its
developer.valvesoftware.comwithhttpsenabled prior to downloading.
Keep note of the location of where steamcmd will be installed, we'll need this later on.
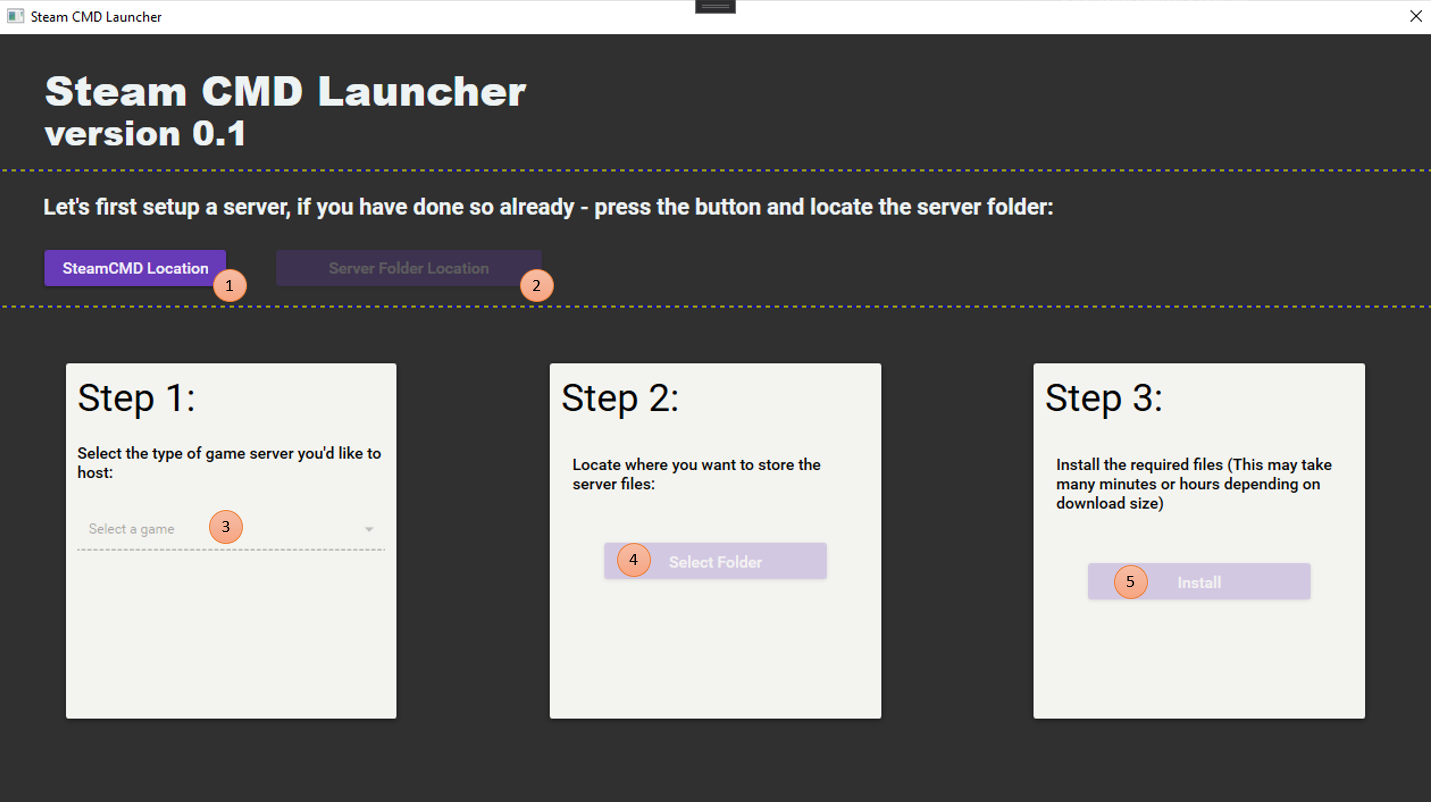
When you boot SteamCMDLauncher for the first time, you'll be presented to the Setup Window.
 From the numbers:
-
1 - SteamCMD location
- This will be where
steamcmd.exeis installed in your computer
- This will be where
-
2 - Sever Folder Location
-
Use this after stating where
steamcmd.exeis located, it should become enabled. After pressing the button, locate where the folder you have your pre-installed server files located. SteamCMDLauncher will then try its best to find what game your running - If successful, it will iterate threw each game it might have found.Follow the rest of these instructions if you want to install a new dedicated game server
-
-
3 - Game to install
- Select from 59 available games to install the dedicated server for, these are the games that support to download without a need of a steam account assigned to it.
-
Some games require a GSLT token, which can only be assigned to an active steam account.
-
4 - Install location
- Select where the installation will be, ensure you have enough storage space available before continuing!
-
5 - Install the files
-
Now your ready to rock and roll! Remember, depending on the file size of the server files and your broadband speed - this can take from 5 minutes to 2 hours! Please keep the program open during this process to avoid difficulties later on.
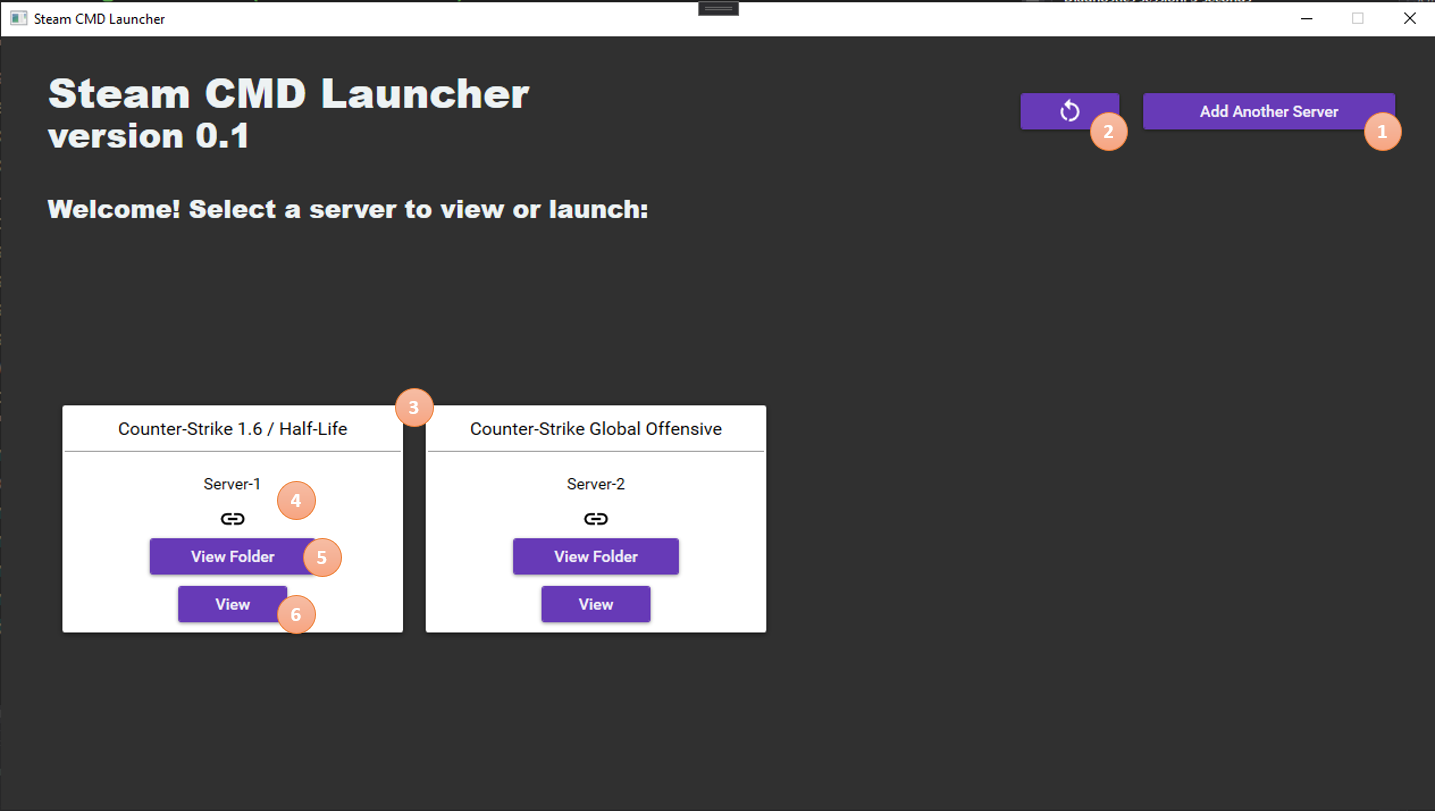
If you have done this process, the next time you boot up the program - you'll see this screen!
-
-
1 - Add Another Server
- You have unlimited space to add as much servers as you want.
-
2 - Refresh Controls
- If you want to see something reflected press this button - Note that not everything will reflect, sometimes you need to restart the program to see it.
-
3 - Server Cards
- These neat little things are what you see for each available server you can manage. Each card contains 5 elements.
-
4 - Server Alias and Folder Link Status
-
This will contain what you named the server and if the folder still exists.
-
Alias names (by default) are numbered, but you can change it from the [6] "View" button
-
If the link icon displays as an broken link, this means the folder that was initially assign has been changed or doesn't exists anymore. Don't worry, SteamCMDLauncher will prompt you to select the new location if so.
-
-
5 - View Folder Button
- This button (if link exists) shows the server files in the explorer window (windows)
- Click this button if the link is broken, the program will then prompt you to locate the new location
-
6 - View Button
- This button will show a new window based on the
Server Cardyou selected. - Clicking this button when the link is broken will result in a prompt stating the operation is invalid.
- This button will show a new window based on the
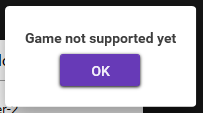
Some games are not support by the program, please provide them if you know the available commands - Here is the message that shows for an unsupported run:
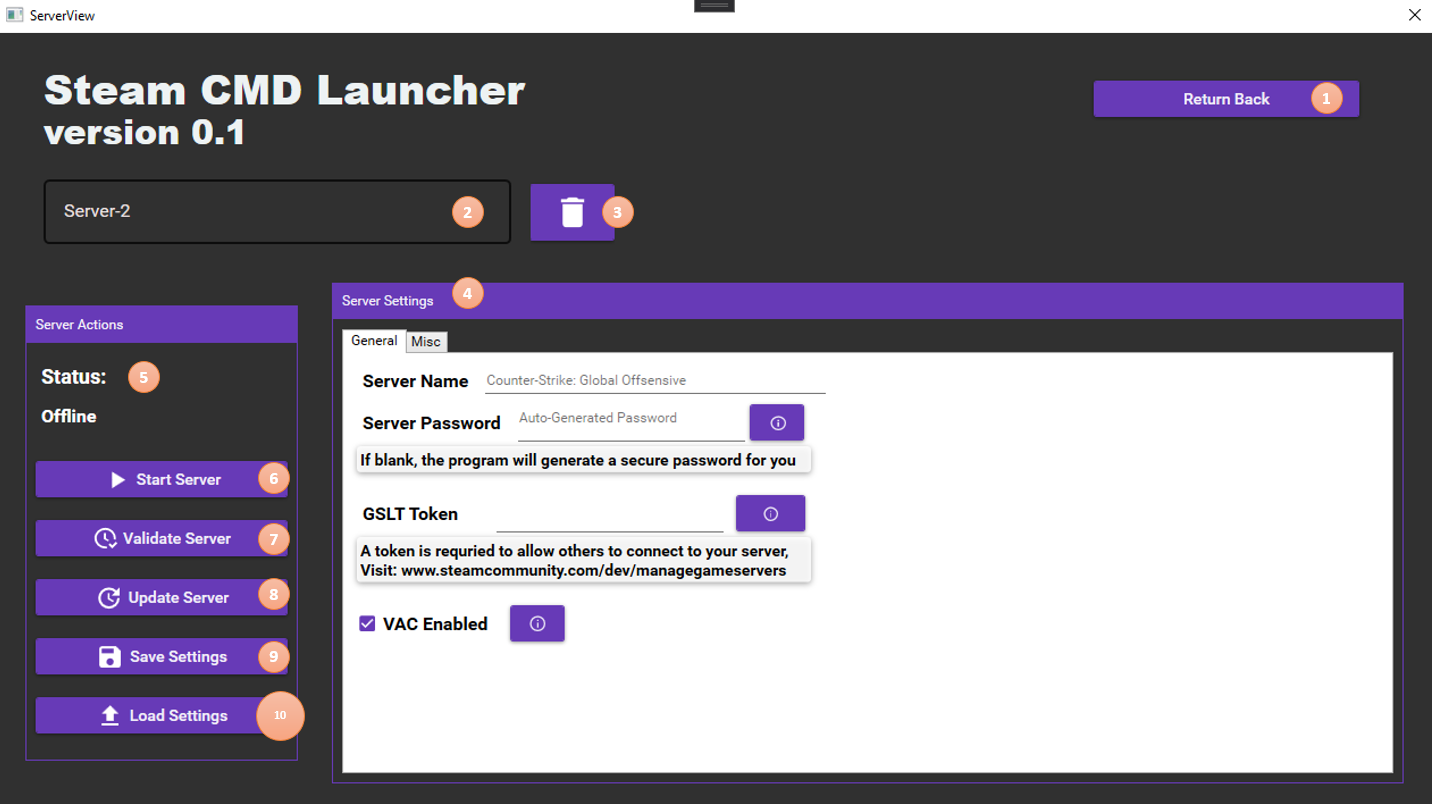
Once you press "View" button on the Server Card, you'll be presented with the following window:
-
1 - Return Back Button
-
This button simply returns you back to the main screen
-
Closing the dialog will also return you back to the main screen
-
-
2 - Server Alias TextBox
-
This will allow you to name the
Server Card -
Resetting the alias is no available at this time
-
-
3 - Delete Server Reference
-
This remove button lets you remove the server information, this doesn't delete the files if so.
-
Due to security and readability issues, the program is not permitted to perform delete operations on server objects.
-
-
4 - Server Settings Box
- This contains all the controls you can change, its read from
resourcesfolder near the executable path
- This contains all the controls you can change, its read from
-
5 - Server Status Button
-
This shows you the status of server, and once stopped how long in minutes it lasted
-
Cannot perform reading actions to steamcmd due to how it buffers the status of the server - Look at Limitations section in the Wiki.
-
-
6 - Start/Stop Server Button
-
This toggle button starts and stops the server
-
This will only work if there are no fields that are left blank (that are required)
-
-
7 - Validate Server Button
- This performs an update and validate files operation on the files on the server. Do this if you have issues with the server.
-
8 - Update Server Button
- This updates the files in the server if the server states your running an older version of files - note that it can break. This is faster than Validation but can lead to more problems in most cases.
-
9 - Save Settings Button
- This button asks for you the name the configuration file and stores it safely in the
configsfile near the executable path. Any fields that contain sensitive information will be encrypted by default. Only the machine that creates the configuration will be able to decrypt the file without issues.
- This button asks for you the name the configuration file and stores it safely in the
-
10 - Load Settings Button
- If you have saved a config before, you can easily load in the configuration from the already provided
configsfolder, or anywhere else if you have moved it since creating the file.
- If you have saved a config before, you can easily load in the configuration from the already provided
Remember this guide is based on Alpha 0.1, if out of date please contain me as soon as possible.