Getting Started
This page covers the product overview, requirements, installation flows, and the main application start/stop modes.
Server Manager is a server management platform developed by Sparks Skywere for managing dedicated. It provides both a desktop GUI and a web-based platform for administering servers from a local machine or across various networks (All self hosted too!).
The application is designed to run on Windows with administrator privileges and offers the following core capabilities:
- Server Management — Install, start, stop, restart, and update game servers through a unified interface.
- Real-Time Server Console — Interactive console that connects to running server processes, allowing operators to view output and send commands in real time through multiple input methods including named pipes and file-based command queues.
- Automated Operations — Schedule server restarts with pre-restart warning broadcasts, MOTD (Message of the Day) announcements at configurable intervals, and automatic update checking with seamless update-and-restart workflows.
- Multi-Node Clustering — A Host/Subhost topology that allows a central Host node to manage multiple Subhost nodes across a network. Nodes join via a secure request-and-approval workflow, and the Host can remotely control servers on any connected Subhost.
- Web-Based Dashboard — A web interface served from a Flask web server (via Waitress WSGI) that provides server management, user administration, analytics charts, and cluster management from any browser on the network.
- User Management with 2FA — Multi-user support with role-based access control (admin/user), bcrypt password hashing, and optional TOTP-based two-factor authentication.
- Monitoring and Metrics — Real-time analytics collection with health scoring, Prometheus-format metrics endpoint, SNMP monitoring support, and Grafana integration with pre-built dashboard configurations.
- Email Notifications — SMTP-based email notifications using templates for events such as server alerts, account lockouts, password resets, maintenance windows, and welcome messages. Supports Gmail, Outlook, Office365, Yahoo, custom SMTP, and OAuth 2.0 for Microsoft Exchange.
- Security — Rate limiting, CSRF protection, input validation (SQL injection and XSS prevention), account lockout, path traversal prevention, SSL/TLS certificate management, and network-level access control.
| Requirement | Minimum | Recommended |
|---|---|---|
| Operating System | Windows 10 / Windows Server 2016 | Windows 11 / Windows Server 2022 |
| Python | 3.8+ | 3.11+ |
| RAM | 4 GB | 8 GB+ |
| Disk Space | 500 MB (application only) | 10 GB+ (with game servers) |
| Privileges | Administrator | Administrator |
| Network | Local access | LAN/WAN for web and cluster |
Linux support is in early development. Debian-based distributions (Ubuntu, Debian) are recommended for ease of use. Other distributions may work but are not actively tested. The Linux installer handles package installation via apt, yum, dnf, or pacman.
All Python dependencies are listed in requirements.txt and are installed automatically by the installer:
| Package | Purpose |
|---|---|
| flask | Web server framework |
| flask-cors | Cross-Origin Resource Sharing support |
| flask-limiter | API rate limiting |
| psutil | Process and system monitoring |
| requests | HTTP client for API calls |
| pywin32 | Windows service support and security APIs |
| pycryptodome | Cryptographic operations |
| gitpython | Git repository management |
| paramiko | SSH connectivity for remote operations |
| schedule | Task scheduling |
| pystray | System tray icon |
| pillow | Image processing for tray icon |
| sqlalchemy | Database ORM and connection management |
| cryptography | SSL certificate generation and Fernet encryption |
| pyodbc | ODBC database connectivity (MSSQL) |
| pyotp | TOTP-based two-factor authentication |
| vdf | Valve Data Format parsing (Steam configs) |
| waitress | Production WSGI server for Flask |
| bcrypt | Password hashing |
| secure-smtplib | Secure SMTP connections |
| msal | Microsoft Authentication Library for OAuth 2.0 |
| requests-oauthlib | OAuth library for SMTP |
| GPUtil | GPU monitoring |
Enabling powershell scripts
- Go to Settings
- Go to System -> Advanced
- Enable powershell scripts
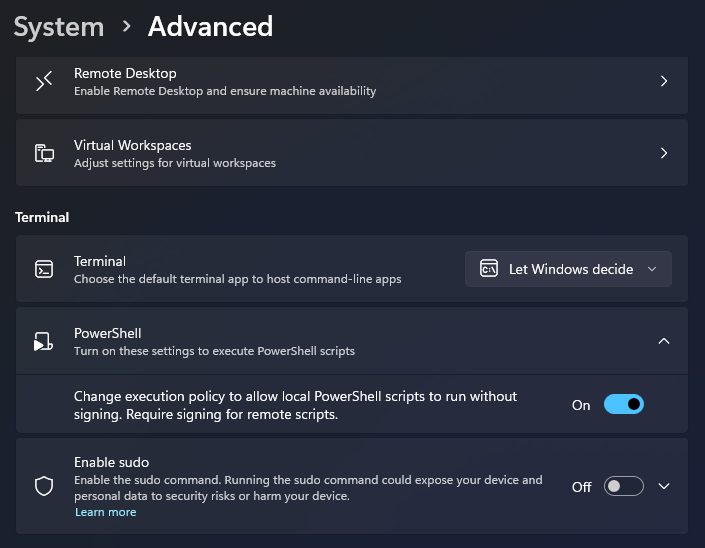
The Windows installer is a PowerShell script (install.ps1) that provides a WinForms-based GUI wizard. It must be run with Administrator privileges.
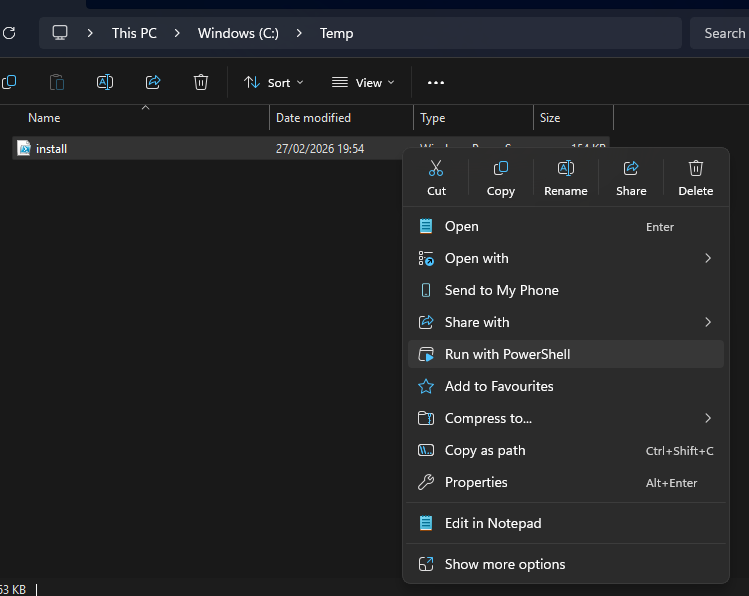
(Owners note: I do plan to make this an EXE in the future, I have Ps2Exe but need to check signing)
Steps to install:
- Open PowerShell as Administrator.
- Navigate to the directory containing the installer or clone the repository first:
git clone https://raw.githubusercontent.com/SparksSkywere/servermanager.git
cd servermanager
- Run the installer:
.\install.ps1
- The GUI wizard will guide you through the following steps:
-
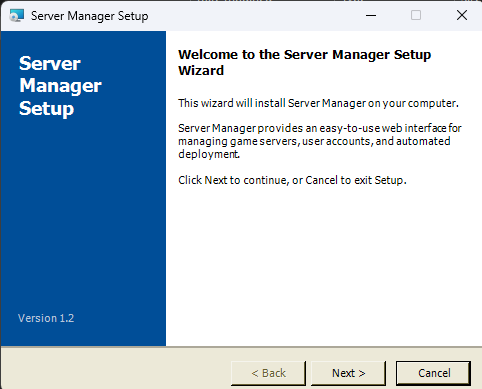
First page — The intial installer page, important page to read the general synopsis of this program and check the current version downloaded.
-
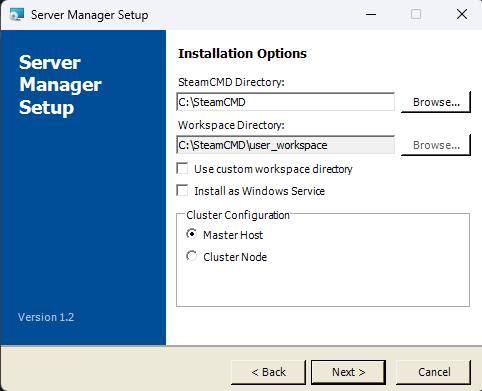
Second Page — Second page where you can select the installer directory with workspace directory (if you want users to access a different secure storage away from the SteamCMD storage) you can also select the clusters configuration at this stage.
-
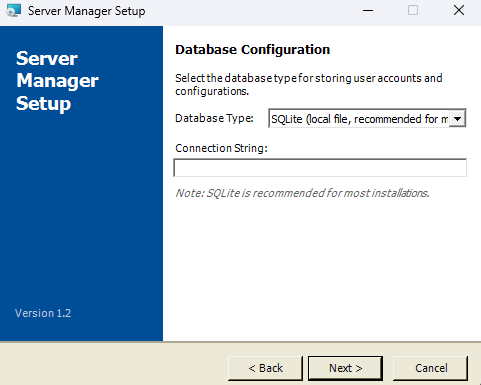
Third Page — Database Configuration, you can choose what type of database will be used by servermanager, default is SQLite.
-
Cluster Configuration — You are asked to select the node role:
- Host — This machine will act as the central management server.
- Subhost — This machine will connect to an existing Host. You will need to provide the Host's IP address.
-
Repository Clone — The Server Manager source code is cloned from the GitHub repository. If direct Git access fails, the installer falls back to downloading a ZIP archive from GitHub.
-
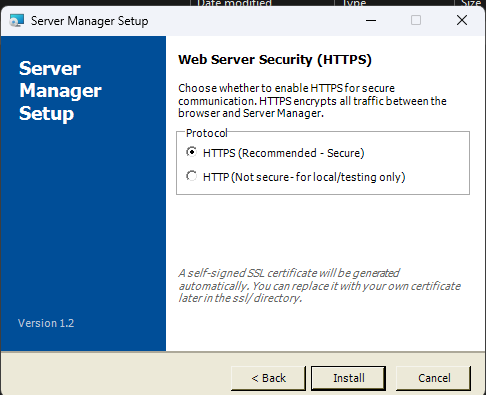
Web Security — The page to choose if you want to use HTTPS or HTTP for running the webserver, for outside communication HTTPS is recommended.
-
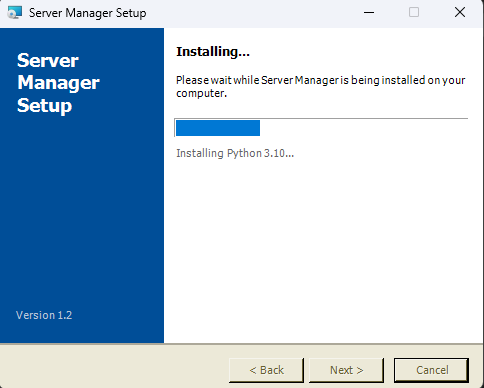
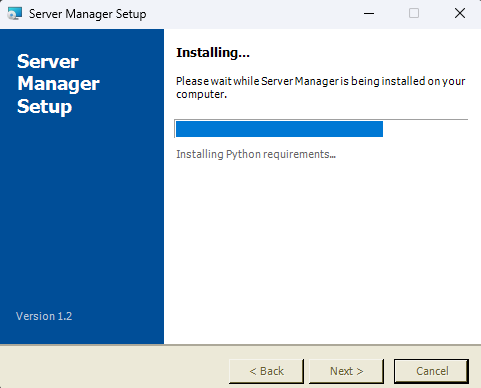
Installation - The progress bars!
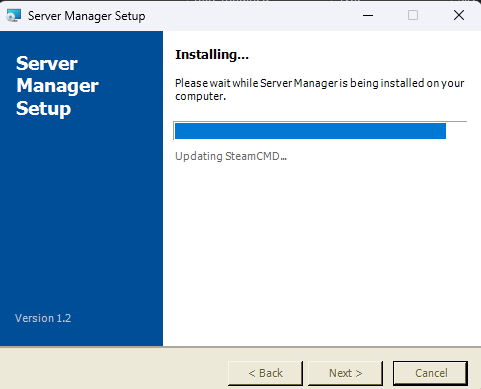
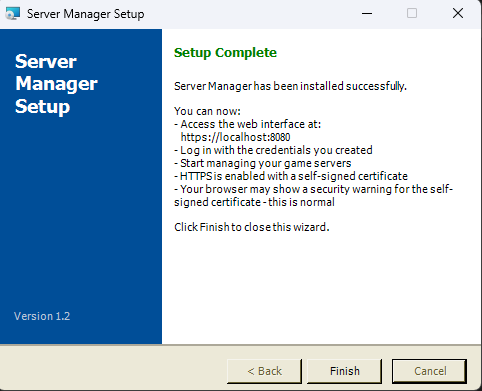
-
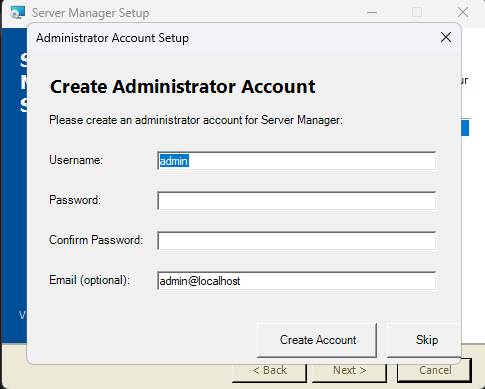
Admin Account Creation — A root administrator account is created with customisable credentials (default:
admin/admin).
-
Reinstallation: If an existing installation is detected in the registry, the installer will prompt you to confirm whether you want to reinstall. Reinstalling will overwrite previous settings.
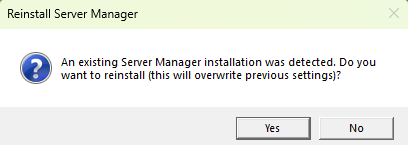
Service Management via Installer: The installer also supports service management mode via the -ServiceAction parameter:
.\install.ps1 -ServiceAction Install    # Install and start as Windows service
.\install.ps1 -ServiceAction Uninstall  # Remove the Windows service
.\install.ps1 -ServiceAction Start      # Start the service
.\install.ps1 -ServiceAction Stop       # Stop the service
.\install.ps1 -ServiceAction Restart    # Restart the service
.\install.ps1 -ServiceAction Status # Check service statusThe Linux installer is a Bash script (install.sh). Run it with sudo privileges:
sudo sh install.shThe Linux installer:
- Detects the package manager (apt, yum, dnf, or pacman).
- Installs Python 3.8+ and pip if not present.
- Installs Git if not present.
- Clones the repository from GitHub.
- Installs Python dependencies from
requirements.txt. - Creates the directory structure under
$HOME/SteamCMD(includingssl/for certificates). - Initialises SQLite databases (users, steam apps, cluster including
pending_requestsandhost_statustables). - Configures cluster role (Host or Subhost) with secure token generation.
- Generates SSL/TLS certificates if HTTPS is selected (using Python
cryptographyoropensslfallback). - Configures firewall rules using UFW or firewalld (ports 8080, 443, 8081, 5001, 27015-27050).
- Creates a
.desktopfile for desktop shortcut integration. - Sets up a systemd user service with SSL environment variables.
If you prefer a manual setup:
git clone https://raw.githubusercontent.com/SparksSkywere/servermanager.git
cd servermanager
pip install -r requirements.txt
After manual installation, you will need to:
- Create the registry keys manually (Windows) or ensure fallback directory detection works.
- Run the
Update-ServerManager.pywtool to initialise the database schema. - Create an admin user using the database tools.
After installation is complete:
-
Start the application. Run
Start-ServerManager.pywto launch Server Manager in desktop mode. The application requires Administrator privileges and will prompt for elevation if not already running as admin. - Access the system tray icon. A tray icon will appear in the Windows taskbar notification area. Right-click it to access the menu.
- Open the desktop dashboard. Right-click the tray icon and select "Open Server Dashboard" to open the Tkinter-based local management GUI.
-
Access the web interface. Open a browser and navigate to
https://localhost:443(if HTTPS was enabled during installation) orhttp://localhost:8080(HTTP). From another machine, replacelocalhostwith your server's IP address. Log in with the admin credentials configured during installation (default:admin/admin). If using a self-signed certificate, your browser will show a security warning — this is expected and safe to proceed through. -
Populate the Steam database. The Steam and Minecraft application ID databases can be populated using the scanners in
Modules/Database/scanners/. RunModules/Database/scanners/AppIDScanner.pyto download the Steam dedicated server catalogue, andModules/Database/scanners/MinecraftIDScanner.pyto download Minecraft version information. This provides the searchable server lists when creating new servers.