English · Français
A Home Assistant integration, installable through HACS, that predicts frost and plant disease risk (late blight, powdery mildew...) from the sensors of your weather station, whatever it is, combined with weather forecasts.
If you find it useful, you can buy me a coffee :-).


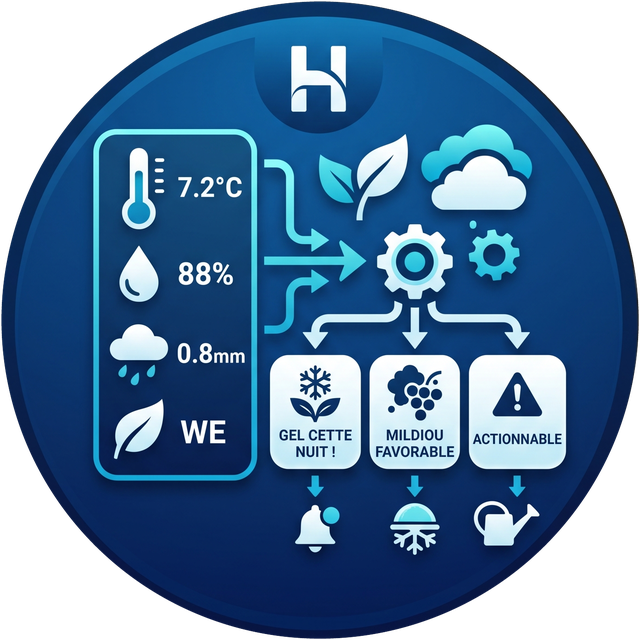
A weather station gives you raw measurements (temperature, humidity, rain, leaf wetness...). This integration turns them into actionable alerts: "frost likely tonight on the apple tree in bloom", "conditions favourable to late blight for 2 days" — ready to use in your automations (notification, switching on a frost cover, preventive treatment...).
The brand does not matter. The integration talks to no hardware at all: it reads Home Assistant entities. Any source able to provide a temperature and a humidity in Home Assistant will do.
Works right away with:
- a private station with a native integration — Ecowitt, Netatmo, Davis, WeatherFlow Tempest, Bresser, Acurite through a bridge, Aqara, Zigbee or Z-Wave;
- an official or public station — MeteoSwiss, Met.no, Météo-France, DWD, OpenWeatherMap, AccuWeather;
- a handful of standalone sensors: one Zigbee thermometer in the orchard and one hygrometer in the greenhouse are enough to start.
If your station has no native integration — exotic model, home-built rig, older hardware — you only need to get its measurements into Home Assistant as entities. Several routes exist, easiest first:
| Situation | Route |
|---|---|
| The station publishes over MQTT | MQTT integration, mqtt sensor |
| The station exposes an HTTP page or API | rest sensor, or scrape |
| Console running Weewx / Meteobridge | MQTT bridge or HTTP export |
| Ecowitt station without a supported gateway | Ecowitt custom server protocol into Home Assistant |
| Data already present but badly shaped | template sensor to convert units or extract a value |
| Manual readings or a file | input_number, or file / command_line sensor |
As soon as those sensors show up in Home Assistant, Météo Sentinelle uses them like any others — you pick them from a dropdown during setup.
The only thing that must come from a regular weather integration is the
weather.* entity providing hourly forecasts, which frost
anticipation relies on. Any free weather integration will do (Met.no is
installed by default in Home Assistant).
The integration communicates with no hardware: it reuses entities already present in Home Assistant. That is what makes it independent of your station's brand, model and protocol — and robust, since there is no driver to maintain.
It combines:
- your station's sensors (temperature, humidity, wind, leaf wetness if available);
- as a fallback, the real-time sensors of an official station such as MeteoSwiss (see below);
- the forecasts of a Home Assistant weather entity (
weather.*) to look several hours or days ahead; - published agronomic models to compute a risk level:
none/watch/warning/severe.
If you use the MeteoSwiss integration (installable through HACS), you can pair it with Météo Sentinelle in two complementary ways:
- As a forecast source — simply pick its
weather.*entity during setup. It feeds the frost model with official Swiss hourly forecasts. - As a fallback source — on the second step of the config flow, you can point to the real-time sensors of your MeteoSwiss station (temperature, humidity, wind, rain).
The fallback principle is simple: your own station always takes priority — a sensor in the orchard describes your plants' microclimate better than an official station several kilometres away. The fallback sensor takes over automatically in two cases:
- the measurement does not exist on your side (for instance if you have no anemometer);
- your sensor fails, goes
unavailable, or returns an unreadable value.
Predictions therefore keep working even when your own station is down. A
Data source entity (ecowitt / meteoswiss / mixed /
unavailable) shows at any moment which station actually feeds the
calculations, with a measurement-by-measurement breakdown in attributes
— handy to get notified when your station drops out.
This step is entirely optional: leave the fields empty and the integration behaves as before, using only your own station. And nothing here is Swiss-specific — any other Home Assistant sensor source can act as the fallback.
- Home Assistant 2026.3.0 or newer (needed for the local icon).
- At least a temperature sensor and a humidity sensor visible in Home Assistant, whatever their origin (see "Which weather station?" above).
- A weather entity (
weather.*) configured for forecasts. - (Optional, but recommended for late blight) a leaf wetness sensor, for example an Ecowitt WH55 or any equivalent.
- (Optional) a second weather source — MeteoSwiss or another — to act as a fallback if one of your station's sensors fails.
- The recorder enabled on your temperature and humidity sensors: the disease models need roughly 4 days of hourly history. If you exclude those entities from the recorder, only the frost model will work.
Météo Sentinelle has been submitted to the HACS default store. Until the submission is merged, add it as a custom repository:
- HACS → Integrations → menu (⋮) → Custom repositories.
- Add the URL of this repository, category Integration.
- Search for "Météo Sentinelle" and install it.
- Restart Home Assistant.
- Settings → Devices & services → Add integration → "Météo Sentinelle".
Once the submission is merged, step 1 and 2 become unnecessary: the integration will show up directly in the HACS search.
Configuration separates what is shared across the site from what belongs to each individual tree.
At install time — the site:
- the temperature and humidity sensors of your station, whatever the brand;
- (optional) wind, rain rate (mm/h), leaf wetness;
- the weather entity to use for forecasts;
- which risk models to enable, and notifications;
- (optional) the MeteoSwiss fallback sensors.
Then — your trees, one at a time, through the "Add a tree" button on the integration page. For each one:
| Field | Purpose |
|---|---|
| Name | "Golden at the back", "Cherry by the terrace"... |
| Species | determines the T10/T90 frost thresholds and which diseases are tracked |
| Growth stage | current position in the season |
| Automatic advancement | lets growing degree days move the stage forward |
| Growing degree day offset | recalibrates the model for your orchard |
Sensors and weather stay shared: adding a tenth tree triggers no extra request.
Each tree becomes a separate Home Assistant device, named "Species + your name" (for example Apple Golden at the back). Its entities are attached to that device:
- Frost risk — computed with the thresholds of this tree's stage. An apple tree in bloom and a cherry still at swollen bud, on the same night, do not produce the same alert.
- Growth stage — as a sensor (recordable) and as a
select(editable). - Automatic advancement — a switch, to take back control tree by tree.
- Disease risks and protection — only those relevant to the species. An apple tree gets powdery mildew, a potato gets late blight; applying potato late blight to an apple tree would make no agronomic sense.
How do you tell one tree's stage from another's? The context comes
from the device: the entity belongs to the tree's device, so Home
Assistant displays it as Apple Golden at the back — Growth stage. The
tree, crop and stage attributes carry the same context for cards
and Jinja templates.
Spring development follows heat accumulation, not the calendar. The integration therefore accumulates growing degree days (base 5.6 °C, from January 1st, daily average method) and compares that total to per-species, per-stage thresholds.
When a threshold is crossed, the stage is advanced and applied automatically, and you are told about it — notification and event. Three safeguards:
- your correction wins. Change the stage by hand from the
selectand it becomes the new reference; - advancement is monotonic. The model never moves a stage backwards: a warm spell does not "undo" an observed bloom;
- everything can be switched off. The Automatic advancement switch disables it for a given tree.
The stage sensor also exposes the next expected stage, the degree days remaining to reach it, the recorded bloom date, and an estimate of the days before harvest.
Two complementary mechanisms, both per tree:
Built-in notifications (enabled by default, can be disabled in the options) — a Home Assistant notification on every escalation, from the "warning" level upwards:
Apple Golden at the back — Frost risk: Severe Growth stage: Full bloom minimum expected −4.1 °C in the shade, damage threshold −2.2 °C, around 12/04 03:00
Events, for your own automations:
| Event | Fired when |
|---|---|
meteo_sentinelle_risk_changed |
a risk level changes |
meteo_sentinelle_stage_advanced |
a stage is advanced automatically |
The event data contains the tree, species, stage, model, previous and new
level, an escalated boolean, and a ready-made detail string.
Two turnkey automations, installable in one click — no YAML to write.
These blueprints are not delivered by HACS (which only installs
custom_components/): they have to be imported once.
Frost protection — warns you when the threshold is crossed, switches on a protection device (heating cable, sprinkler, smart plug) and switches it off when the risk clears. The device is optional: without it, this is a plain frost alert.

All-risk alerts — routes frost, late blight, powdery mildew and stage changes to the channel of your choice, with filtering by minimum level and by risk type.
French versions of both blueprints are available in
blueprints/automation/meteo_sentinelle/ (protection_gel.yaml and
alerte_meteo_sentinelle.yaml) — blueprints cannot be translated by
Home Assistant, so each language ships as its own file.
If the button does not work, copy the URL of the YAML file and import it from Settings → Automations & scenes → Blueprints → Import blueprint.
Both blueprints only fire when the chosen threshold is crossed: staying in alert does not notify again, and dropping back below it triggers the return to normal.
Two design principles: alerts fire only on changes — a reminder every 15 minutes would quickly teach you to ignore the integration — and only on escalation, since an improvement has no business waking anyone up.
These settings can be changed at any time through Options on the integration; trees are edited from their own entry.
All models work on hourly series rebuilt from Home Assistant history, as the published criteria require ("6 continuous hours", "11 hours at RH ≥ 90%").
There is no single frost threshold. An apple tree withstands −18 °C in dormancy and suffers from −2.2 °C at full bloom. The integration uses the T10 / T90 tables from Washington State University (temperatures causing 10% and 90% bud mortality after 30 minutes of exposure) for apple, pear, apricot, plum, peach/nectarine and sweet cherry.
You choose the species during setup; the growth stage can then be
changed at any time from the select entity — useful to automate it or
adjust it by observing the orchard.
The integration also estimates surface temperature: under a clear sky and light wind, night-time radiation cools the ground 3 to 5 °C below air temperature. Ground frost therefore commonly occurs while the shelter still reads +2 °C. Low crops (tomato, potato, vegetables) are evaluated on this surface temperature, trees on air temperature.
Two criteria are computed in parallel:
| Criterion | Condition | Origin |
|---|---|---|
| Hutton | 2 consecutive days, T min ≥ 10 °C, ≥ 6 h continuous at RH ≥ 90% | James Hutton Institute / AHDB, 2017 |
| Smith | 2 consecutive days, T min ≥ 10 °C, ≥ 11 h continuous at RH ≥ 90% | Smith, 1956 |
The risk level follows Hutton, the more sensitive of the two. The controlled-environment trials behind these criteria showed that contemporary isolates of Phytophthora infestans infect under noticeably less humid conditions than Smith predicted: Smith under-detects modern aggressive genotypes. It remains exposed as an attribute, for comparison.
A leaf wetness sensor, if you have one, replaces the RH ≥ 90% proxy.
A cumulative 0-100 index developed at UC Davis, which drives treatment spacing. The epidemic starts after 3 consecutive days with ≥ 6 continuous hours between 21.1 and 29.4 °C; the index then gains 20 points per favourable day and loses 10 per unfavourable day or per peak at ≥ 35 °C (lethal to conidia).
Published bands: 0-30 low, 40-60 moderate, > 60 high — with a recommended spray interval exposed as an attribute.
A correction added by this integration: unlike late blight, powdery mildew is inhibited by free water — rain washes conidia away. The original Gubler-Thomas does not model rain, so a −10 point penalty is applied beyond 2.5 mm daily, borrowing the rule from the "Hop Powdery Mildew" model (Cascade variant), itself derived from Gubler-Thomas. This can be disabled in the options.
A model says "risk is high". A decision tool says "spray before
Thursday". The meteo_sentinelle.log_treatment action records an
application:
action: meteo_sentinelle.log_treatment
data:
  target: powdery_mildew
  tree: Apple Golden at the back   # omitted = every relevant tree
  product: Wettable sulphur
  residual_days: 10
  rainfast_mm: 20
The integration derives a Late blight / powdery mildew protection entity giving the end-of-protection date, accounting for both residual activity and wash-off: past the declared rain total, protection is considered lost even if the residual period has not elapsed. While a protection is active, the displayed risk level is downgraded by one step.
Tracking is per tree: you can treat the apple today and the pear next week without the two getting mixed up.
No product database is bundled: enter residual activity and rainfastness from the label of whatever you apply.
These models faithfully reproduce published criteria, but fall short of a professional tool on three points:
- inoculum is not modelled — three wet days in April with no nearby outbreak are harmless; the same three after a neighbour reports one are critical. Without a regional monitoring network, these models assume the pathogen is present and therefore sometimes alert for nothing;
- no tracking of infection cohorts (latency, lesion emergence);
- no field validation — expert models are calibrated on multi-year, multi-region trials.
Use this as an aid to vigilance, not as plant-health advice.
- Hutton criteria — AHDB / James Hutton Institute
- Gubler-Thomas index — UC IPM, Gubler et al. 1999
- Critical T10/T90 temperatures — WSU, published by USU Extension IPM-012-11
- Growing degree days and apple phenology — MSU Enviroweather
- v0.4: several monitored trees, each with its own stage and calculations; automatic advancement by growing degree days; alerts through events, notifications and a blueprint.
- v0.5: renamed to Météo Sentinelle, opened up to any weather station,
meteo_sentinelledomain. - v0.6: fully translated interface (English and French).
- v0.7: ready-made frost protection blueprint.
- v0.8: English-first documentation, bilingual blueprints, translated notifications.
- v1.0 (current): first stable release — the feature set, the entity names and the event payloads are now considered settled, and submitted to the HACS default store.
- Next: apple scab (Mills table), infection cohorts with latency for late blight, cultivar sensitivity, learning the degree day offset from the user's manual corrections.
See ARCHITECTURE.md for the design rationale (in French).
The integration displays in Home Assistant's language: species, growth stages, risk levels, sensor names and notifications exist in English and French, and switch automatically according to the user's language. English is the fallback for every other language.
One consequence to know about for automations: entities expose a
technical key as their state (full_bloom), not the displayed text
("Full bloom"). Home Assistant translates it for display. A condition
must therefore compare the key:
condition:
  - condition: state
    entity_id: sensor.apple_golden_growth_stage
    state: "full_bloom"   # not "Full bloom"
Blueprints are the one exception: Home Assistant offers no translation mechanism for them, so English and French versions ship as separate files.
Since Home Assistant 2026.3, a custom integration can provide its own
icon directly inside its folder, without going through the central
home-assistant/brands repository (which no longer accepts custom
integration submissions anyway). That is the method this project uses:
custom_components/meteo_sentinelle/brand/
├── icon.png      (256×256)
├── icon@2x.png   (512×512)
└── icon.svg      (source, not used by Home Assistant)
Requires Home Assistant 2026.3 or newer; on an older version the icon shows nowhere (silent fallback to the generic one), without affecting how the integration works.
If this integration saves you time (or saves your tomato plants!), you can buy me a coffee:
GPL-3.0 — see LICENSE. The code stays free: you may use, modify and redistribute it, provided any derivative version also remains open source under the same licence.