API communication examples with RealTerm
The recommended approach to communicate with RF Explorer devices is using a programming language with support for Serial Port communication. This include easy to use multi-platform libraries already available for .NET and Python, free download from RF Explorer GITHUB repository, as well as C library for Arduino. All these libraries are provided as open source, so you are free to modify for your own purposes.
In some cases it may be useful to interact with a RF Explorer device using a simple terminal program. As it is usual in high performance serial communication protocols, RF Explorer UART API uses binary data to compress and accelerate data transmission, as otherwise using pure ASCII would lead to slow communication particularly when returning sweep data.
Therefore simplest terminals such as Hiperterminal are not suitable for reliable communication with RF Explorer. We found the open source RealTerm tool to be the easiest one to use, as it allows to easily mix ASCII and Binary data together. Other tools such as Putty and TeraTerm are also suitable but requires binary only mode which is a bit less user friendly for humans. Below setup and examples are configured for Realterm.
You can download RealTerm from https://realterm.sourceforge.io/
You can work by default at 500,000bps, which is the suggested speed. Alternatively you may work at 2400bps lower speed, in such case you have to change the RF Explorer device configuration (a handheld unit by manually changing CONFIG MENU <baud rate> option, or IoT unit by selecting GPIO2 status when booting up the board). The image below shows the configuration in RealTerm to open the port (in this case port 10 or COM10, your exact port may be different) at 500,000bps 8N1. You must connect the RF Explorer device to your USB port before trying to use RealTerm.
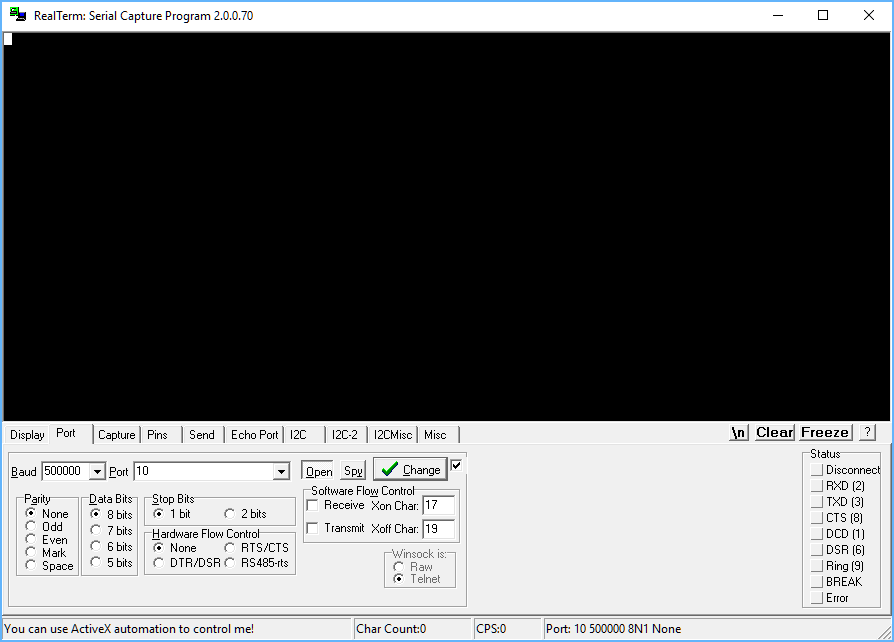
Note Baud, Parity, Data Bits and Stop Bits configuration parameters. You can open the COM port by clicking the [Open] button.
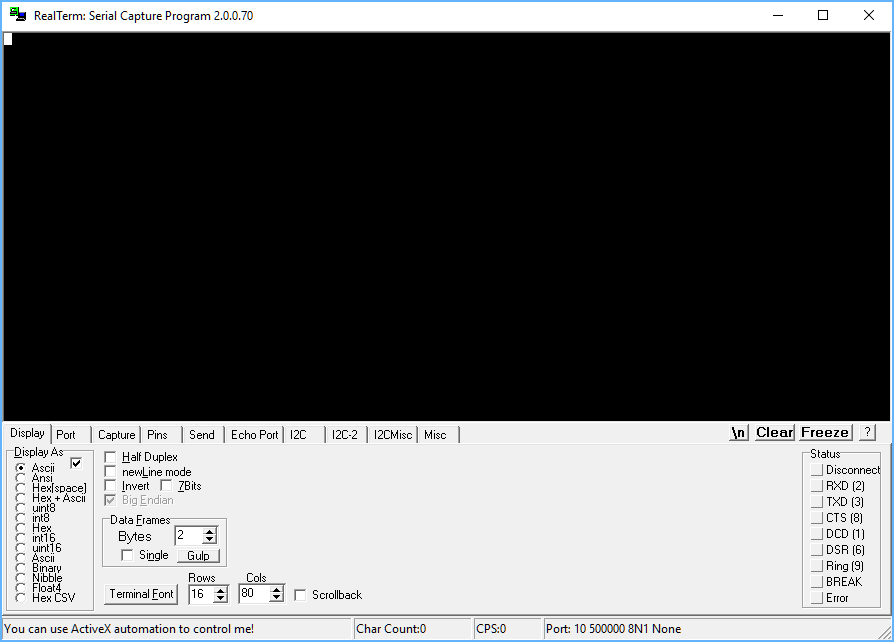
The next suggested step is configuring the Display terminal parameters. Here you can choose between ASCII, HEX, or HEX+ASCII. We will see which option is best later, for the moment select ASCII mode as shown below
You can now switch to the Send tab, so we can use some actual command examples.
The very first one is to simply reset the unit so it reboots clean from any previous status. For that you can see the www.rf-explorer.com/API defines the Request_Reboot command as #<Size>r where Size=3 (binary), so we need to send a '#' char, a 0x03 binary byte, and a 'r' char. This is simple to do with RealTerm by using combined #\x03r command string. See below, to send the command click on [Send ASCII] button.

You should get a screen dump text on terminal screen with firmware version and serial number, depending on the specific version, copyright notice, etc. You may get more or less information depending on specific version and device model. An example below shows one possible response.
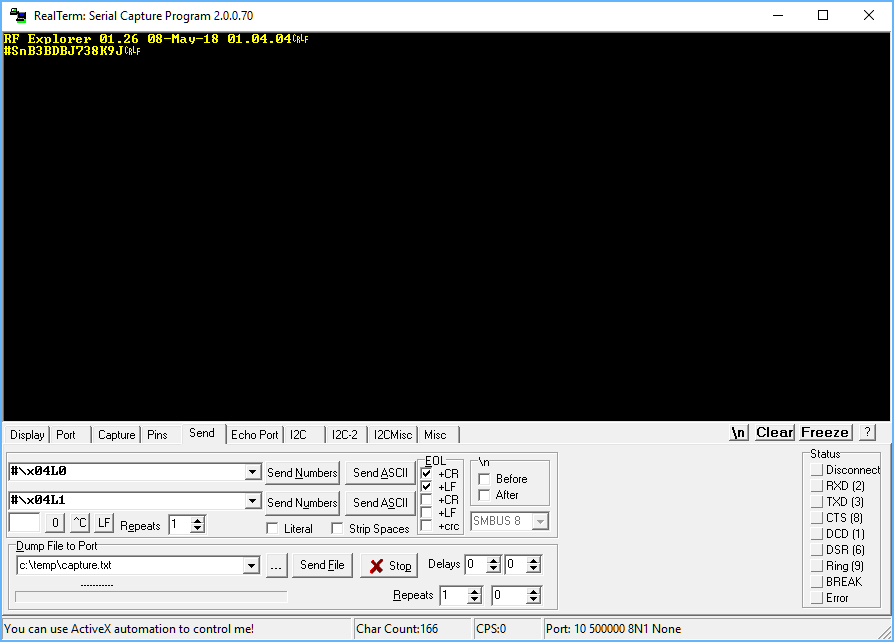
Other simple examples could use ON/OFF LCD screen commands, defined as Disable_LCD and Enable_LCD in the API. In this case commands will be #\x04L0 and #\x04L1 as depicted in image above.
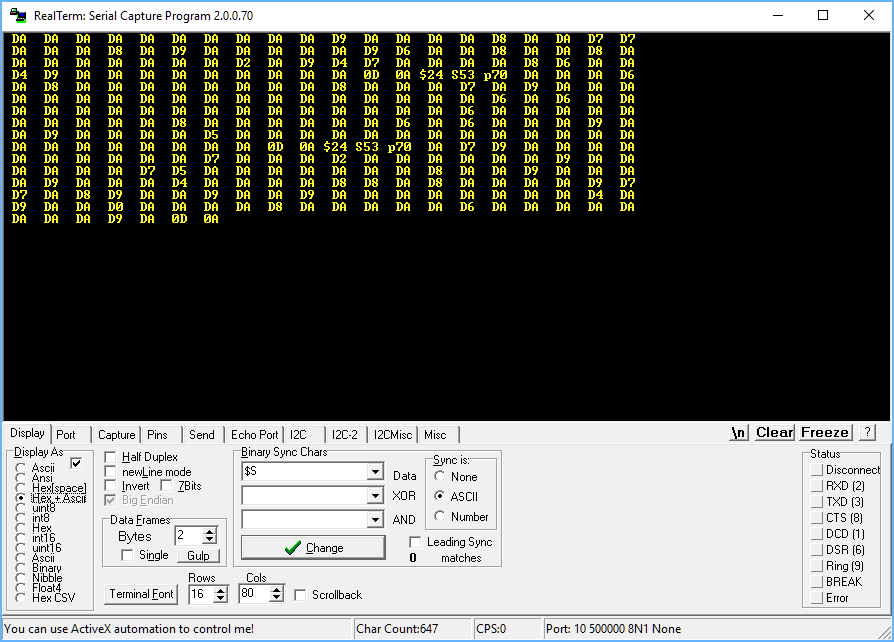
A more complex example could be using Request_Config as #\x04C0 and Request_Hold #\x04CH commands, to start receiving sweeps and stop them, respectively. In the example below you can see the response where a number of configuration parameters are received, then a few $S strings with sweep data.
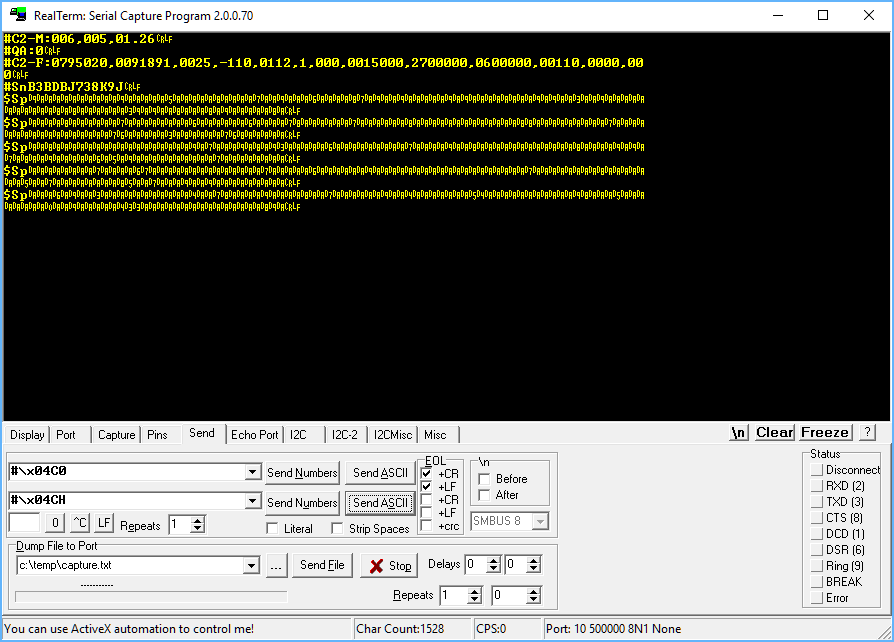
These $S strings are documented in the API as Sweep_data and include ASCII and binary data. To help on interpreting the data you can better use HEX+ASCII screen configuration as per below image, so you can more easily identify the $S string start and then manually decode each HEX binary digit to get actual dBm measured value.