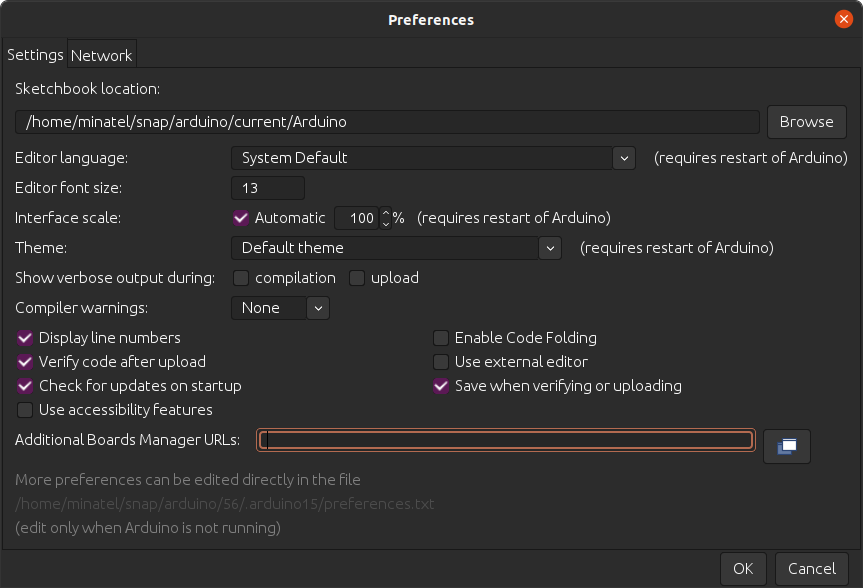
This is the preferred and easiest way to install Arduino Core support for Pettee UWB Board
To start the installation process using the Boards Managaer, follow these steps:
-
Install the current upstream Arduino IDE at the 1.8 level or later. The current version is at the arduino.cc website.
-
Start Arduino and open the Preferences window and enter the release link below into Additional Board Manager URLs field. You can add multiple URLs, separating them with commas.
https://raw.githubusercontent.com/PetteeMFG/Pettee_UWB_Package/main/package_petteeuwb_index.json -
Open Boards Manager from Tools > Board menu and install PetteeMFG Boards platform (and do not forget to select your PetteeMFG board from Tools > Board menu after installation).
-
Restart Arduino IDE.
In order to program the STM32F401RBT6 microcontroller on the Pettee UWB Board an ST-Link V2 needs to be used to connect your computer and the board. You must make the following connections between the ST-Link V2 and the Pettee UWB board in order for SWD JTAG programming or debugging to take place.
ST-Link V2 to Pettee UWB Board

3.3V -> 3.3V

IO ---> SWDIO (PA13)

CLK --> SWCLK (PA14)

RST --> RESET (NRST)

GND --> GND

