Third Assignment of the course Research_Track_1 , Robotics Engineering.
Professor. Carmine Recchiuto.
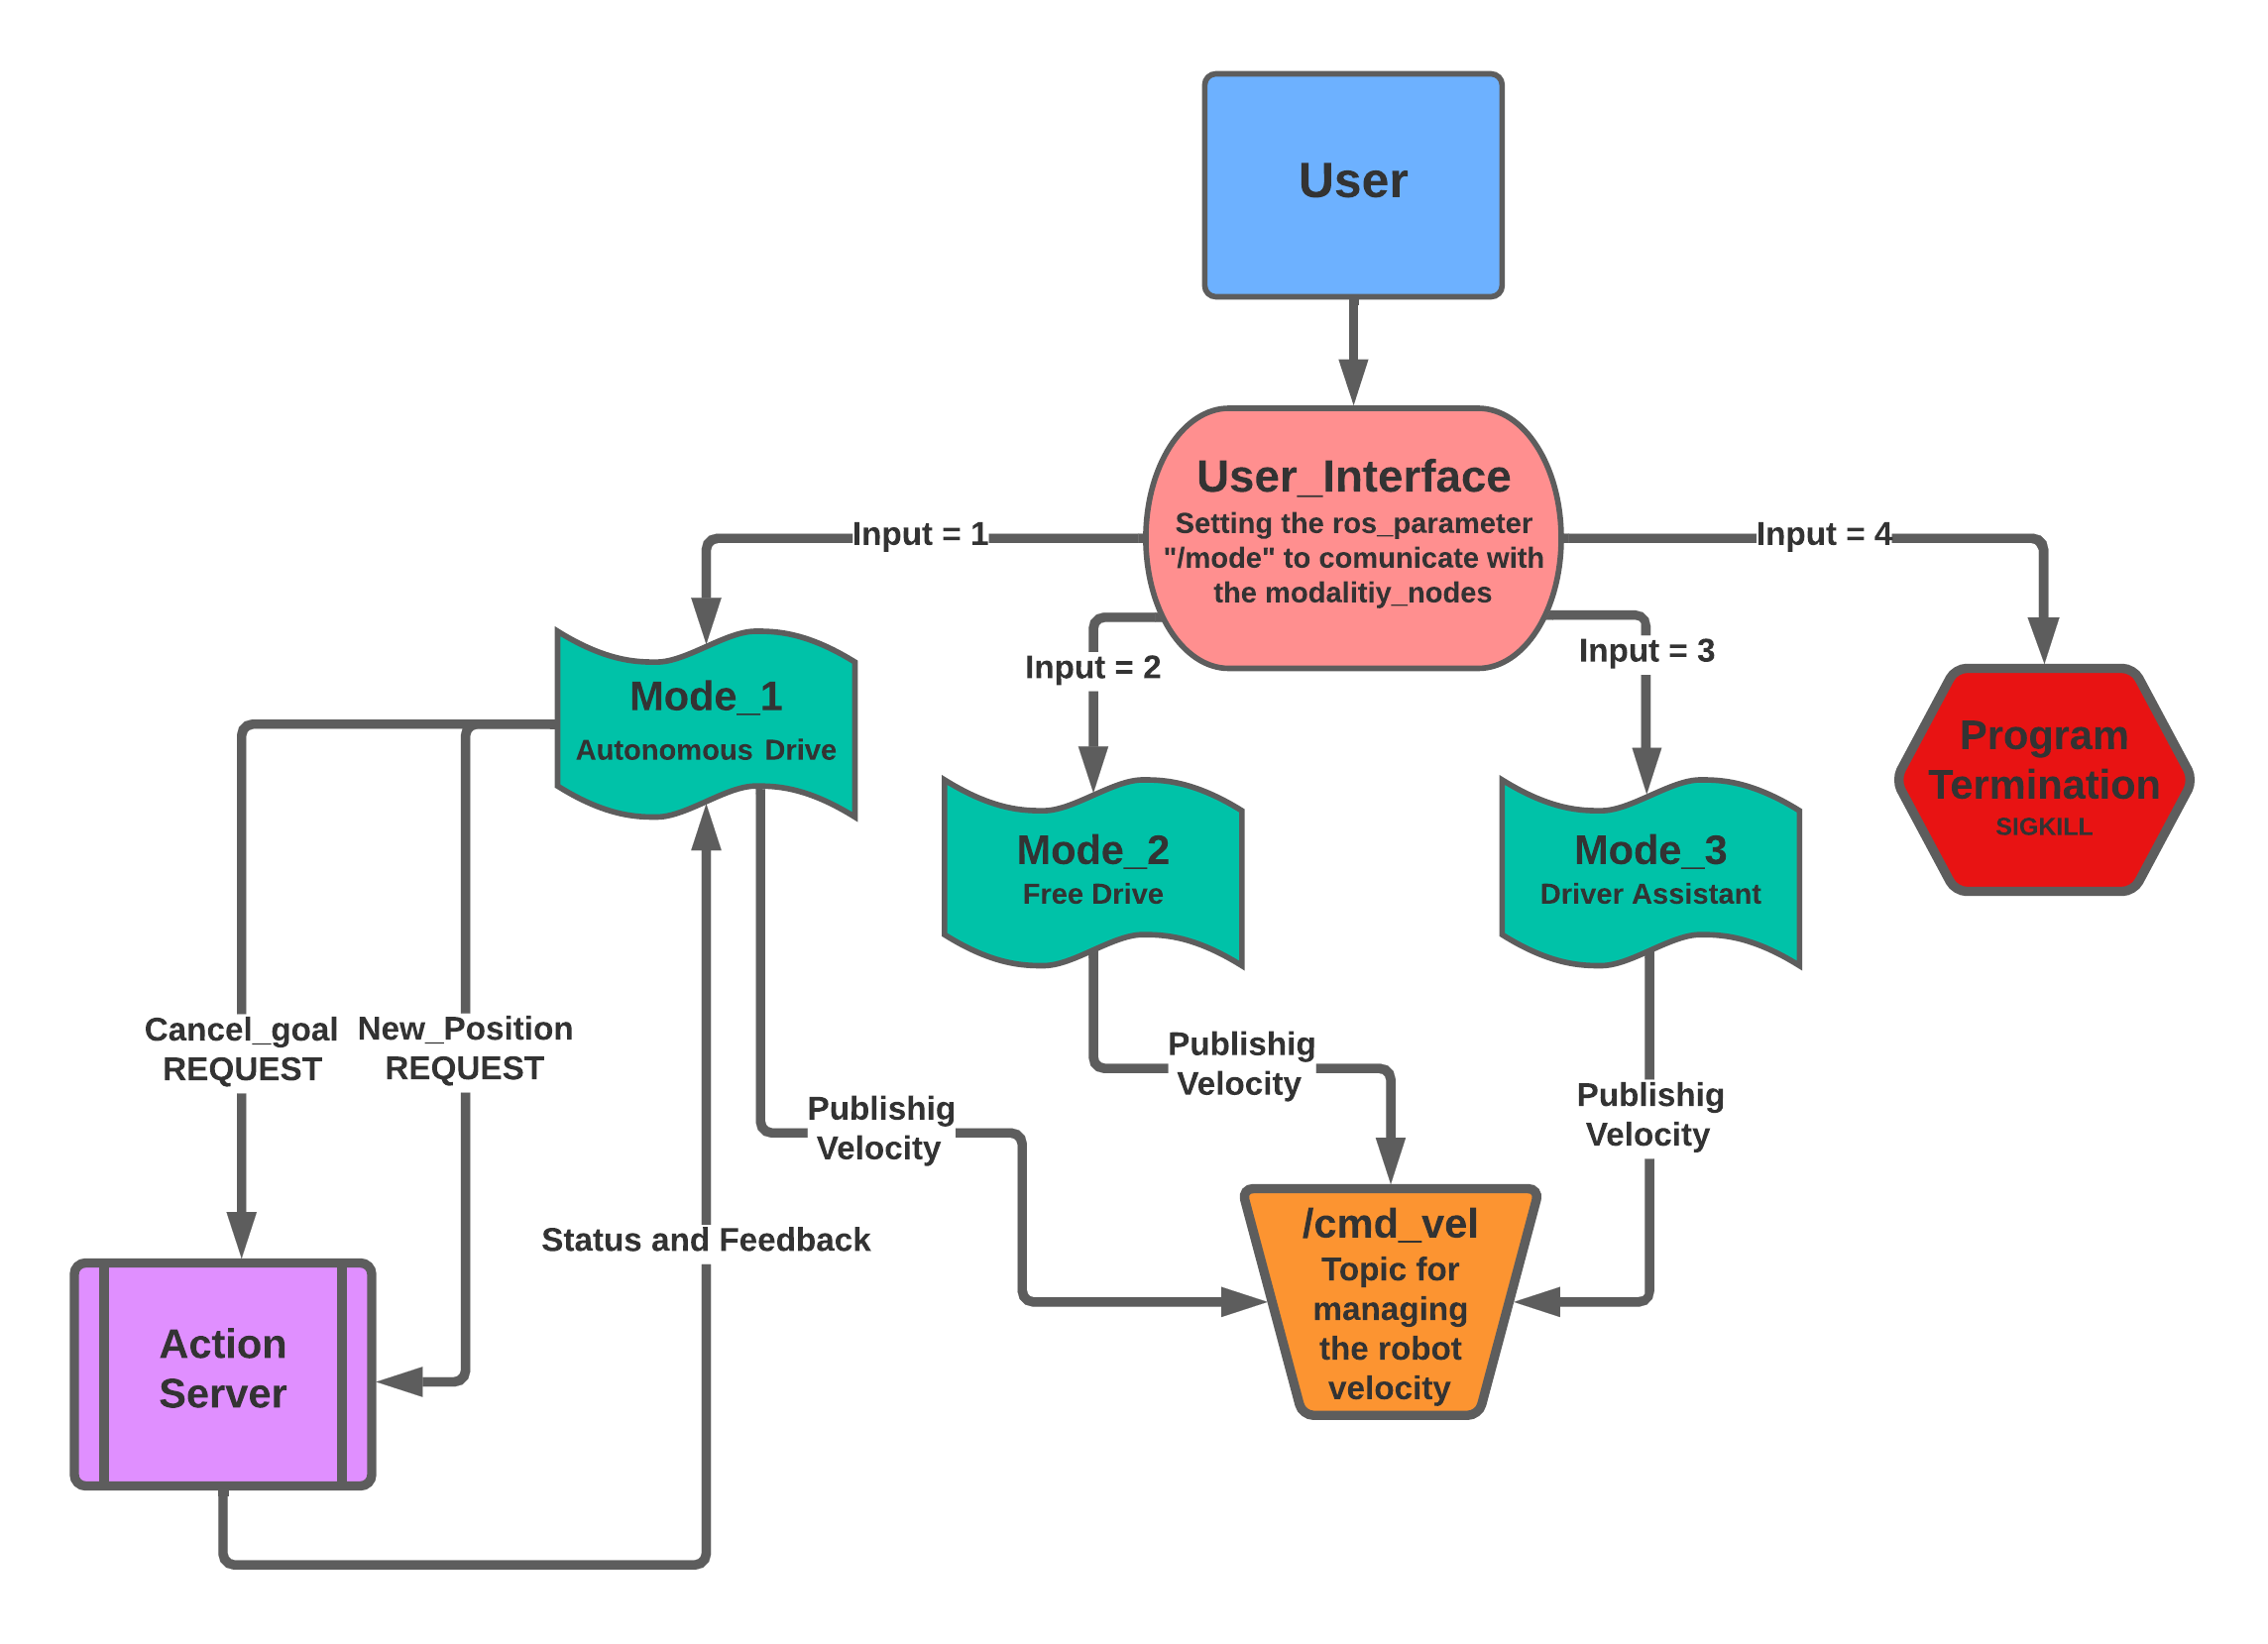
This is a ROS Robotics Simulator which use Gazebo and Rviz. The aim of this project was to implement three modality of movement that the user can select in order to let the robot exploring an unknown but limited map. The user can select the desired behaviour of the robot on a user-interface terminal window, the possible modalities are:
- 1. Autonomous Drive: The user can set a goal position and the robot will autonomously reach it__
- 2. Free Drive: The user can control the robot in the enviroment using its keyboard
- 3. Driver Assistant: The user can control the robot movement using its keayboard, but an algorithm of obstacle avoidance will prevent the robot to smash into walls

The implementation of this simulator is based on ROS (Robot-Operating-System), specifically the NOETIC version. In addition, the project makes use of some packages and tools that need to be installed before starting the project:
-
To Install:
$ git clone https://github.com/CarmineD8/slam_gmapping.git
-
ros navigation stack
To Install:
$ sudo apt-get install ros-<ros_distro>-navigation
-
xterm
To Install:
$ sudo apt-get install -y xterm
Once the user has all the needed packages, the simulation starts by running a .launch file called
run.launch
<launch>

	<include file="$(find final_assignment)/launch/launch_nodes.launch" />
	<include file="$(find final_assignment)/launch/simulation_gmapping.launch" />
	<include file="$(find final_assignment)/launch/move_base.launch" />
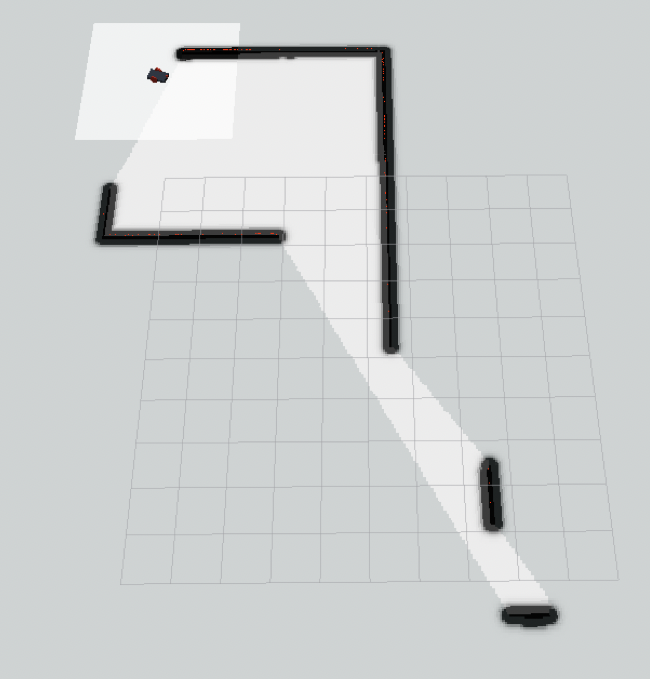
</launch>As soon as the simulator starts, Rviz (a 3D visualizer for the Robot Operating System (ROS) framework) and Gazebo (an open-source 3D Robotics simulator) create on the screen respectively: What the robot sees of the surrounding space thanks to its sensors The entire explorable environment
ROS create the environment described in the file house.world, stored into the world folder.
The world view given by the Gazebo simulation turns out to be:
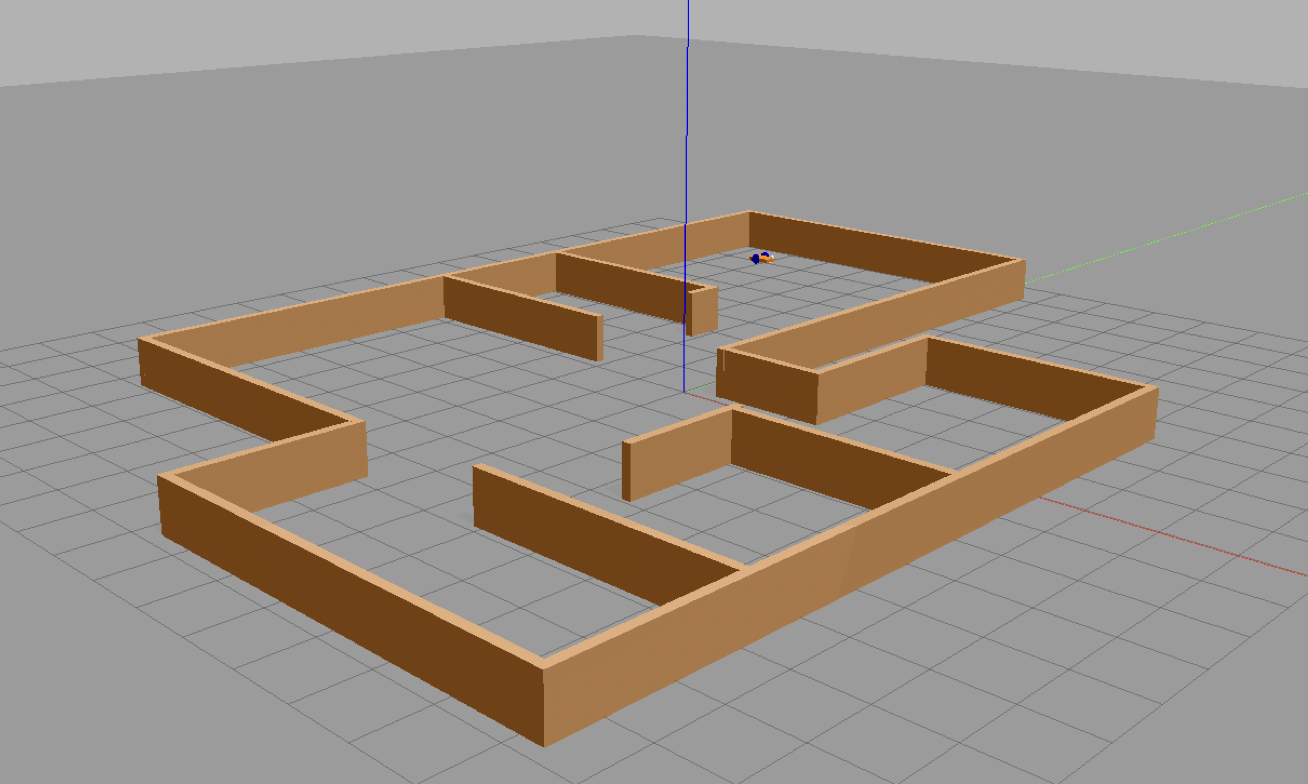
Not knowing all the boundaries of the map, the robot initially knows only the portion of the environment that its sensors allow it to perceive from its starting position.
As the robot moves its knowledge of the map increases. On Rviz the environment known to the robot is graphed and updated at each time instant.

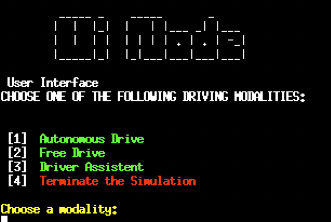
This is the main node and the first one spawned.
This script provides the user with a small graphic explaining how to select the movement modes of the robot. It also manages the user input by going to modify, if the command is correct, the ros parameters that allow the activation of the nodes set for each mode.
rospy.set_param('mode', mode_number)This mechanism is managed with a switch-case that makes use of standard Python dictionaries. The possible commands are the following:
- [1] - Reach autonomousely a user's desired position
- [2] - Free drive the robot with the keyboard
- [3] - Drive the robot with the keyboard with an active collision avoidance
- [4] - STOP the simulation
When the first modality is called the user will be able to set the desired goal position and to cancel it during the reaching by pressing [0] .
The Desired goal position is set by the user in the UI by modifying two ROS_Parameters.
rospy.set_param('des_pos_x', desired_x_position)
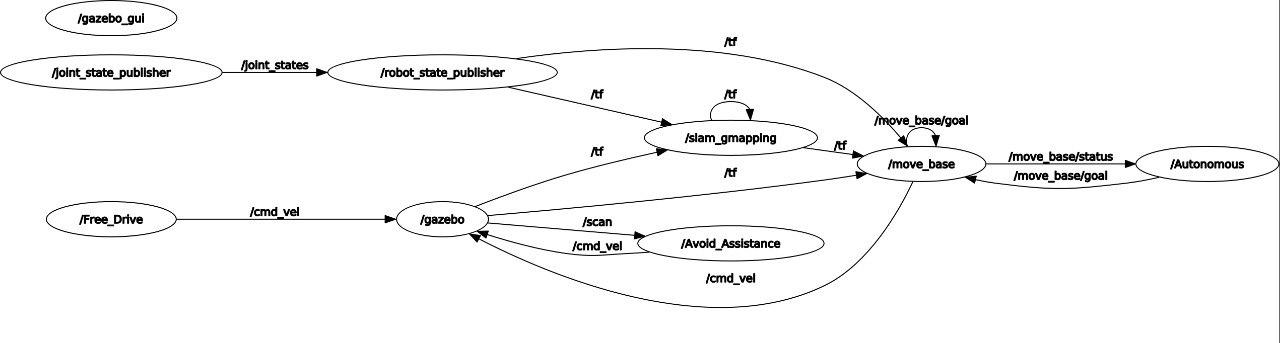
rospy.set_param('des_pos_y', desired_y_position)The Mode_1 node sends the goal-position to the ActionServer /move_base, the client receives the feedbacks which is print on screen in the current xterm window. Moreover the action sends the the status which is: managed using python dictionaries and print, the main status are [1] the goal achievement and [2] the goal cancelation . Then the move_base node evaluate the shortest path via the Dijkstra's path algorithm. The robot starts moving toward the goal beacause the move_base node publishes the right velocity and orientation on the cmd_vel topic.
If the user decide to change modality from the UI, the goal is correctly cancelled by sending the proper cancelation message to the ActionServer and this Node turns to an Idle state.
The Second modality is just the teleop_twist_keyboard node adapted on this package by checking the status of the ROS parameter "/mode" which represent the current modality.
The user can control the robot movement by pressing the following keys:
| Turn left | Stop turn | Turn right | |
|---|---|---|---|
| Go forward | u |
i |
o |
| Stop | j |
k |
l |
| Go backward | m |
, |
. |
The user can change the robot velocity of 10% by pressing the following keys:
| Linear and Angular | Linear only | Angular only | |
|---|---|---|---|
| Increase | q |
w |
e |
| Reset | a |
s |
d |
| Decrease | z |
x |
c |
If the user decide to change modality from the UI, The Free Drive Node turns to an Idle state.
The Driver Assistant Node starts from the Free Drive Node but is able to disable the commands that, if pressed, would cause the robot to collide into the walls of the map.
The robot is equipped with a laser scanner. The scanner publishes a message of type sensor_msgs/LaserScan.msg on the /scan which is read in a CallBack function by the Node Driver Assistant. Here the algorithm checks weather there's an obstacle or not. The user will be able to select only the direction that wouldn't bring the robot to the walls, this part has been implemented by popping out from a python dictionary the defective commands.
The User can control the robot movement by pressing the following keys:
| Turn left | ------ | Turn right | |
|---|---|---|---|
| Go forward | - |
i |
- |
| ------ | j |
- |
l |
| Go backward | - |
k |
- |
The change of velocity is still implemented in this modality and uses the same set of keys.
If the user decide to change modality from the UI, The Driver Assistant Node turns to an Idle state.
I would like in the future, to implement motion algorithm based on the total knowledge of the map that the robot acquires with these modes. I think it is possible to implement the A* (A-star) path planning algorithm, based on finding the fastest Belmand-Ford path to a point , considering the walls of the room as obstacles. This set of implementations would make the movement of the robot in the space more efficient and could be an opportunity to confront myself with such types of algorithms.