CodePen is a popular online code editor that allows developers to quickly prototype and share their code. In our courses, Codepen is one of the options teachers can select for students to code in. In order for participants to be able to code, you must create an account and set up a new environment for each "lesson".
The first step is to create an account on CodePen. Go to https://codepen.io/ and click on the Sign Up button in the top right corner. You can sign up using your email address, or by linking your GitHub or Google account.

Creating an account will allow you to save any work. An account is not required and can by bypassed by clicking Start Coding instead.
Once you have logged in, you will be taken to your dashboard. To create a new pen, click on the "New Pen" button in the top right corner.
The editor interface is where you will write your code. It is divided into three main sections:
- HTML: This is where you will write the markup for web pages.
- CSS: This is where you will write the styling for web pages.
- JavaScript: This is where students learn to write code that makes web pages interactive. (Not used in this lesson)
You can switch the layout using the layout button in the editor.
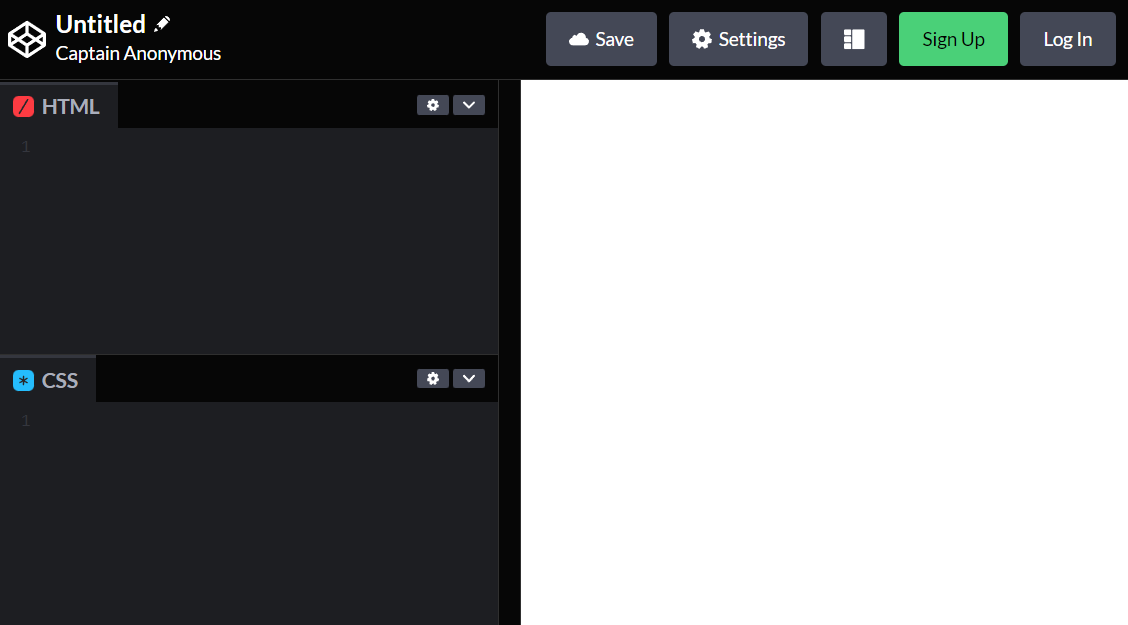
The preview area is located to the right of the editor. It displays the output of your code. You can switch between the live preview and the debug mode by clicking the button at the top right corner of the preview area.
Once you have finished writing your code, if you've created an account, you can save your pen by clicking the "Save" button in the top right corner. You can also share your pen with others by clicking the "Share" button, which will generate a link that you can send to others.
We will use Codepen to create our very own webpage. To do this we will write code in HTML and CSS. This is a short exercise, so we won't be teaching anything in depth. Follow along with the steps and try to get your webpage up.
HTML (Hypertext Markup Language) is the standard markup language used to create the structure and content of a web page. It is used to create elements such as headings, paragraphs, lists, images, and links on a page.
CSS (Cascading Style Sheets) is used to control the layout and presentation of the elements on a web page. It is used to control things like colors, fonts, spacing, and overall layout of a page.
In other words, HTML determines what exists is on a webpage, and CSS determines how it looks.
Here is an example of the basic syntax of HTML:
<h1>Welcome to my website!</h1>
<p>This is my first website.</p>
In this example, we define the content of the page using HTML Tags which tell the page what kind of content is in between them.

-
<h1></h1>: Describes a heading of level 1 (the largest) -
<p></p>: Describes a paragraph.
Note that the second tags always have a slash / this tells the page that it is done describing the content.
Here is an example of the basic syntax of CSS
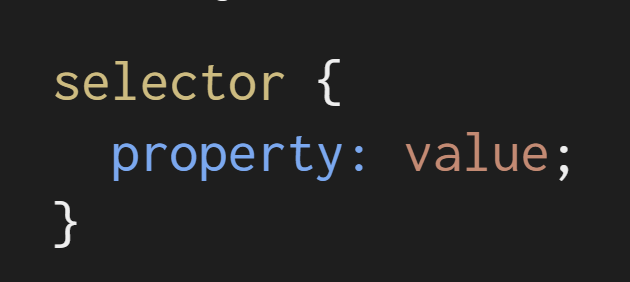
selector: Selects the html elements we want to set the appearance of.property: The aspect of the element we want to set.value: What we are setting the property to.
Let's say we want to make our HTML heading from earlier red and larger. We have to select h1, and set the color property to the value red. Then in the same block we can set the font-size property to 20px.
h1 {
color: red;
font-size: 20px;
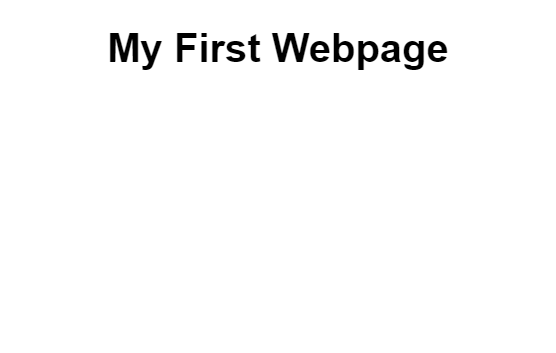
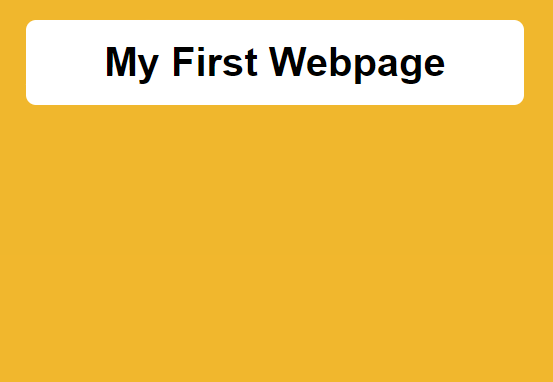
}Start the project from a clean slate. The first thing we're going to do is add a heading to our page. You can title your page anything you want.
<h1>My First Webpage</h1>We creating a heading by writing our own title text in between opening <h1> and closing </h1> tags.
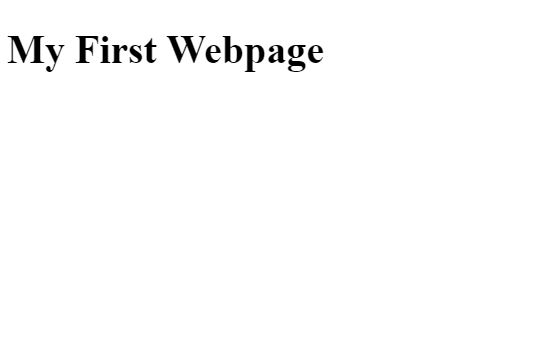
Then we can use CSS to change how it looks.
h1 {
 font-family: sans-serif;
 text-align: center;
}
In your page, you can choose different values. Here are some you can try out:
For font-family choose from:
serifsans-serifmonospacecursivefantasyArialHelveticaTimes
For text-align choose from:
centerleftright
Colors in CSS are represented in many ways. The easiest way to describe a color is using a color picker. Google has a color picker built in if you search "color picker".
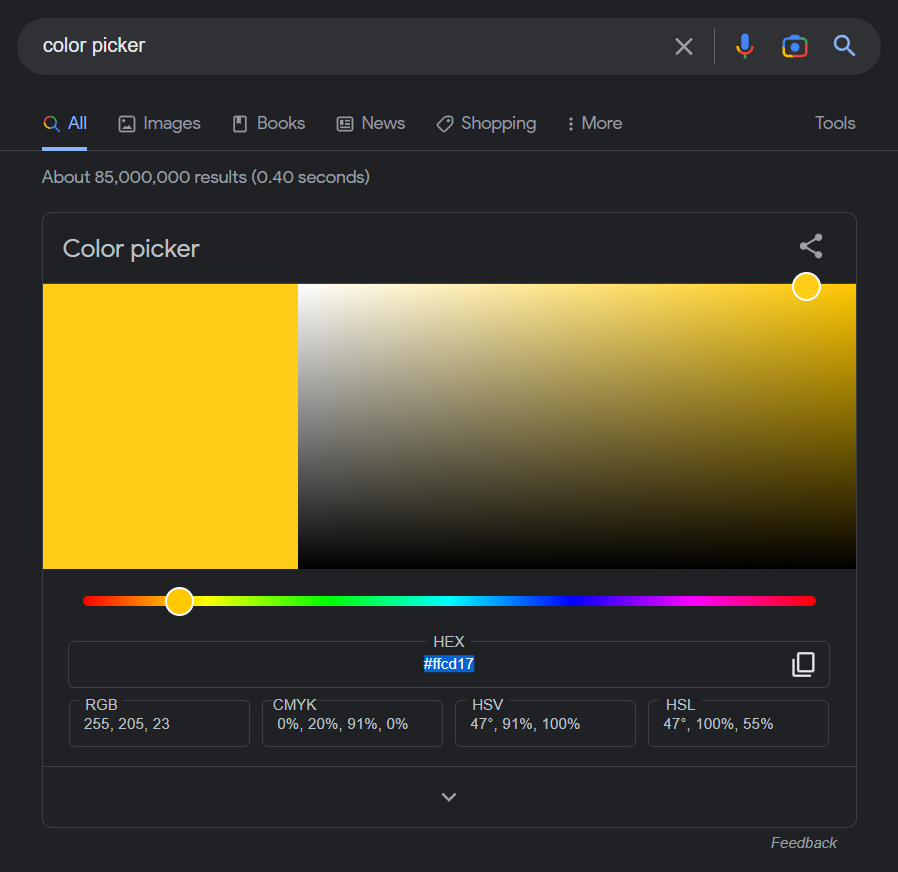
We are going to select a background for our page, use the color picker to find a color you like and copy the hex code e.g. #ffcd17. Now we can use it in our CSS to change the background of our website.
To access the background, we can use the body selector and set its background-color to the color you picked.
body {
  background-color: #f2b611;
}

h1 {
 font-family: sans-serif;
 text-align: center;
}
When you write text, it's important to have a high contrast with the background so its easy to read. Since our text is black, we can make the heading pop by giving it a white background and making it look like its in a banner. We can do this by setting four properties. Try adding them one at a time and see what they do.
body {
  background-color: #f2b611;
}

h1 {
 font-family: sans-serif;
 text-align: center;

 background-color: white;
 padding: 16px;
 margin: 16px;
 border-radius: 8px;
}
A site with only text can be a little boring. By adding media like images we can add variety and engagement to the page. Find an image on the web and copy the link to the url. Try to find an image that fits in with the background color you chose.
Be sure that you don't just copy the link to the website. To do this, find the image you want to use and click "Copy Image Address".
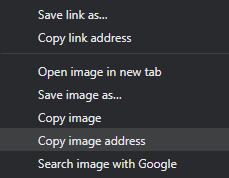
Once you have it in your clipboard, you can paste it into the src attribute of an img tag in your html.
<h1>My First Webpage</h1>
<img src="https://paste-your-image-link-here.jpg" />
Your image may be way too large for the page or much too small. But we can fix that by adding this block to your CSS.
img {
  width: 300px;
  height: 300px;

  display: block;
  margin: auto;

  padding: 16px;
  background-color: white;
}
The CSS above does three things.
- Use
widthandheightproperties to set the size of the image. (Feel free to tweak these numbers and see what happens). - Use
display: block;andmargin: autoto center the image on the page. (This is covered in greater detail in the full course). - Use
paddingandbackground-colorproperties to add a frame to the image.

In only a few minutes, you've used two coding languages to create your first webpage. Here is an example of what your final code could look like.
<h1>My First Webpage</h1>
<img src="https://user-images.githubusercontent.com/13992684/214703816-71331bdc-ca1f-4723-a66d-c2219dc27928.png" />body {
background-color: #E3A81D;
}
h1 {
font-family: sans-serif;
text-align: center;
background-color: white;
padding: 16px;
margin: 16px;
border-radius: 8px;
}
img {
width: 300px;
height: 300px;
display: block;
margin: auto;
padding: 16px;
background-color: white;
}