This is a small program I wrote while learning some of the basics of programming an AVR-based chip using Rust. The seven segment LED shows a number betreen 0 and 9. Upon pressing the button an interrupt is fired that increments the shown number. The counter is wrapping at 9, so that it continues at 0. I made an effort to make it overcomplicated by storing the displayed digit in the non-volatile, internal EEPROM of the ATmega328P. Resetting the mcu thus does not reset the counter itself!
If you're interested in learning the basics of AVR and Rust, check out the AWESOME list about where to start.
The setup for this project consists of
-
an ATmega328P (or ATmega328, I guess)
I'm using an Arduino, but this should work without one. Just lookup the PIN mapping from the mcu to the Arduino pins and change the circuit accordingly.
-
a seven segment LED (or seven leds, if that's what you have on hand)
-
a pushbutton
-
one capacitor, I think mine is 1nF
-
some (8) resistors, 220Ω should do
I also used a 1kΩ resistor combined with the capacitor to create a simple debouncer. I think it was mainly luck that mine worked out of the box. There are a number of different techniques for creating the same effect.
-
some wires/jumpers and
-
a breadboard
Here is an image showing the wiring. But feel free to use the schematic below, if you can't
make out the connections.
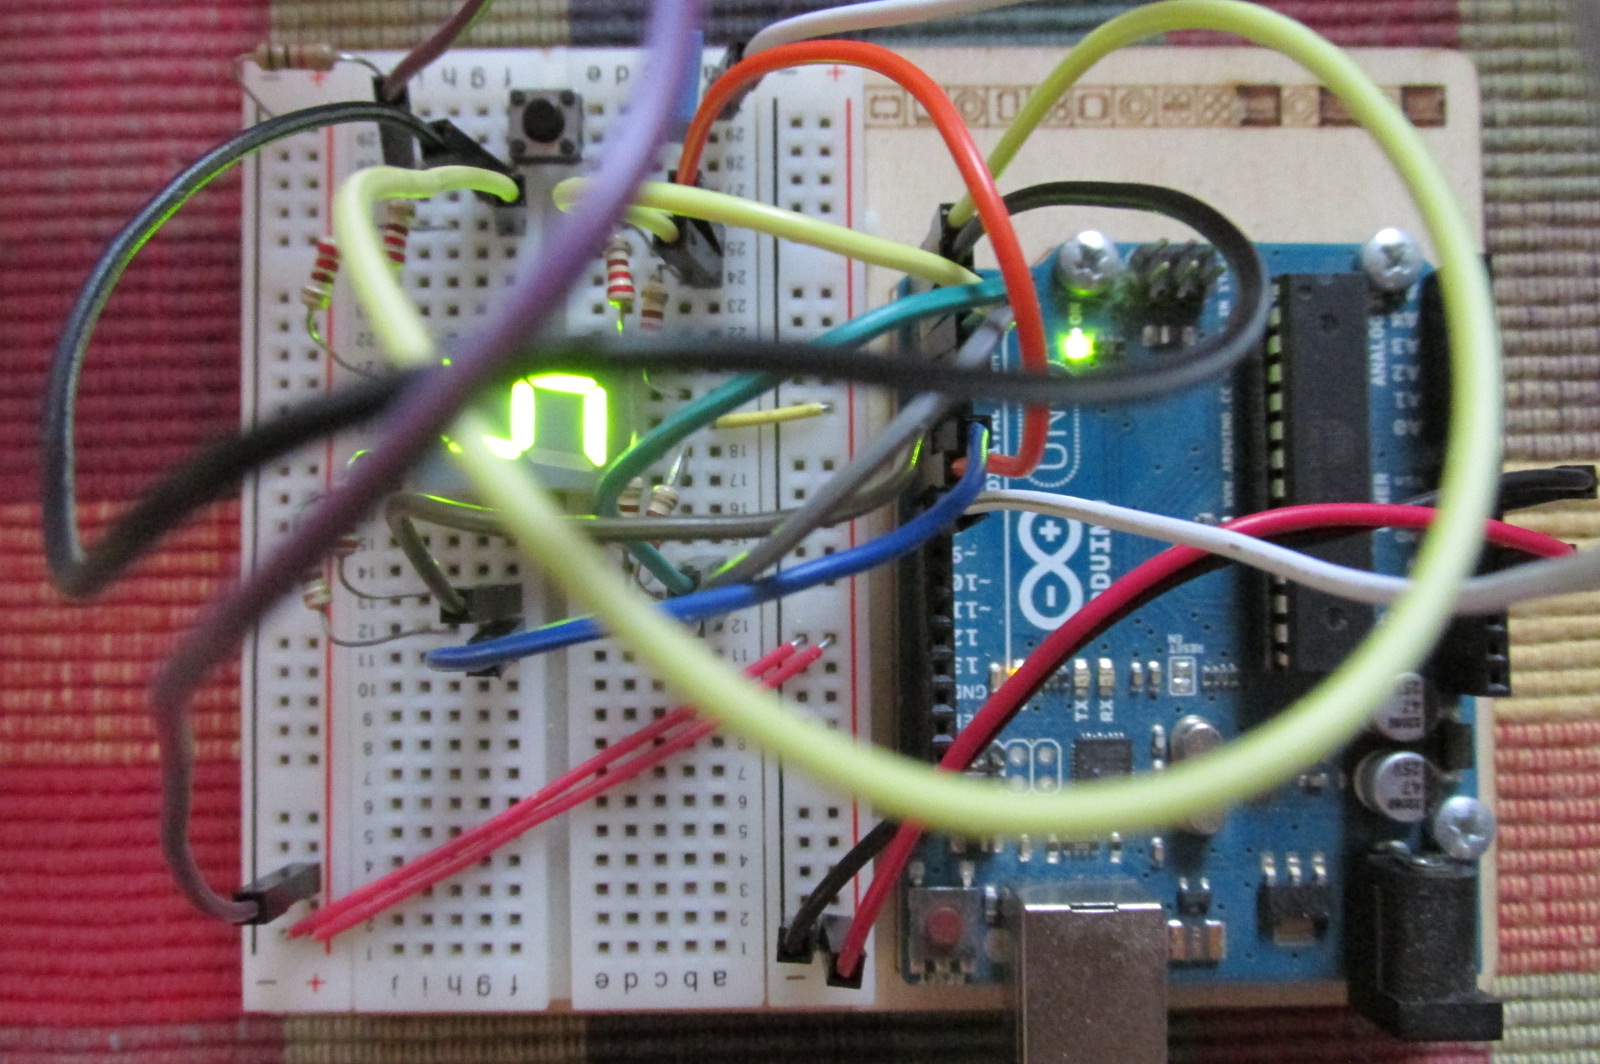
Note that the seven segment LED part in Fritzing seems broken. The pins on the breadboard do not match up with those shown in this schematic.
If you're having trouble mapping your segments correctly, have a look at the Segments
struct. It's a mapping from each pin of the port to the name of the segment.

- A recent version of the nightly Rust compiler. Anything including or greater than rustc 1.47.0-nightly (0820e54a8 2020-07-23) can be used.
- The rust-src rustup component -
$ rustup component add rust-src - AVR-GCC on the system for linking
To compile this program for the ATmega328p you can simply run make build.
I'm using avrdude to upload the compiled ELF-file, simply run make.
If your serial port differs from /dev/ttyACM0 overwrite it like this:
$ make PORT=/dev/yourportI tried to do some heavy commenting, to enable everyone to learn from this example. Now, there are some really ugly parts and some of the unsafe code could, and might, be rewritten in a safer way, but if you want to have a look, follow the white rabbit 🐇
If your having trouble with the way I explained something or found a bug, feel free to contact me or open an issue!
License: MIT