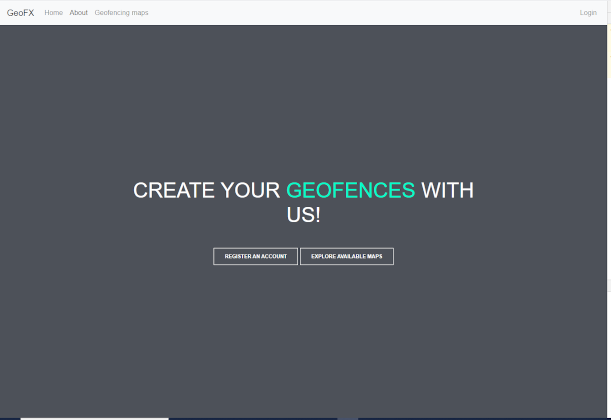
Brought to you by GeofencingX
An application which lets user create and publish their own context-dependent Geofencing web maps. Based on Django and Geoserver.
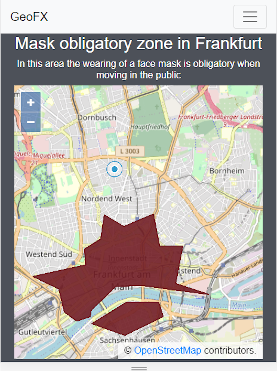
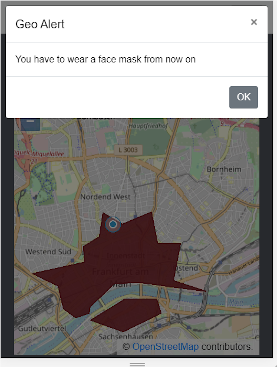
Note: The displayed area in Frankfurt above is just made-up and does not reflect any official restrictions. It serves only as an example use case.
Tested on OSGeoLive (Lubuntu) based on Ubuntu 18.04.5 (OSGeo-Live).
- sudo access to a terminal
- Python 3.X
- a running Postgres Database
- Geoserver instance running at a local tomcat server
If tomcat is not yet installed, follow the instructions to do it, for example from here. Make sure to follow the instructions until the last step so that you create a user/role which allows you to access the tomcat manager gui. When your tomcat is up and running, download the latest geoserver war from geoserver.org. Make sure to downlad the WAR archive. Unzip the archive, then copy the .war file to your tomcat webapps directory, e.g.:
sudo cp geoserver.war /opt/tomcat/latest/webapps/
# give permissions to the tomcat user:
sudo chown tomcat:tomcat  /opt/tomcat/latest/webapps/geoserver.war
Finally, access the tomcat manager gui at localhost:8080/manager (or the port where you are running it) with your username and password, and start the geoserver application via the gui.
sudo apt-get install python3-venv
# Create a virtual environment for the Python application
python3 -m venv env
# Activate the virtual environment
source env/bin/activate
# Install dependencies
pip install Django psycopg2-binary djangorestframework requests
# Create a database for the application
# Enter postgres console to create a database and user
psql
CREATE DATABASE geofx;
-- Create user (make sure to set your own password)
CREATE USER geofx_user WITH ENCRYPTED PASSWORD '<your_password>';
GRANT ALL PRIVILEGES ON DATABASE geofx to geofx_user;
-- Connect to the database
\c geofx ;
-- Create the postgis extension
CREATE EXTENSION postgis ;
-- Exit pqsl
\qNow copy the settings_config.py.template
cp src/geofx/geofx/settings_config.py.template src/geofx/geofx/settings_config.py
# Afterwards, configure the usernames/passwords in the settings_config.py
# Now we setup nginx so that both the django app and geoserver
# will be proxied via localhost:80. This assumes that your tomcat/geoserver
# instance is up and running on port 8080 ! Change the host and port numbers if necessary.
# Also make sure that your port 80 is not blocked by another application.
sudo apt-get install nginx
sudo rm /etc/nginx/sites-enabled/default
sudo rm /etc/nginx/sites-available/default
# Copy the nginx configuration file (make sure you execute this
# from the root folder of this repository)
sudo cp config/geofx /etc/nginx/sites-available/geofx
# Symlink
sudo ln -s /etc/nginx/sites-available/geofx /etc/nginx/sites-enabled/geofx
# Restart nginx so that the changes will be applied
sudo service nginx restartAt the moment the following things must be installed manually as well. ToDo: Automatize this In the local geoserver setup:
- create a workspace 'geofx'
- create a store 'geofx', which belongs to that workspace. Configure the local PostGIS connection as above
# Activate the virtual environment (if not yet activated)
source env/bin/activate
cd src/geofx
# If this is the first time running after cloning the repository, you need to do
python manage.py migrate
# Then everytime for running:
python manage.py runserverWhen any changes to the model have been made, this must be updated in django like this:
cd src/geofx
python manage.py makemigrations
python manage.py migrate
# (this has to be repeated anytime the model is changed)To be installed for running the application:
- Django (BSD license)
- NGINX (BSD license)
- Apache Tomcat (Apache license 2.0)
- Geoserver (GPL 2 license)
Included in this repo:
- Bootstrap (MIT license)
- jQuery (MIT license)
- OpenLayers (BSD license)
An optional feature is to enable CORS so that the content of the GeoFX application can be included on other websites. This must be configured via filters in Tomcat. The necessary information is given in the Tomcat documentation