- Overview
- Architecture Overview
- Technologies
- Setup
- LoadGenerator Setup
- MetricsAnalyser Setup
- MetricsAnalyser Results
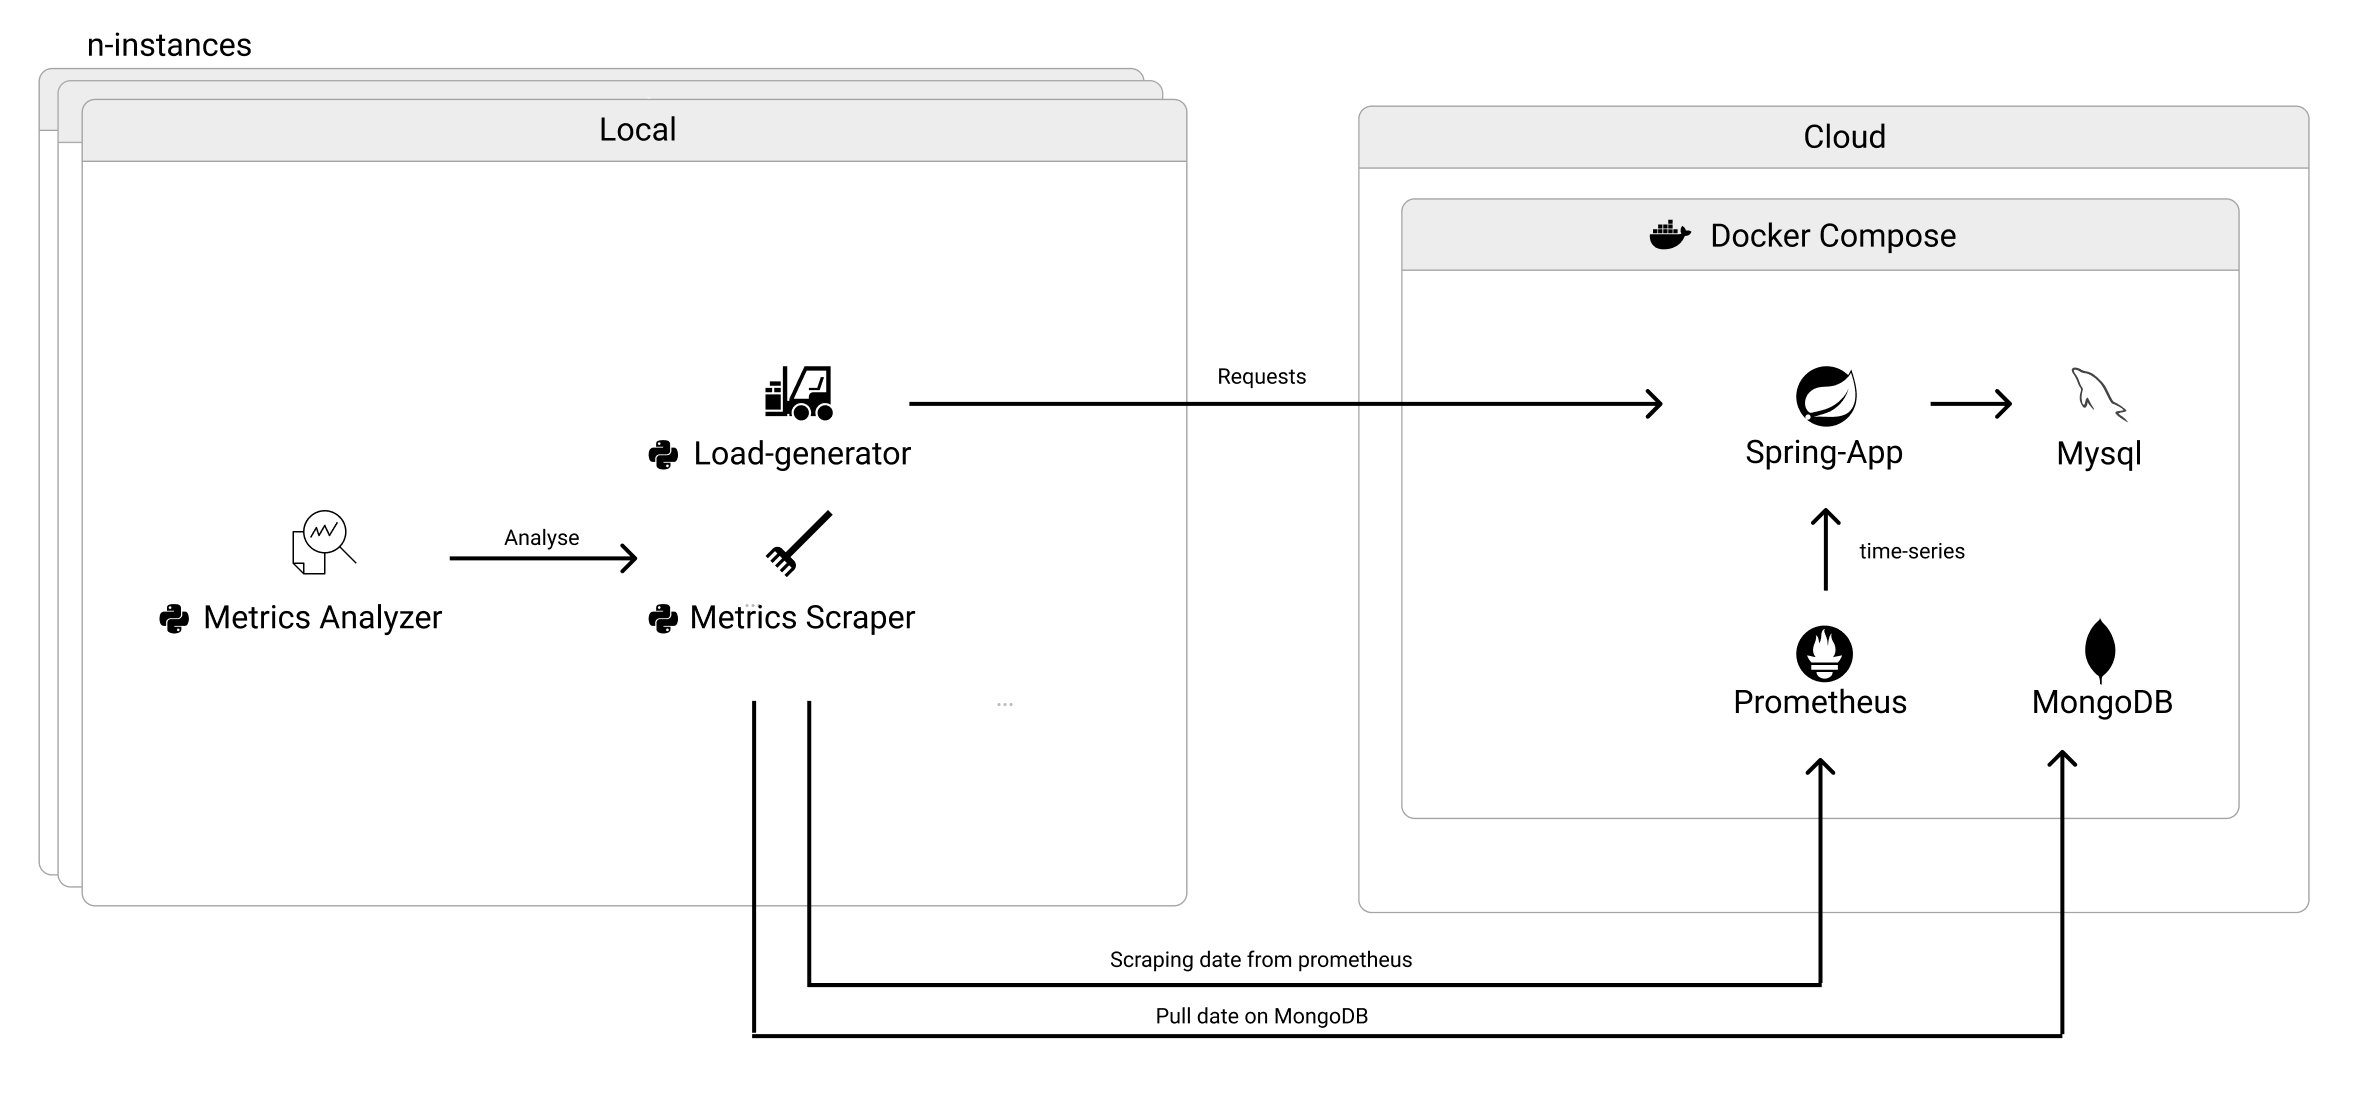
DPMP is a master thesis work consisting in a sensitive analysis for performance optimization. Here you can find the architecture of the project:
Project is created with:
- JDK: 17.0.1
- Spring-Framework: 2.6.2
- Maven: 3.6.3
- Docker Engine: 20.10.8
- Python: 3.8
- Docker Compose: 1.29.2
- Docker Desktop: 4.1.1
- MongoDB: 5.0.10
- Mysql: 8.0
- Prometheus:
To run this project, you need to install Docker and setup these containers:
- MongoDB
- Mysql
- Prometheus
$ docker run --name mysqldb -e MYSQL_ROOT_PASSWORD="YOUR-ROOT-PSW" -e MYSQL_DATABASE="DB-NAME" -e MYSQL_USER="USER-NAME" MYSQL_PASSWORD="USER-PSW" -p 3307:3307 -it mysql:8.0
$ docker exec -it mysqldb  /bin/bash
$ mysql -u root -p
$ grant all on DB-NAME.* to 'USER-NAME'@'%'; -- Gives all privileges to the new user on the newly created database
$ docker run --name mymongo -d mongo
$ docker run \
$    -p 9090:9090 \
$    -v /path/to/prometheus.yml:/etc/prometheus/prometheus.yml \
$    prom/prometheus
NOTE: You can find an example of prometheus.yml config file in the root folder of the repository
Edit Docker compose file, adding in mysql config block this lines:
 mysqldb:
    container_name: mysqldb
    image: mysql:8.0
    ports:
      - 3307:3306
    environment:
      - MYSQL_ROOT_PASSWORD=<YOUR-ROOT-PSW>
      - MYSQL_DATABASE=<DB-NAME>
      - MYSQL_USER=<USER-NAME>
      - MYSQL_PASSWORD=<USER-PSW>
Let's open a terminal and change your directory in the root project folder. Inside DPMP project you have already a Dockerfile configured. You need to only execute this line:
$ docker build -t DPMP .
Now you have builded DPMP image and you are ready to execute it with docker compose. Let's execute this line in root project folder:
$ docker compose up
The LoadGenerator make N http requests to one ore more endpoints exposed by the microservice. If you open LoadGenerato.py file, you can configure the amount of requests you can to the endpoint Before you run the LoadGenerator you can find in .py folder, let's wait docker compose finish the deploying. When docker compose is started, you can run the load generator either with terminal or with an IDE.
Advice: I suggest downloading Pycharm, so you can downlaod and import all the libraries listed in the .py file
After that, you can see all date saved in mongoDB.
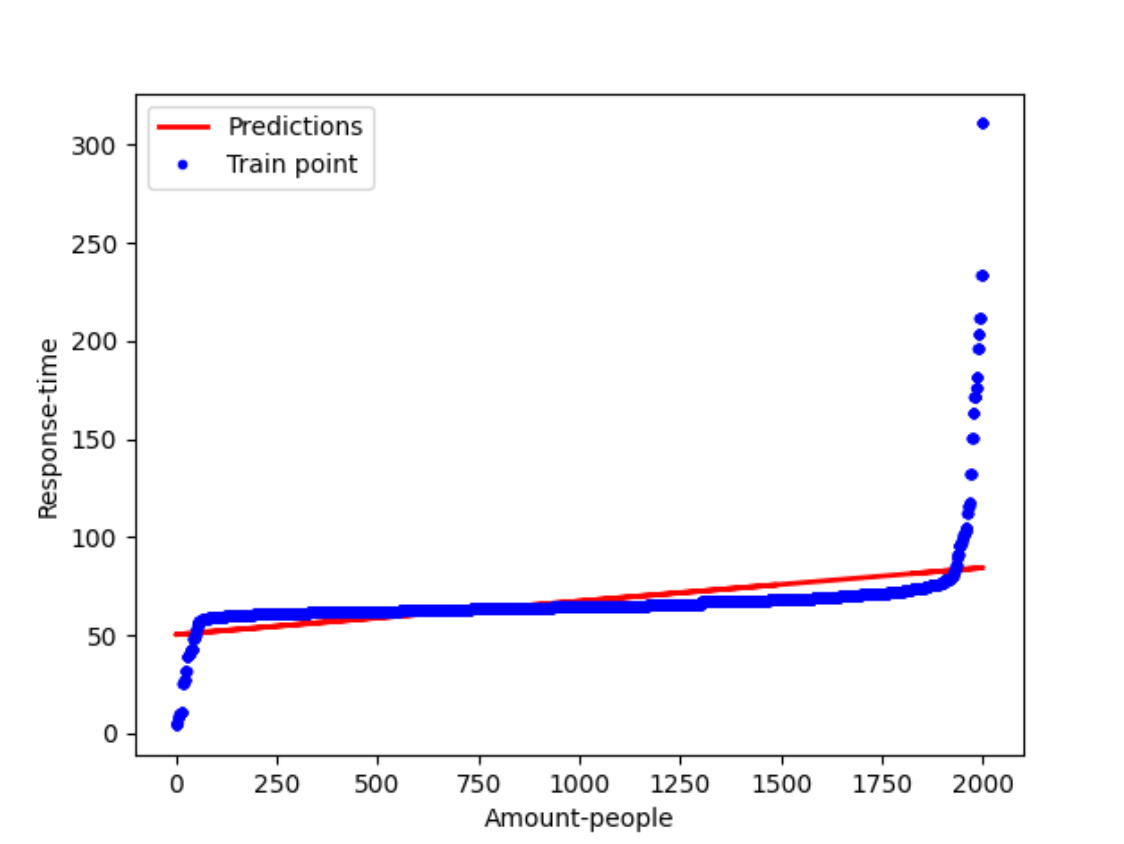
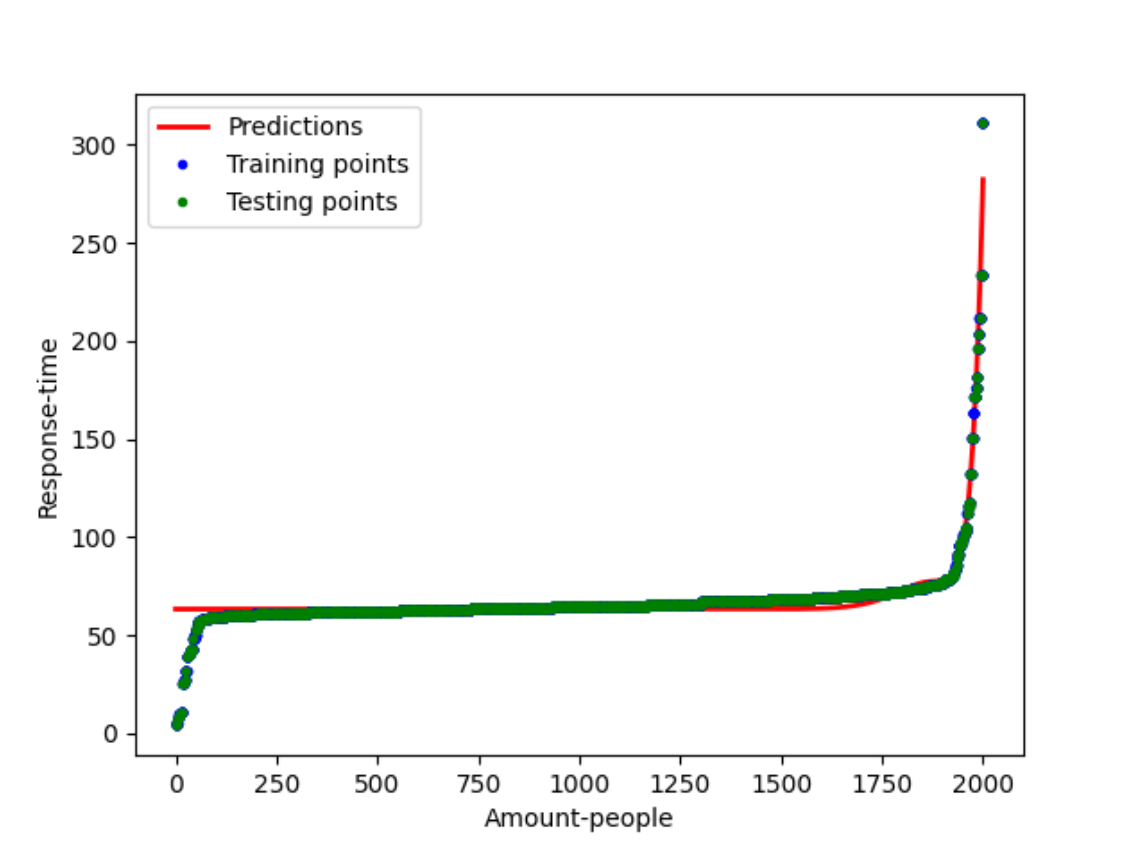
When the LoadGenerator concludes all the requests, we can plot MetricsAnalyser results. The MetricsAnalyser shows two different plot, hightlighting three curves:
- Train curve: a set of point get from train dataset
- Test curve: a set of point get from test dataset
- Predicted curve: in the first plot is shown a predicted curved obtained from a linear regression, while the second curve is obtainer from a polynomial regression
Here you can find some MetricsAnalyser plots: