


Features: Temporal Data, (Reverse) Geocoding, Events, Weather, Holidays, Analytics
This library utilizes Breinify's API to provide tasks like PushNotifications, geocoding, reverse geocoding, weather and events look up, holidays determination through the API's endpoints, i.e., /activity and /temporaldata. Each endpoint provides different features, which are explained in the following paragraphs. In addition, this documentation gives detailed examples for each of the features available for the different endpoints.
PushNotifications: The goal of utilizing Breinify’s Time-Driven push notifications is to send highly dynamic & individualized engagements to single app-users (customer) rather than the everyone in a traditional segments. These push notifications are triggered due to user behavior and a combination of hyper-relevant weather, events, and holidays.
Activity Endpoint: The endpoint is used to understand the usage-patterns and the behavior of a user using, e.g., an application, a mobile app, or a web-browser. The endpoint offers analytics and insights through Breinify's dashboard.
TemporalData Endpoint: The endpoint offers features to resolve temporal information like a timestamp, a location (latitude and longitude or free-text), or an IP-address, to temporal information (e.g., timezone, epoch, formatted dates, day-name), holidays at the specified time and location, city, zip-code, neighborhood, country, or county of the location, events at the specified time and location (e.g., description, size, type), weather at the specified time and location (e.g., description, temperature).
First of all, you need a valid API-key, which you can get for free at https://www.breinify.com. In the examples, we assume you have the following api-key:
938D-3120-64DD-413F-BB55-6573-90CE-473A
It is recommended to use signed messages when utilizing the iOS library. A signed messages ensures, that the request is authorized. To activate signed message ensure that Verification Signature is enabled for your key (see Breinify's API Docs for further information). In this documentation we assume that the following secret is attached to the API key and used to sign a message.
utakxp7sm6weo5gvk7cytw==
- iOS 9.0+
- Xcode 8.1+
- AppCode 2016.3+
- Swift 3.0+
Please follow this link if you're new to Cocoapods and need some information how to setup the environment.
As an alternative Carthage could also be used. Please follow this link for further information.
Add the following statement in your Swift file:
import BreinifyApiWhenever the library is used, it needs to be configured, i.e., the configuration defines which API key and which secret
(if signed messages are enabled, i.e., Verification Signature is checked) to use.
Breinify.setConfig("938D-3120-64DD-413F-BB55-6573-90CE-473A",
secret: "utakxp7sm6weo5gvk7cytw==")Whenever the library is not used anymore, it is recommended to clean-up and release the resources held. To do so, the Breinify.shutdown()
method is used. A typical framework may look like that:
// whenever the application utilizing the library is initialized
Breinify.setConfig("938D-3120-64DD-413F-BB55-6573-90CE-473A",
           secret: "utakxp7sm6weo5gvk7cytw==")

// whenever the application utilizing the library is destroyed/released
Breinify.shutdown()The /activity endpoint is used to track the usage of, e.g., an application, an app, or a web-site. There are several libraries available to be used for different system (e.g., Node.js, Android, Java, JavaScript, Ruby, PHP, Python).
The example shows, how to send a login activity, reading the data from an request. In general, activities are added to the interesting measure points within your applications process (e.g., login, addToCart, readArticle). The endpoint offers analytics and insights through Breinify's dashboard.
// create a user you're interested in
let breinUser = BreinUser(firstName: "Fred", lastName: "Firestone")

// invoke activity call
do {
    try Breinify.activity(breinUser, activityType: "login")
  } catch {
    print("Error is: \(error)")
}Instead of sending an activity utilizing the Breinify.activity(...) method, it is also possible to create an instance of a BreinActivity and pass this later on to the Breinify.activity(...) method.
// create a user you're interested in
let breinUser = BreinUser(firstName: "Fred", lastName: "Firestone")

// create activity object and collect data
let breinActivity = BreinActivity(user: breinUser)
            .setActivityType("readArticle")
            .setDescription("A Homebody President Sits Out His Honeymoon Period")

// invoke activity call later
do {
     try Breinify.activity(breinActivity)
   } catch {
     print("Error is: \(error)")
} The /temporalData endpoint is used to transform your temporal data into temporal information, i.e., enrich your temporal data with information like
current weather, upcoming holidays, regional and global events, and time-zones, as well as geocoding and reverse geocoding.
Sometimes it is necessary to get some more information about the user of an application, e.g., to increase usability and enhance the user experience,
to handle time-dependent data correctly, to add geo-based services, or increase quality of service. The client's information can be retrieved easily
by calling the /temporaldata endpoint utilizing the Breinify.temporalData(...) method or by executing a BreinTemporalData instance, i.e.,:
do {
   try Breinify.temporalData({
      // success
      (result: BreinResult) -> Void in

      if let holiday = result.get("holidays") {
         print("Holiday is: \(holiday)")
      }
      if let weather = result.get("weather") {
         print("Weather is: \(weather)")
      }
      if let location = result.get("location") {
         print("Location is: \(location)")
      }
      if let time = result.get("time") {
         print("Time is: \(time)")
      }
   })
   } catch {
     print("Error")
}
The returned result contains detailed information about the time, the location, the weather, holidays, and events at the time and the location. A detailed example of the returned values can be found here.
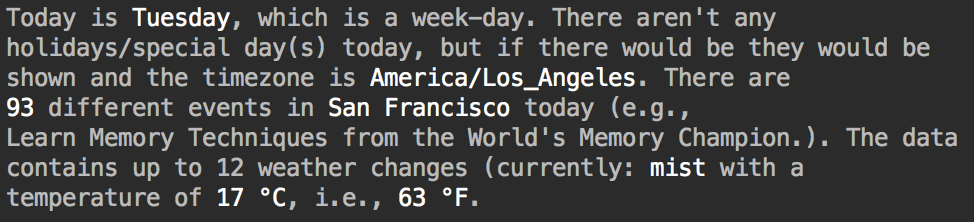
Possilbe sample output utilizing some commanly used features.
Sometimes it is necessary to resolve a textual representation to a specific geo-location. The textual representation can be
structured and even partly unstructured, e.g., the textual representation the Big Apple is considered to be unstructured,
whereby a structured location would be, e.g., { city: 'Seattle', state: 'Washington', country: 'USA' }. It is also possible
to pass in partial information and let the system try to resolve/complete the location, e.g., { city: 'New York', country: 'USA' }.
	do {
	   let breinTemporalData = BreinTemporalData()
	           .setLocation(freeText: "The Big Apple")

	   try Breinify.temporalData(breinTemporalData, {
	          (result: BreinResult) -> Void in

             let breinLocationResult = BreinLocationResult(result)
             print("Latitude is: \(breinLocationResult.getLatitude())")
             print("Longitude is: \(breinLocationResult.getLongitude())")
             print("Country is: \(breinLocationResult.getCountry())")
             print("State is: \(breinLocationResult.getState())")
             print("City is: \(breinLocationResult.getCity())")
             print("Granularity is: \(breinLocationResult.getGranularity())")
	        })
	  } catch {
	       print("Error")
	  }
This will lead to the following result:
Latitude is: 40.7614927583
Longitude is: -73.9814311179
Country is: US
State is: NY
City is: New York
Or shown as an Apple Map result:
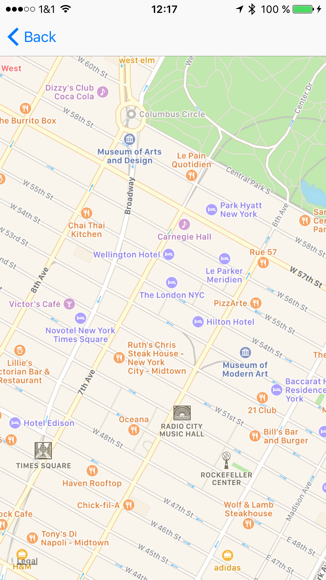
Map output by utilizing the result of reverse geocoding requests.
The library also offers the feature of reverse geocoding. Having a specific geo-location and resolving the coordinates to a specific city or neighborhood (i.e., names of neighborhood, city, state, country, and optionally GeoJson shapes).
A possible request if you're interesed in events might look like this:
do {
   let breinTemporalData = BreinTemporalData()
         .setLatitude(37.7609295)
         .setLongitude(-122.4194155)
         .addShapeTypes(["CITY"])

   try Breinify.temporalData(breinTemporalData, {
      (result: BreinResult) -> Void in
      print("Api Success : result is:\n \(result)")

     // Events
     let breinEventResult = BreinEventResult(result)
     breinEventResult.getEventList().forEach { (entry) in

     let eventResult = BreinEventResult(entry)
     print("Starttime is: \(eventResult.getStartTime())")
     print("Endtime is: \(eventResult.getEndTime())")
     print("Name is: \(eventResult.getName())")
     print("Size is: \(eventResult.getSize())")

     let breinLocationResult = eventResult.getLocationResult()
     print("Latitude is: \(breinLocationResult.getLatitude())")
     print("Longitude is: \(breinLocationResult.getLongitude())")
     print("Country is: \(breinLocationResult.getCountry())")
     print("State is: \(breinLocationResult.getState())")
     print("City is: \(breinLocationResult.getCity())")
     print("Granularity is: \(breinLocationResult.getGranularity())")
     }
} Let's integrate Breinify's PushNotifications within an iOS App. Follow this link to see how you can configure your app for receiving push notifications.
Using Breinify Push Notifications in iOS apps is straightforward. The Breinify SDK integrates smoothly within the iOS Application Lifecycle. Simply invoke the appropriate Breinify functions within the following lifecycle functions:
- didFinishLaunchingWithOptions
- applicationDidEnterBackground
- applicationDidBecomeActive
- applicationWillTerminate
- didRegisterForRemoteNotificationsWithDeviceToken
- didReceiveRemoteNotification
Add the following statements to your delegate swift file (e.g AppDelegate.swift):
import BreinifyApiThe entry point didFinishLaunchingWithOptions is used to configure the Breinify SDK.
func application(_ application: UIApplication, didFinishLaunchingWithOptions launchOptions: [UIApplicationLaunchOptionsKey: Any]?) -> Bool {
  // configure the BreinifySDK and remote notification handling
  Breinify.didFinishLaunchingWithOptions(apiKey: "938D-3120-64DD-413F-BB55-6573-90CE-473A",
                                         secret: "utakxp7sm6weo5gvk7cytw==")
  return true
}
Note: using didFinishLaunchingWithOptions will configure the Breinify-SDK like the method Breinify.setConfig(...). So no further call of Breinify.setConfig(...) is necessary.
Perfect, the BreinifyApi is now configured, a default BreinUser is created and the communication to the Breinify Engine is now possible.
Now we need to provide the device token to the Breinify Engine as well. We do this by simply adding the following call to the didRegisterForRemoteNotificationsWithDeviceToken method.
func application(_ application: UIApplication, didRegisterForRemoteNotificationsWithDeviceToken deviceToken: Data) {
  // register device Token within the API
  Breinify.didRegisterForRemoteNotificationsWithDeviceToken(deviceToken)
}This method is invoked when the remote notification is send from APNS (Apple Push Notification Service). Add the following lines to the function didReceiveRemoteNotification.
func application(_ application: UIApplication, didReceiveRemoteNotification userInfo: [AnyHashable: Any], fetchCompletionHandler completionHandler: @escaping (UIBackgroundFetchResult) -> Void) {
   // inform the Breinify SDK
   Breinify.didReceiveRemoteNotification(userInfo)
   completionHandler(.newData)
}Now we need to cover the situation when the app goes into background mode. So we add the lifecycle information to the BreinifyApi as well.
func applicationDidEnterBackground(_ application: UIApplication) {
   // App is now in background
   Breinify.applicationDidEnterBackground()
}Whenever the App is active again we need to tell this the BreinifyApi as well. So we simply pass this information as well.
func applicationDidBecomeActive(_ application: UIApplication) {
   // App is now active again
   Breinify.applicationDidBecomeActive()
}When the App terminates we provide this information in order to do some housekeeping.
func applicationWillTerminate(_ application: UIApplication) {
        Breinify.applicationWillTerminate()
}The complete code for the sample application can be found here. It assumes that you have configured the pushnotification as described here.
The Breinify engine will trigger a notification that will be send through Apple Notification Service and will trigger notification to the user.
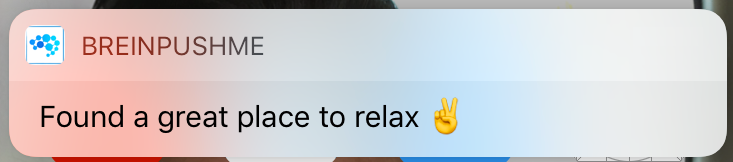
Notification that will appear.
Assuming the user will react to this particular notification a more detailed dialog might appear if the App has been configured to use RichText-Notifications:
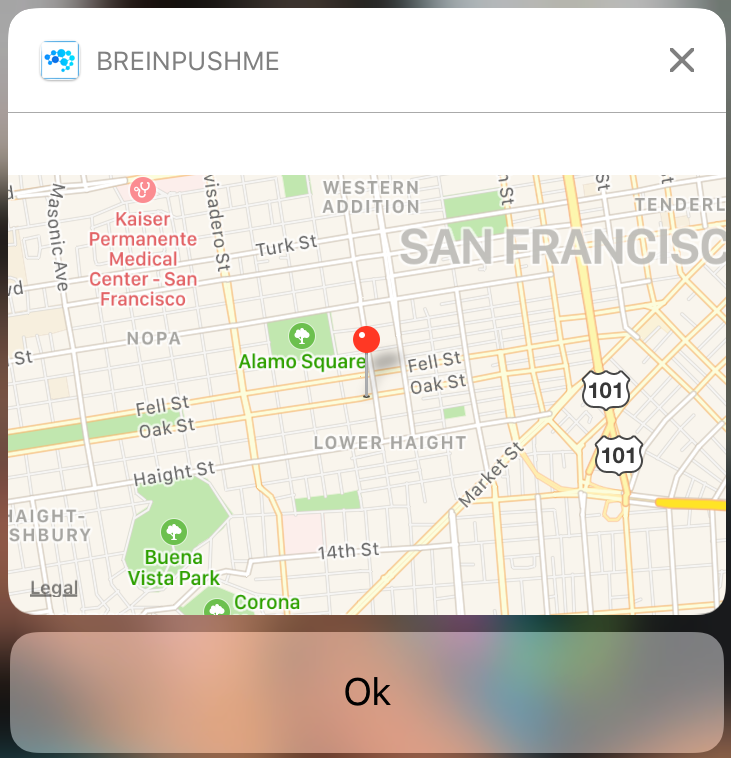
Detailed notification with more information.
It is just a sample to show a map. Further media content can be considered as well (e.g. Images, Videos).
The Breinify SDK can provide current location data if your app has configured the appropriate properties within the Info.plist file. Simply add the following location permissions:
<key>NSLocationAlwaysUsageDescription</key>
<string>Please allow this app to provide location data.</string>

<key>NSLocationWhenInUseUsageDescription</key>
<string>Please allow this app to provide location data.</string>
To understand all the capabilities of Breinify's APIs, have a look at: