In this document, you will find a guide detailing, step by step, how to contribute to this addon.
Something important : I am right there. If this guide is a bit unclear, if you're lost somewhere, if you feel lonely... Wait no... But if you need help with something described in this guide, just ask me for help, I will be glad to help you help me !
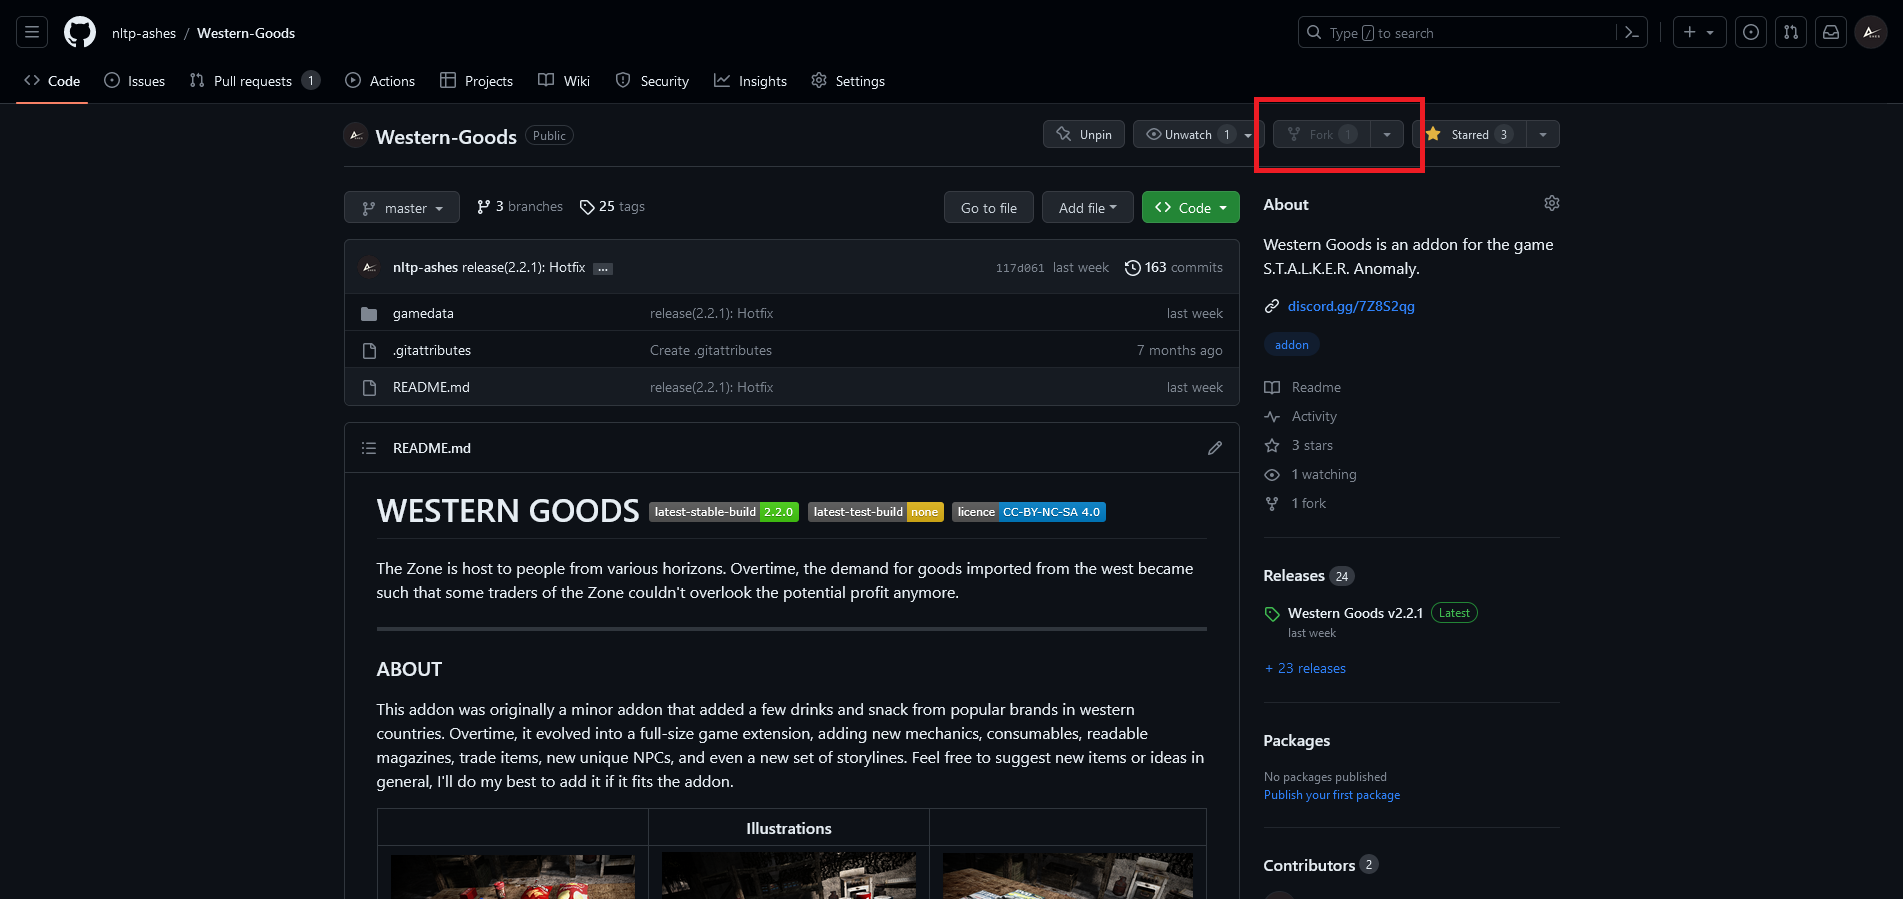
The first step is to fork Western Goods. For this, you will need a GitHub account. Once you have that and you are logged in, head to the addon's repository.
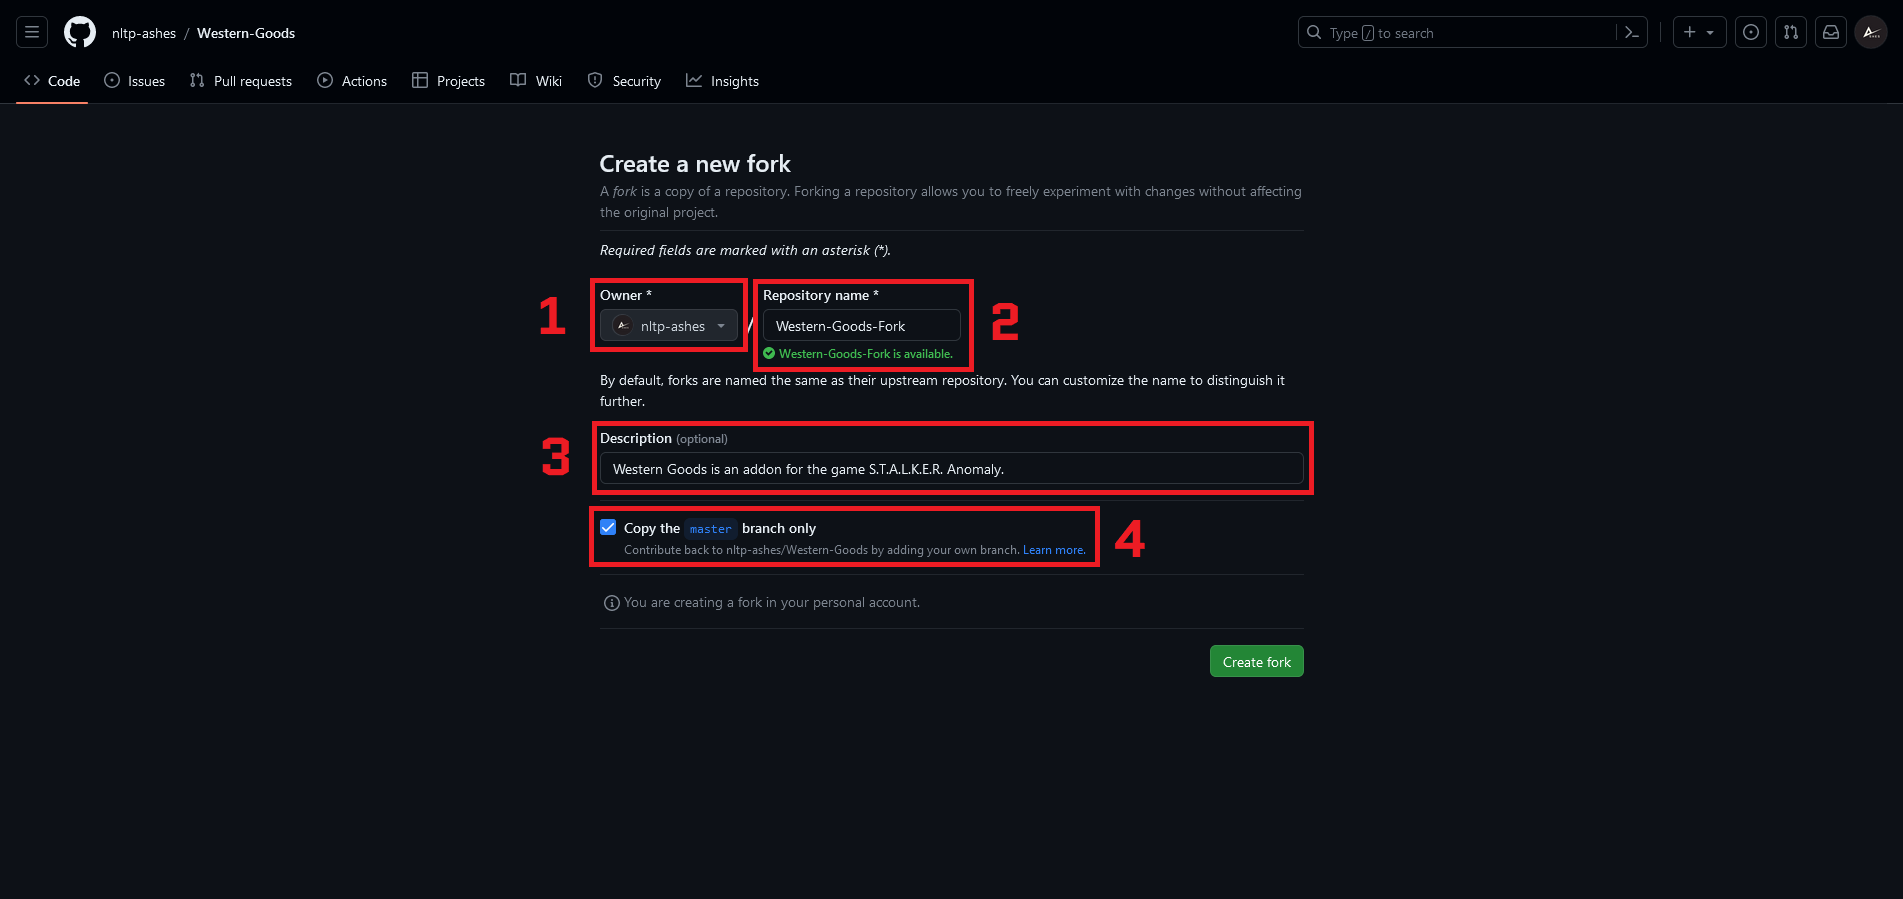
Once you press this button, you should be redirected to another page, where you'll get to select :
1. Which account to use for the fork (whatever you want);
2. The name of your fork (whatever you want);
3. The description of your fork (whatever you want);
4. Whether to only copy the main branch (you should select this).
Your fork should now be created. You can find it amongst your repositories.
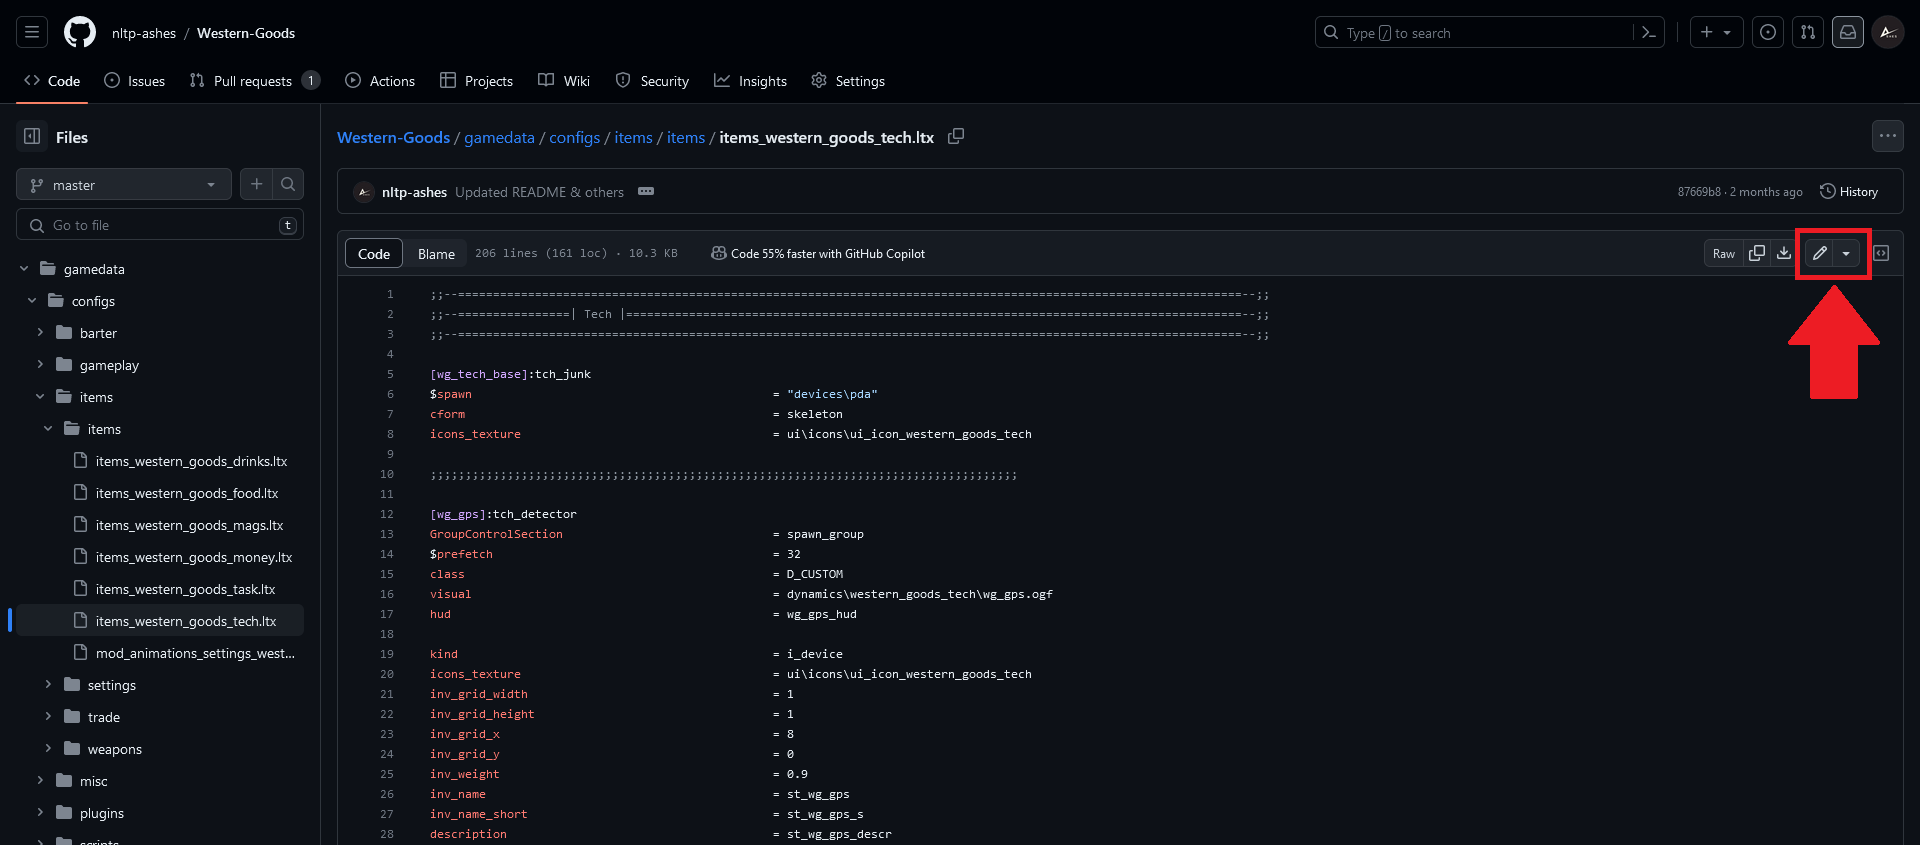
To edit the addon, locate a file you would like to change, and click the Edit button.
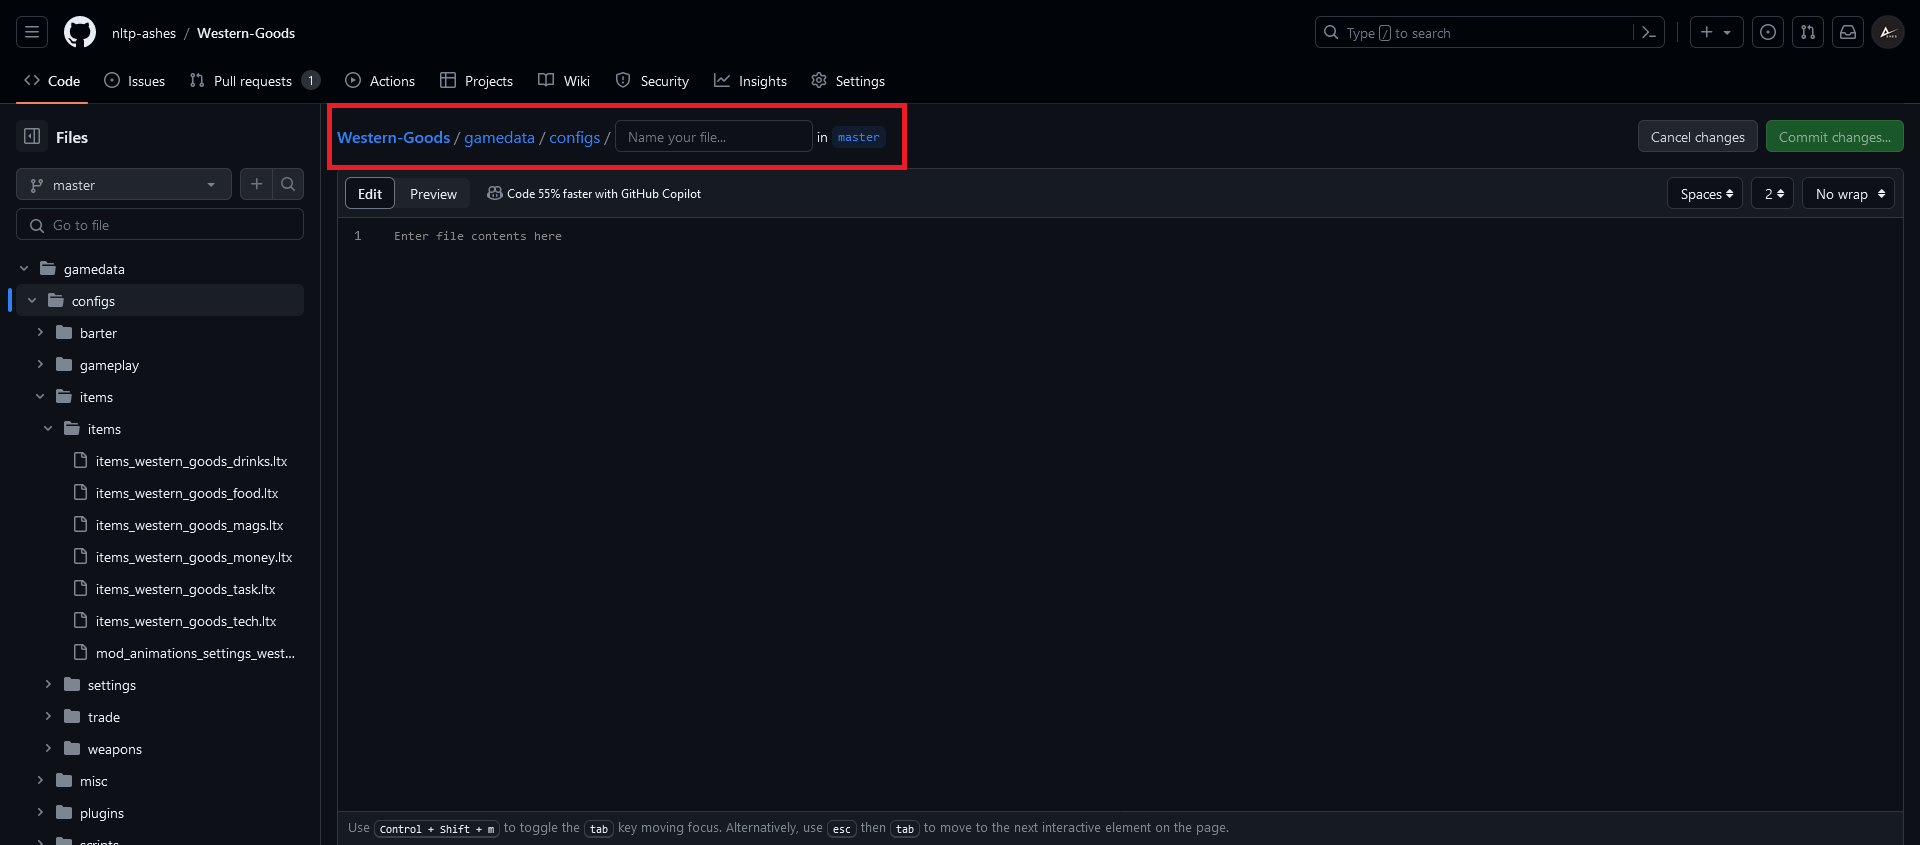
If you would like to add a new file, head into the folder where you want to create the file (or one of the parent folders), and use Add file.
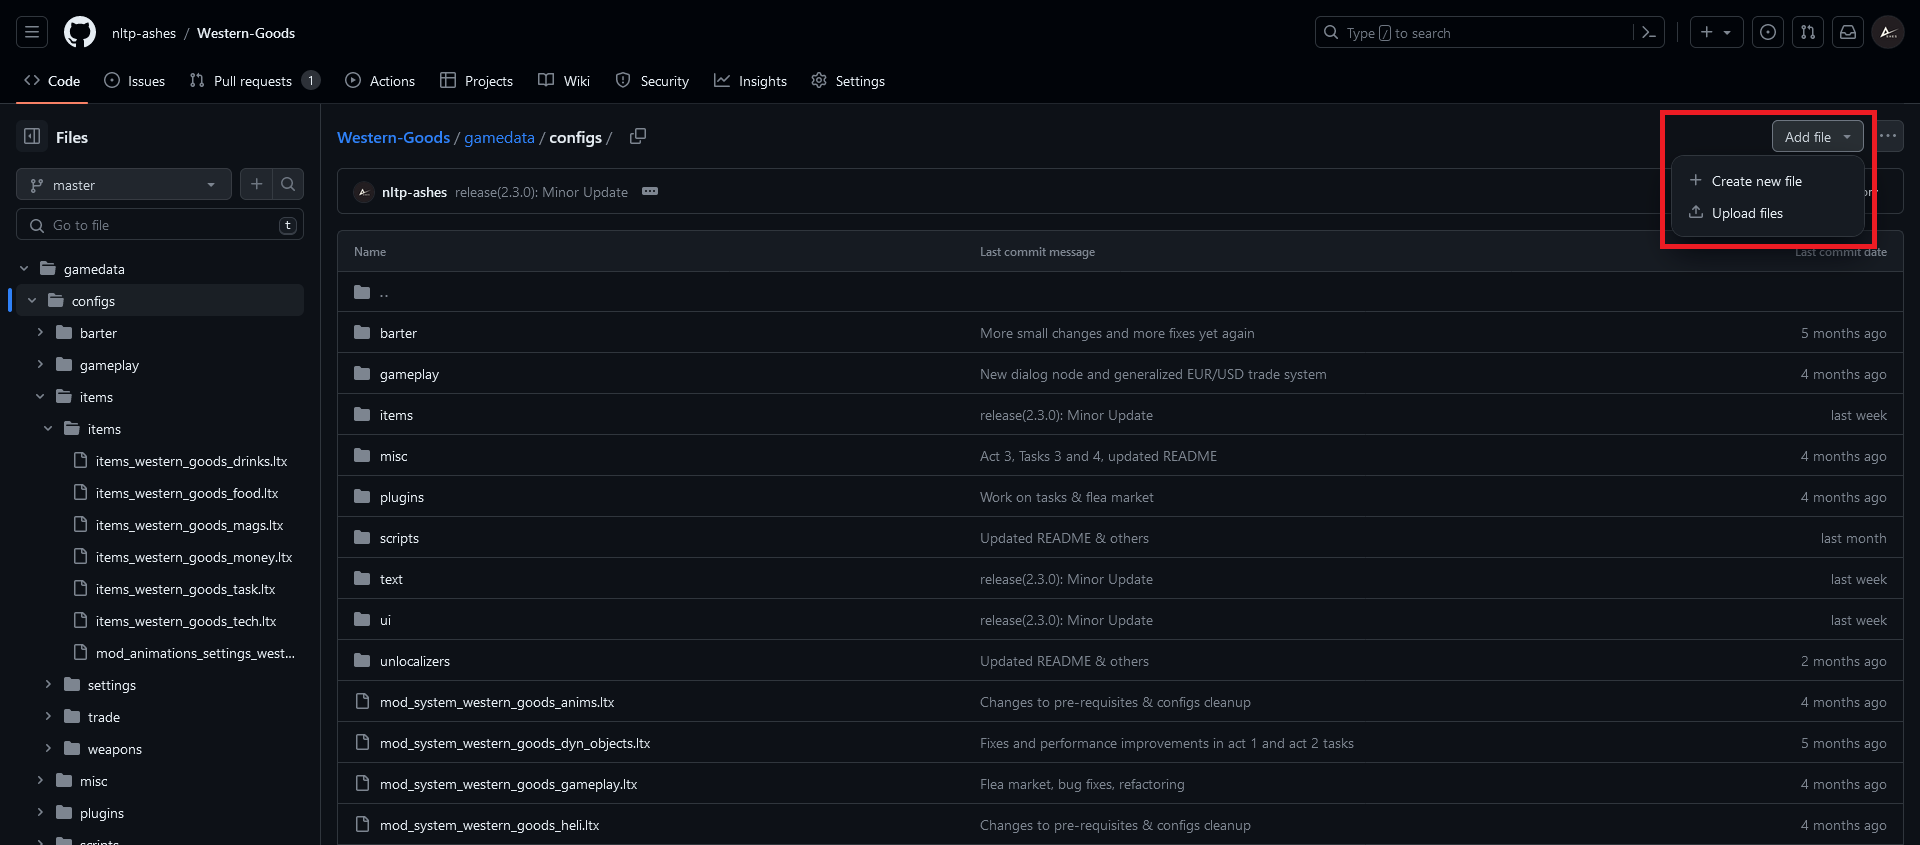
If the folder where you want to create your file does not exist, simply place yourself in the nearest parent folder, and complete the path in the file name. It will create the folders accordingly.
When you're satisfied with your changes, you can commit your changes and push them to your repository using the green commit button.
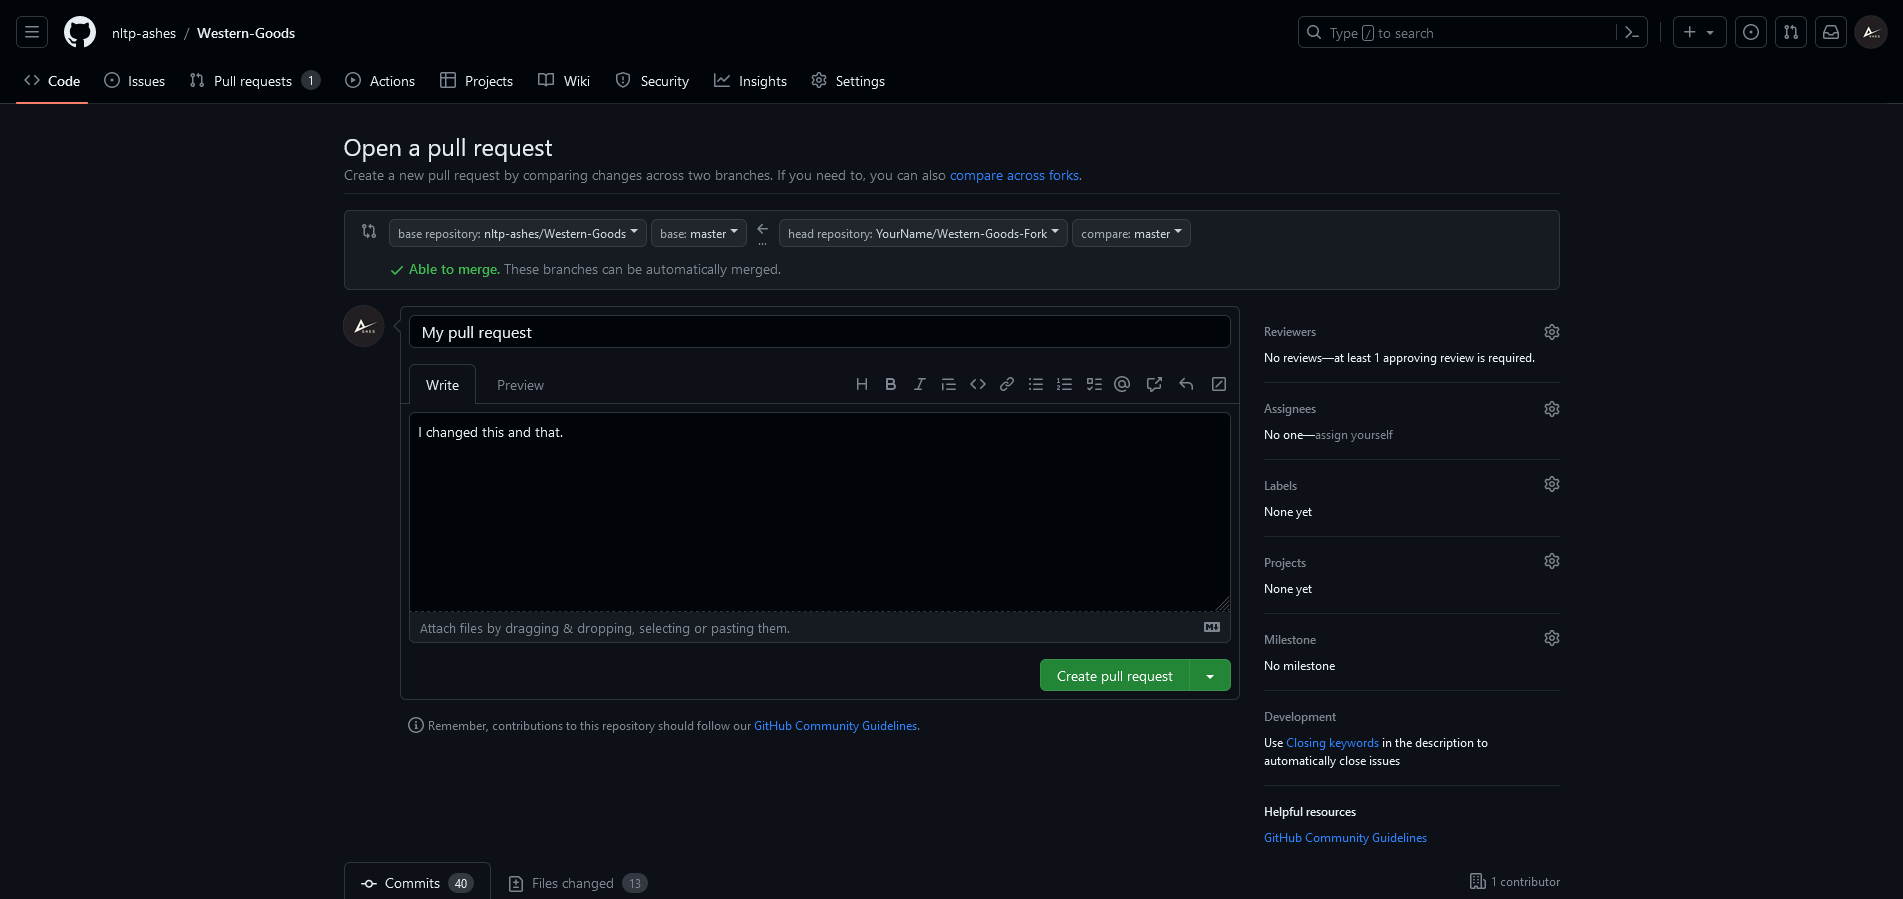
Finally, when you're done with your changes, you can open a Pull Request. Make sure to click "Compare across all forks".
If you need help, you can follow this guide.
Please specify :
- What the intent of your changes were;
- Roughly, what was changed;
- Any details of importance.
Something to note is, if you have created your Pull Request, and want to make changes, just keep commiting to your branch. New commits will automatically be added to your Pull Request. You do not need to create a new Pull Request.
From there on, it's up to me to review your Pull Request. Please check your Pull Request regularly, as it can happen that I ask you to make changes before your work can be merged into the main addon.