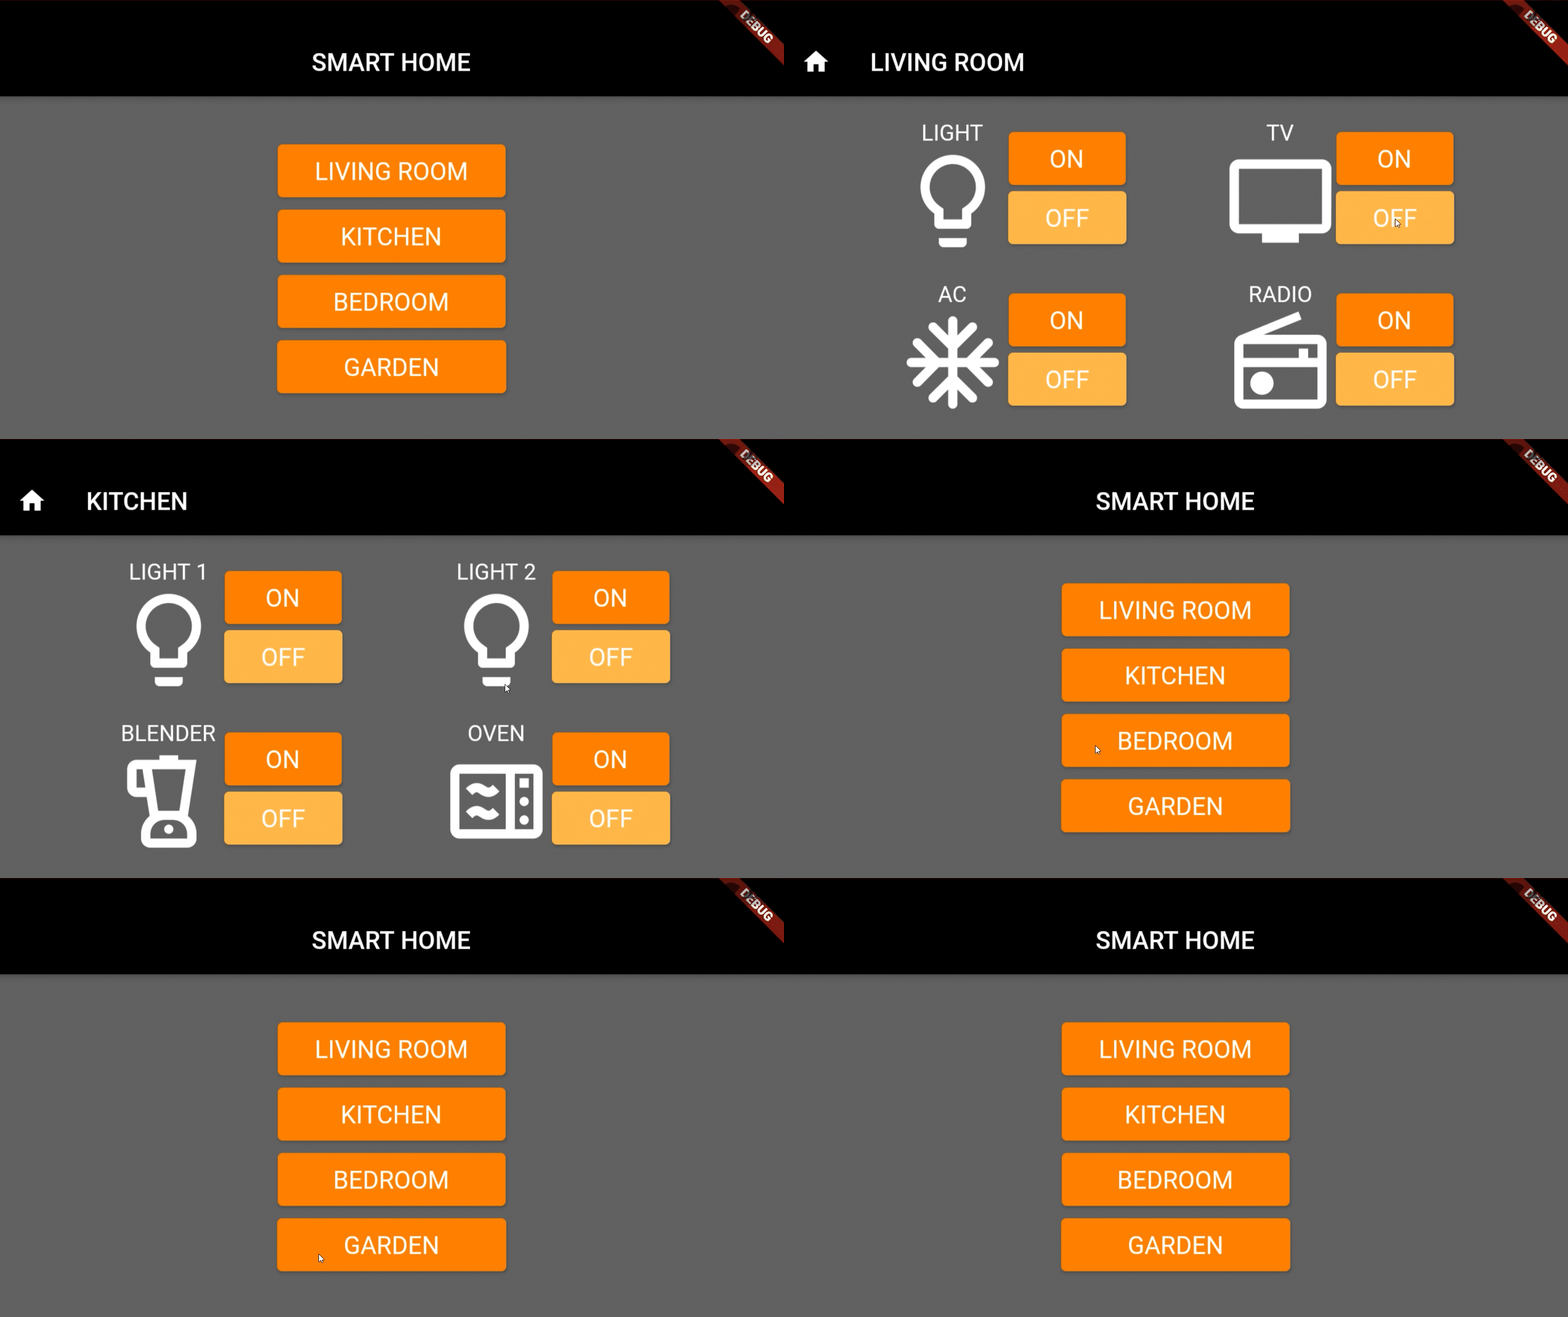
This is a demo application to control the GPIO pins on the reTerminal just by clicking buttons on the LCD! The buttons for different functions can be connected to relays via the GPIO pins and connect to other household appliances as well!
Here I have used Flutter to develop the application on the PC and then run the application on reTerminal using flutter-pi. flutter-pi is a light-weight Flutter Engine Embedder for Raspberry Pi that runs without X. That means you don't need to boot into Raspberry Pi OS Desktop & have X11 and LXDE load up. You just need to boot into the command-line and run your application.
For a step-by-step guide on building your own UI using Flutter on the reTerminal, click here
First we need to install flutter-pi on the reTerminal.
Click here to access the GitHub repo of flutter-pi
- Step 1. Log in to reTerminal as explained in this wiki and install flutter engine binaries on the reTerminal
git clone --depth 1 https://github.com/ardera/flutter-engine-binaries-for-arm.git engine-binaries
cd engine-binaries
sudo ./install.sh- Step 2. Install cmake, graphics, system libraries and fonts
sudo apt install cmake libgl1-mesa-dev libgles2-mesa-dev libegl1-mesa-dev libdrm-dev libgbm-dev ttf-mscorefonts-installer fontconfig libsystemd-dev libinput-dev libudev-dev libxkbcommon-dev- Step 3. Update the system fonts
sudo fc-cache- Step 4. Clone flutter-pi and cd into the cloned directory
git clone https://github.com/ardera/flutter-pi
cd flutter-pi- Step 5. Compile flutter-pi
mkdir build && cd build
cmake ..
make -j`nproc`- Step 6. Install flutter-pi
sudo make install- Step 7. Open raspi-config
sudo raspi-config-
Step 8. Switch to console mode by navigating to
System Options > Boot / Auto Loginand select Console or Console (Autologin) -
Step 9. Enable the V3D graphics driver by navigating to
Advanced Options > GL Driver > GL (Fake KMS) -
Step 10. Configure the GPU memory by navigating to
Performance Options -> GPU Memoryand enter 64 -
Step 11. Press ESC on the keyboard to leave rasp-config window
-
Step 12. Give the reTerminal permission to use 3D acceleration. (NOTE: potential security hazard. If you don't want to do this, launch flutter-pi using sudo instead.)
usermod -a -G render pi- Step 13. Reboot reTerminal
sudo reboot- Step 1. Intall Flutter SDK from here
Note: Make sure the flutter SDK is compatible to the installed engine binaries.
- Step 2. Clone the following repo and cd into the directory
git clone https://github.com/lakshanthad/Flutter_reTerminal_Smart_Home_UI
cd Flutter_reTerminal_Smart_Home_UI- Step 3. Build the asset bundle
flutter build bundle- Step 4. Deploy the asset bundle to the reTerminal
scp -r ./build/flutter_assets pi@<ip_address_of_reTerminal>:/home/pi/testappNote: Use any location on the reTerminal to save the file
- Step 1. Type the following on the command-line of reTerminal
flutter-pi /home/pi/testapp
- Step 2. Connect an LED to GPIO 24
Note: A resistor is needed between the GPIO pin and the LED or otherwise the LED will burn out.
- Step 3. Type the following on the command-line of reTerminal to run the app
flutter-pi /home/pi/testappWhen you press the ON/ OFF buttons for the LIGHT of LIVING ROOM page, you will notice the LED which is connected to GPIO 24 will start to react accordingly!
You can also extend this by adding a relay to the GPIO pins and control home appliances and build a complete smart home solution on the reTerminal!
If you want to control other GPIO pins by pressing the buttons on the screen, you can check the pages livingRoom.dart, kitchen.dart, bedroom.dart, garden.dart and modify the codes inside the following section:
ElevatedButton(
child: Text('ON'),
onPressed: () {
    print('ON');
    // ledState(true/false,GPIO_number);
},
),
Here ledState function is included in the main.dart file and it is called as ledState(true/false,GPIO_number) with 2 arguments.
Example:
- ledState(true,24) will turn on the GPIO 24
- ledState(false,24) will turn off the GPIO 24

