Router Connection Setup Guide
This guide is based on the GL.iNet GL-AR750 router. Other routers should also have similar steps.
-
Before getting started, make sure that you've followed the Atlas 200 DK setup guide to edit the netplan configuration file
/etc/netplan/01-netcfg.yaml. -
Connect the Atlas 200 DK board to the router's LAN port via a Ethernet cable.
-
Connect Raspberry Pi to the router's WiFi. (A USB mouse & a keyboard are needed.) The default WiFi SSID & password can usually be found on the back of the router. In our case, the SSID is
GL-AR750-013and the password is the same as the default user password on the Atlas board. -
Connect your laptop to the router' WiFi.
-
Open a browser on your laptop and login into router's admin page with admin username & password. For GL.iNet GL-AR750, visit http://192.168.8.1/#/login
-
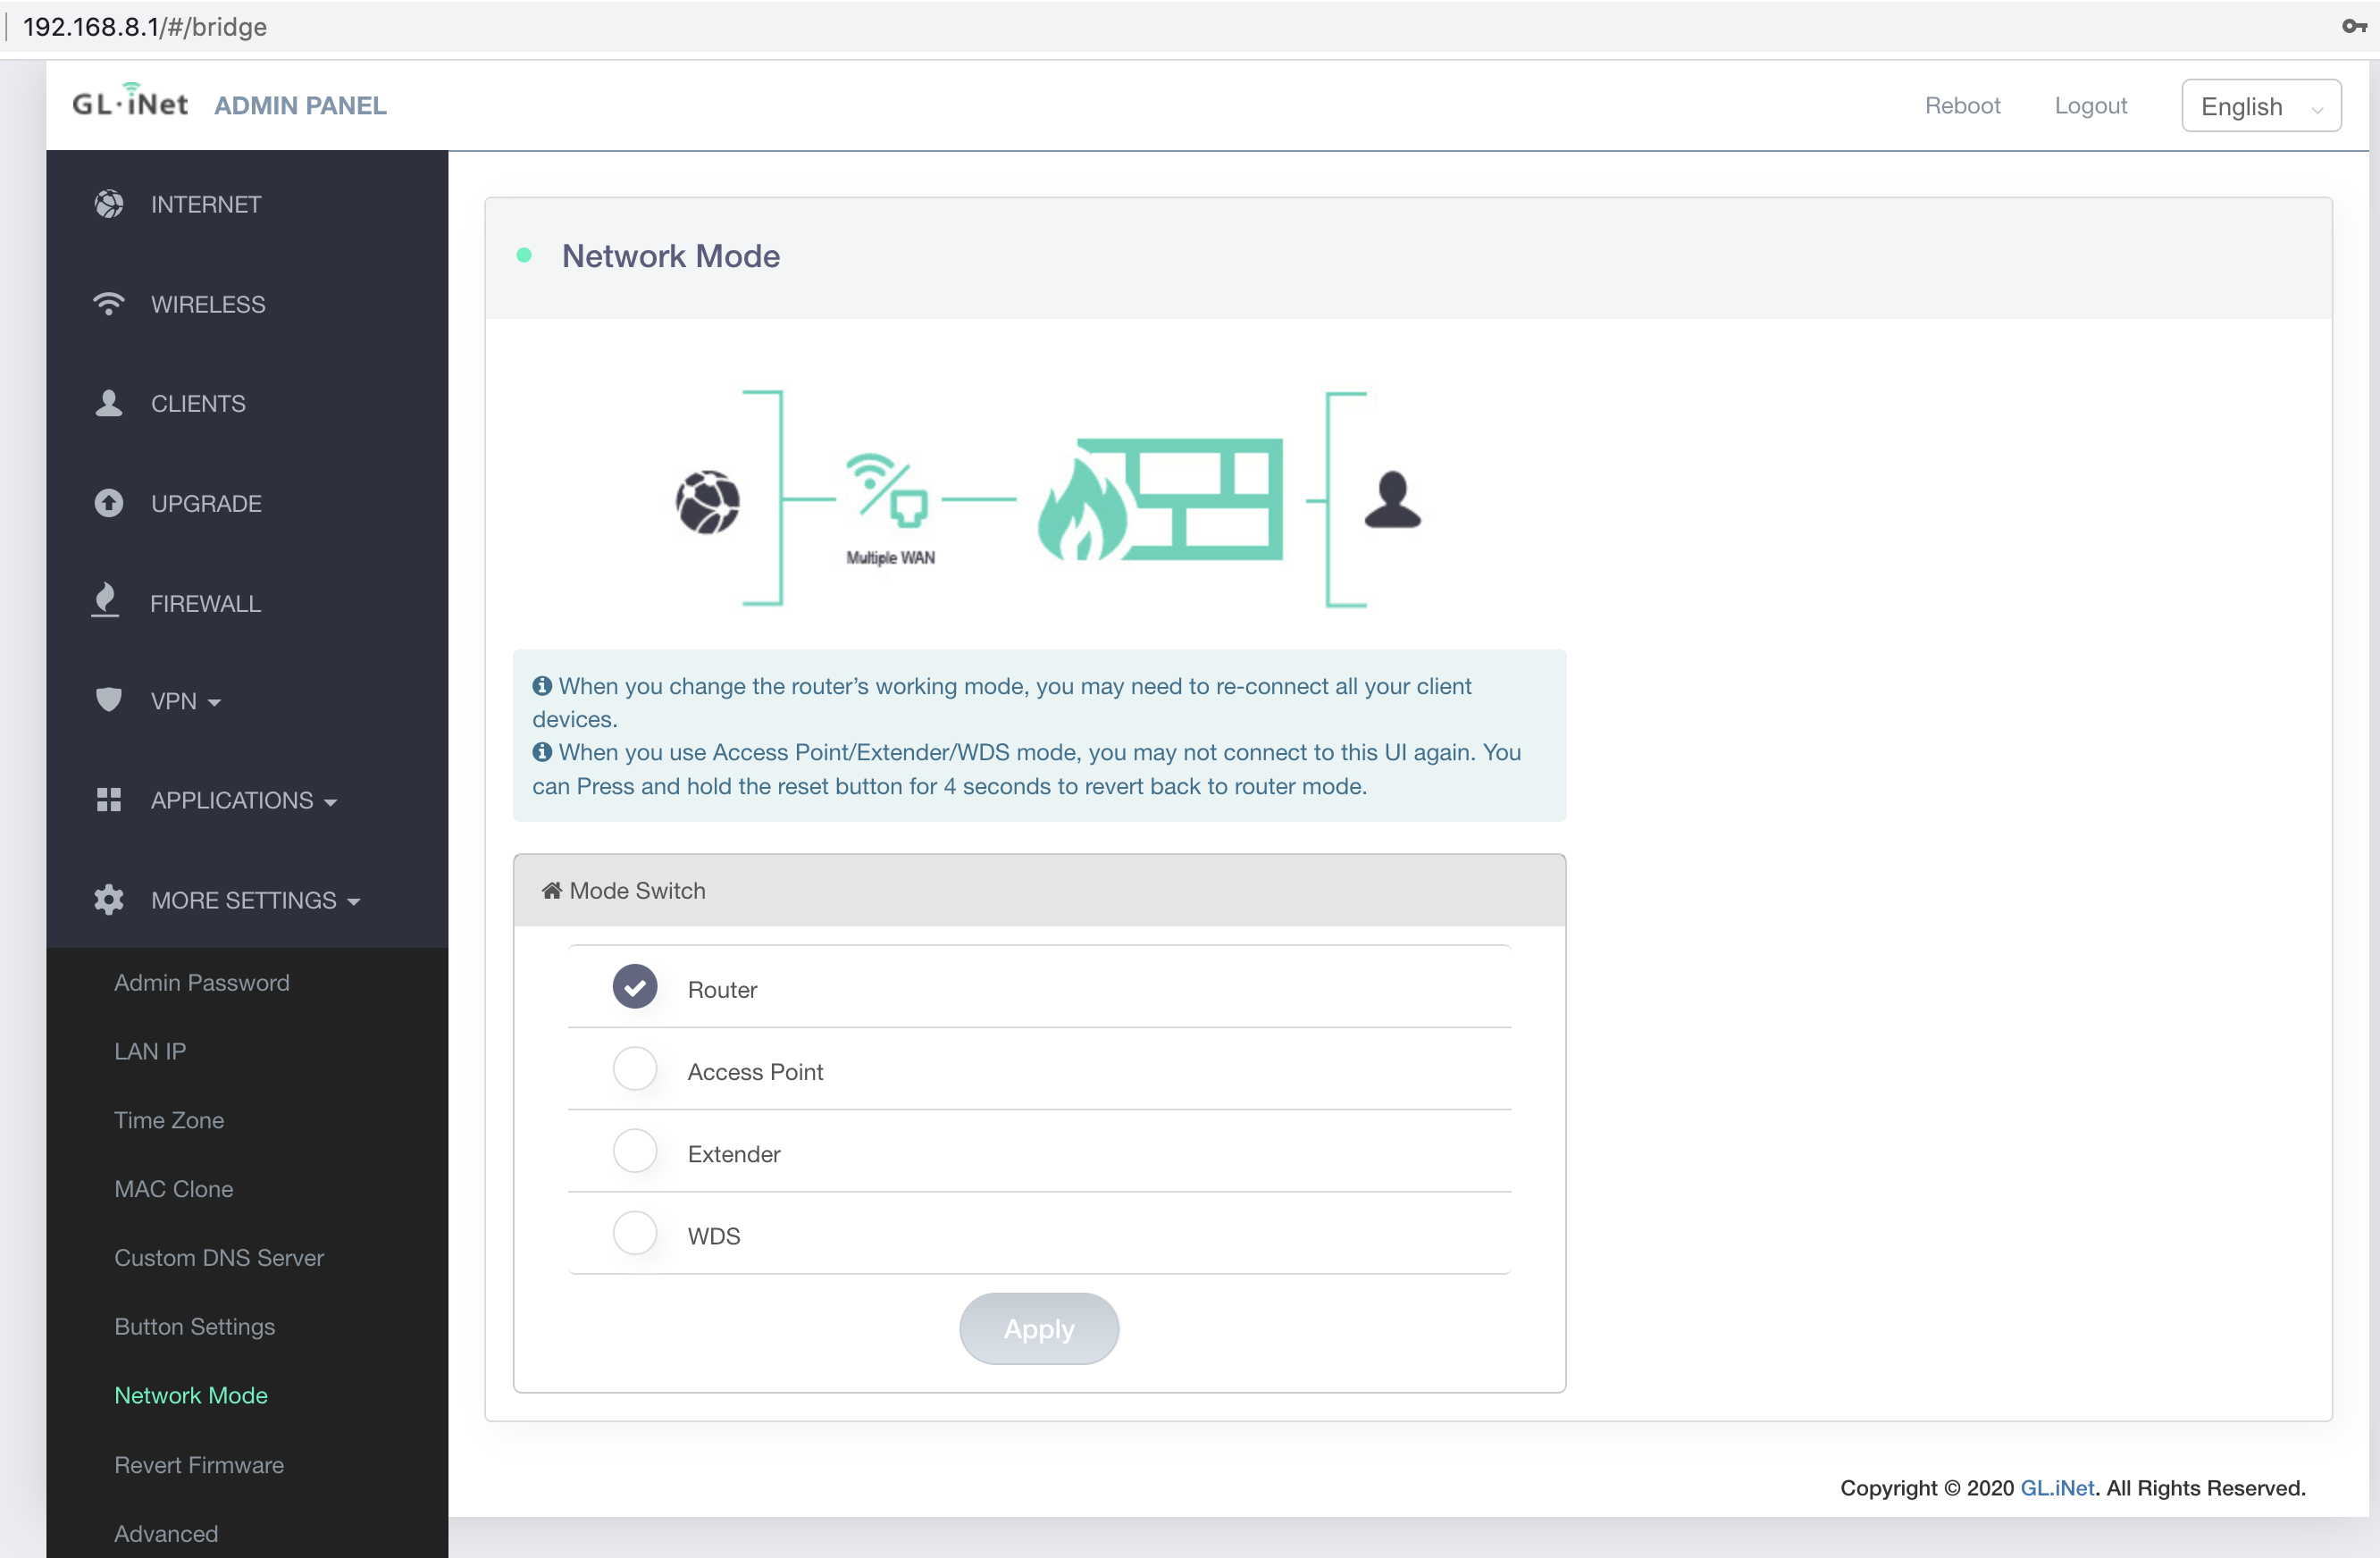
Go to
MORE SETTINGS -> Network Modeto verify that it's in the "Router" mode.
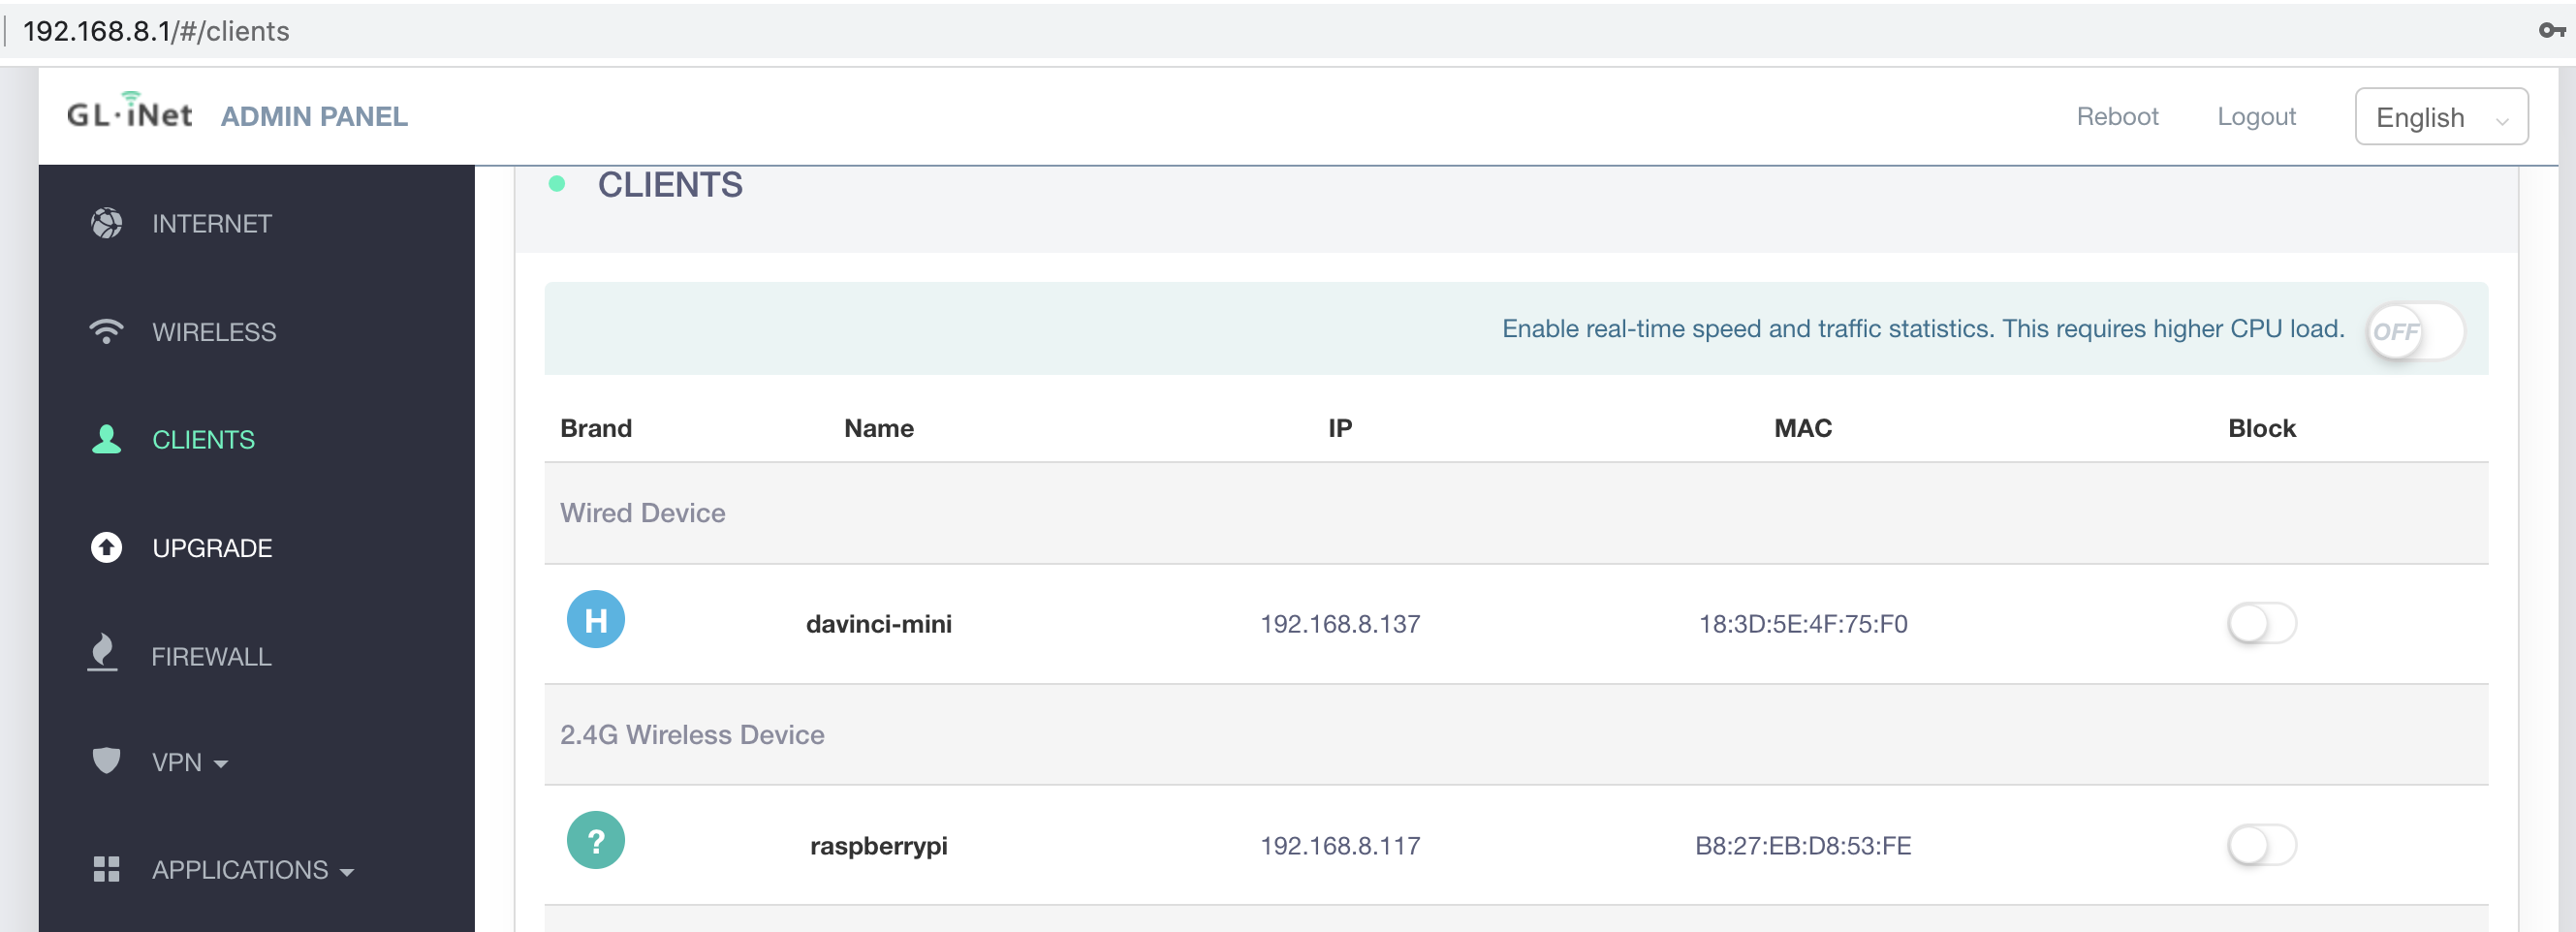
- In the Clients Panel, make sure that you see two entries like this. (The IP & MAC address can be different). Make a note of these two MAC addresses.
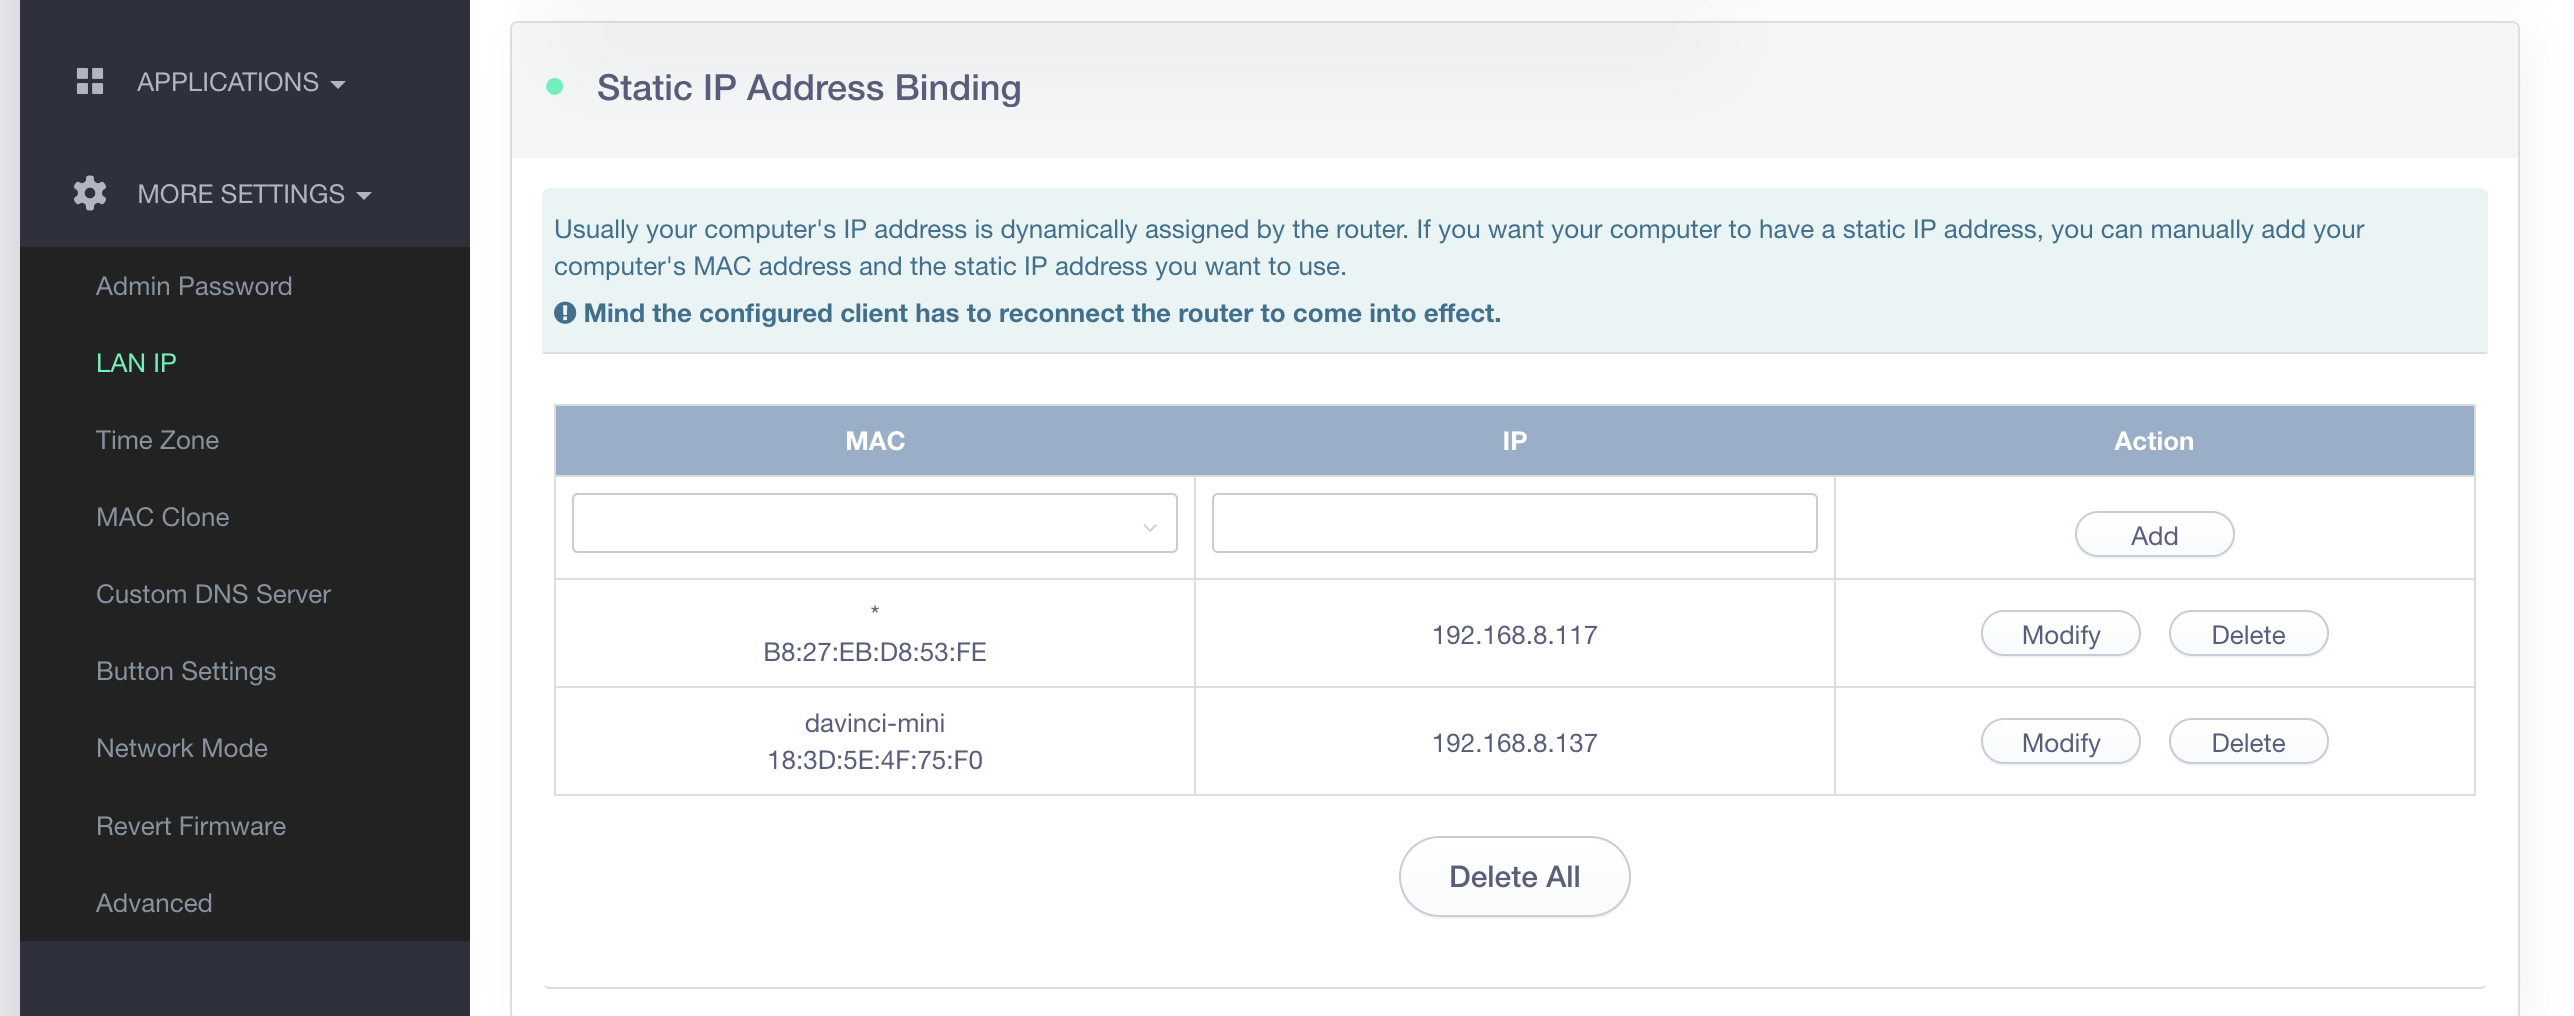
- Go to
MORE SETTINGS -> LAN IP -> Static Address Binding, add two entries using the above <MAC addr>:<IP addr> pairs.
-
Congratulations! You can now use these two IP addresses to access the Atlas board and the Pi. On the CLI, it will be
ssh pi@192.168.8.117andssh HwHiAiUser@192.168.8.117in our example. -
Connect router's WAN port to your home router or another Windows PC to provide Internet access to this router.