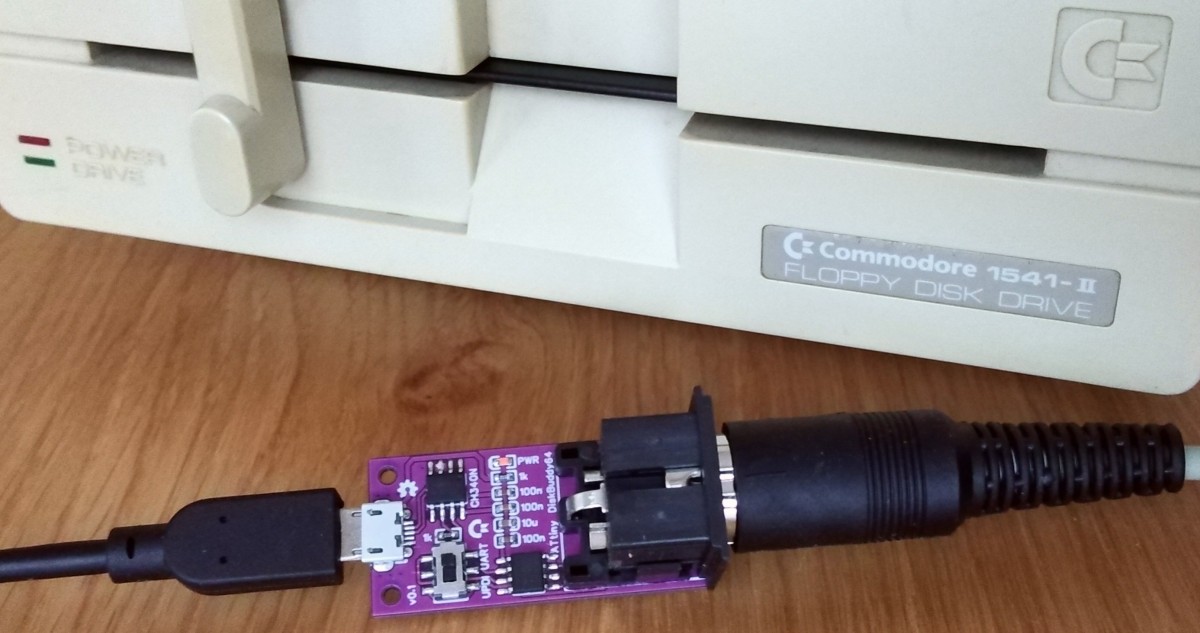
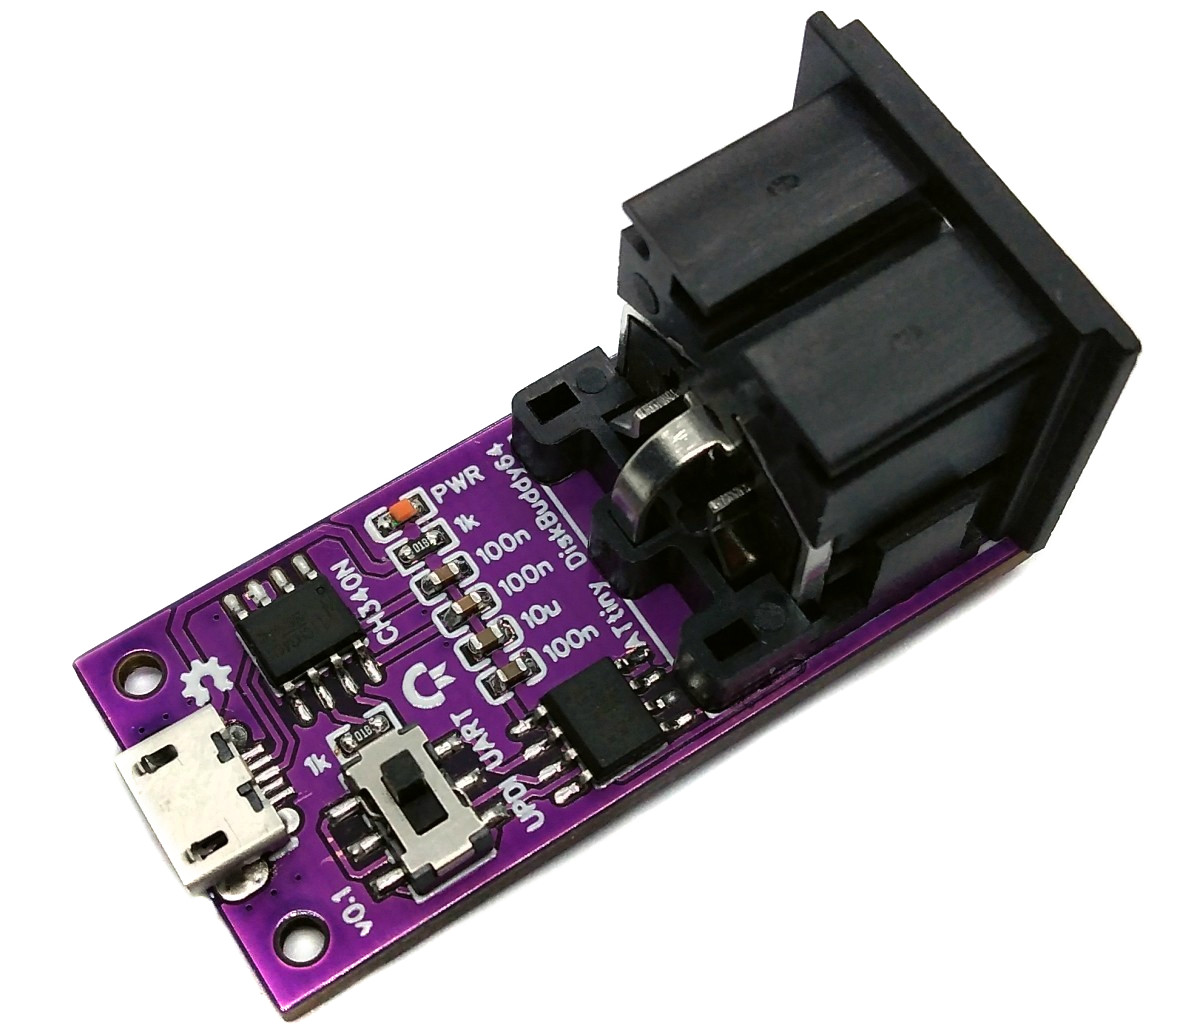
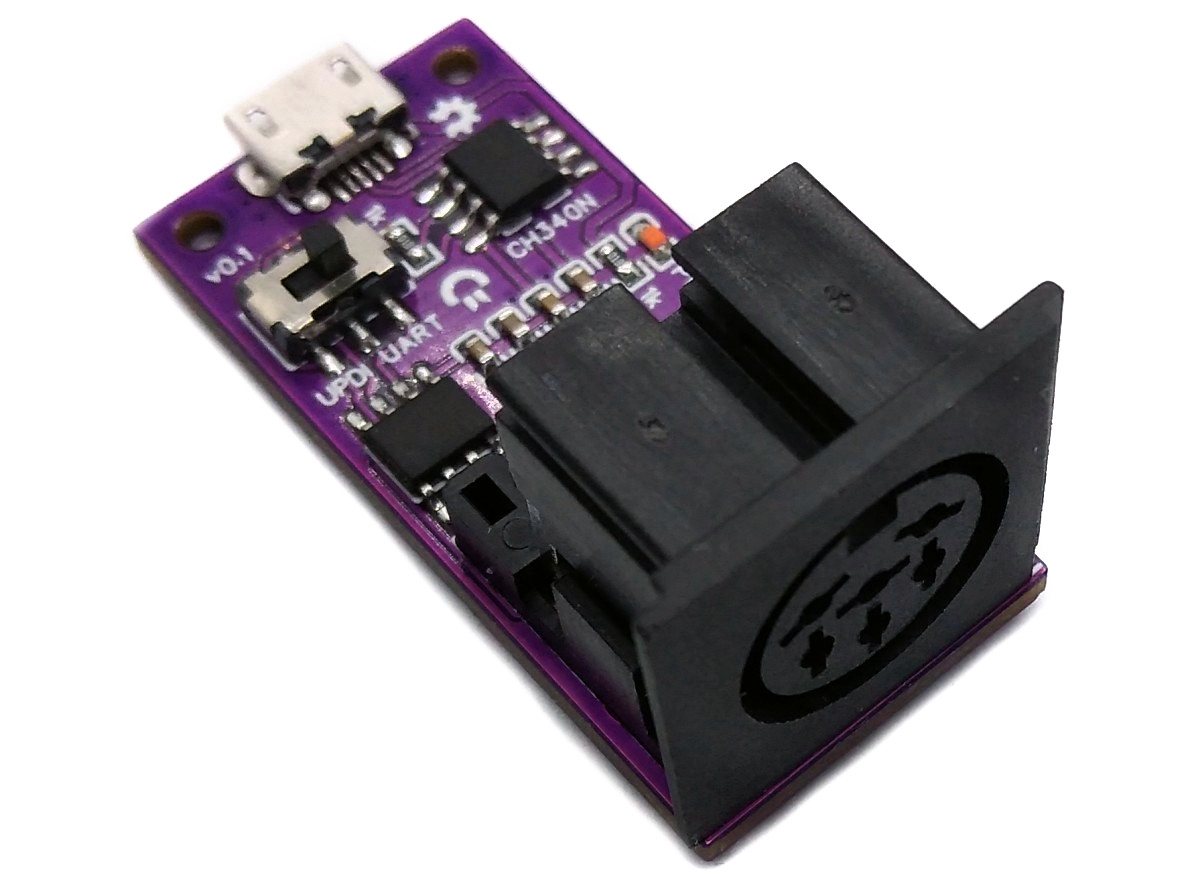
DiskBuddy64 is a minimal adapter that can interface a Commodore 1541(II) floppy disk drive to your PC via USB in order to read from and write on disks. It uses its own fast loader to minimize the transfer times. The DiskBuddy64 is controlled via a command line interface or a graphical front end written in Python.
The DiskBuddy64 is a proprietary interface. It does not turn the floppy disk drive into a standard USB mass storage device. Instead, it offers the ability to send low-level IEC commands back and forth over USB. The provided Python scripts were developed to support this interface and can directly access the floppy disk drive and the contents of an inserted floppy disk. Thanks to the integrated fast loader, the adapter reads or writes floppy disks at twelve times the normal speed, dumping an entire disk in about 32 seconds. DiskBuddy64 cannot read or write copy-protected disks.
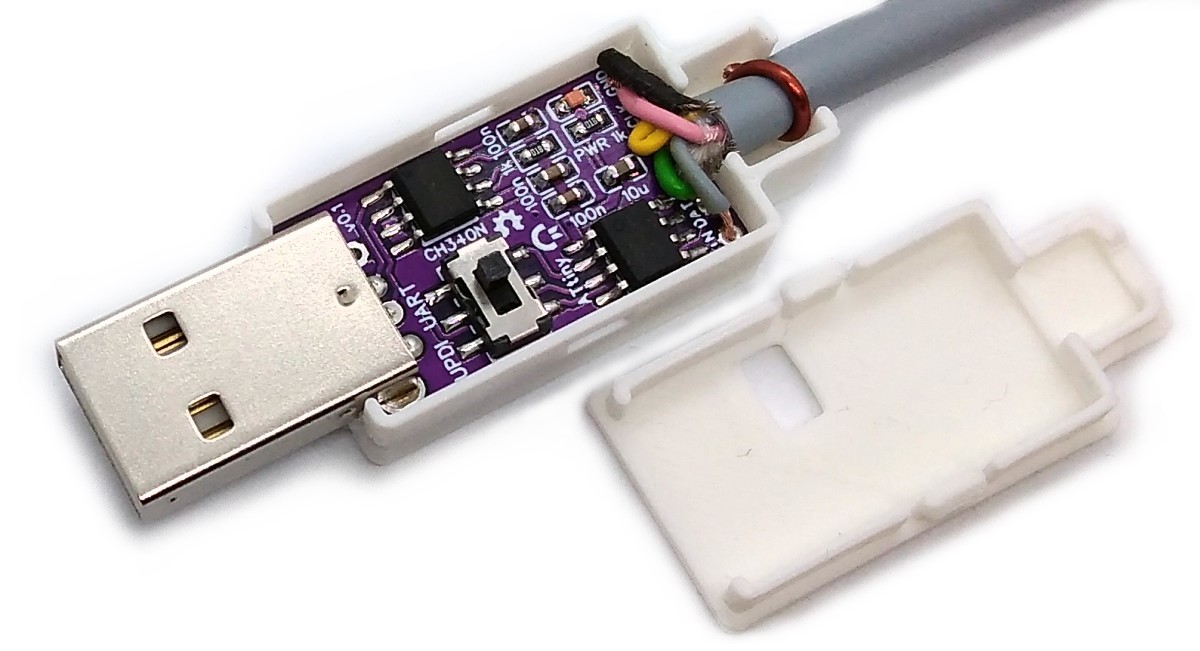
The integrated USB to serial converter can also be used as a SerialUPDI programmer for the on-board ATtiny microcontroller, so that no additional hardware is required to flash the firmware.
- Design Files (EasyEDA): https://easyeda.com/wagiminator/c64-diskbuddy64
- Project Video (Youtube): https://youtu.be/fXj1PHnRwoE
The schematic is shown below:
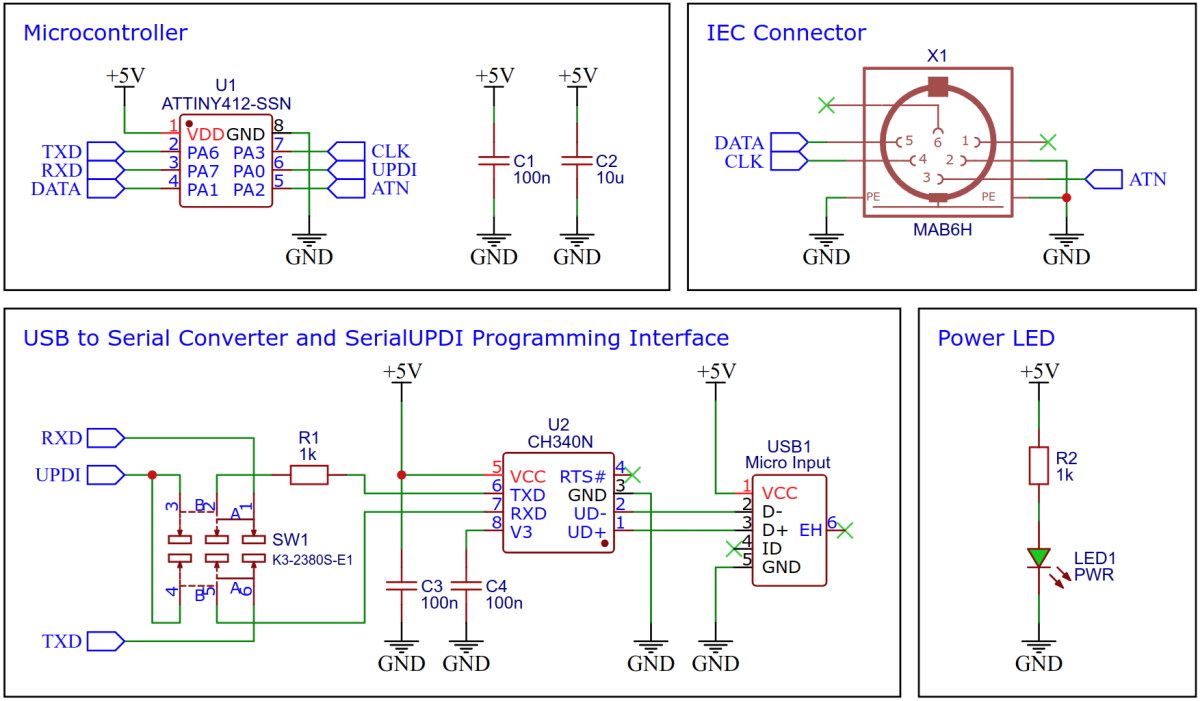
One of the (not quite so) new 8-pin tinyAVRs was chosen for this project. Any of these MCUs can be used: ATtiny202, ATtiny212, ATtiny402 or ATtiny412. Don't buy them in China, they are much cheaper e.g. at Digikey (€0.45).
The CH340N (or CH330N) is now in use everywhere with me. At around €0.45 (if you buy 10 pieces) it is very cheap, fast, small, uncomplicated, reliable and hardly requires any external components (not even a crystal). It's probably the best choice for this small project too. And it is also used as a SerialUPDI programmer for the ATtiny.
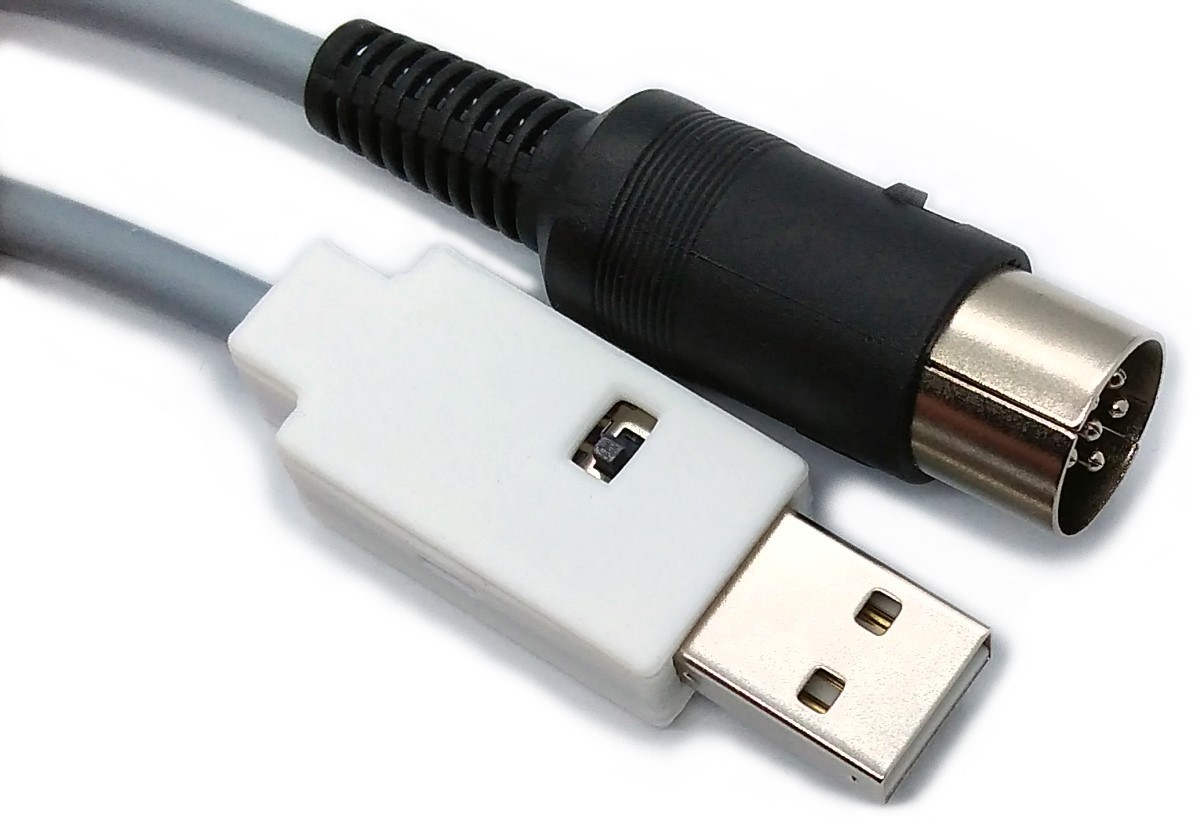
The floppy disk drive is connected to the adapter via the 6-pin DIN jack. Alternatively, a serial cable can be soldered directly to the corresponding pads.
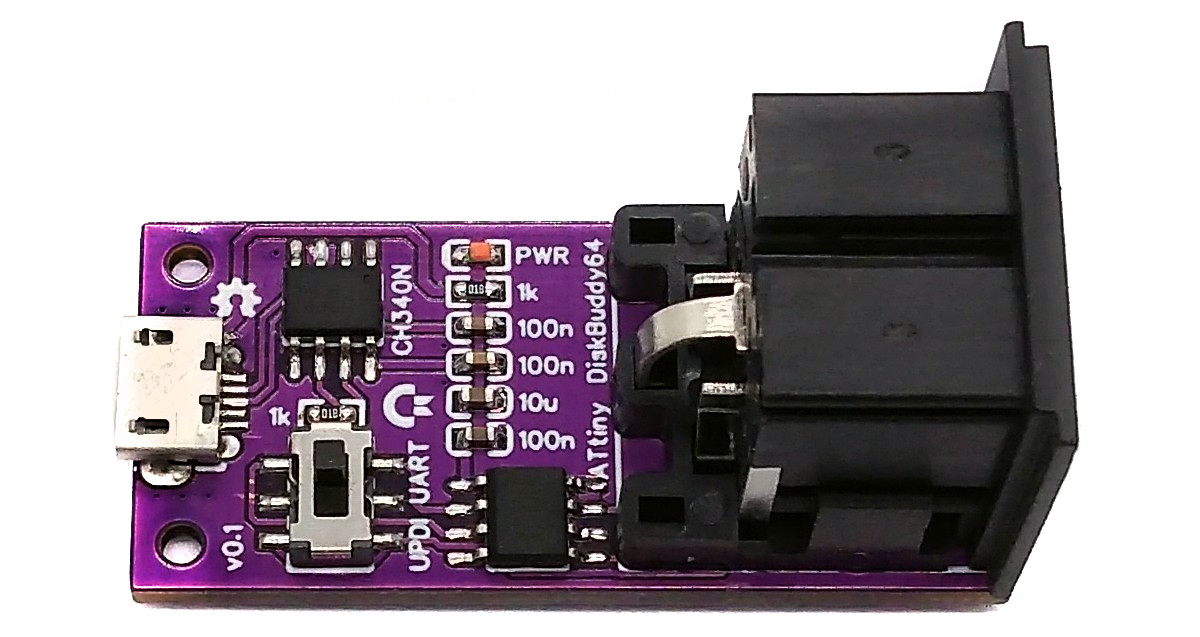
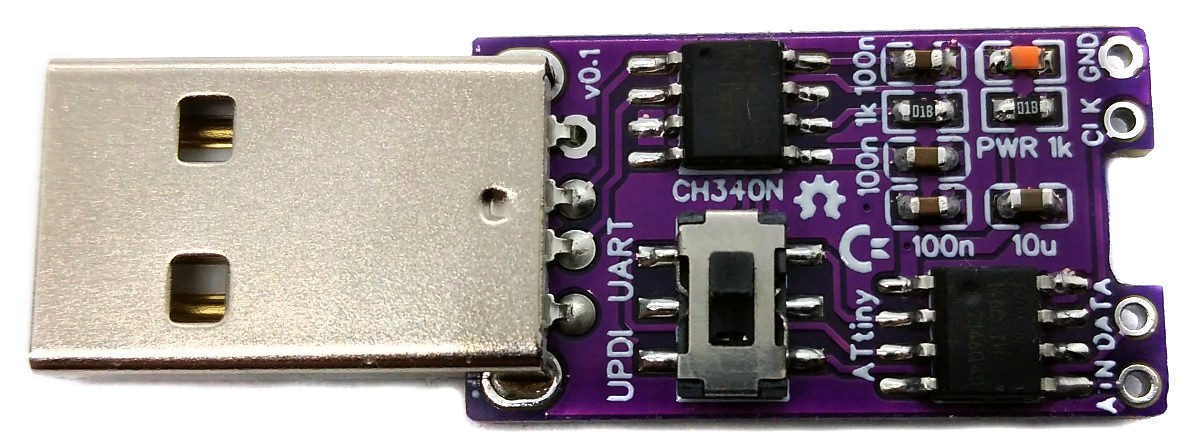
Two PCB versions are available, one with micro USB and IEC connector, the other as a USB stick with male USB-A and directly soldered IEC cable. The corresponding Gerber files can be found in the hardware folder and can be uploaded to a PCB manufacturer of your choice.
The main reason for the low speed of the 1541 floppy disk drive is the slow serial data transfer to the computer. As with most fast loaders, a proprietary transmission protocol is used here to accelerate this. Instead of the synchronous serial protocol with handshake and lots of waiting times, an asynchronous 2-bit parallel data transmission is used. For this to work, the sender and receiver must understand this protocol. For this purpose, a corresponding program is loaded into the RAM area of the memory and executed on the floppy disk drive side. The corresponding source codes (in 6502 assembly) can be found in the software/drive/ folder. To increase the speed even further, the GCR encoding and decoding is not done by the floppy disk drive, but by the PC. Reading or writing an entire 35-track floppy disk takes 32 seconds - not a world record, but about 12 times faster than normal speed and sufficient for most purposes.
For a more detailed explanation of some functional principle, I recommend Michael Steil's website. Take the opportunity to watch his Ultimate Commodore 1541 Drive Talk, then you will know (almost) everything you need to know about the Commodore floppy disk drives.
The DiskBuddy64 adapter bridges the gap between your PC and the Commodore 1541 floppy disk drives. It communicates with the floppy disk drive via bit banging of the IEC protocol and with the PC via the integrated USB-to-serial converter. The adapter also supports the proprietary protocol for faster data transmission. It essentially provides the basic functions of the IEC protocol in such a way that they can be called up from the PC using serial commands via USB. The source codes of the firmware can be found in the software/avr/ folder.
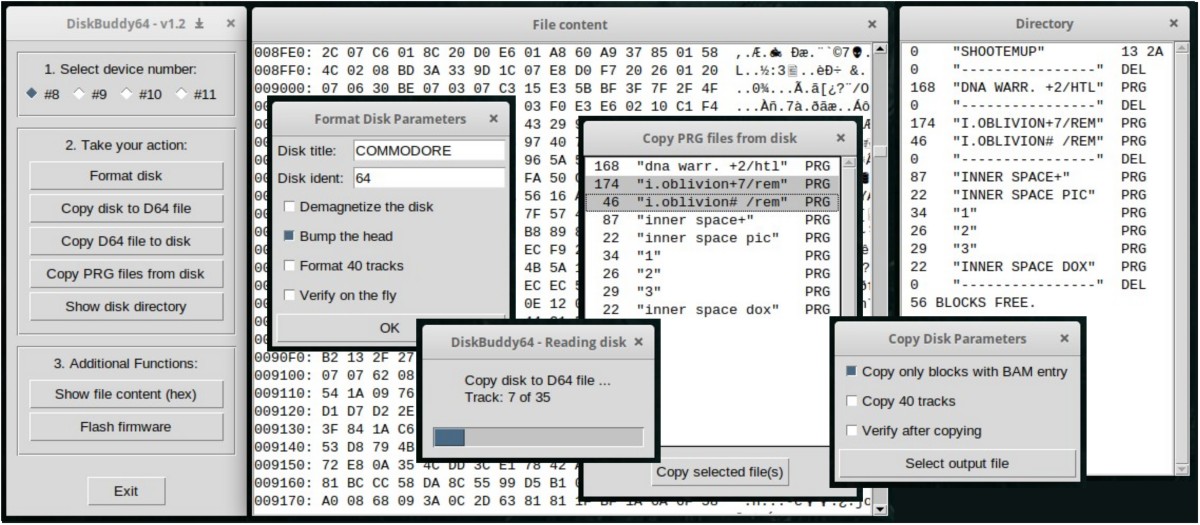
The Python scripts provide the user interface on the PC. These control the adapter and thus the floppy disk drive via USB. Both command line tools and a simple graphical user interface are available. The Python scripts can be found in the software/pc/ folder.
DiskBuddy64 uses the D64 format to read or create disk images. The structure of a D64 file can be found here. The D64 format is supported by all C64 emulators as well as by SD2IEC and Pi1541.
- Set the serial mode switch on the device to "UPDI".
- Connect the device to a USB port of your PC.
- Use one of the following methods:
- Execute the respective Python script on your PC:
python diskbuddy-gui.py. - Click on Flash firmware.
- Execute the respective Python script on your PC:
python flash-firmware.py.
- Open your Arduino IDE.
- Make sure you have installed megaTinyCore.
- Go to Tools -> Board -> megaTinyCore and select ATtiny412/402/212/202.
- Go to Tools and choose the following board options:
- Chip: Select the chip you have installed on your device
- Clock: 16 MHz internal
- Programmer: SerialUPDI
- Leave the rest at the default settings.
- Go to Tools -> Burn Bootloader to burn the fuses.
- Open the DiskBuddy64 sketch and click Upload.
- Make sure you have installed the latest avr-gcc toolchain.
- Open a terminal.
- Navigate to the folder with the makefile and the Arduino sketch.
- Run
DEVICE=attiny202 make installto compile, burn the fuses and upload the firmware (change DEVICE accordingly).
Python needs to be installed on your PC in order to use the software. Most Linux distributions already include this. Windows users can follow these instructions. In addition PySerial and Tkinter (8.6 or newer) must be installed. However, these are already included in most Python installations.
Windows users may also need to install a driver for the CH340N USB to serial adapter. This is not necessary for Linux or Mac users.
- Set the serial mode switch on your DiskBuddy64 adapter to "UART".
- Connect the adapter to your Commodore 1541(II) floppy disk drive via an IEC cable.
- Connect the adapter to your PC via a USB cable.
- Switch on your floppy disk drive.
- Use the provided Python scripts in the software/pc/ folder on your PC.
- Execute the respective Python script on your PC:
python diskbuddy-gui.py. - The rest should be self explanatory.
The following command line tools are available:
python disk-detect.py
python disk-dir.py [-h] [-d {8,9,10,11}]

optional arguments:
-h, --help                  show help message and exit
-d, --device                device number of disk drive (8-11, default=8)
python disk-format.py [-h] [-x] [-n] [-c] [-v] [-d {8,9,10,11}] [-t TITLE] [-i IDENT]

optional arguments:
-h, --help                  show help message and exit
-x, --extend                format 40 tracks
-n, --nobump                do not bump head
-c, --clear                 clear (demagnetize) disk (recommended for new disks)
-v, --verify                verify each track after it is formatted
-d, --device                device number of disk drive (8-11, default=8)
-t TITLE, --title TITLE     disk title (max 16 characters, default=commodore)
-i IDENT, --ident IDENT     disk ident (2 characters, default=64)

Example: python disk-format.py -t games -i a7
python disk-read.py [-h] [-x] [-b] [-d {8,9,10,11}] [-i INTER] [-f FILE]

optional arguments:
-h, --help                    show help message and exit
-x, --extend                  read disk with 40 tracks
-b, --bamonly                 only read blocks with BAM entry (recommended)
-d, --device                  device number of disk drive (8-11, default=8)
-i INTER, --interleave INTER  sector interleave (default=4)
-f FILE, --file FILE          output file (default=output.d64)

Example: python disk-read.py -b -f game.d64
python disk-write.py [-h] [-b] [-d {8,9,10,11}] [-i INTER] -f FILE

optional arguments:
-h, --help                    show help message and exit
-b, --bamonly                 only write blocks with BAM entry (recommended)
-d, --device                  device number of disk drive (8-11, default=8)
-i INTER, --interleave INTER  sector interleave (default=4)
-f FILE, --file FILE          input file (*.d64)

Example: python disk-write.py -b -f game.d64
python disk-verify.py [-h] [-b] [-d {8,9,10,11}] [-i INTER] [-e ERRORS] -f FILE

optional arguments:
-h, --help                    show help message and exit
-b, --bamonly                 only verify blocks with BAM entry (recommended)
-d, --device                  device number of disk drive (8-11, default=8)
-i INTER, --interleave INTER  sector interleave (default=4)
-e ERRORS, --errors ERRORS    tolerated errors until abort (default=0)
-f FILE, --file FILE          d64 file to compare the disk with

Example: python disk-verify.py -b -f game.d64
python disk-load.py [-h] [-d {8,9,10,11}]

optional arguments:
-h, --help            show help message and exit
-d, --device          device number of disk drive (8-11, default=8)
python flash-firmware.py
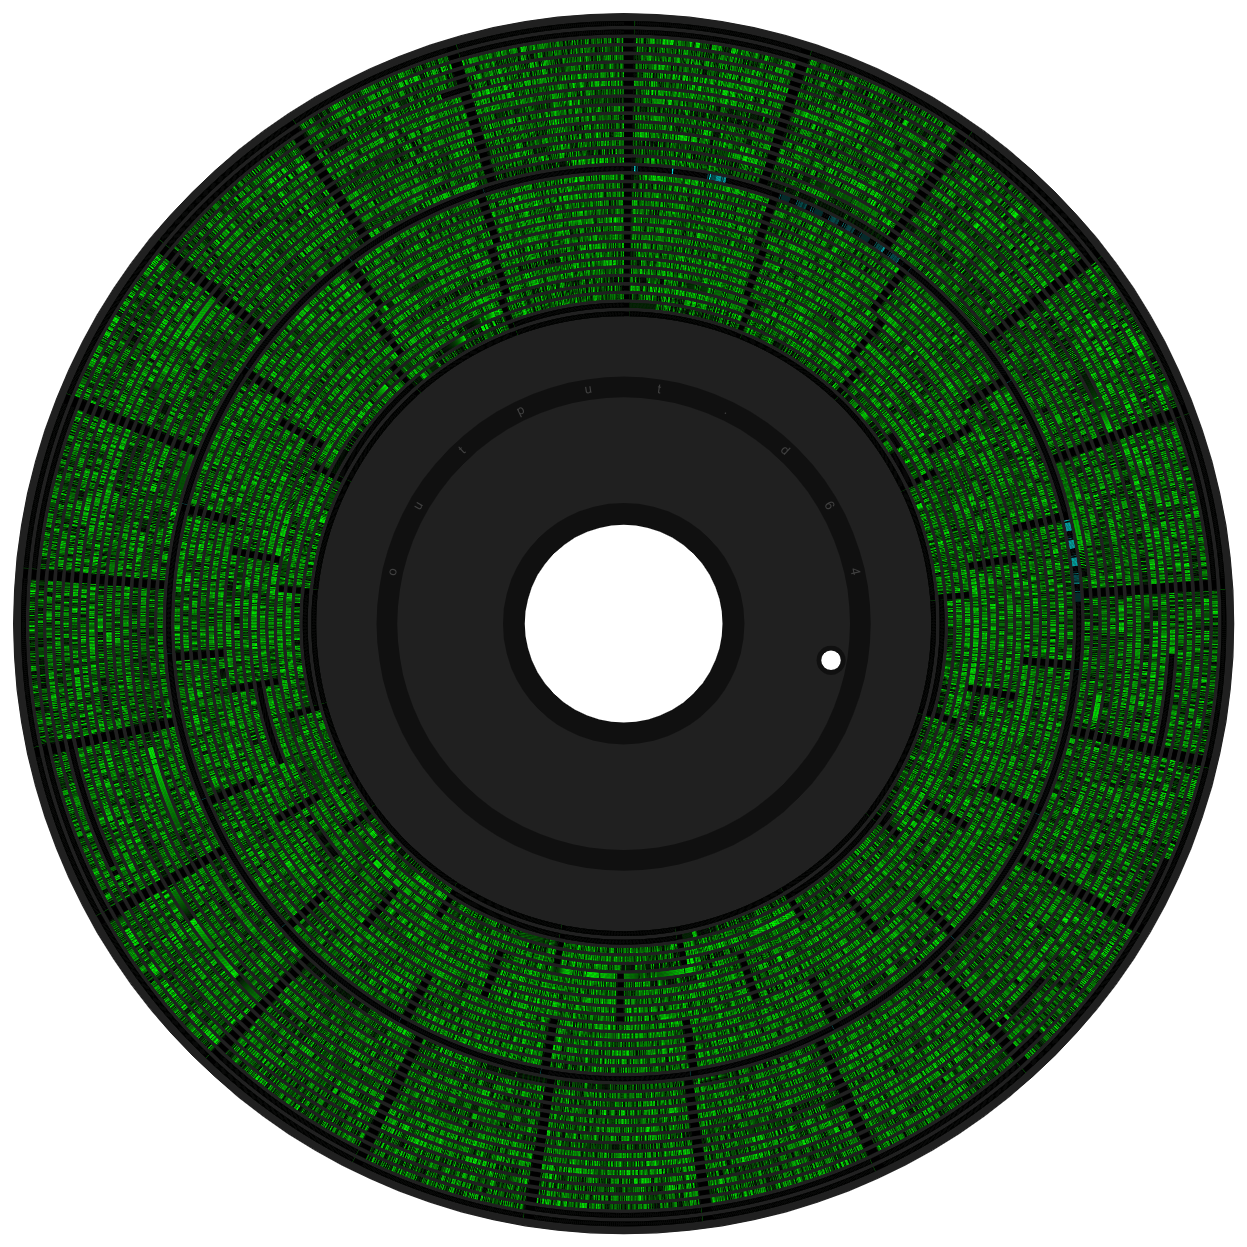
There are numerous applications to create and modify D64 image files and add or delete PRG files yourself. The whole thing is very quick and easy, for example with WebDrive on cbm8bit.com. As a web application, it is platform-independent and requires no installation. In addition, you can even visualize the image of the diskette - very cool!
If you are looking for a command line tool for working with D64 files, cc1541 is a good choice.
- SD2IEC Project
- XU1541 Project
- Michael Steil: Commodore Peripheral Bus
- Michael Steil: A 256 Byte Autostart Fast Loader
- Michael Steil: Ultimate Commodore 1541 Drive Talk
- Jim Butterfield: How The VIC/64 Serial Bus Works
- J. Derogee: IEC disected
- Immers/Neufeld/Moser: D64 File Format
- OpenCBM Software
- cc1541 Software
- cbm8bit WebDrive
- Microchip: ATtiny Datasheet
- WCH: CH340N Datasheet

This work is licensed under Creative Commons Attribution-ShareAlike 3.0 Unported License. (http://creativecommons.org/licenses/by-sa/3.0/)