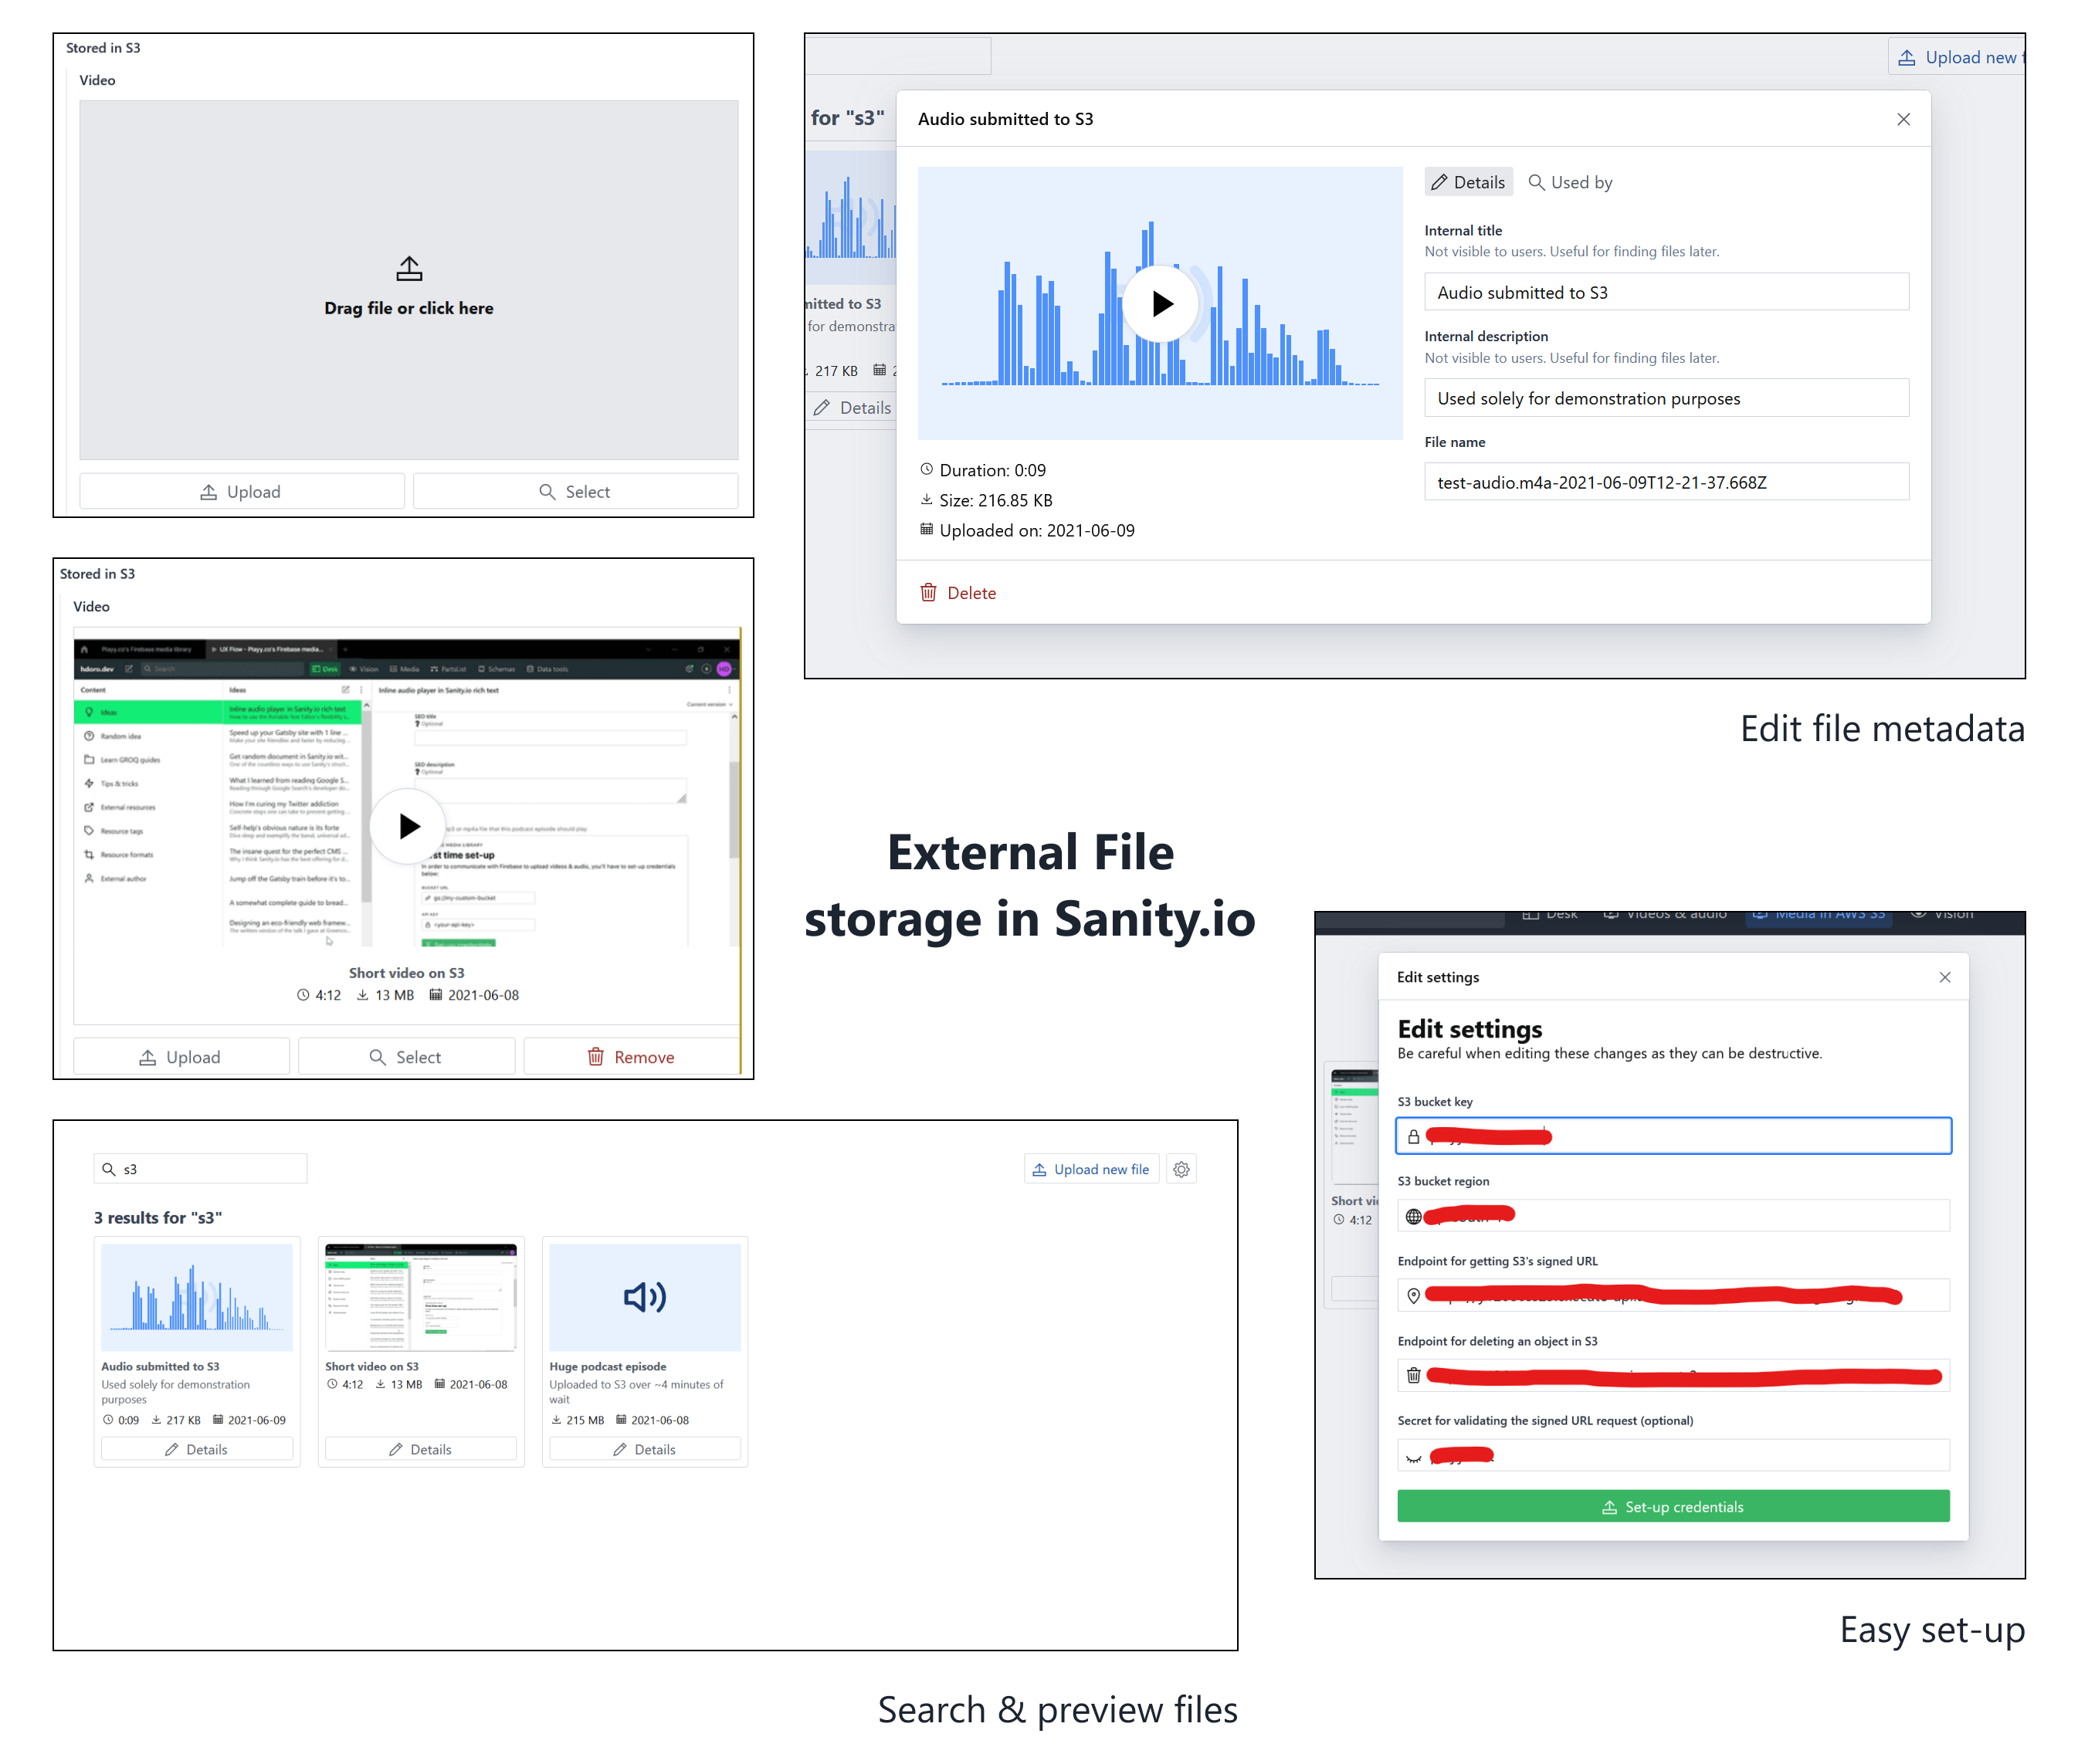
Allows uploading, referencing and deleting files to Cloudflare R2 directly from your Sanity studio. Is a flavor of sanity-plugin-external-files.
- Cost-effective: Cloudflare R2 is a cost-effective solution for storing large files. You only pay for what you use. No egress fees.
- Fast: Cloudflare R2 is built on Cloudflare's global network, making it fast to upload and download files.
- Secure: Cloudflare R2 is built on Cloudflare's security-first architecture, making it secure by default.
- Simplicity: Cloudflare R2 is easy to set up and use.
- Create Cloudflare Account here
- Create a new R2 Bucket (e. g.
sanity-media) - Either use the R2.dev public domain or add your custom domain
- Deploy the Cloudflare Worker as described below
- Add the worker URL to your plugin configuration (
workerUrl) - Add the R2 Bucket URL (either R2.dev subdomain or custom domain) to your plugin configuration (
url)
The plugin requires a Cloudflare Worker to handle the file uploads and deletions. You can find the code for the worker in the worker directory of this repository.
This is required because Sanity Studio doesn't support any server-side logic.
- Install the Wrangler CLI
- Login to your Cloudflare account by running
wrangler login git clonethis repository (git clone https://github.com/hdoro/sanity-plugin-external-files)cdinto theworkerdirectory (cd packages/cloudflare-r2/worker)- Adjust the
wrangler.tomlfile and configureALLOWED_ORIGINSandbucket_nameto match your setup - Add
SECRETas Cloudflare Secret as described here (e. g.SECRET=your-secret) - Run
wrangler publishto deploy the worker - Copy the worker URL from the output and add it to your plugin configuration
- Login to your Cloudflare account here
- Go to "R2" and either create a new bucket or choose your existing one (e. g.
sanity-media) - Go to "Settings" and choose "R2.dev subdomain"
- Hit "Enable"
- Login to your Cloudflare account here
- Go to "Website" and choose "Add domain" (e. g.
example.com) - Follow the instructions to add your domain
- Go to "R2" and either create a new bucket or choose your existing one (e. g.
sanity-media) - Go to "Settings" and choose "Custom domain"
- Add your custom domain (or subdomain) by entering it and follow the instructions to add the necessary DNS records
- Install the plugin
sanity-plugin-r2-filesby running:
npm i sanity-plugin-r2-files
# or yarn / pnpm / bun- Include the plugin in your
sanity.config.(js|ts):
import { cloudflareR2Files } from 'sanity-plugin-r2-files'
import { defineConfig } from 'sanity'

export default defineConfig({
  plugins: [
    cloudflareR2Files({
      toolTitle: 'Media Library',
      credentials: {
        url: 'https://<random>.r2.dev',
        workerUrl: 'https://<worker>.<user>.workers.dev',
      },
    }),
  ],
})- And use its
r2-files.mediatype in schemas you want to use Cloudflare R2 files from:
export default {
  name: 'caseStudy',
  type: 'document',
  fields: [
    {
      name: 'featuredVideo',
      type: 'r2-files.media',
      options: {
        accept: {
          'video/*': ['mp4', 'webm', 'mov'],
        },
      },
    },
  ],
}Each media item is a Sanity document that holds information of the object stored in Cloudflare R2, like its fileURL, contentType and fileSize. It's analogous to Sanity's sanity.imageAsset and sanity.fileAsset: they're pointers to the actual blob, not the files themselves.
These files' type is r2-files.storedFile.
When selected by other document types, media is stored as references to these file documents. You can get the URL of the actual assets by following references in GROQ:
*[_type == 'caseStudy'] {
  ...,

  featuredVideo-> {
    fileSize,
    fileURL,
    cloudflareR2 {
      fileKey,
      baseUrl,
    },
  },
}
Refer to sanity-plugin-external-files for those.