扩展原生能力指的是将您原生开发的功能通过一定规范暴露给 uni小程序环境,然后即可在 uni小程序应用中调用您的原生功能。
uni 扩展原生能力有两种方式:一种是不需要参与页面布局,只需要通过 API 调用原生功能,比如:获取当前定位信息、数据请求等功能,这种情况可通过扩展module的方式来实现;另一种是需要参与页面布局,比如:map、image,这种情况需要通过扩展component即组件的方法来实现;
- JAVA环境 jdk1.7+(最优1.8)
- Android Studio 下载地址:Android Studio官网 OR Android Studio中文社区
- 下载uni小程序 2.9.8+SDK 详情;
- HBuilderX-2.9.8+
-
Module 扩展 非 UI 的特定功能.
-
Component 扩展 实现特别功能的 Native 控件.
如果你扩展的Module或Component要与宿主进行数据交互需要注意。宿主与小程序不在同一进程,内存不共享。所以需要开发者自己实现跨进程通信。后续会完善此交互问题。
关于扩展的Module或Component代码中日志log。小程序运行在io.dcloud.unimp子进程。看日志log需要在这个进程看日志log。
扩展的Module或Component参数中有用到JSONObject或JSONArray,不要使用org.json.JSONObject。请使用com.alibaba.fastjson.JSONObject. 依赖库com.alibaba:fastjson:1.1.46.android
原生扩展代码运行在小程序进程中。所以禁止调用DCUniMPSDK的API。DCUniMPSDK的API只可以在宿主进程调用。否则会触发Not initialized异常。
关于扩展模块需要某些权限申请时。请使用DCUniMPPermissionUtil.requestPermissions申请权限。方便日后权限统一申请处理!!!
下面以TestModule为例,源码请查看 uni小程序SDK 包中的示例 DEMO 工程;
-
在现有Android项目中创建library的Module。例如
TestModule -
配置刚创建的Module的build.gradle信息。
示例:
//导入aar需要的配置
repositories {
	flatDir {
		dirs 'libs'
	}
}
dependencies {
	//必须添加的依赖
	compileOnly 'com.android.support:recyclerview-v7:27.1.0'
	compileOnly 'com.android.support:support-v4:27.1.0'
	compileOnly 'com.android.support:appcompat-v7:27.1.0'
	compileOnly 'com.alibaba:fastjson:1.1.46.android'

	compileOnly fileTree(include: ['uniapp-release.aar'], dir: '../app/libs')
}
Tips:
uniapp-release.aar是扩展module主要依赖库,必须导入此依赖库!
-
Module 扩展必须继承 UniModule 类
示例:
public class TestModule extends UniModule
-
扩展方法必须加上@UniJSMethod (uiThread = false or true) 注解。UniApp 会根据注解来判断当前方法是否要运行在 UI 线程,和当前方法是否是扩展方法。
-
UniApp是根据反射来进行调用 Module 扩展方法,所以Module中的扩展方法必须是 public 类型。
示例:
//run ui thread
@UniJSMethod(uiThread = true)
public void testAsyncFunc(JSONObject options, UniJSCallback callback) {
    Log.e(TAG, "testAsyncFunc--"+options);
    if(callback != null) {
        JSONObject data = new JSONObject();
        data.put("code", "success");
        callback.invoke(data);
    }
}

//run JS thread
@UniJSMethod (uiThread = false)
public JSONObject testSyncFunc(){
    JSONObject data = new JSONObject();
    data.put("code", "success");
    return data;
}
-
同样因为是通过反射调用,Module 不能被混淆。请在混淆文件中添加代码:
-keep public class * extends io.dcloud.feature.uniapp.common.UniModule{*;}
- Module 扩展的方法可以使用 int, double, float, String, Map, List, com.alibaba.fastjson.JSONObject 类型的参数类型的参数
由于uni小程序运行在独立子进程中。内存与宿主不共享。所以宿主进程注册了TestModule,在uni小程序是无法使用的。
Android创建子进程时会主动再次初始化Application!所以uni小程序注册TestModule必须在Application中的onCreate初始化或注册。
Tips
- 注册
TestModule之前记得配置宿主的build.gradle导入Module模块. - 以下示例代码写在宿主的Application中。
示例:
public class App extends Application {
    @Override
    public void onCreate() {
        super.onCreate();
        try {
            UniSDKEngine.registerModule("TestModule", TestModule.class);
        } catch (UniException e) {
            e.printStackTrace();
        }
	}
}
到此,我们已经完成了一个简单的 module 扩展
module 支持在 vue 和 nvue 中使用
示例:
<template>
	<div>
		<button type="primary" @click="testAsyncFunc">testAsyncFunc</button>
		<button type="primary" @click="testSyncFunc">testSyncFunc</button>
	</div>
</template>

<script>
	// 获取 module
	var testModule = uni.requireNativePlugin("TestModule")
	export default {
		methods: {
			testAsyncFunc() {
				// 调用异步方法
				testModule.testAsyncFunc({
						'name': 'unimp',
						'age': 1
					},
					(ret) => {
						console.log(ret)
					})
			},
			testSyncFunc() {
				// 调用同步方法
				var ret = testModule.testSyncFunc({
					'name': 'unimp',
					'age': 1
				})
				console.log(ret)
			}
		}
	}
</script>
Tips
uni.requireNativePlugin仅用于获取UniModule的对象。UniComponent不支持该方法!
下面以TestComponent为例,源码请查看 uni小程序SDK 包中的示例 DEMO 工程;
请参考 扩展 Module
-
Component 扩展类必须继承 UniComponent
示例:
public class TestText extends UniComponent<TextView>
-
UniComponent的initComponentHostView回调函数。构建Component的view时会触发此回调函数。
示例:
@Override
protected TextView initComponentHostView(@NonNull Context context) {
    TextView textView = new TextView(context);
    textView.setTextSize(20);
    textView.setTextColor(Color.BLACK);
    return textView;
}
-
Component 对应的设置属性的方法必须添加注解 @UniComponentProp(name=value(value is attr or style of dsl))
示例:
@UniComponentProp(name = "tel")
public void setTel(String telNumber) {
    getHostView().setText("tel: " + telNumber);
}
-
UniApp 通过反射调用对应的方法,所以 Component 对应的属性方法必须是 public,并且不能被混淆。请在混淆文件中添加代码
-keep public class * extends io.dcloud.feature.uniapp.common.UniComponent{*;}
- Component 扩展的方法可以使用 int, double, float, String, Map, List, com.alibaba.fastjson.JSONObject 类型的参数
- Component定义组件方法.
示例:
- 在组件中如下声明一个组件方法
@UniJSMethod
public void clearTel() {
   getHostView().setText("");
}- 注册组之后,你可以在UniApp 文件中调用
<template>
	<div>
		<myText ref="telText" tel="12305" style="width:200;height:100" @onTel="onTel" @click="myTextClick"></myText>
	</div>
</template>
<script>
    export default {
        methods: {
			myTextClick(e) {
				this.$refs.telText.clearTel();
			}
        }
    }
</script> 由于uni小程序运行在独立子进程中。内存与宿主不共享。所以宿主进程注册了TestComponent,在uni小程序是无法使用的。
Android创建子进程时会主动再次初始化Application!所以uni小程序注册TestComponent必须在Application中的onCreate初始化或注册。
Tips
- 注册
TestModule之前记得配置宿主的build.gradle导入的Module模块. - 以下示例代码写在宿主的Application中。
示例:
public class App extends Application {

    @Override
    public void onCreate() {
        try {
            UniSDKEngine.registerComponent("myText", TestText.class);
        } catch (UniException e) {
            e.printStackTrace();
        }
        super.onCreate();
    }
}
到此,我们已经完成了一个简单的 component 扩展
注意:扩展的 component 只能在 nvue 文件中使用
示例:
<template>
	<div>
		<myText tel="12305" style="width:200;height:100" @onTel="onTel"></myText>
	</div>
</template>

<script>
    export default {
        data() {
            return {
            }
        },
        onLoad() {
        },
        methods: {
			onTel: (e)=> {
				console.log("onTel="+e.detail.tel);
			}
        }
    }
</script>向JS环境发送一些事件,比如click事件
void fireEvent(elementRef,type)
void fireEvent(elementRef,type, data)
void fireEvent(elementRef,type,data,domChanges)
elementRef(String):产生事件的组件idtype(String): 事件名称,默认事件名称格式为"onXXX",比如OnPullDowndata(Map<String, Object>): 需要发送的一些额外数据,比如click时,view大小,点击坐标等等。domChanges(Map<String, Object>): 目标组件的属性和样式发生的修改内容
示例:
通过 @事件名="方法名" 添加事件,如下添加onTel事件
//原生触发fireEvent 自定义事件onTel
Map<String, Object> params = new HashMap<>();
Map<String, Object> number = new HashMap<>();
number.put("tel", telNumber);
//目前uni限制 参数需要放入到"detail"中 否则会被清理
params.put("detail", number);
fireEvent("onTel", params);
//标签注册接收onTel事件
<myText tel="12305" style="width:200;height:100" @onTel="onTel"></myText>
//事件回调
methods: {
onTel: (e)=> {
console.log("onTel="+e.detail.tel);
}
} 注意
执行自定义事件fireEvent时params的数据资源都要放入到"detail"中。如果没有将你得返回的数据放入"detail"中将可能丢失。请注意!!!
JS调用时,有的场景需要返回一些数据,比如以下例子,返回x、y坐标
void invoke(Object data);
void invokeAndKeepAlive(Object data);
invoke调用javascript回调方法,此方法将在调用后被销毁。invokeAndKeepAlive调用javascript回调方法并保持回调活动以备以后使用。
示例:
@UniJSMethod(uiThread = true)
public void testAsyncFunc(JSONObject options, UniJSCallback callback) {
    Log.e(TAG, "testAsyncFunc--"+options);
    if(callback != null) {
        JSONObject data = new JSONObject();
        data.put("code", "success");
        callback.invoke(data);
    }
}
注意
执行自定义事件fireEvent时params的数据资源都要放入到"detail"中。如果没有将你得返回的数据放入"detail"中将可能丢失。请注意!!!
用于页面监听持久性事件,例如定位信息,陀螺仪等的变化。
示例:
页面监听event事件
var globalEvent = uni.requireNativePlugin('globalEvent');
globalEvent.addEventListener('myEvent', function(e) {
  console.log('myEvent'+JSON.stringify(e));
});
插件 原生代码发出myEvent事件
Map<String,Object> params=new HashMap<>();
params.put("key","value");
mUniSDKInstance.fireGlobalEventCallback("myEvent", params);
注意 globalEvent事件只能通过页面的UniSDKInstance实例给当前页面发送globalEvent事件。其他页面无法接受。
- PRIVATE_WWW 对应相对路径URL为"_www"开头的地址
- PRIVATE_DOC 对应相对路径URL为"_doc"开头的地址
- PUBLIC_DOCUMENTS 对应相对路径URL为"_documents"开头的地址
- PUBLIC_DOWNLOADS 对应相对路径URL为"_downloads"开头的地址
-
Q1: 原生插件拿到
_doc/a.png、static/test.js等路径参数如何转换原生开发的地址?可通过UniSDKInstance.rewriteUri转换app中的路径参数。
示例:
 Uri uri = mUniSDKInstance.rewriteUri(Uri.parse("_doc/a.png"), URIAdapter.FILE);
 Log.e(TAG, uri.toString())
-
Q2: 我想操作DOC目录下的文件如何获取路径地址?
可通过UniSDKInstance.rewriteUri转换app中的路径参数。
示例:
 Uri uri = mUniSDKInstance.rewriteUri(Uri.parse("_doc/"), URIAdapter.FILE);
 Log.e(TAG, uri.toString())
小程序运行在独立子进程。所以想要看小程序的日志需要将进程切换到io.dcloud.unimp进程查看log!
修改项目中assets/data/dcloud_control.xml 内部信息。将syncDebug改为true,开启调试模式。 注意正式版需要改为false!!!
修改后查看io.dcloud.unimp进程查看log。TAG为console
获取UniSDKInstance对象。该对象中可以获取到上下文。
示例
@UniJSMethod (uiThread = true)
public void gotoNativePage(){
    if(mUniSDKInstance != null) {
        Intent intent = new Intent(mUniSDKInstance.getContext(), NativePageActivity.class);
        mUniSDKInstance.getContext().startActivity(intent);
    }
}
uni-app插件市场有大量丰富的插件。
1.插件市场下载uni-app插件(此处以RichAlert为例)
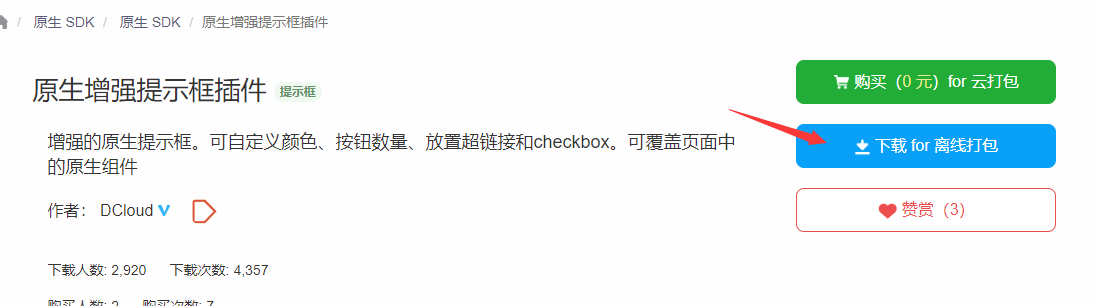
2.解压插件包得到package.json和android文件夹
3.将插件中android目录下的aar/jar文件放入libs下,其余文件参考项目目录放入指定文件夹中。
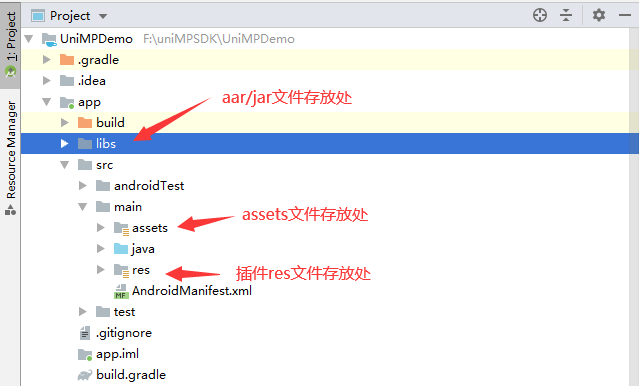
4.在assets目录下创建dcloud_uniplugins.json文件
- 说明 dcloud_uniplugins.json
- 说明 package.json
- 阅读
package.json读取android配置信息。编写dcloud_uniplugins.json内容
示例:
{
  "nativePlugins": [
    {
      "plugins": [
        {
          "type": "module",
          "name": "DCloud-RichAlert",
          "class": "uni.dcloud.io.uniplugin_richalert.RichAlertModule"
        }
      ]
    }
  ]
}
5.阅读package.json读取dependencies、minSdkVersion、permissions配置信息。配置gradle文件和AndroidManifest.xml。
6.阅读package.json读取parameters节点信息配置AndroidManifest.xml。填写插件需要的meta-data信息。
到此原生插件已集成到宿主APP中
Tips:
- uni小程序sdk无法使用插件市场中付费的原生插件.