| name | route |
|---|---|
Getting Started |
/getting-started |
import { Image } from './components/image';
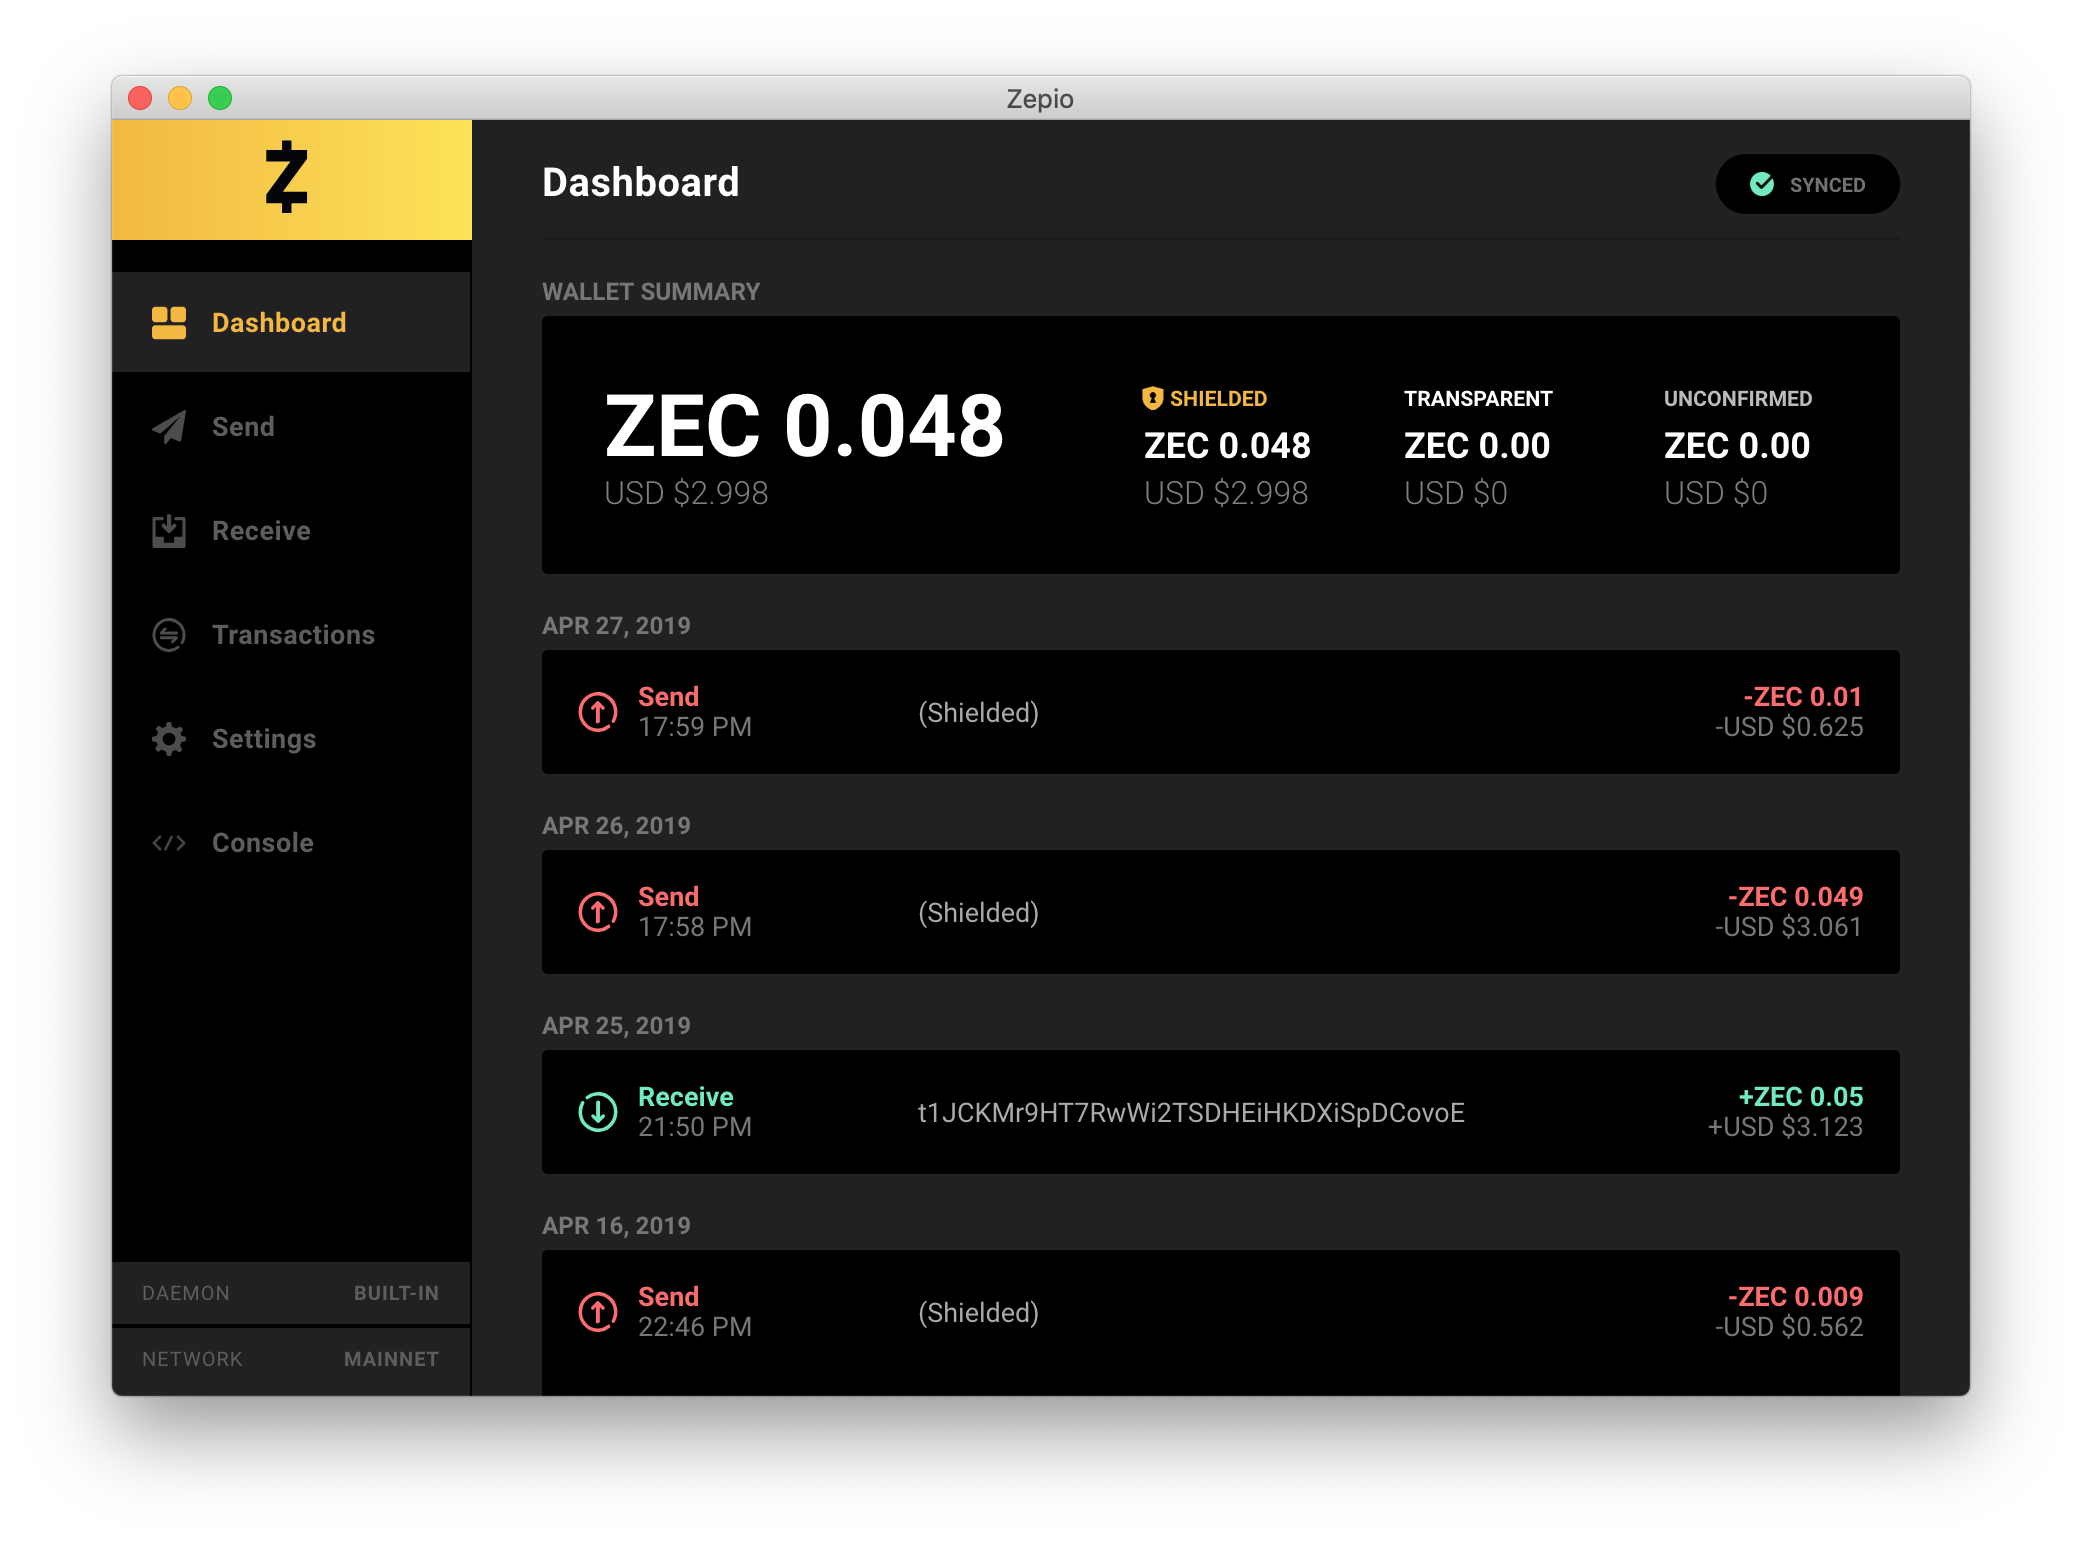
Zepio's Dashboard is the entry point of the application. This is where a user can get an overview of the latest state and updates to the wallet. More specifically, a user is faced with the following when inside of the Dashboard:
- Overview of the balance of coins available for spending (
shieldedandtransparent). - Balance of any unconfirmed transactions.
- Overview of the USD-denominated value of the funds.
- Chronological list of the most recent transactions performed within the wallet.
- Details of a specific transaction.
- Network base chain (
mainnetortestnet). - Full node daemon status (
built-inorcustom). - Network synchronization status pill (
ready,syncing,error).
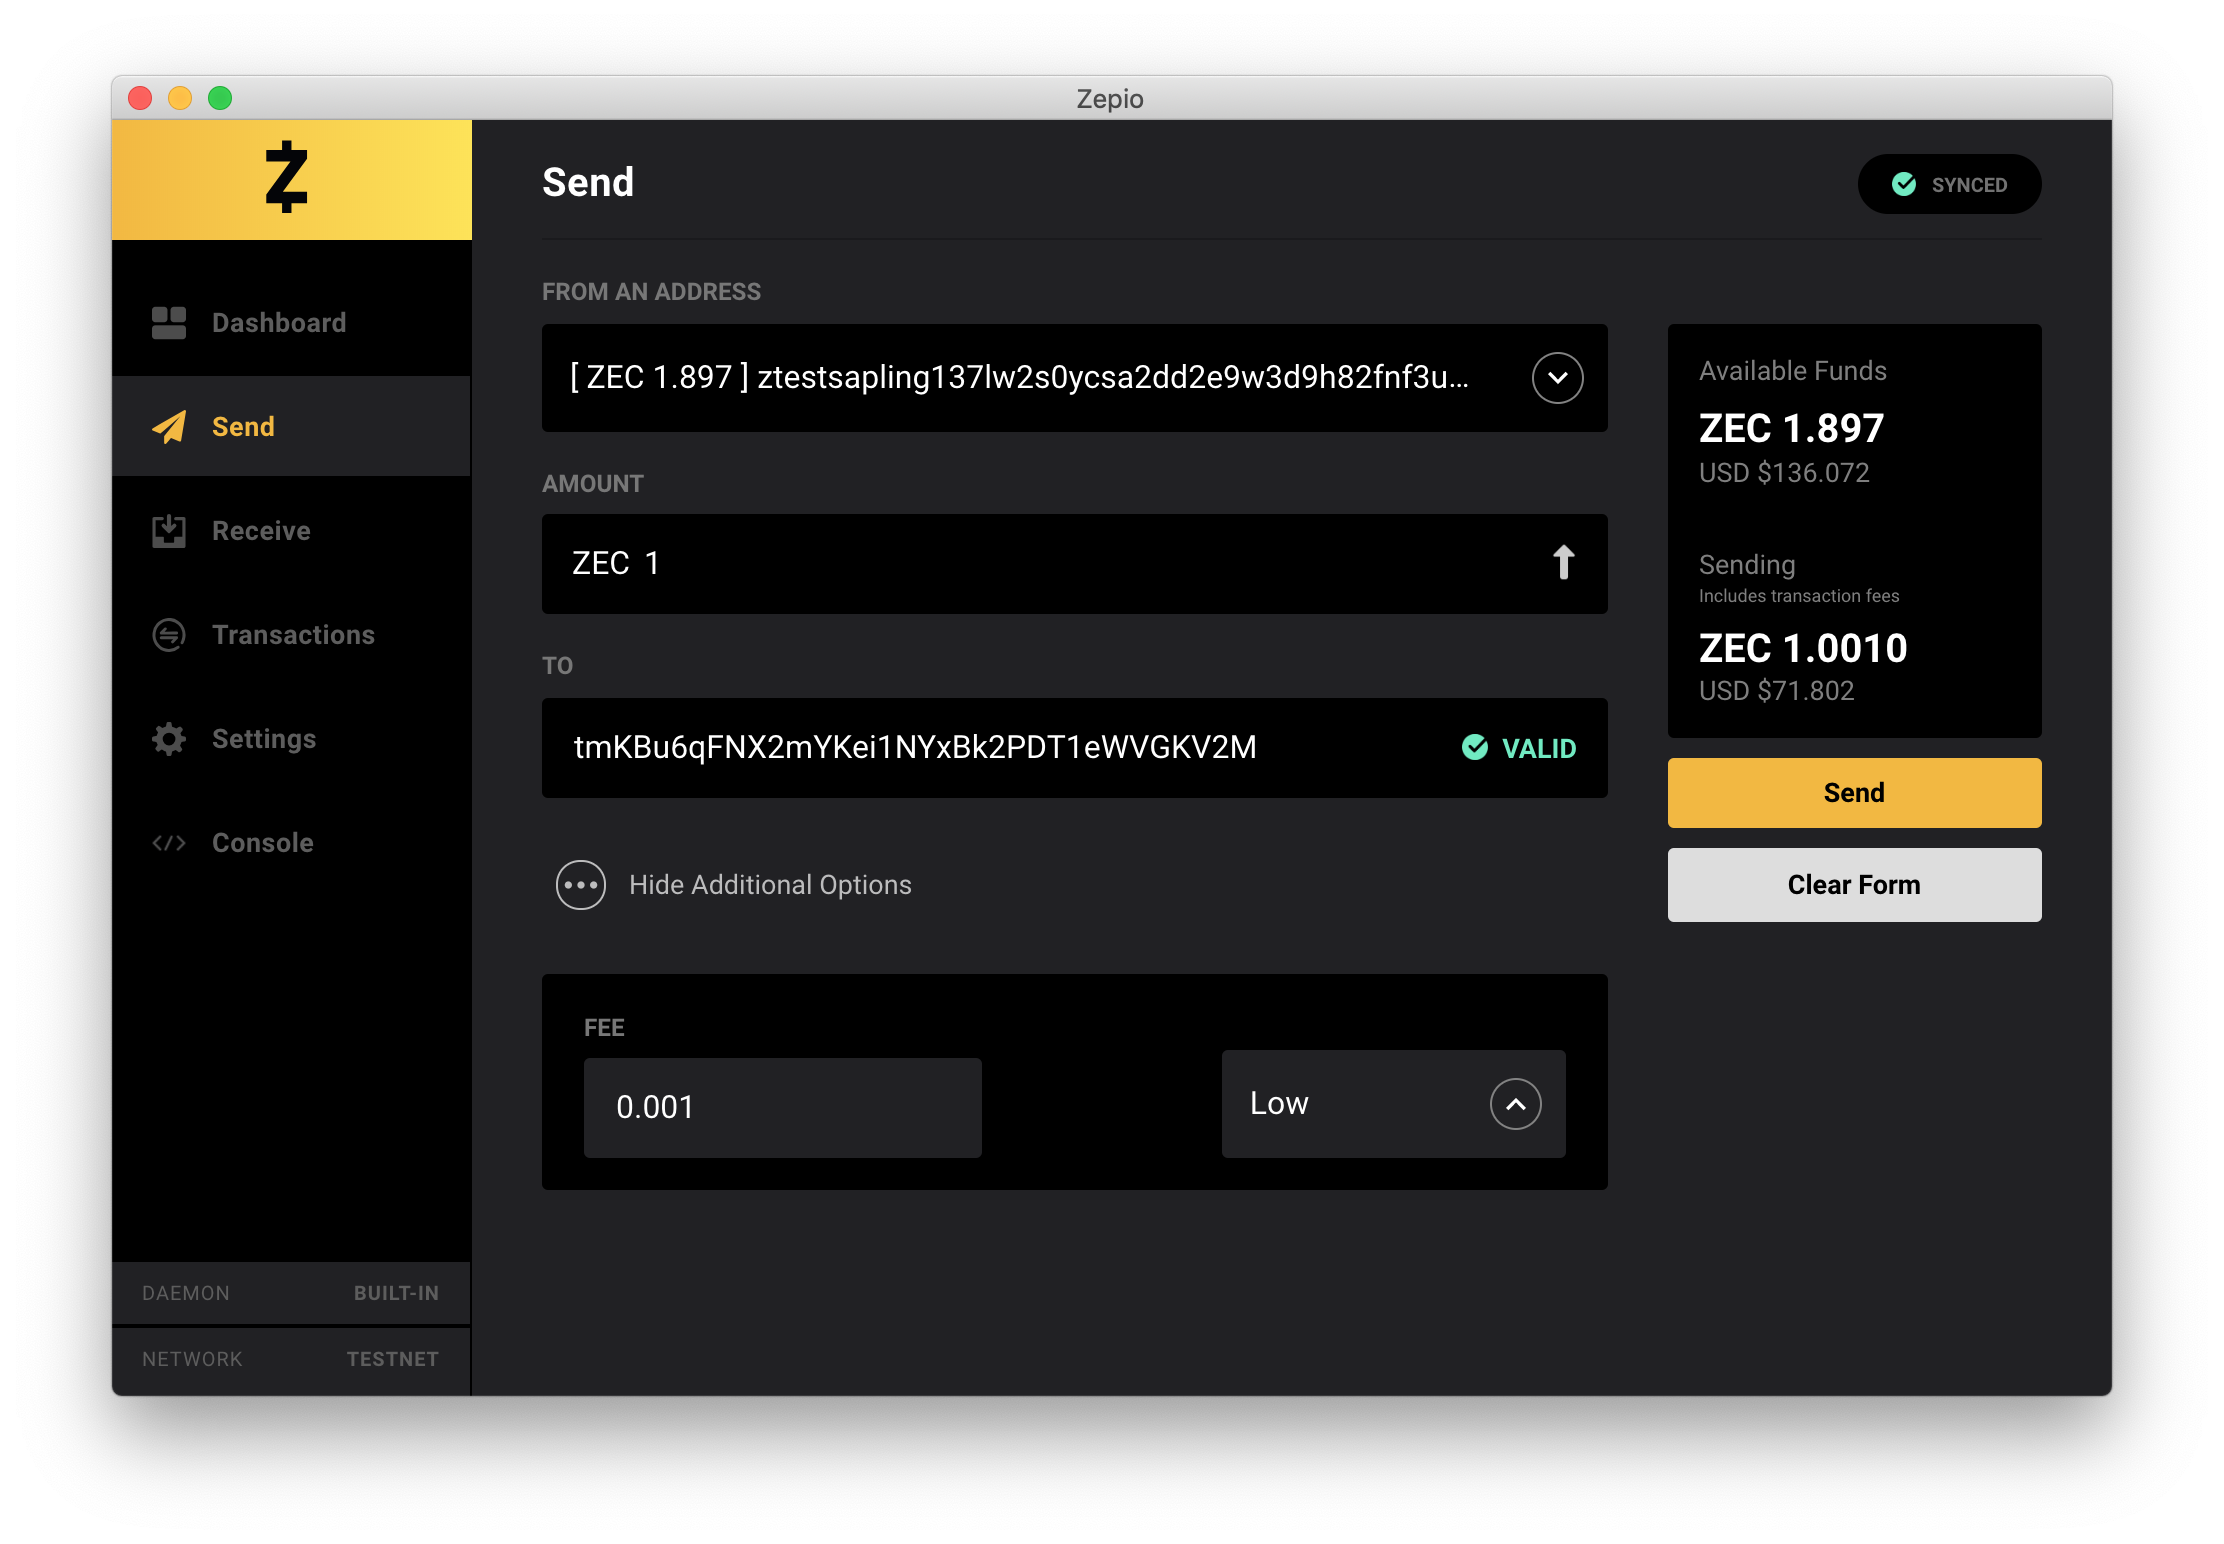
The Send view provides an easy way to send ZEC to any other Zcash address. To the right is an overview of the transaction being created, and to the right you will find a smart form. To begin, select a source address to send ZEC from -- the selector shows all available addresses and their respective funds.
Next, select a ZEC amount that you wish to send. Use the arrow to the right of the input if you wish to send all of the funds available in that address.
The next field is the Zcash address the funds are being sent to. It's a smart input, so all addresses pasted are checked for validity. You will see either VALID or INVALID to the right of the input -- you won't be able to submit a transaction to an address that does not validate. If sending to a shielded address, the user will also be shown a memo field that accepts either HEX or ASCII formatting.
It is advised to use the default fee of 0.0001 ZEC to refrain from having your transactions distinguished from the rest. That being said, if you'd like to send a transaction with a specific transaction fee, just use the Show Additional Options toggler. Low, medium, and high amounts are proposed, but you are also able to enter a custom ZEC value.
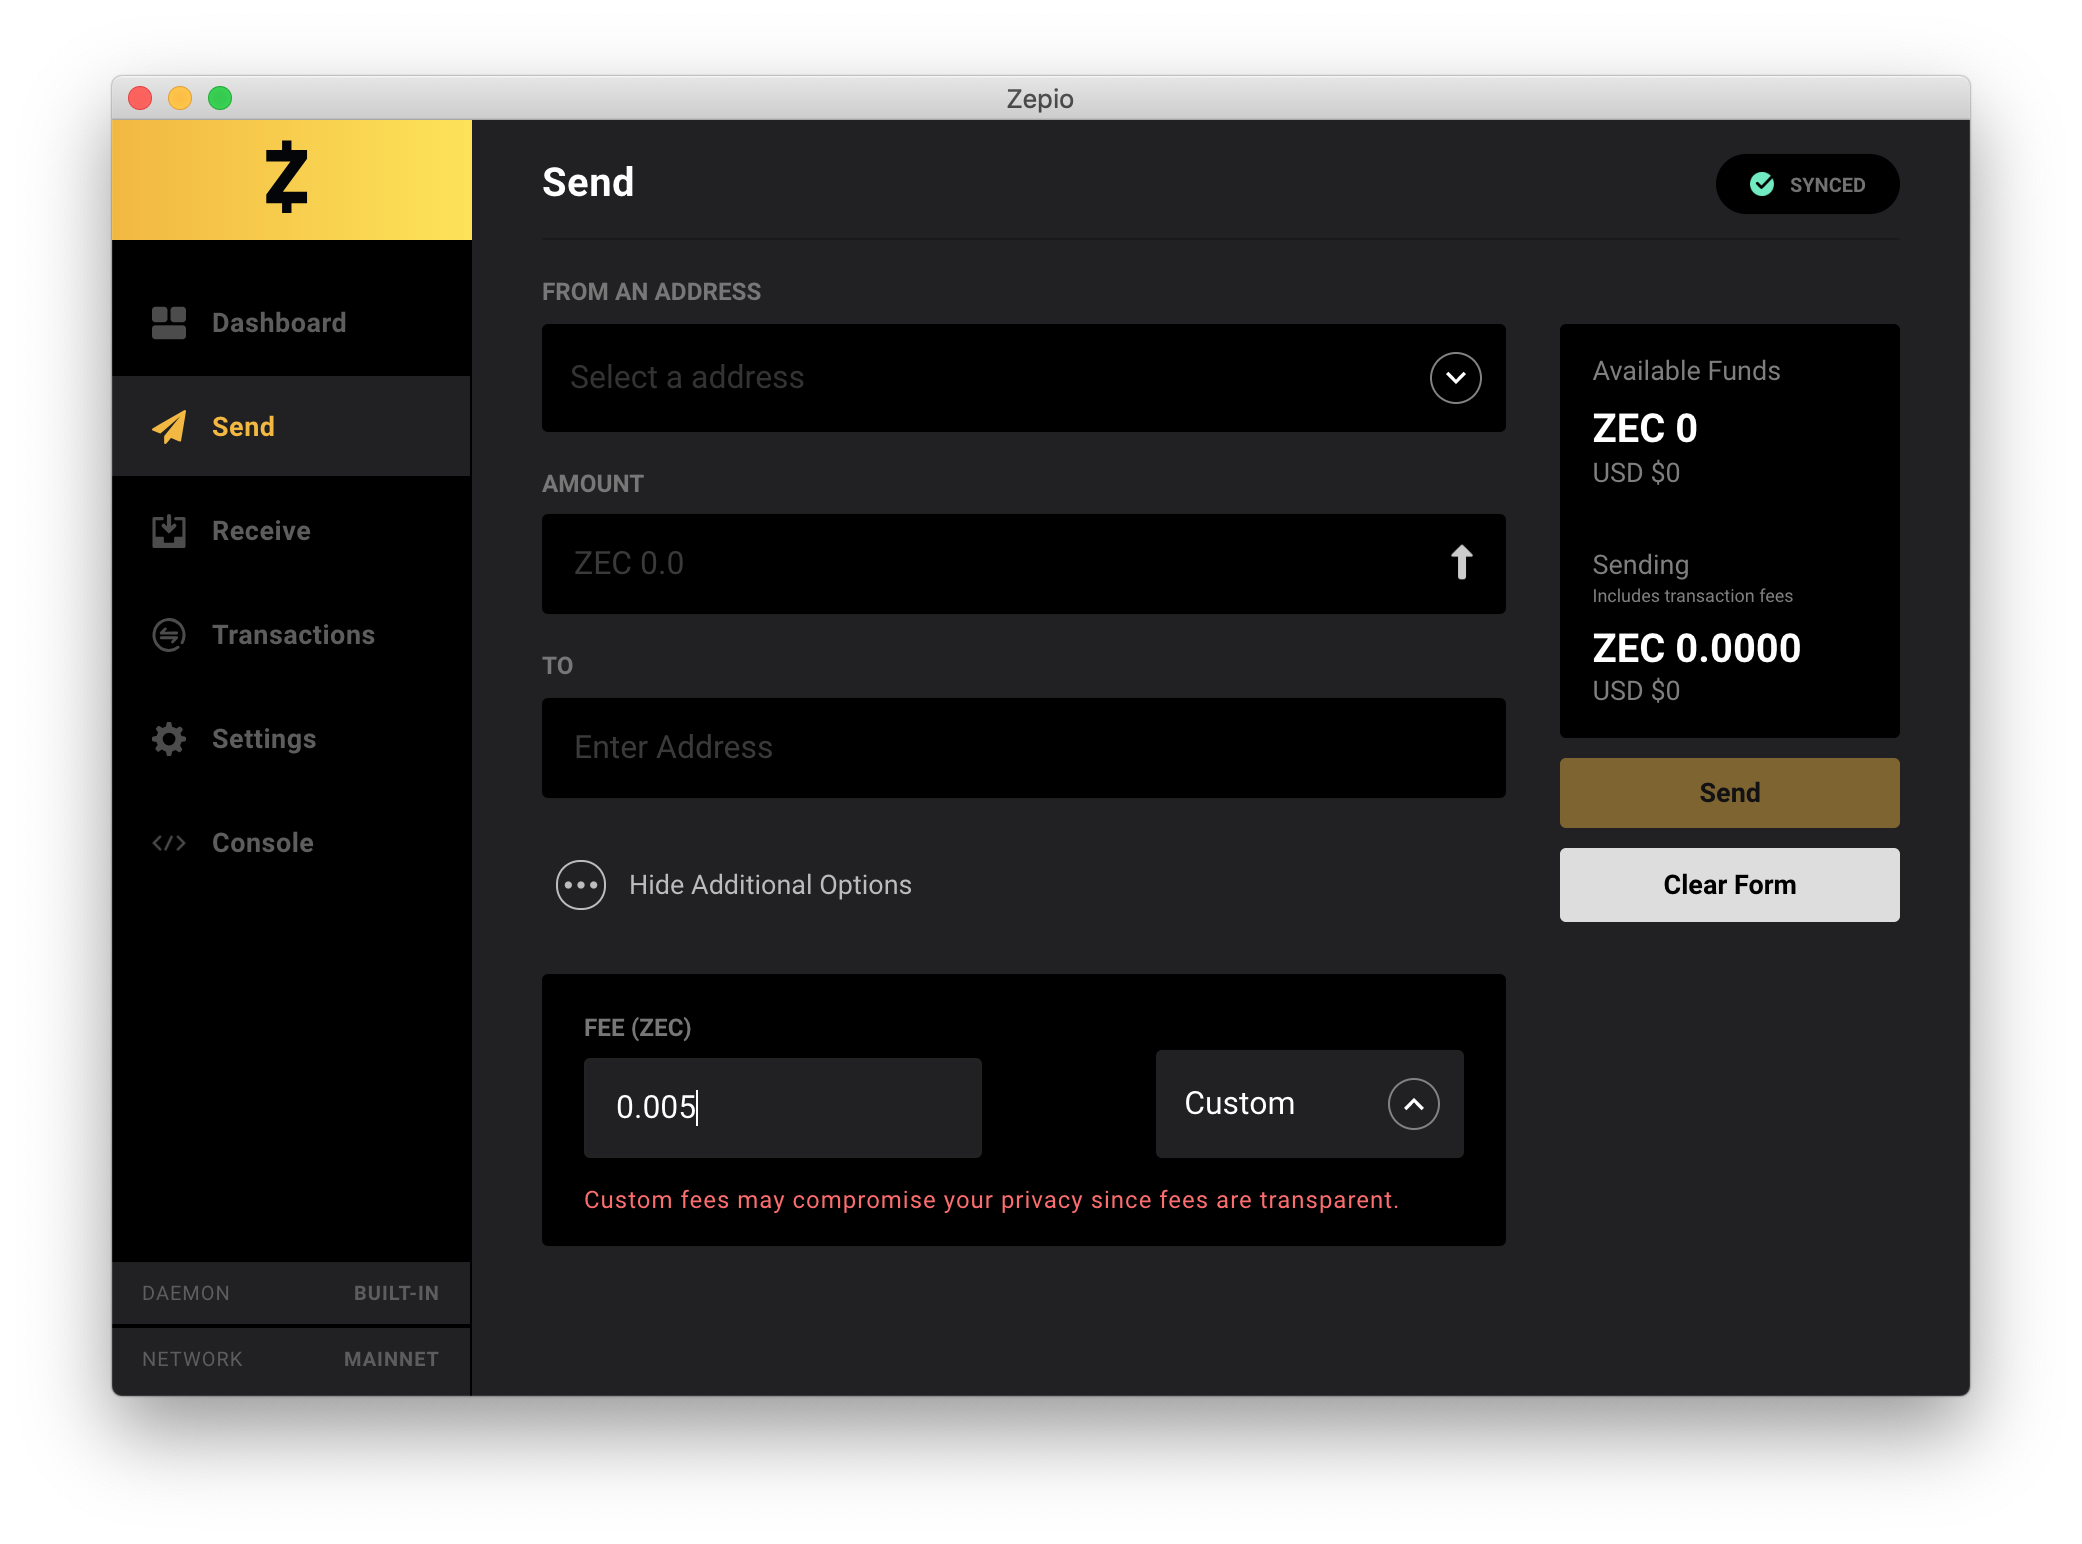

After submitting the transaction, you will be presented with a modal detailing the information and requesting final confirmation to propagate the transaction through the full node.
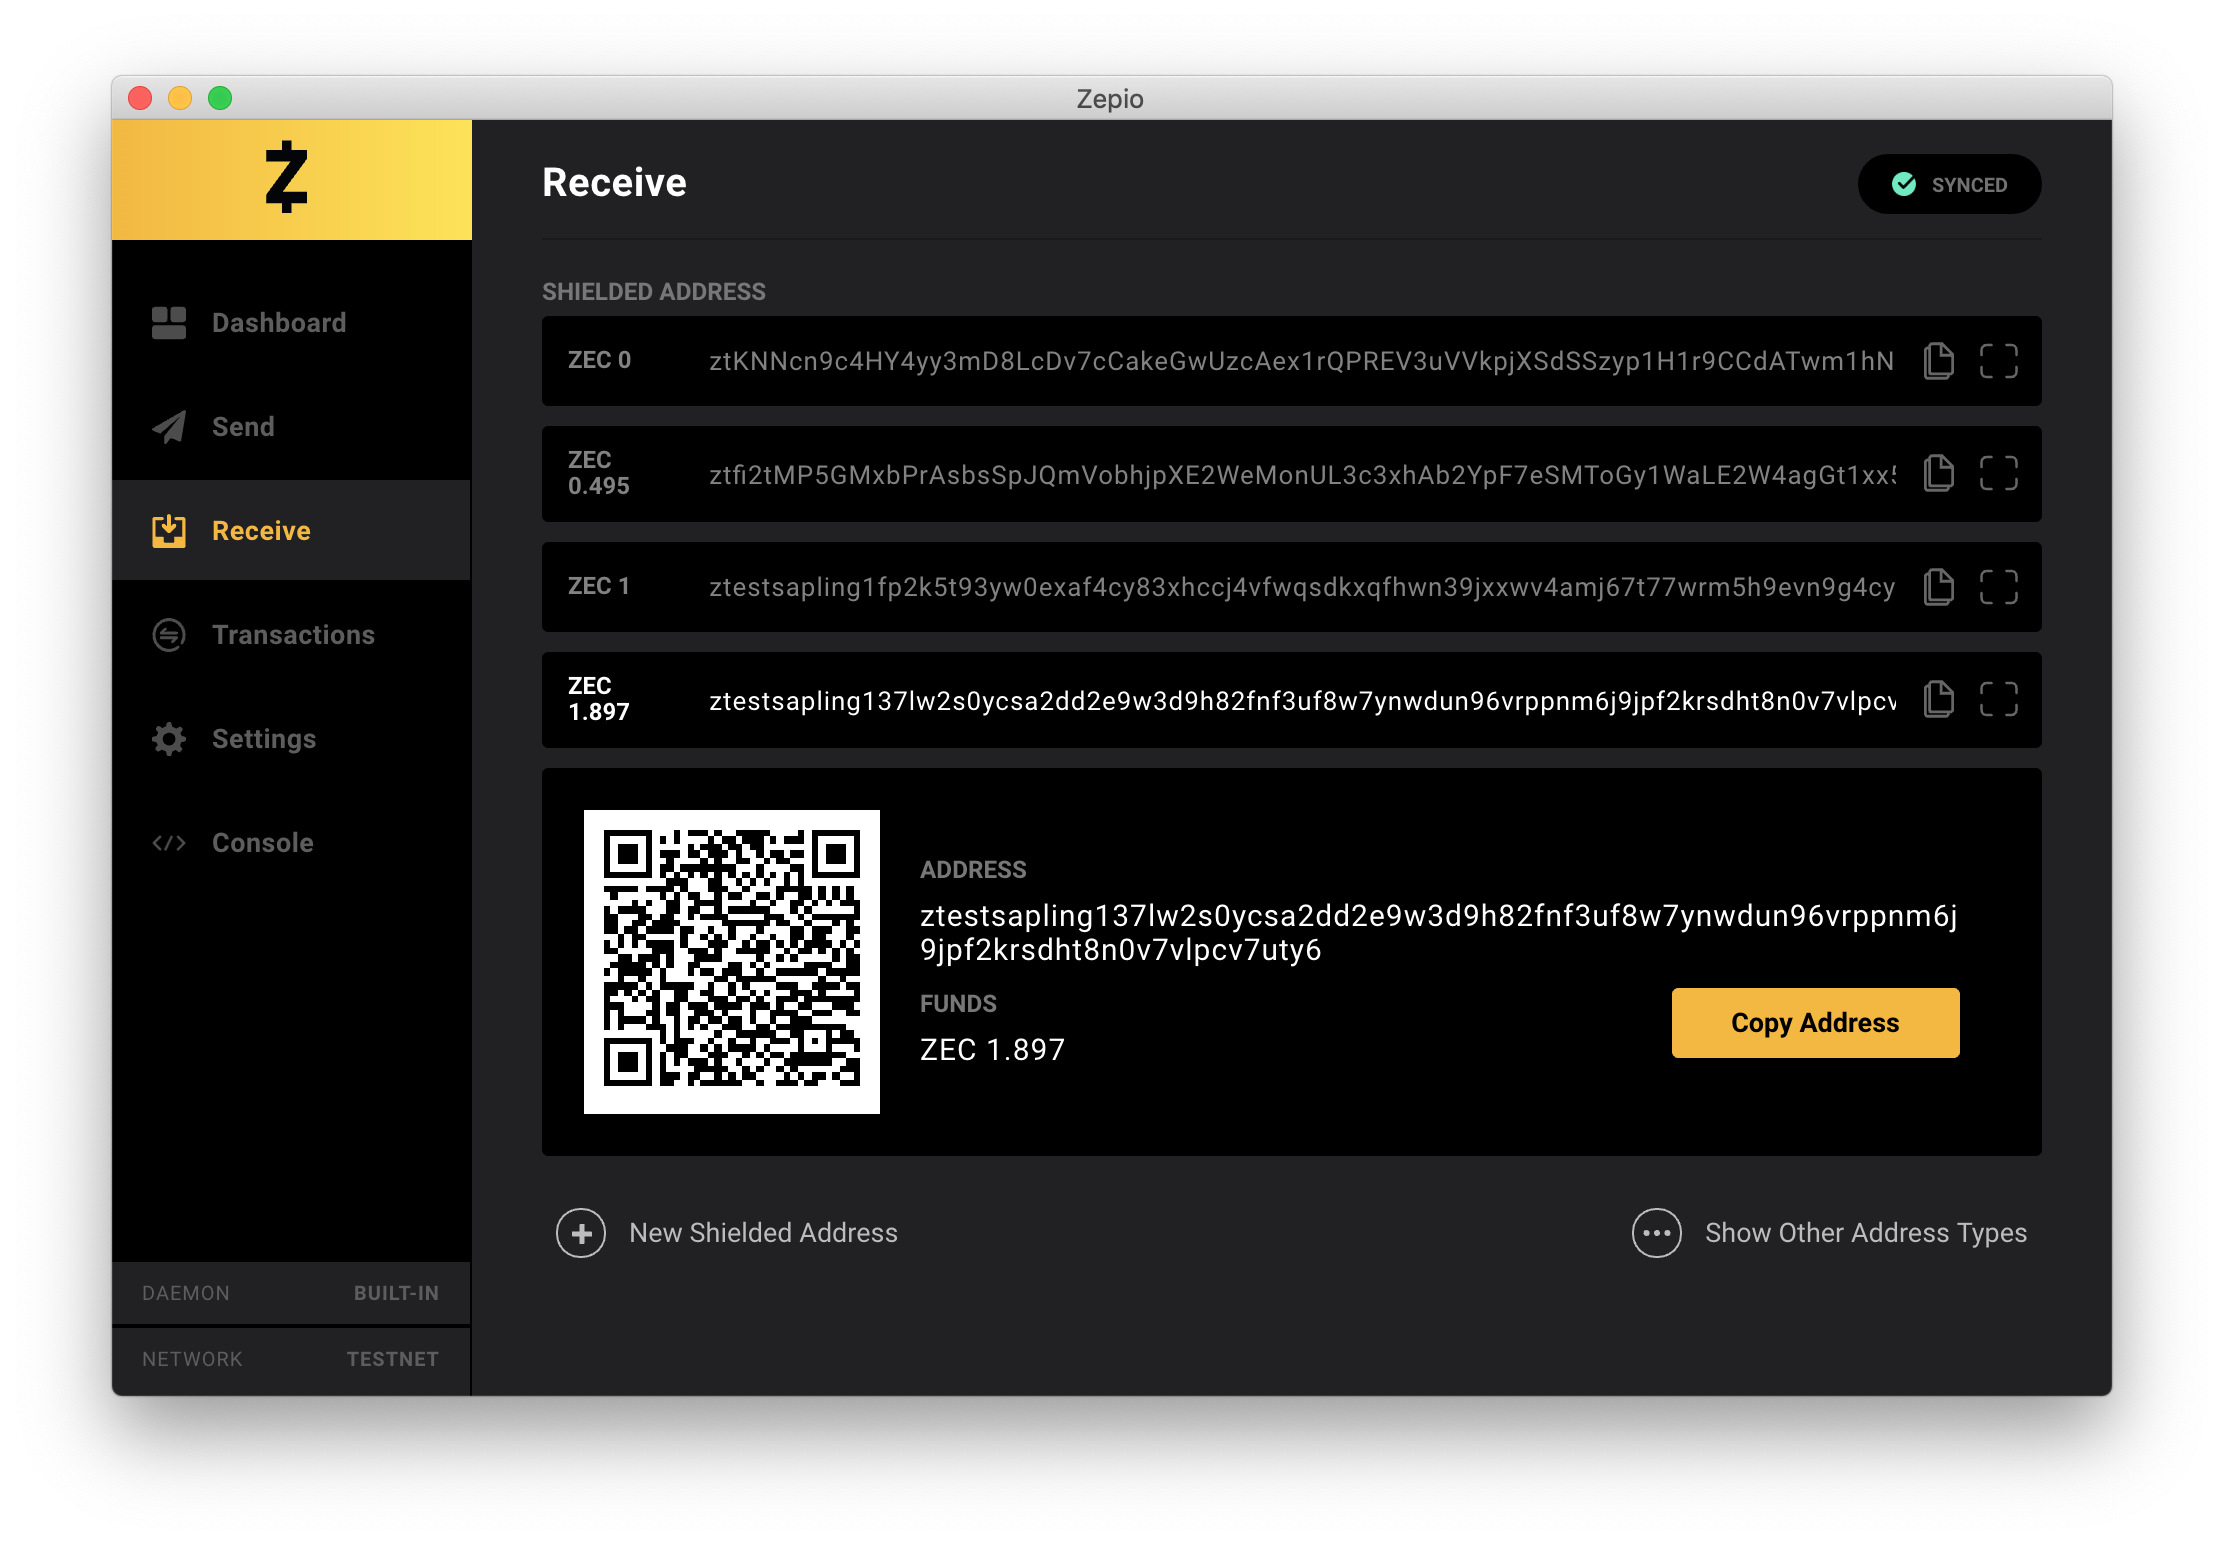
The Receive view provides information about all addresses in the wallet. For complete privacy on your transactions, make sure to use shielded addresses (start with zs). Transparent addresses, which provide no privacy capabilities, are available inside Show Other Address Types. You are able to generate as many addresses as needed, both shielded and transparent addresses.
Clicking on the address item itself will present you with a QR code and more details about the address, such as address and available funds. Along with the copy address buttons, you are just 1 to 2 clicks away from receiving funds.
![]()
The Transactions view showcases all of the transactions that you have performed with the wallet. It's structured in chronological order for easier finding and tracking of transactions. The transaction item displays the time at which the transaction took place, whether it is a sending or receiving transaction, the ZEC and USD values sent, and the address being sent to/from. For shielded transactions you may see (Shielded) instead.
By clicking in any of the transaction list items, you will be prompted with a Transaction Details modal.
![]()
Transaction Details modal shows you more information pertinent to the transaction. You will be able to see the exact date/time the transaction took place, the value of ZEC (and USD) being sent/received, as well as the transaction ID. By clicking on the transaction ID, you will be taken to a Zcash Block Explorer. Do note that if you perform shielded-to-shielded transactions, the details in the Block Explorer will be rather limited and non-existent. Additionally, you can also see the number of confirmations for that specific transactions.
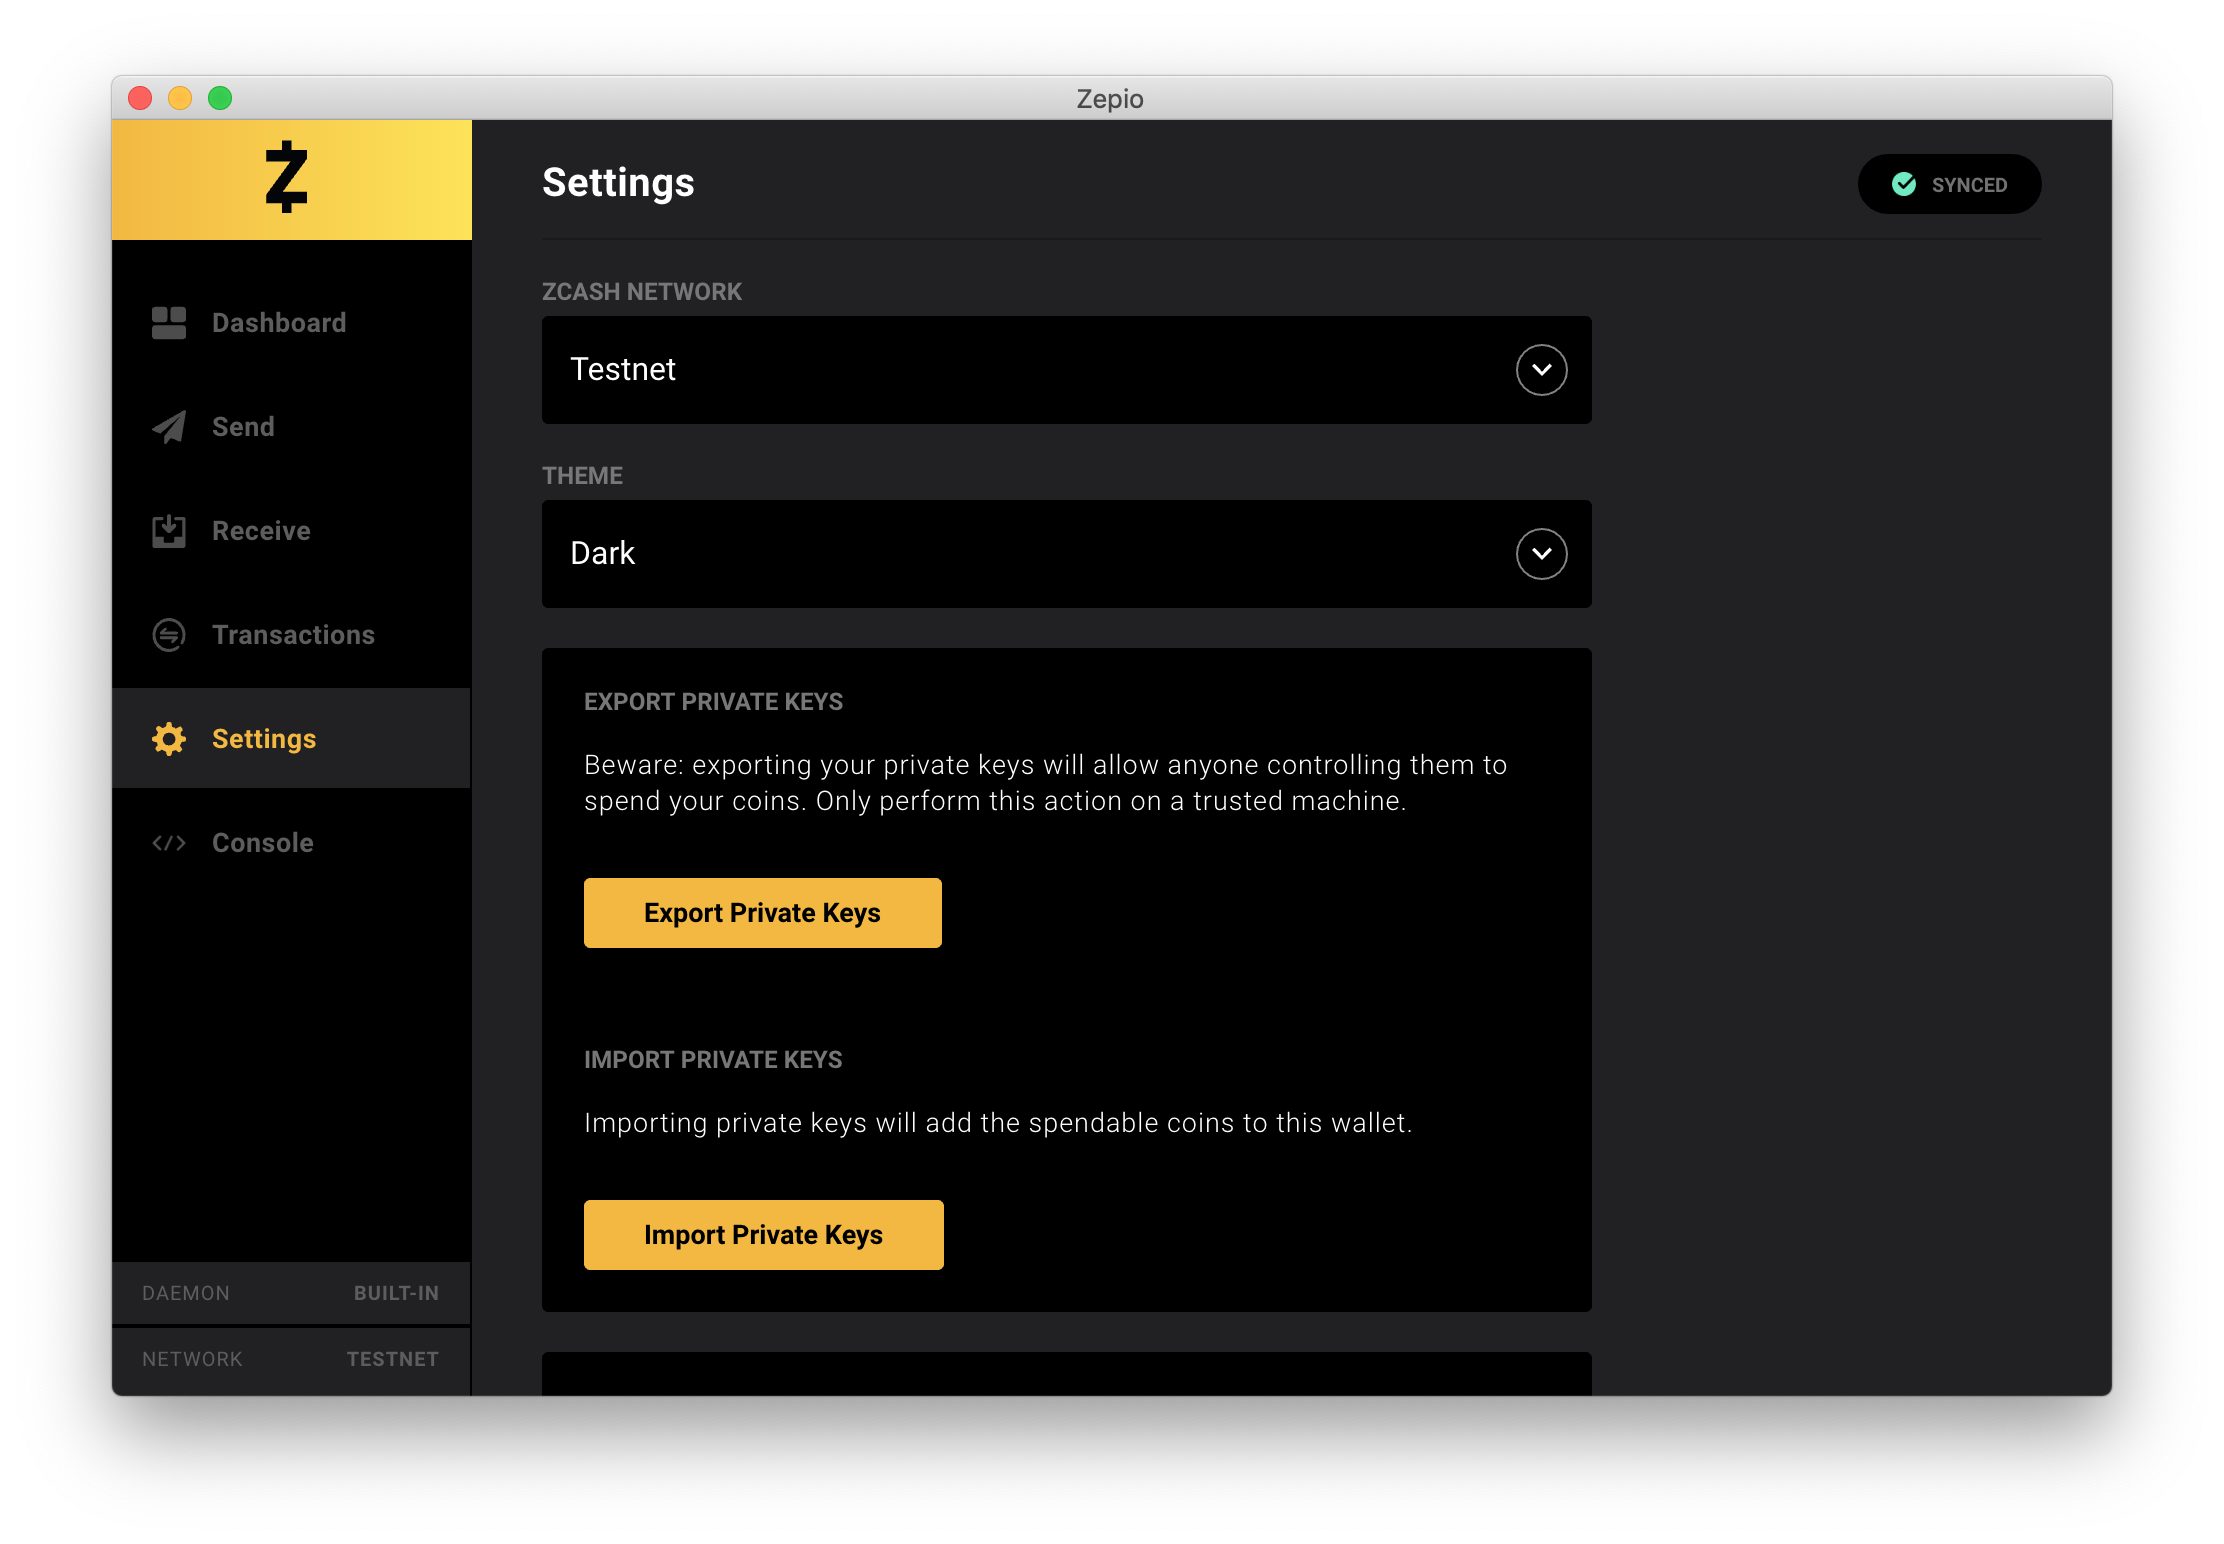
The Settings view provides options to further configure Zepio for your own specific wants and needs. The following actions are possible inside of the Settings view:
- Change between
mainnetandtestnetZcash chains. - Toggle between
LightandDarkZepio themes. - Import and export address-specific private keys.
- Backup
wallet.datfile.
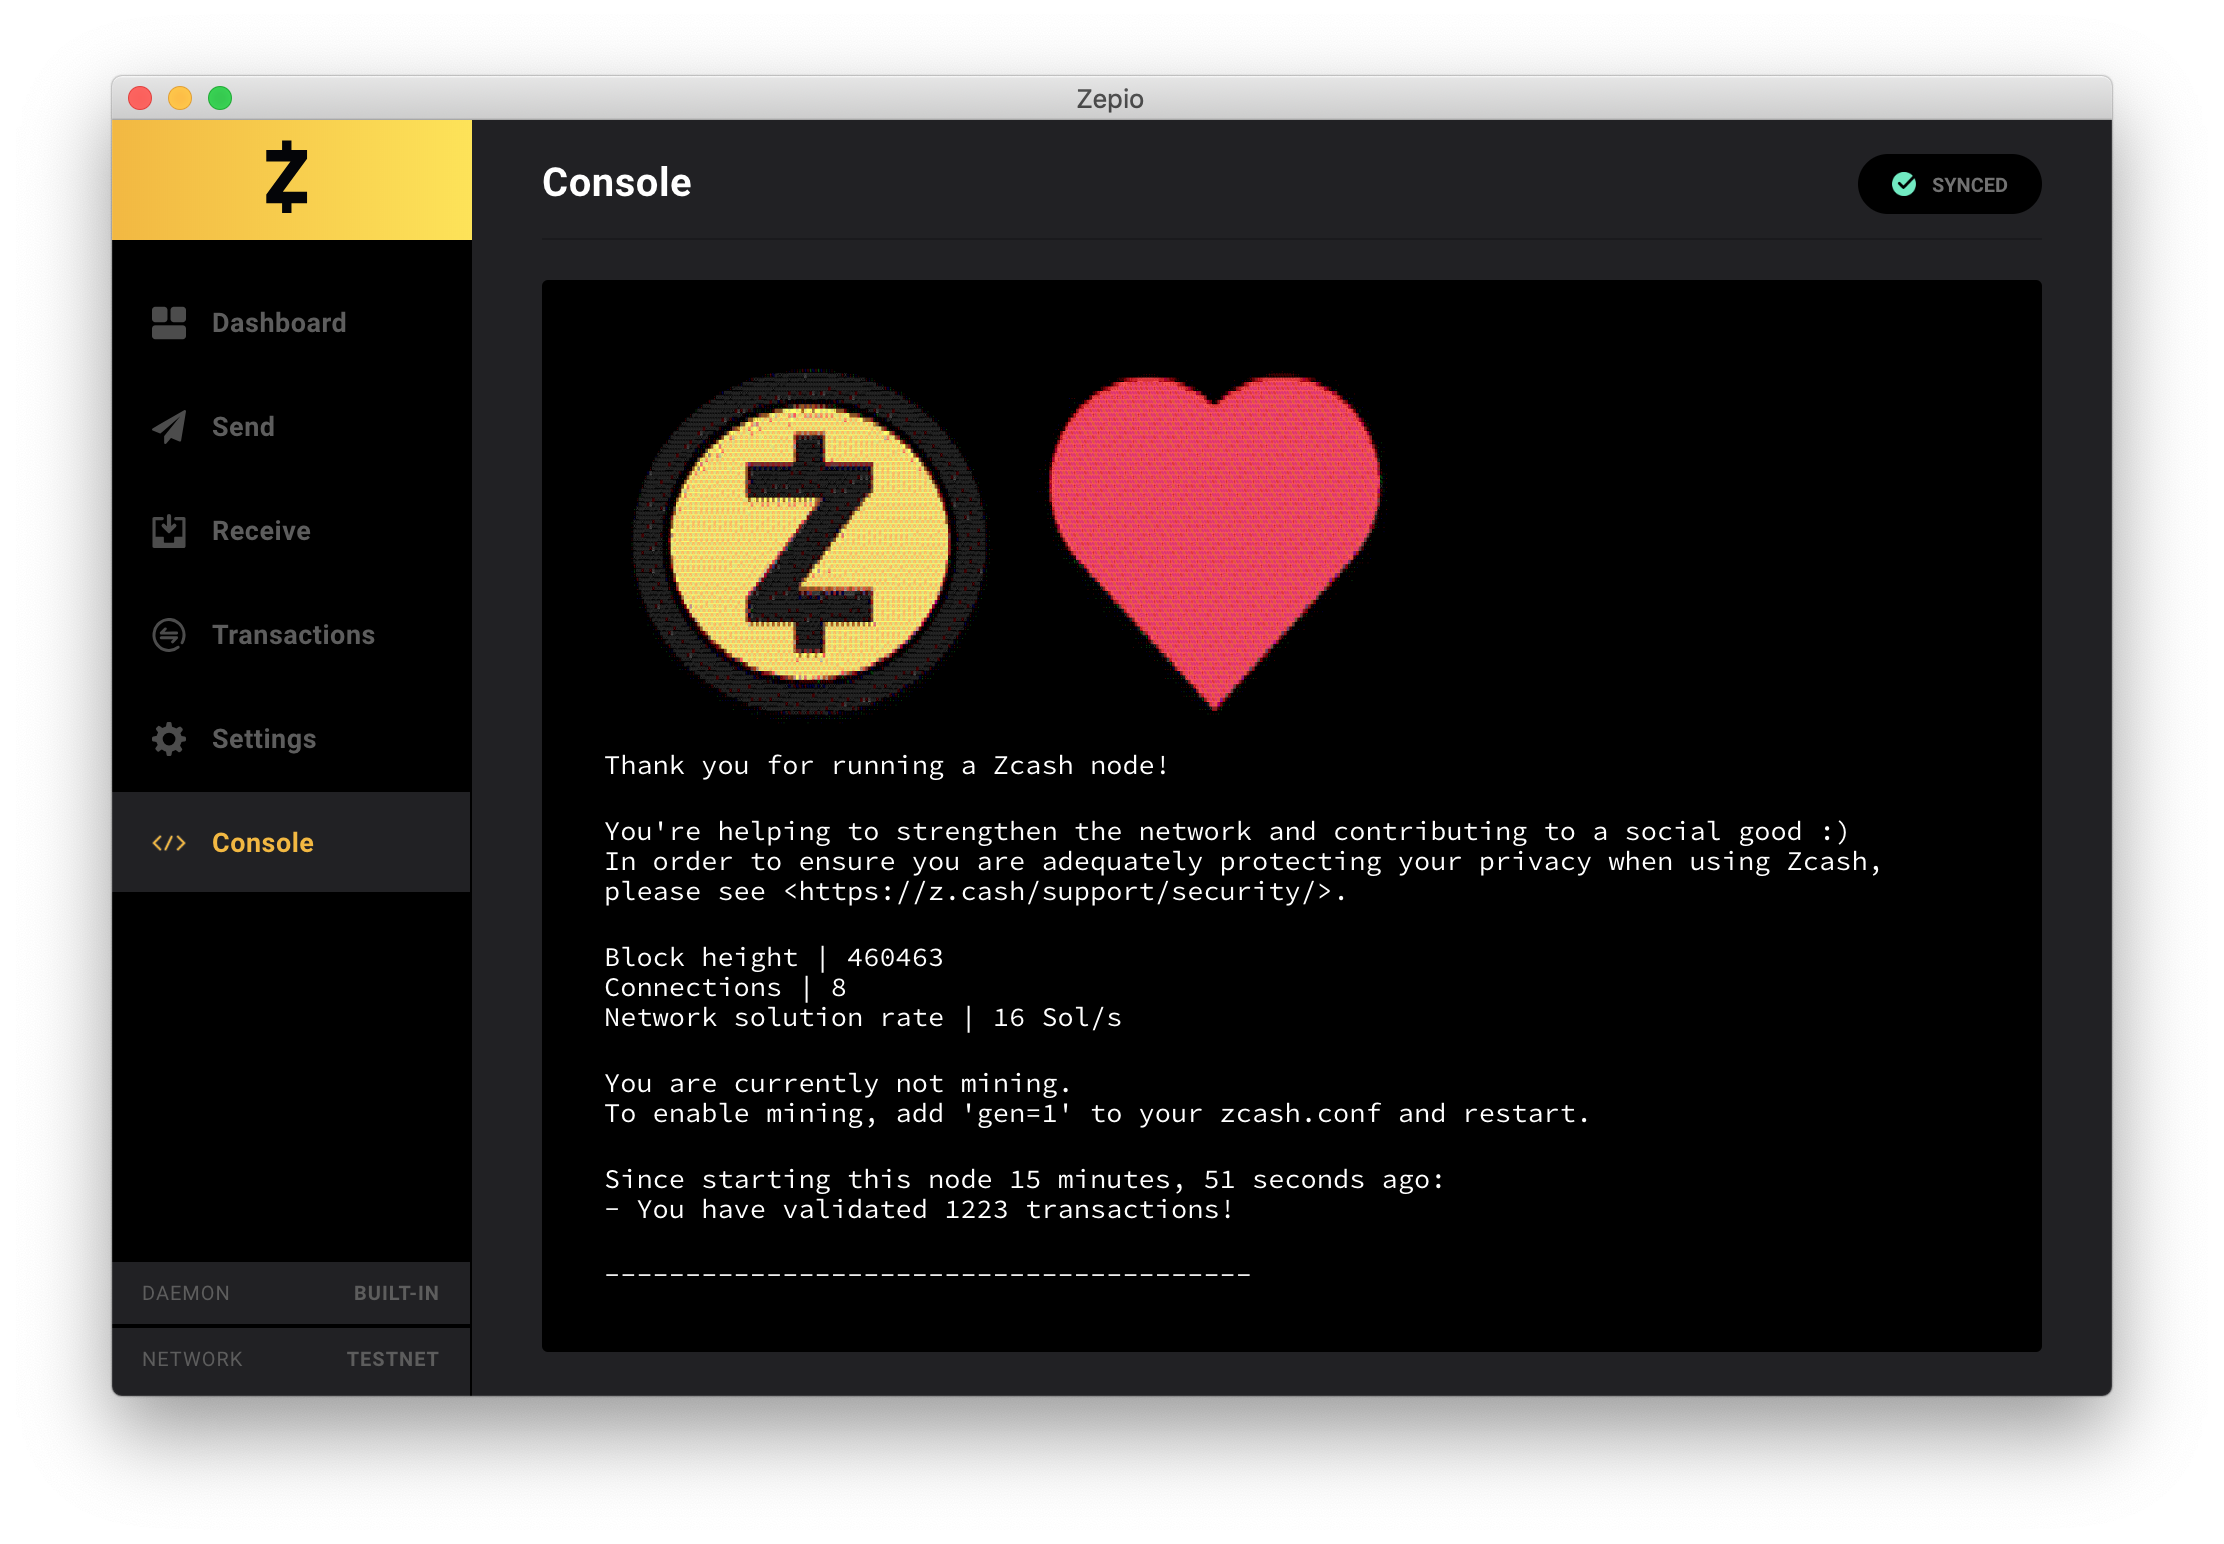
The Console view displays the information from the built-in zcashd full node. It provides further insights into the status of the embedded node such as block height, network solution rate, and number of connections. It also details the longevity of the running node process.
In case you run into any synchronization issues, the Console is a good place to start getting more details.
Please note that if you are running your own
zcashdfull node, Zepio will not display the Console view.