GearScout is an open source platform for FRC scouting, providing a versatile API and frontend that require little to no updates between game seasons since 2022.
The GearScout server is written in Java, using Spring Boot and backed by a PostgreSQL database.
The frontend is divided into four applications based on user roles. Each application can be installed as a PWA, and are written with React + TypeScript.
The intention of GearScout is to design a scouting system that needs minimal (or zero) changes between game years. We accomplish this by keeping all interfaces fairly generalized - take a look at the API documentation.
For example, since game objectives change every year, we do not hardcode any objective names into the server. Instead, when we record a match, our data collection frontend defines the names of the objectives.
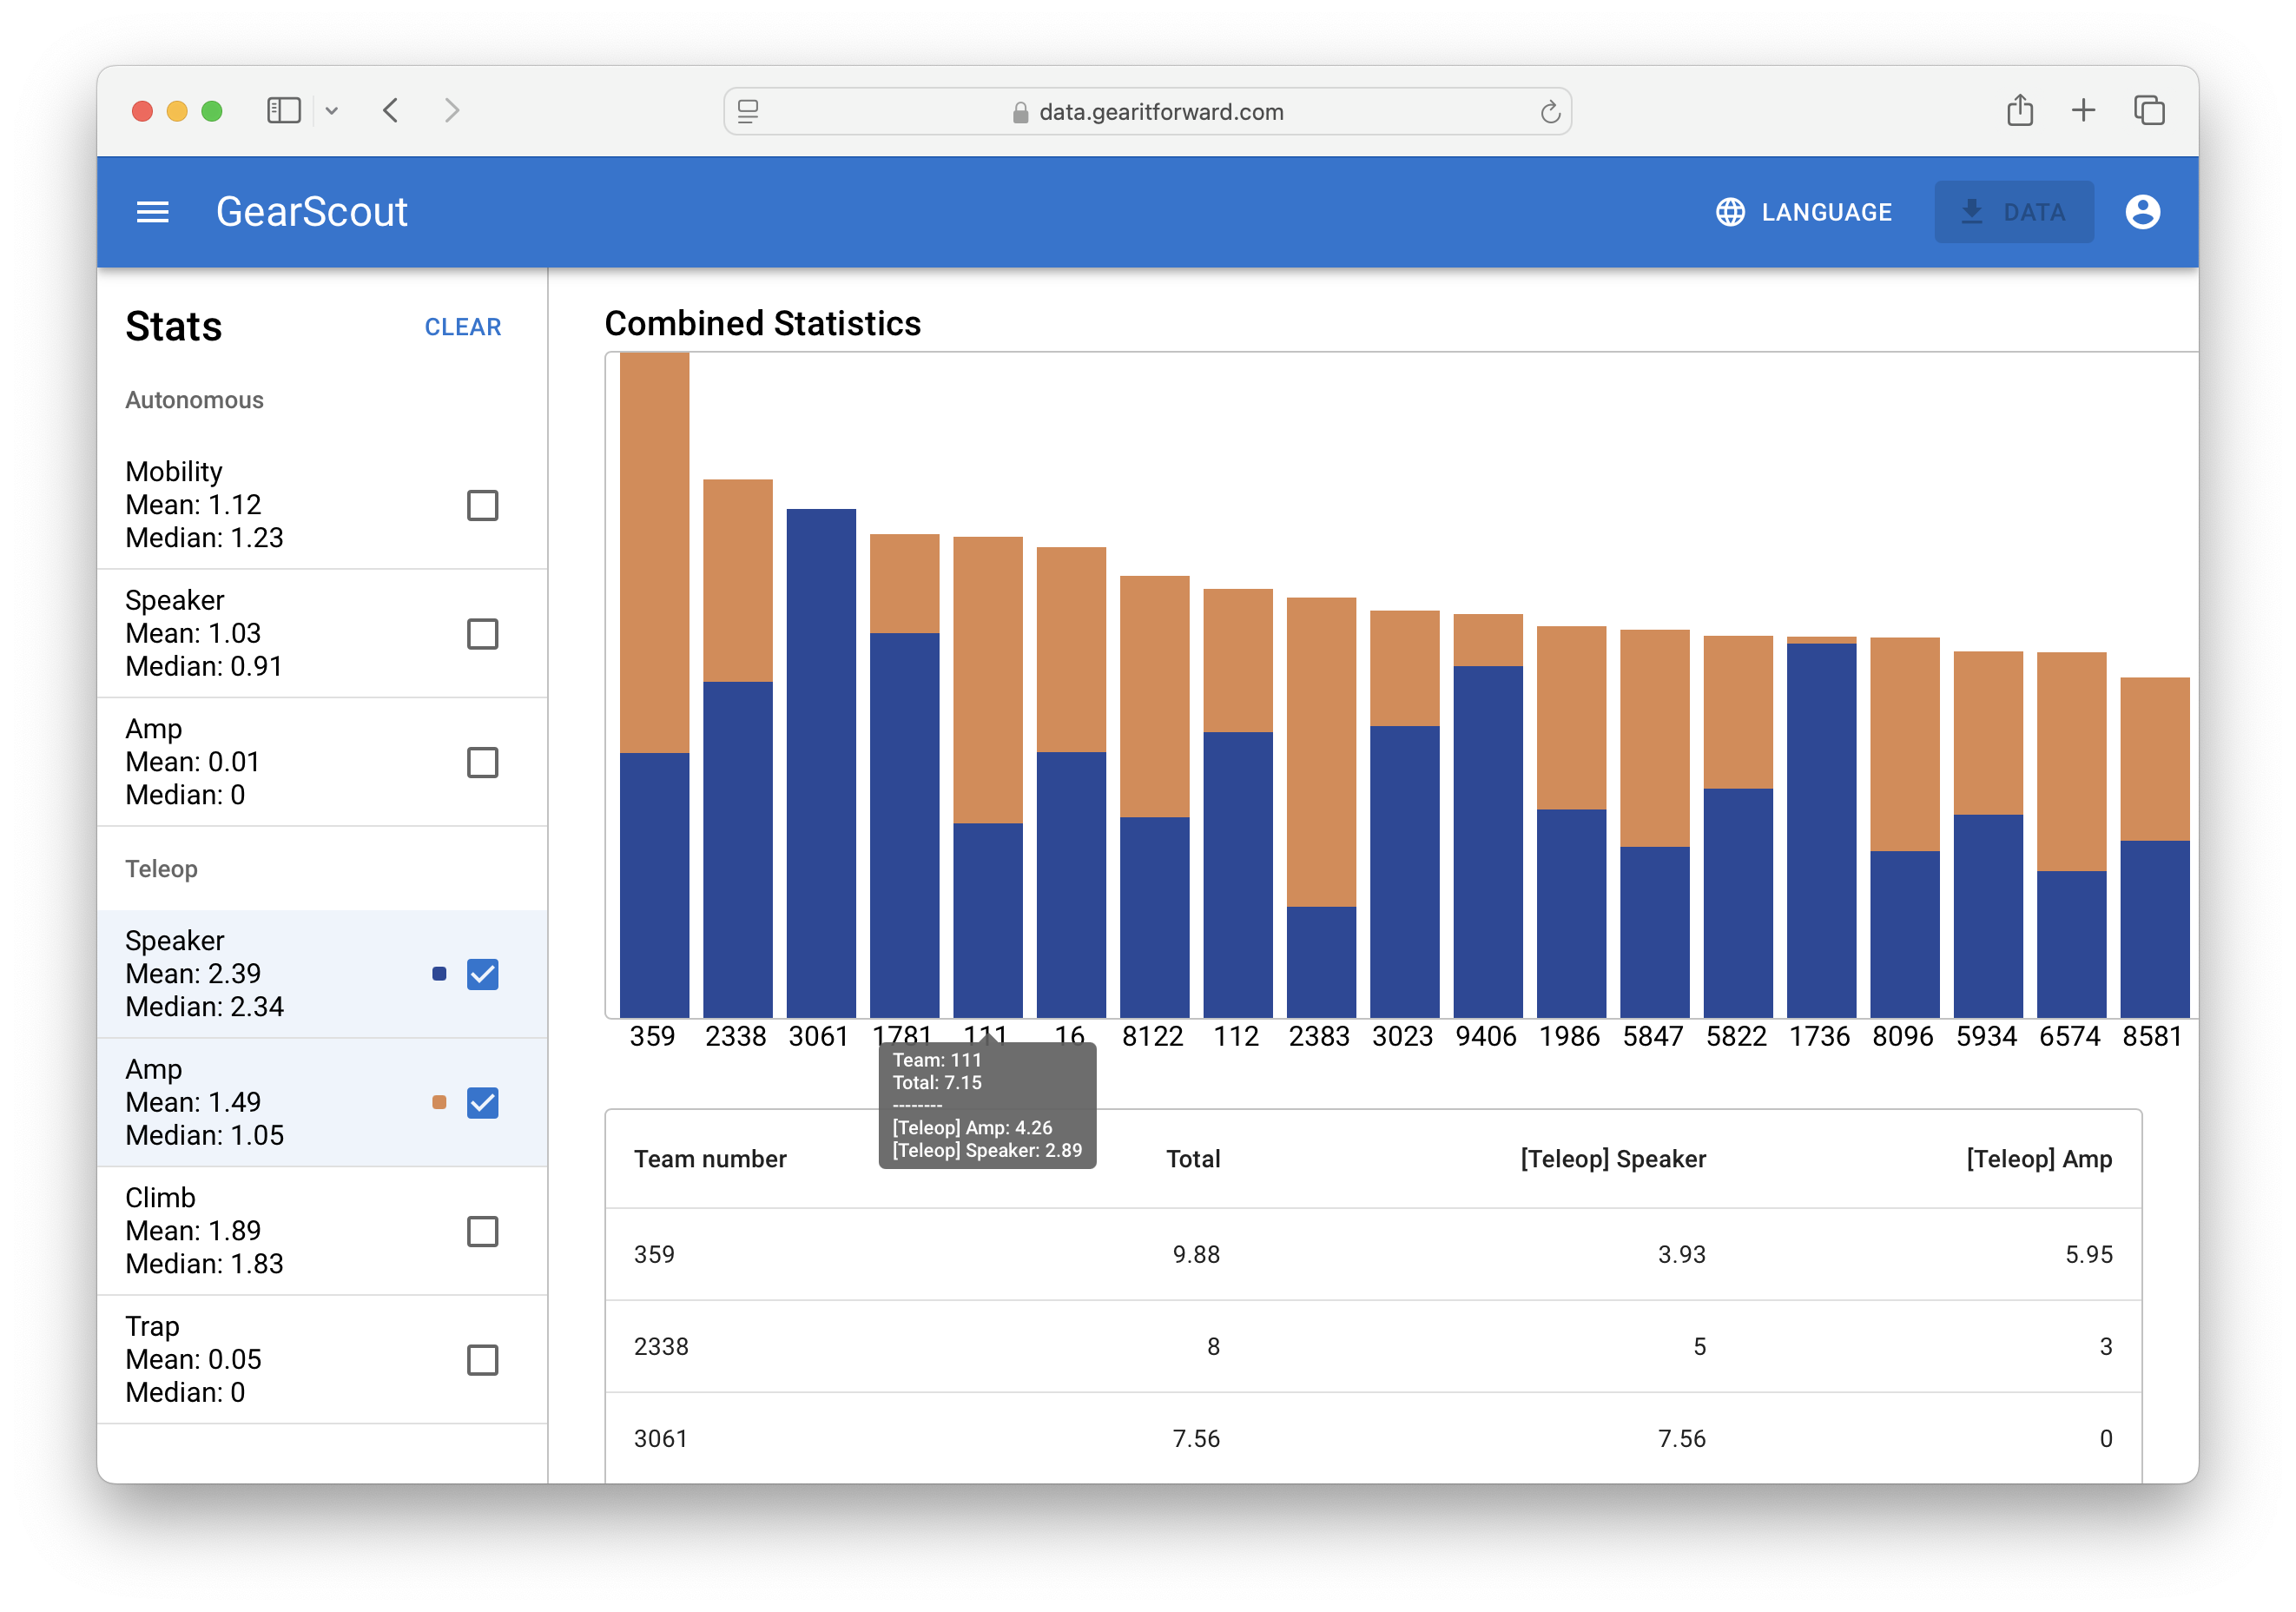
Like the server, the analytics frontend does not know what objectives it will receive. When it receives the list of objectives from the server, it groups together the objectives with matching names, then performs statistical analysis.
This design pattern is applied to all types of scouting:
- Objectives have an arbitrary name and count
- Pit scouting records are an arbitrary question + answer pair
- Qualitative scouting records are an arbitrary topic + content pair
As a consequence, the server and analytics app require almost no changes between game years. However, it is still possible that FIRST may design an objective that cannot be sufficiently tracked by this system. If such a case arises, like the grid in 2023, then we will design a backwards-compatible update to handle the special case.
Hosted at https://data.gearitforward.com
Website
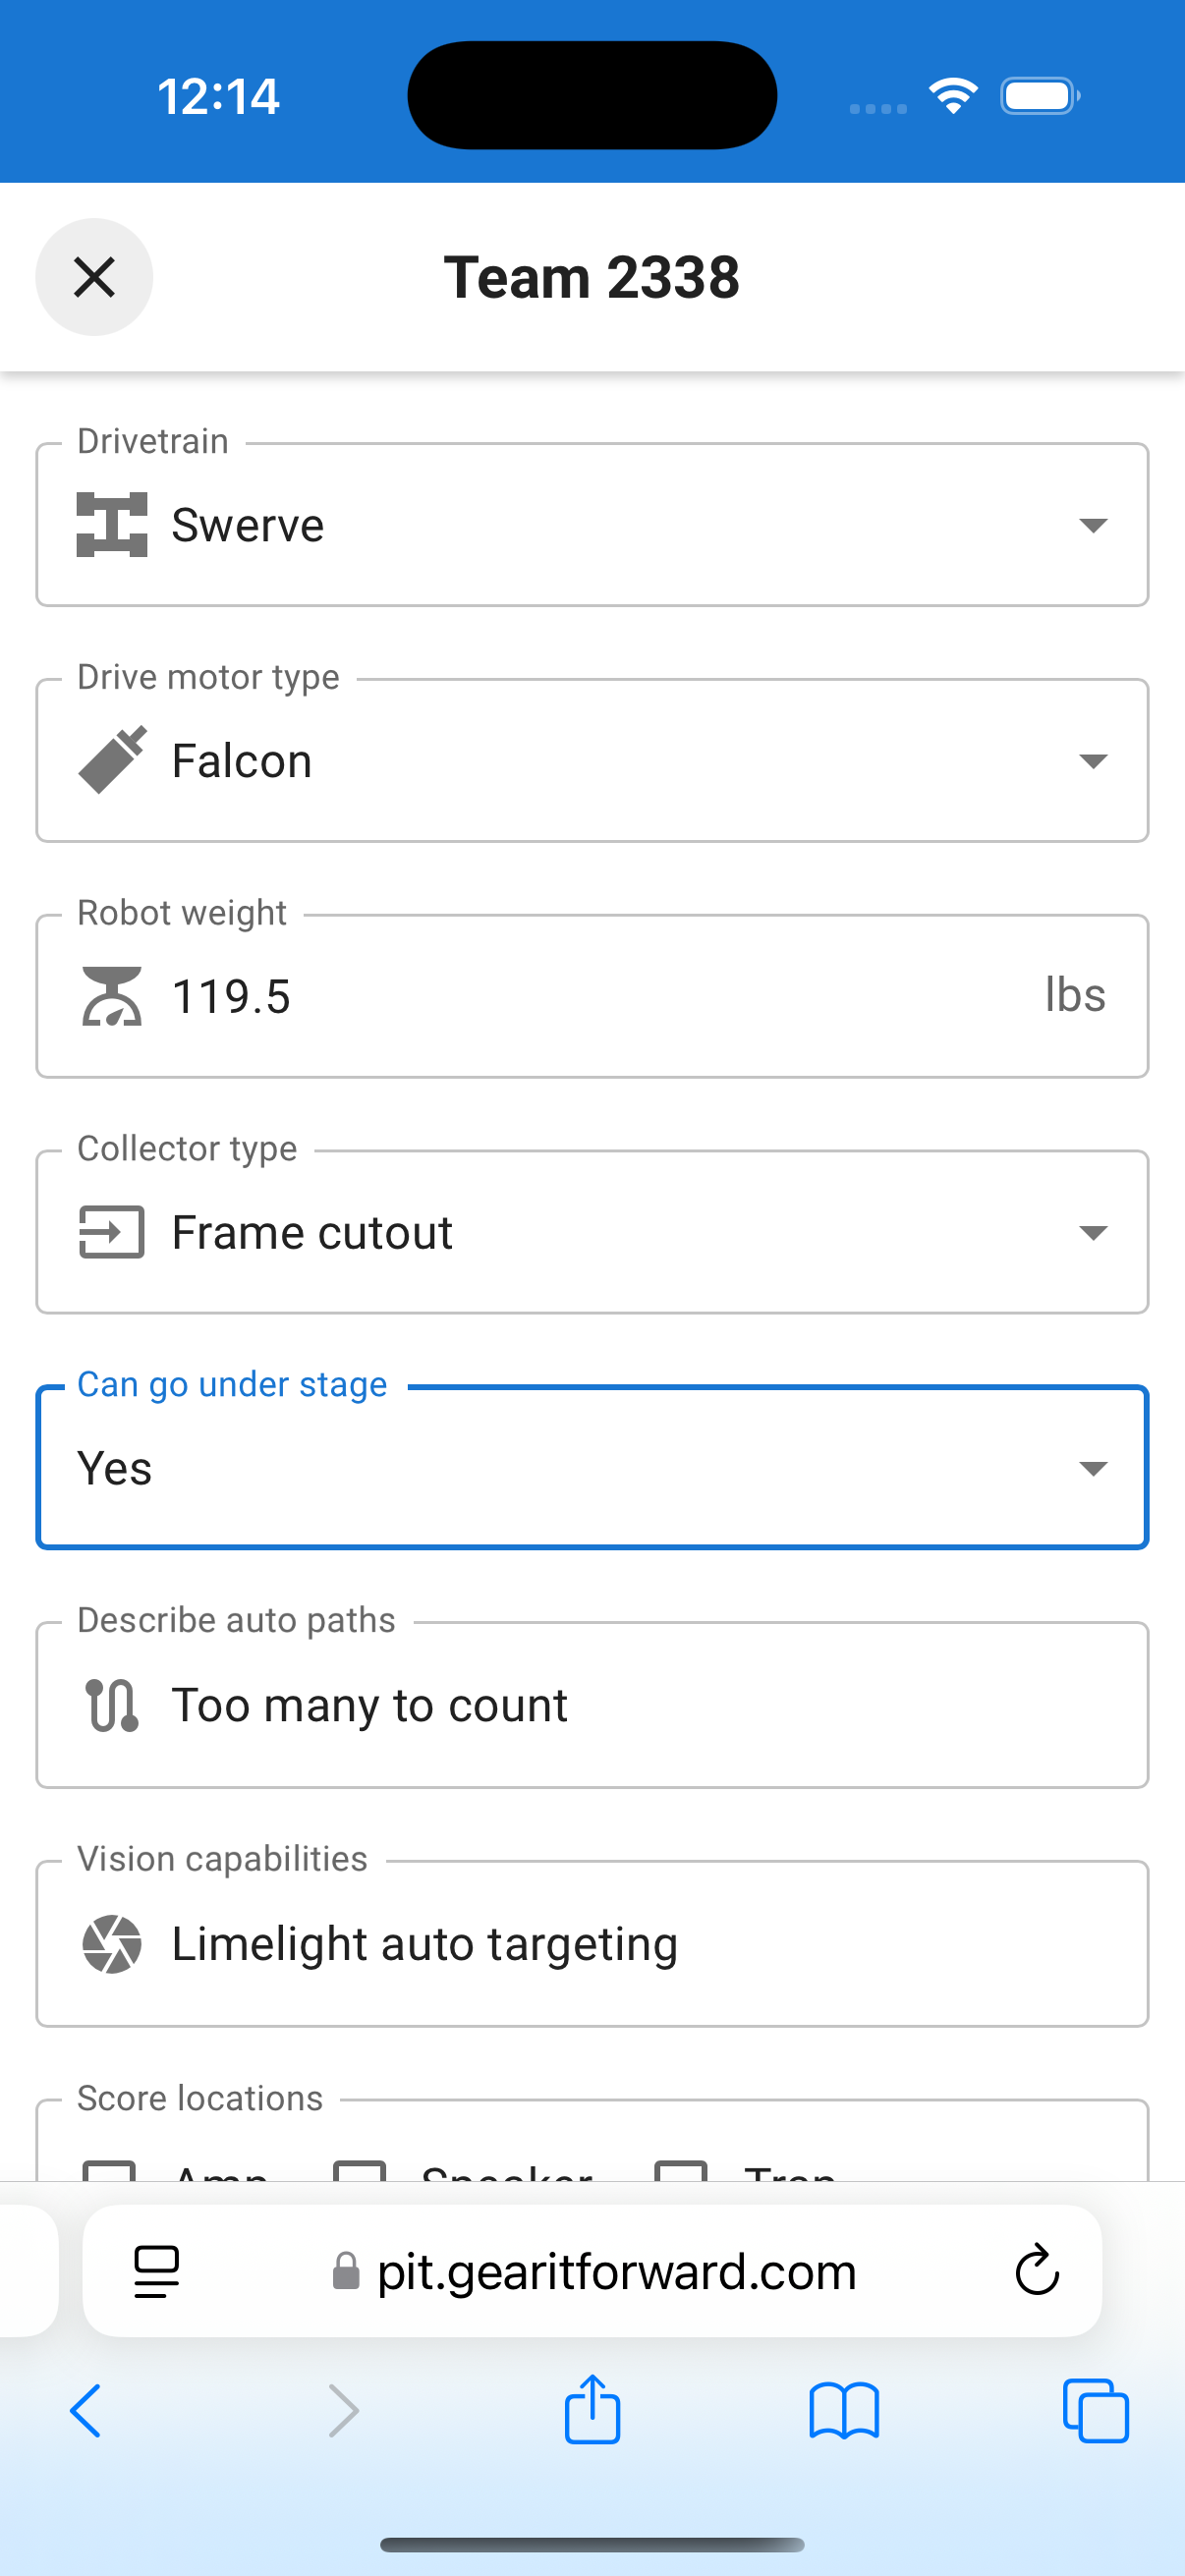
Pit scouting app (of course). Users perform 'inspections' by answering questions on a form.
GitHub | Website
Quantitative scouting app. Users record 'objectives' scored in a match.
GitHub |
Website
A qualitative scouting app. Users make 'comments' about a robot's match performance.
More detailed information coming soon, but here's a brief summary:
If you wish to run your own instance of the server, we assume you have some amount of experience with an SQL database. Otherwise, please read the documentation on setting up a Postgres database.
- Navigate to the root level of this repository.
- Run the gradle task
./gradlew bootJar. This will cause Gradle + Spring Boot to generate an "uber-jar" that bundles all dependencies. - Set up an instance of PostgreSQL
- Install Postgres on the host machine
- Set a password for PostgreSQL.
- Once Postgres is running, log into it with
psql - Create a new database
- Run
java -jar <path to jarfile>. The server should fail to start, but will create a configuration file namedapplication.yaml. - Modify the configuration file to contain the following lines:
server:
  port: 25575

spring:
  database:
    # sample application.yaml has a few fields here, leave them alone
  jpa:
    # sample application.yaml has a few fields here, leave them alone
  datasource:
    platform: postgres
    url: jdbc:postgresql://localhost:5432/<dbname> # TODO: replace <dbname>
    username: postgres
    password: verysecurepassword # TODO

auth:
  url: # TODO

jwt:
  header: Authorization
  secret: supersecretauthkey # TODO

tba:
key: ApiKeyjYsTn4CgRDyd5L8Ph6MEQ7 # TODO- Repeat step 4 - this time, the server should start successfully!
Failed to configure a DataSource: 'url' attribute is not specified and no
embedded datasource could be configured.
This error means that you haven't set the spring.datasource.url field
correctly in your application.yaml. Refer to step 5
in the instructions above.
Message : The server requested SCRAM-based authentication, but no password was provided.
This error means that you haven't set a PostgreSQL password in your
application.yaml. Refer to step 5
in the instructions above.
Message : FATAL: password authentication failed for user "postgres"
This error means that the PostgreSQL password in your application.yaml is
incorrect. Or, you haven't set a PostgreSQL password.
org.springframework.beans.factory.UnsatisfiedDependencyException
This error means that one or more fields are missing from your
application.yaml. Make sure that you aren't missing the jwt: and tba:
fields shown in step 5 of the instructions above.
- Navigate to
<project root>/client. - Run
npm installto install project dependencies. - Run
npm run analytics:buildornpm run pitscout:build. - Copy the build files to the host machine.
- Configure a web server like nginx to serve the files.