Rabbit MQ is a popular industrial strength open source implementation of the AMQP messaging protocol for communicating with message queue middleware that runs on all major operating systems.
Rabbit MQ is built on the robust Erlang OTP platform which is a pre-requisite before installing the Rabbit MQ Server which you download from:
- Download and install Eralng OTP For Windows (vR16B03)
- Run the Rabbit MQ Server Windows Installer (v3.2.3)
This will download, install and run the Rabbit MQ Server Windows Service listening for AMQP clients at the default port 5672.
To provide better visibility of the state of the Rabbit MQ Server instance it's recommended to enable Rabbit MQ's Management Plugin which you can do on the command line with:
"C:\Program Files (x86)\RabbitMQ Server\rabbitmq_server-3.2.2\sbin\rabbitmq-plugins.bat" enable rabbitmq_management
To see the new changes you need to restart the RabbitMQ Windows Service which you can do on the command line with:
net stop RabbitMQ && net start RabbitMQ
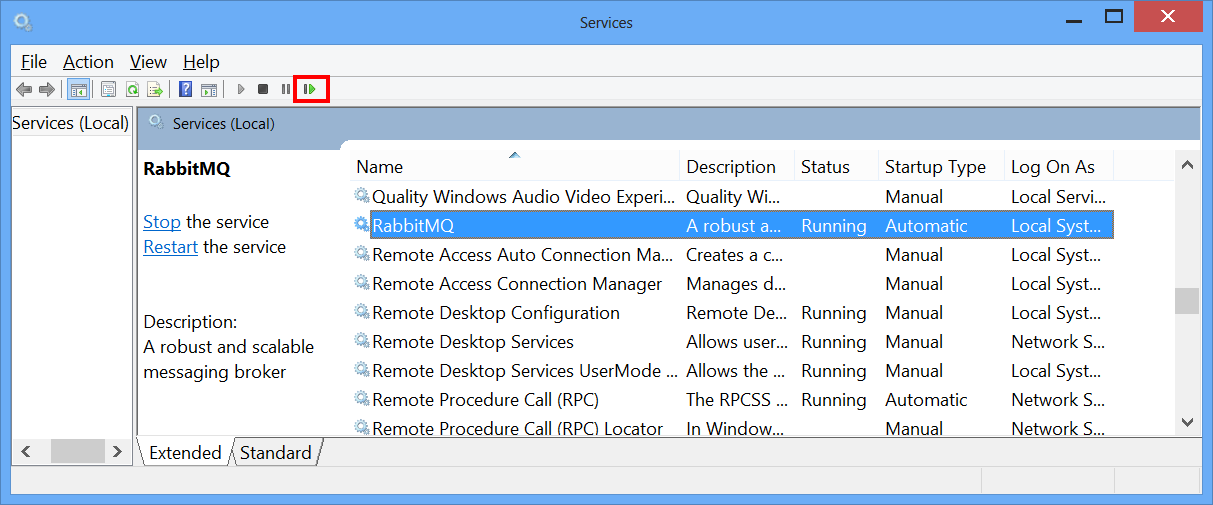
Or by restarting the service from the services.msc MMC applet UI:
- Open Windows Run dialog by pressing the Windows + R key:

- Select the RabbitMQ Windows Service and click the Restart Icon:
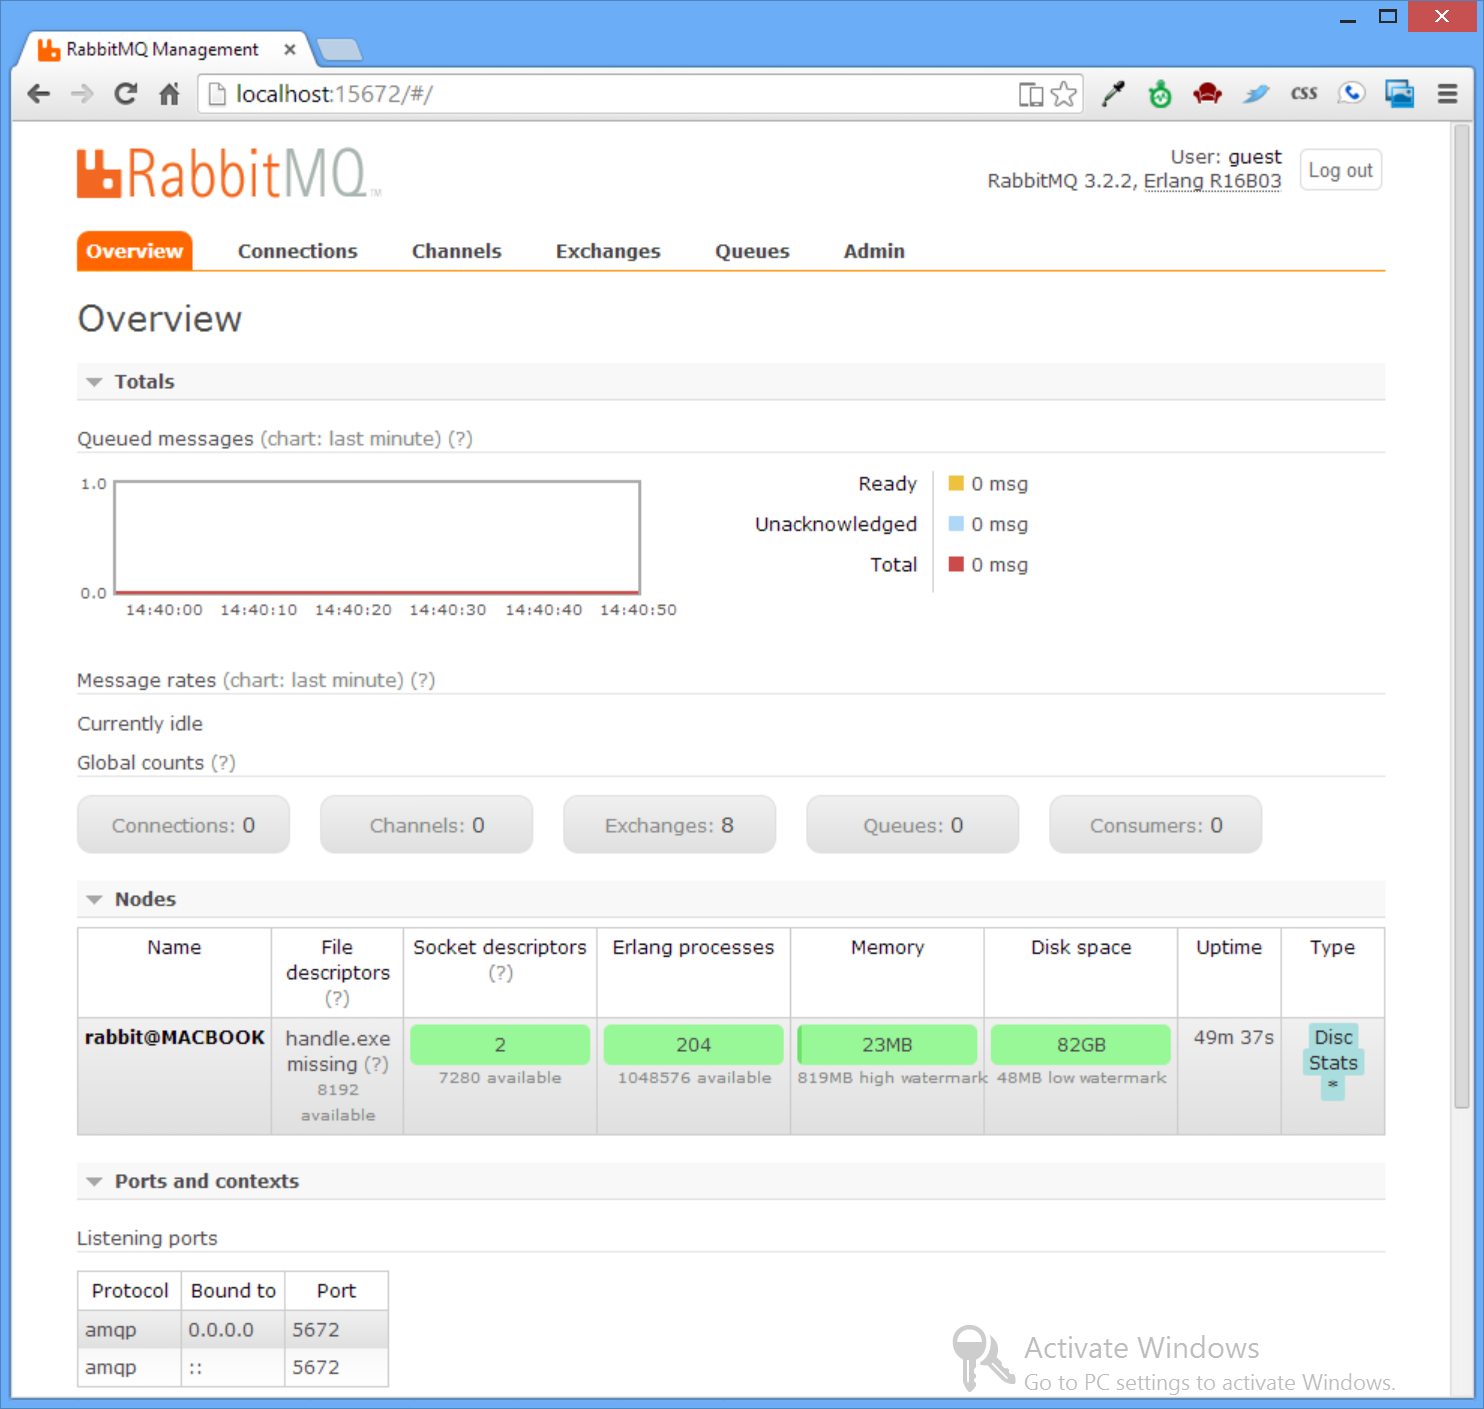
Once restarted you can view Rabbit MQ's management UI with a web browser at: http://localhost:15672 which shows an overview on
the state of the Rabbit MQ server instance:
To use Rabbit MQ from .NET get the Rabbit MQ's .NET AMQP client libraries from NuGet:
PM> Install-Package RabbitMQ.Client
With the package installed, we can go through a common scenario of sending and receiving durable messages with Rabbit MQ.
See RabbitMqTests.cs in this repo, for a stand-alone example of this walk-thru below:
First you need to register the type of Exchange and Queue before you can use them. For a durable work queue you want to create a durable "direct" exchange and bind a durable queue to it, e.g:
const string ExchangeName = "test.exchange";
const string QueueName = "test.queue";

using (IConnection conn = rabbitMqFactory.CreateConnection())
using (IModel channel = conn.CreateModel())
{
    channel.ExchangeDeclare(ExchangeName, "direct", durable:true, autoDelete:false, arguments:null);

    channel.QueueDeclare(QueueName, durable:true, exclusive:false, autoDelete:false,arguments:null);
    channel.QueueBind(QueueName, ExchangeName, routingKey: QueueName);
}
In this example we'll reuse the QueueName for the routing key which will enable sending messages to a specific queue.
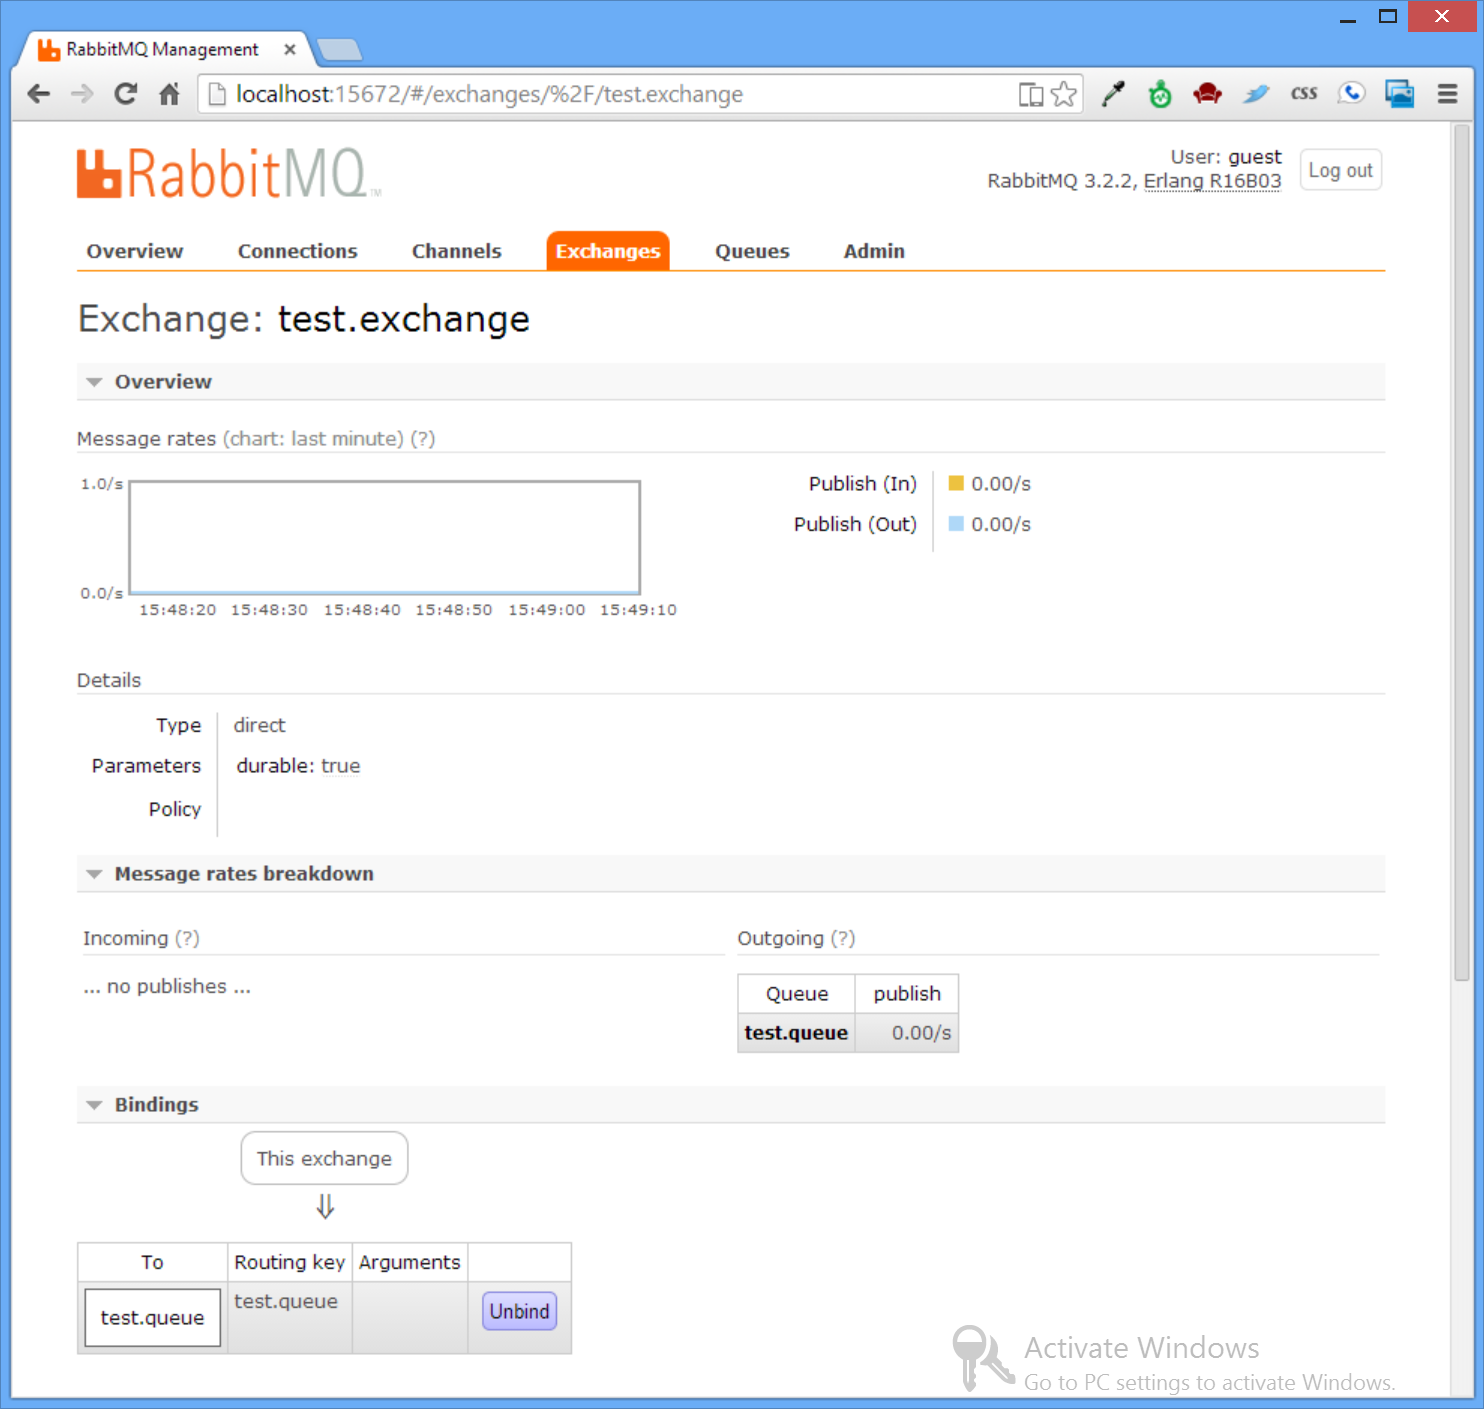
The code only needs to be run once which registers and configures the Exchange and Queue we'll be using in the remaining examples. Once run, go back to the Management UI to see the new *test.exchange Exchange with a binding to the newly created test.queue:
Once the exchange and queue is setup we can start publishing messages to it.
Rabbit MQ lets you send messages with any byte[] body, for text messages you can just send UTF8 bytes.
To ensure the message is persistent across Rabbit MQ Server starts you will want to mark the message as persistent as seen below:
var props = channel.CreateBasicProperties();
props.SetPersistent(true);
var msgBody = Encoding.UTF8.GetBytes("Hello, World!");
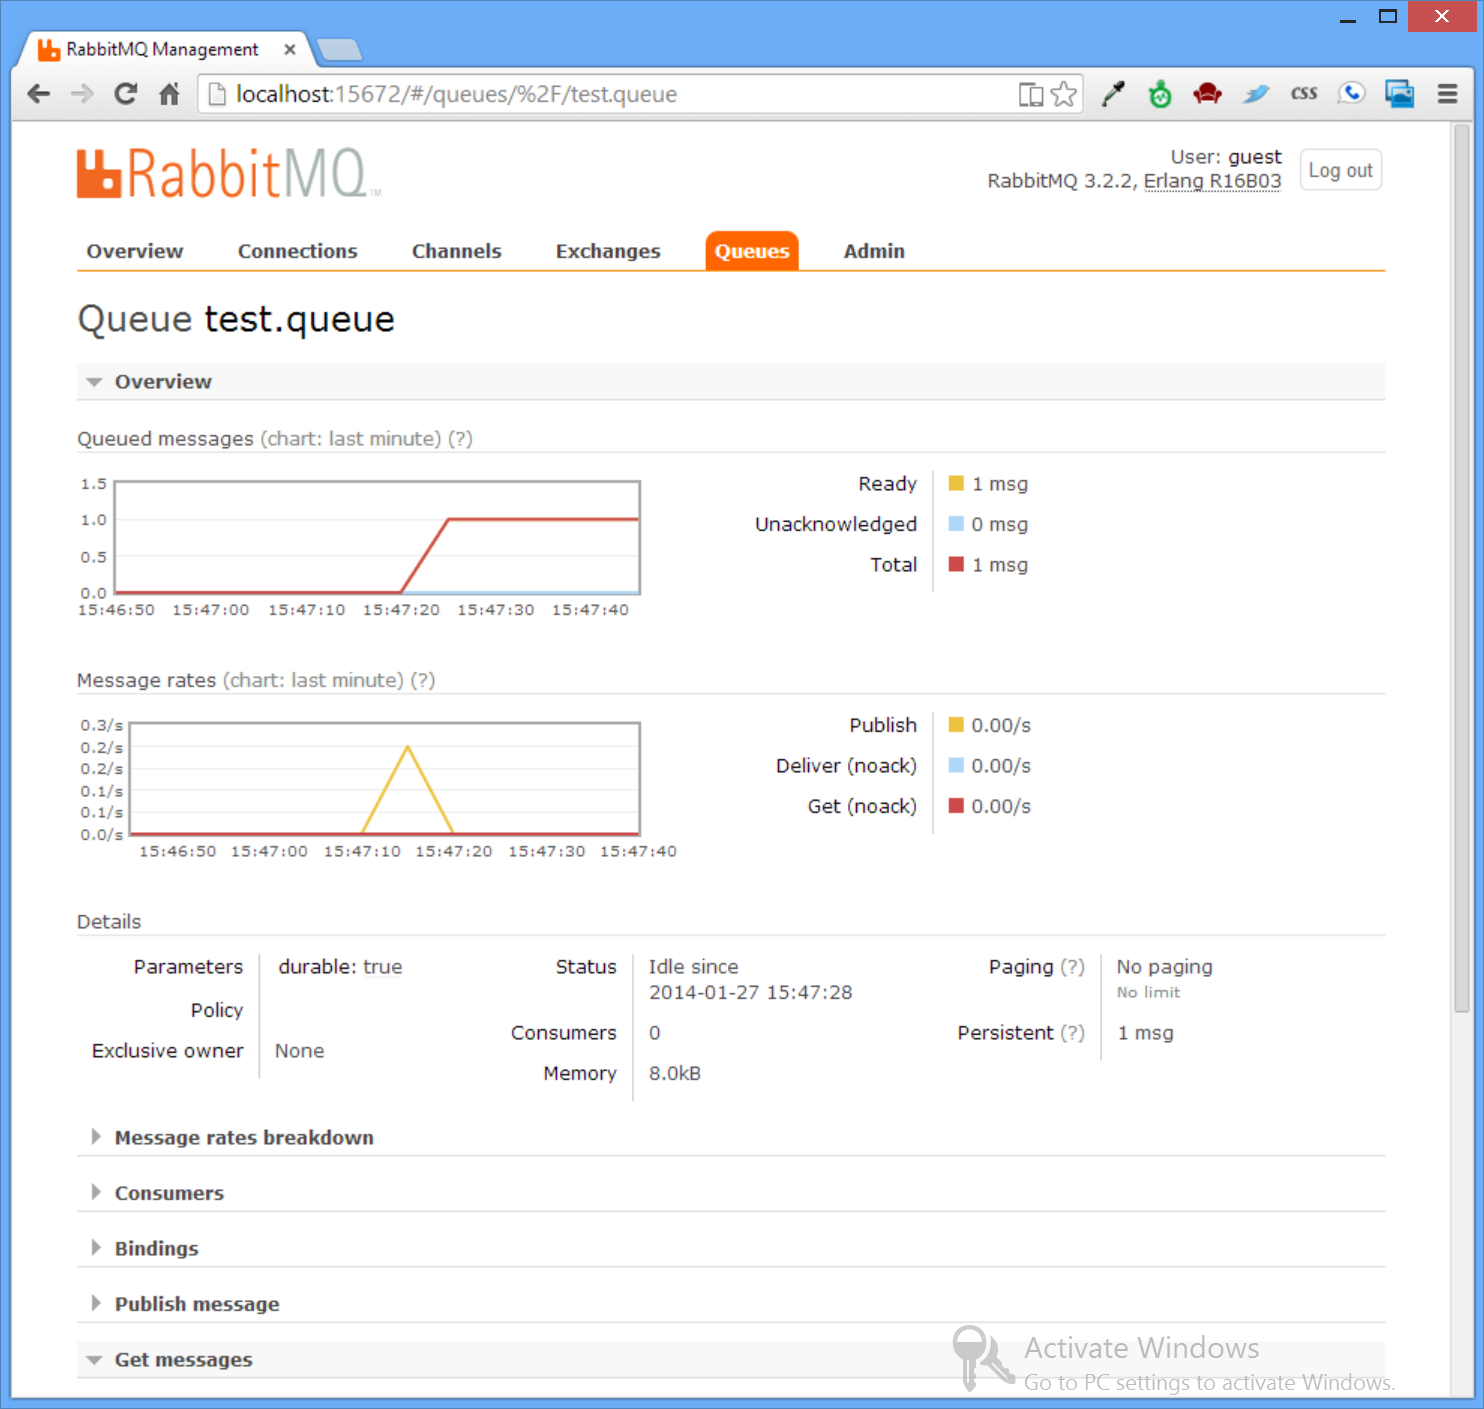
channel.BasicPublish(ExchangeName, routingKey:QueueName, basicProperties:props, body:msgBody);The routing key will ensure that a copy of the message is delievered to the test.queue which you can see in the Admin UI:
There are a couple of different ways you can read published messages from the queue, the most straight forward way is to use BasicGet:
BasicGetResult msgResponse = channel.BasicGet(QueueName, noAck:true);

var msgBody = Encoding.UTF8.GetString(msgResponse.Body);
msgBody //Hello, World!
The noAck:true flag tells Rabbit MQ to immediately remove the message from the queue.
Another popular use-case is to only send acknowledgement that you've successfully accepted the message (and remove it from the queue)
which can be done with a seperate call to BasicAck:
BasicGetResult msgResponse = channel.BasicGet(QueueName, noAck:false);

//process message ...

channel.BasicAck(msgResponse.DeliveryTag, multiple:false);
An alternate way to consume messages is via a subscription push-based event model.
You can use the built-in QueueingBasicConsumer to provide a simplified programming model by allowing you to block on a
Shared Queue until a message is received, e.g:
var consumer = new QueueingBasicConsumer(channel);
channel.BasicConsume(QueueName, noAck:true, consumer:consumer);

var msgResponse = consumer.Queue.Dequeue(); //blocking

var msgBody = Encoding.UTF8.GetString(msgResponse.Body);
msgBody //Hello, World!The Shared Queue will block until it receives a message or the channel it's assigned to is closed which causes it to throw
an EndOfStreamException. With this, you can setup a long-running background thread to process multiple messages in an
infinite loop until the Queue is closed.
The sample below shows an example of this in action which publishes 5 messages on a seperate thread before closing the channel the subscription is bound to causing an EndOfStreamException to be thrown, ending the subscription and exiting the loop:
using (IConnection conn = rabbitMqFactory.CreateConnection())
using (IModel channel = conn.CreateModel())
{
    var consumer = new QueueingBasicConsumer(channel);
    channel.BasicConsume(QueueName, noAck: true, consumer: consumer);

    ThreadPool.QueueUserWorkItem(_ => {
        var now = DateTime.UtcNow;
        while (DateTime.UtcNow - now < TimeSpan.FromSeconds(5))
        {
            var props = channel.CreateBasicProperties();
            props.SetPersistent(true);

            var msgBody = Encoding.UTF8.GetBytes("Hello, World!");
            channel.BasicPublish(ExchangeName, routingKey:QueueName, basicProperties:props,
                body:msgBody);

            Thread.Sleep(1000);
        }

        channel.Close();
    });

    while (true)
    {
        try
        {
            var msgResponse = consumer.Queue.Dequeue(); //blocking

            var msgBody = Encoding.UTF8.GetString(msgResponse.Body);

            Console.WriteLine("Received Message: " + msgBody);

            Thread.Sleep(1000);
        }
        catch (EndOfStreamException ex)
        {
            Console.WriteLine("Channel was closed, Exiting...");
            break;
        }
    }
}
The complete source of these examples are available in the stand-alone RabbitMqTests.cs.