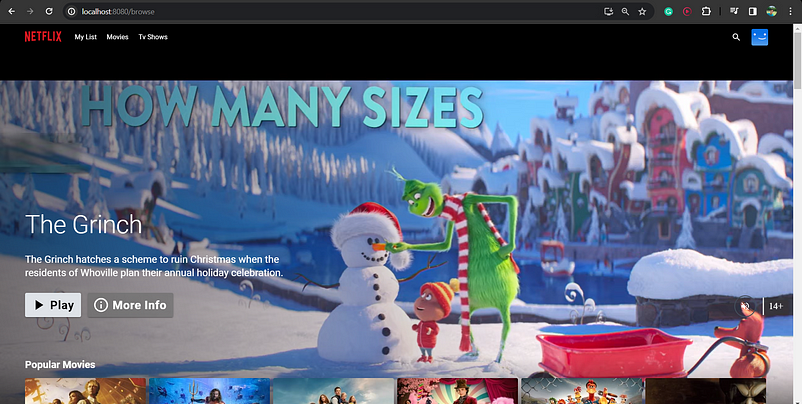
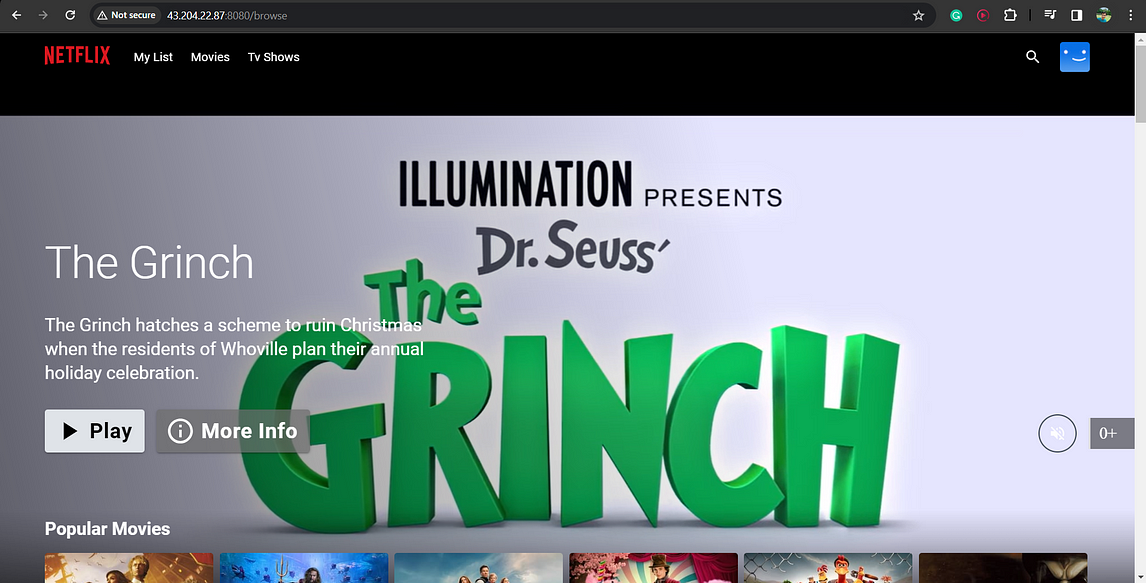
In This Project, we are Developing and Deploying a video streaming application on EC2 using Docker and AWS Developers Tools.
-
CodeCommit: For Source Code Management -
CodeBuild: For building and testing our code in a serverless fashion -
CodeDeploy: To deploy our code -
CodePipeline: To streamline the CI/CD pipeline -
System Manager: To store Parameters -
DockerHub: To store Docker Images in a Repository -
Identity and Access Management(IAM) for creating a Service Role -
S3for artifact storing -
EC2for Deployment
Clone this Repository
git clone https://github.com/NotHarshhaa/DevOps-Projects.git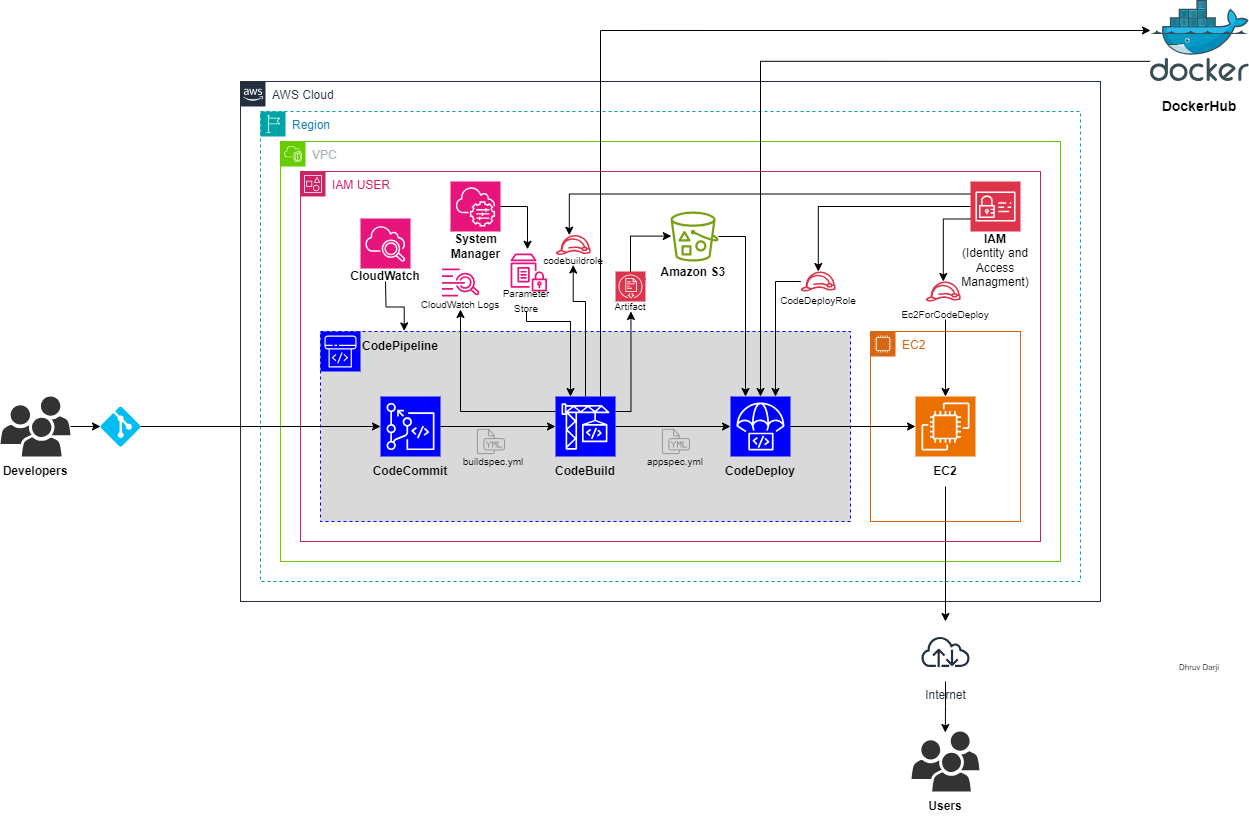
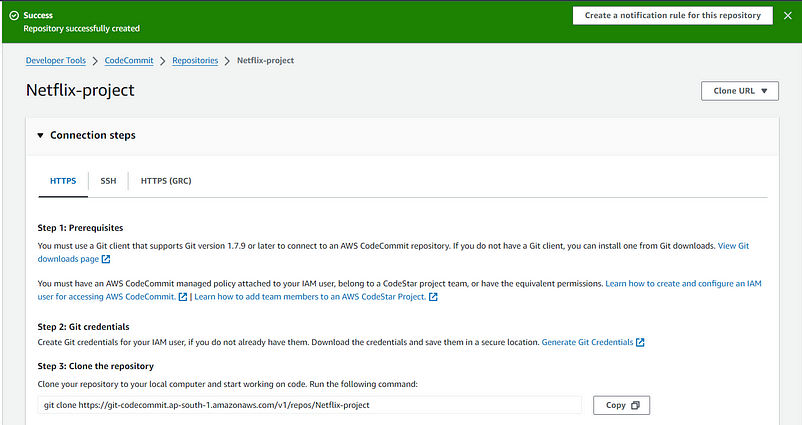
- Create a Repository
-
Go to the IAM console and create a user.
-
Click on Create User -> User details -> Next.
-
Add Permission for full access to CodeCommit.

-
Click on Create for the user.
-
Click on the user and go to the security credentials section
-
Now we are going to create SSH credentials for this user.
-
Go to the terminal and run this command
ssh-keygen-
Keep all the default values.
-
Copy the public key using
cat ~/.ssh/id_rsa.pub. Paste it into the security credentials, and SSH public key for the CodeCommit section, and copy theSSH key id. -
Go back to the repository and copy the URL for the git connection.
-
Now run
cd ~/.ssh
touch config-
Host git-codecommit.*.amazonaws.com
-
User <paste the id of ssh key (can find after you paster your key in aws )-> IdentityFile
~/.ssh/id_rsa -
Now we can connect to this repo.
-
Run this command now
git clone <SSH URL>-
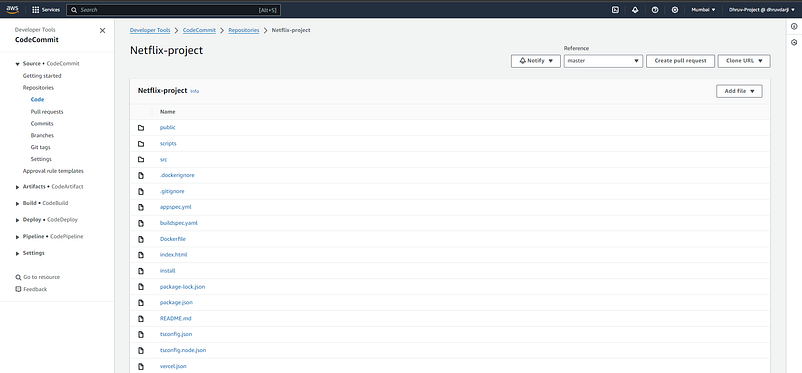
Now copy all the content from my git repository to your code commit repository.
-
And do a git push.

-
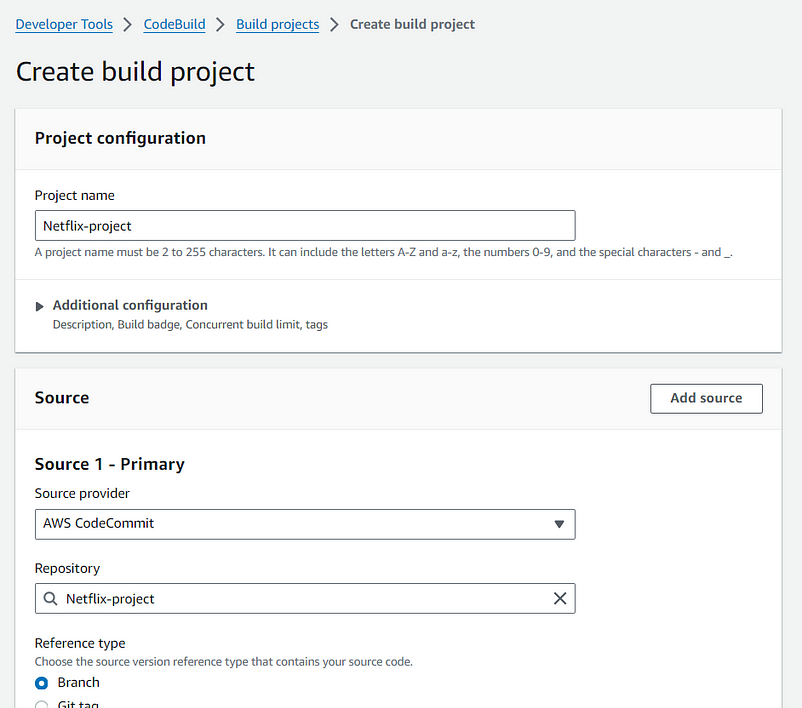
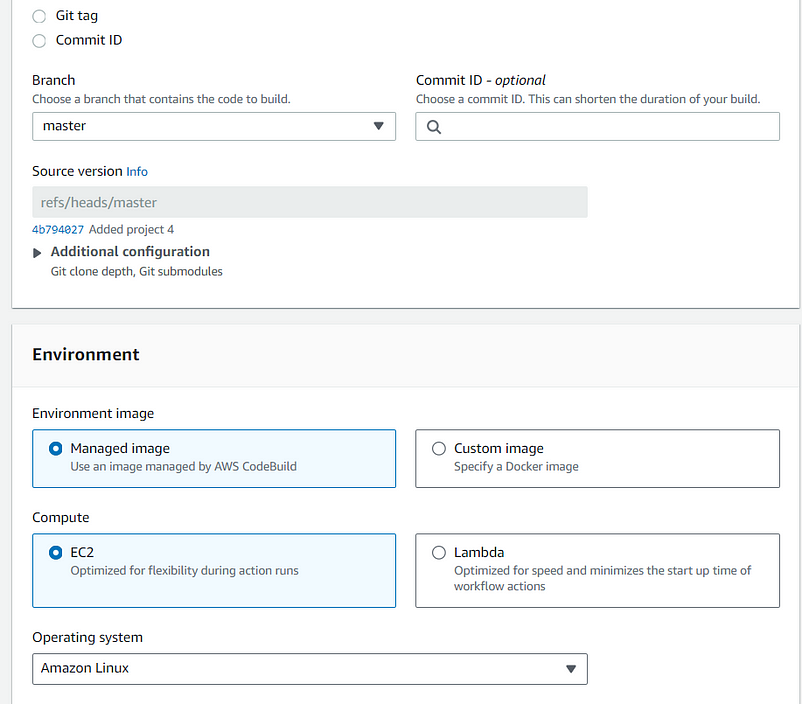
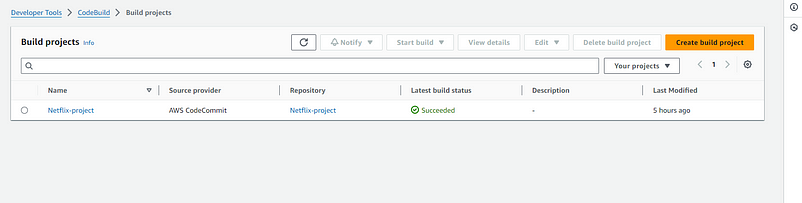
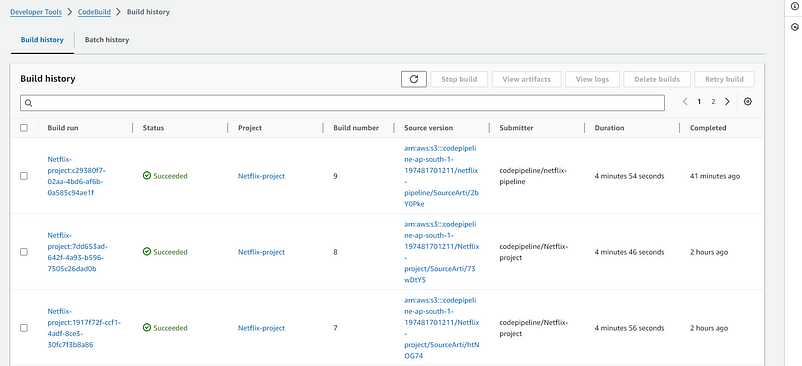
Click on
Create build project -
Follow this steps
-
CodeBuild will need
buildspec.ymlto build a project. -
The
buildspec.ymlfile is in the repository root folder. -
Also, This project will containerize so that select the
Enable this flag if you want to build Docker images or want your builds to get elevated privileges.
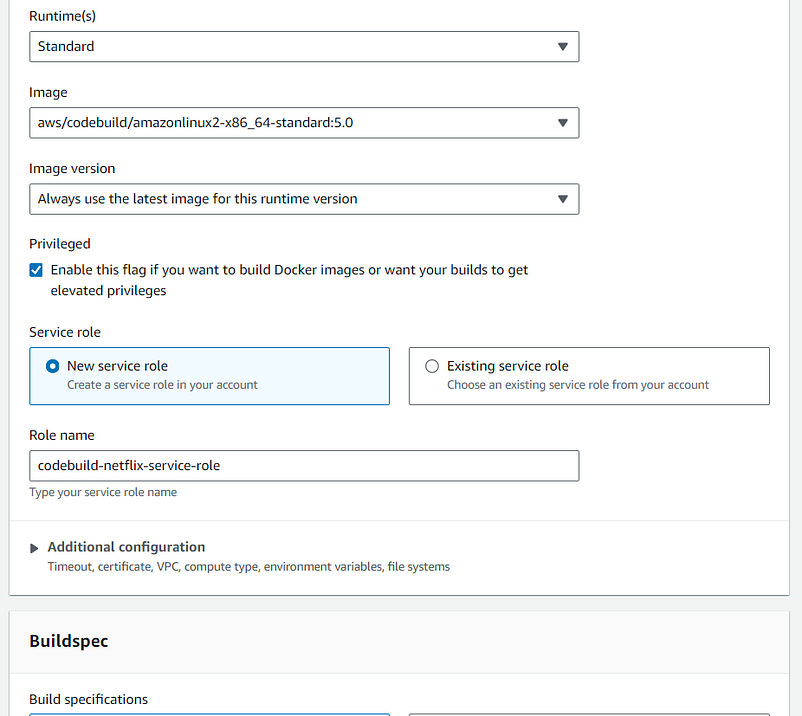
-
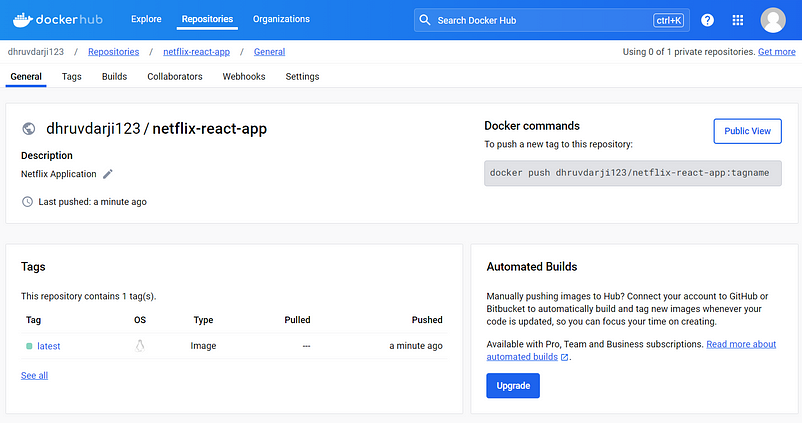
In this project, we will build and push a Docker image to the DockerHub repository.
-
So, We need DockerHub credentials like
UsernameandPassword. -
Also, we are using a free API to consume movie/TV data in this Project. TMDB.
-
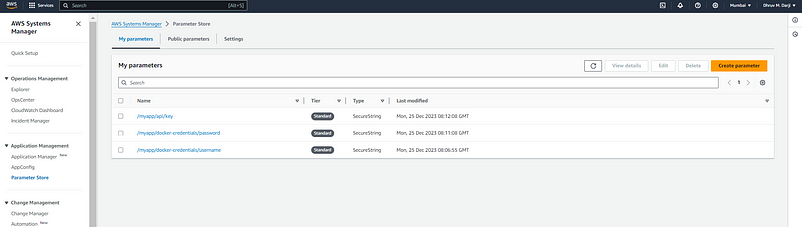
Goto
AWS System Managerdashboard. -
Click on
Parameter Store->Create parameter -
In Parameter details
Add DockerHub Username
Name: /myapp/docker-credentials/username
Type: SecureString
Value: Add Your DockerHub Username
Add DockerHub Password
Name: /myapp/docker-credentials/password
Type: SecureString
Value: Add Your DockerHub Password or secret token
Add TMDB API Key
Name: /myapp/api/key
Type: SecureString
Value: Add Your TMDB API key
-
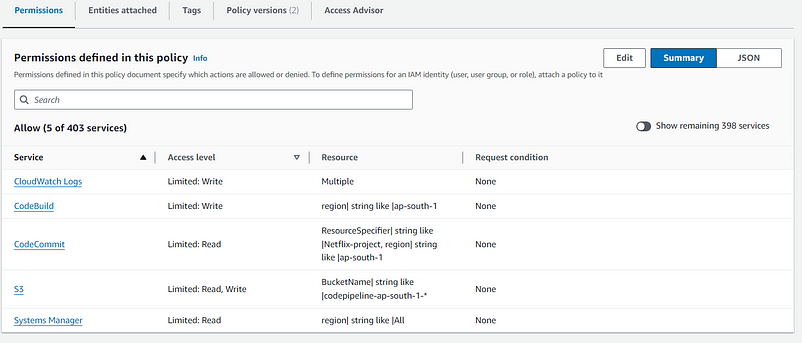
Also, Add Permission in CodeBuild Created Role to assess
Parameters from CodeBuild to System Manager -
For this, Create an inline policy.
{
            "Sid": "Statement1",
            "Effect": "Allow",
            "Action": [
                "ssm:GetParameters"
            ],
            "Resource": [
                "arn:aws:ssm:*:{AWS Account ID 12 Digit}:parameter/*"
            ]
        }
-
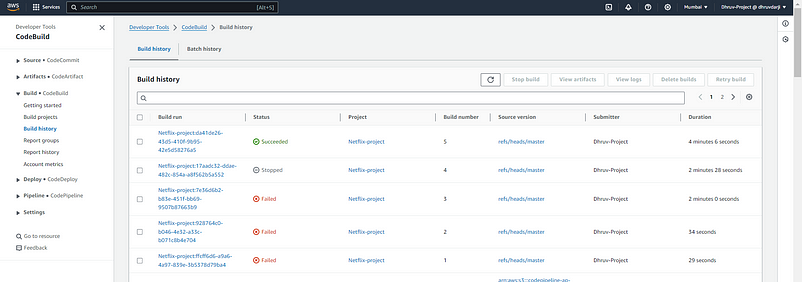
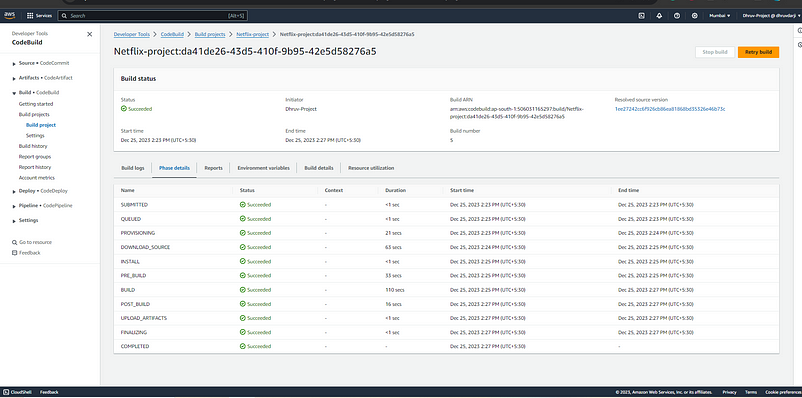
Just for Test
-
Pullthis Docker Image is locally usingdocker run -n netflix -p 8080:80 dhruvdarji123/netflix-react-app
In the CodeBuild console Click on Edit button -> Artifacts -> Type: “S3” -> put Uplode Location.
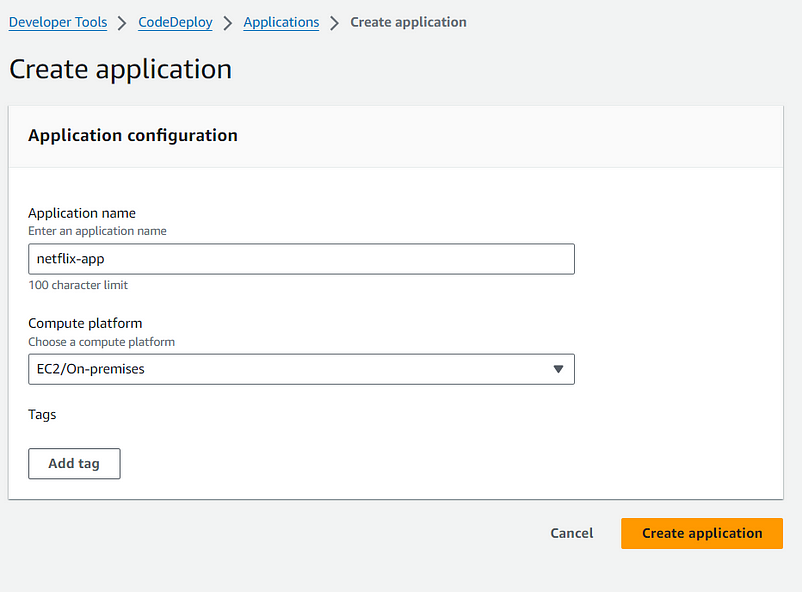
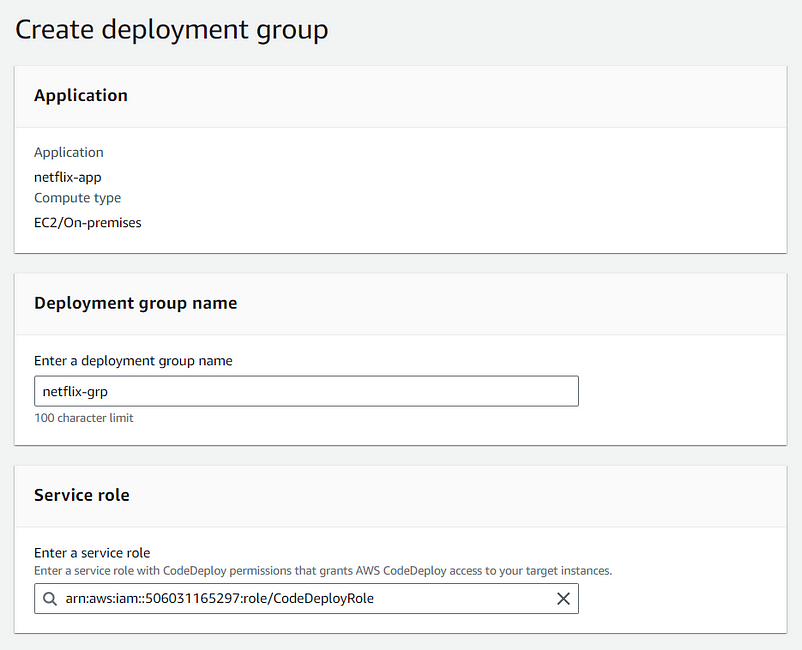
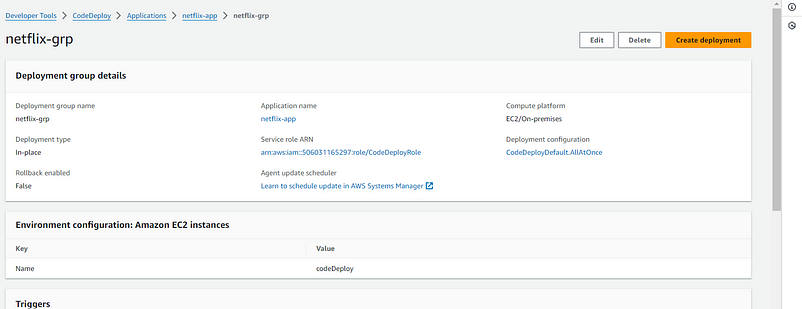
- Create Application and Compute platform is EC2/On-premises
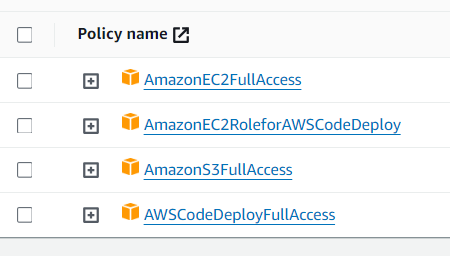
Create Service role (Give permissions -
1.AmazonEC2FullAccess
2.AmazonEC2RoleforAWSCodeDeploy
3. AmazonS3FullAccess
4.AWSCodeDeployeFullAccess
5.AWSCodeDeployRole
6.AmazonEC2RoleforAWSCodeDeployLimitaccesstoS3
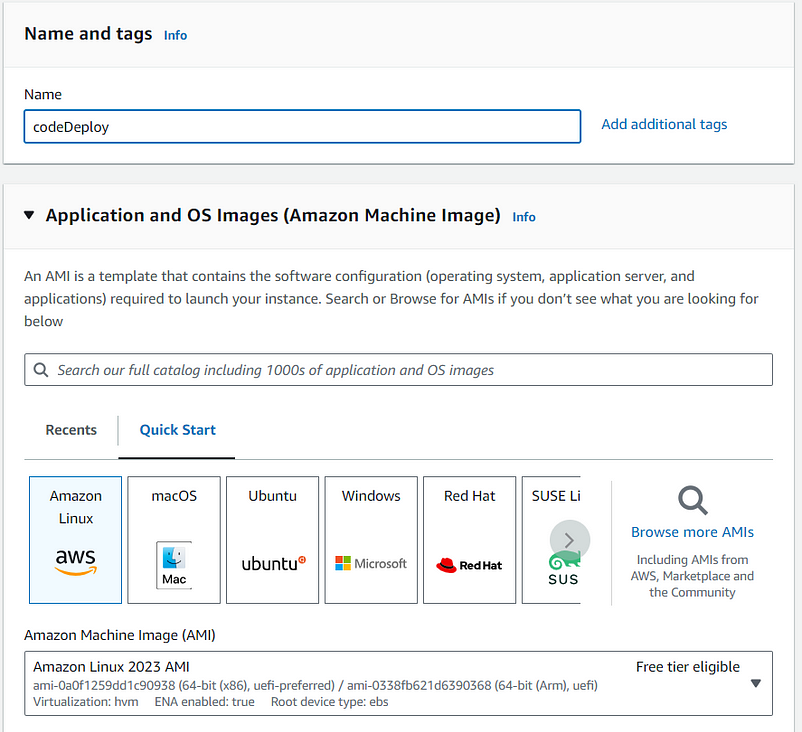
Click Launch Instances
-
Amazon Linux->t2.micro -
Also, Create a Service Role for
EC2 to access s3 & CodeDeploy -
Goto IAM Dashboard -> Create Role -> Service Role -> EC2
-
Add this permission
-
AmazonEC2FullAccess -
AmazonEC2RoleforAWSCodeDeploy -
AmazonS3FullAccess -
AWSCodeDeployFullAccess
- Give Role name -> Click on Create Role
- Give This Service Role here.

-
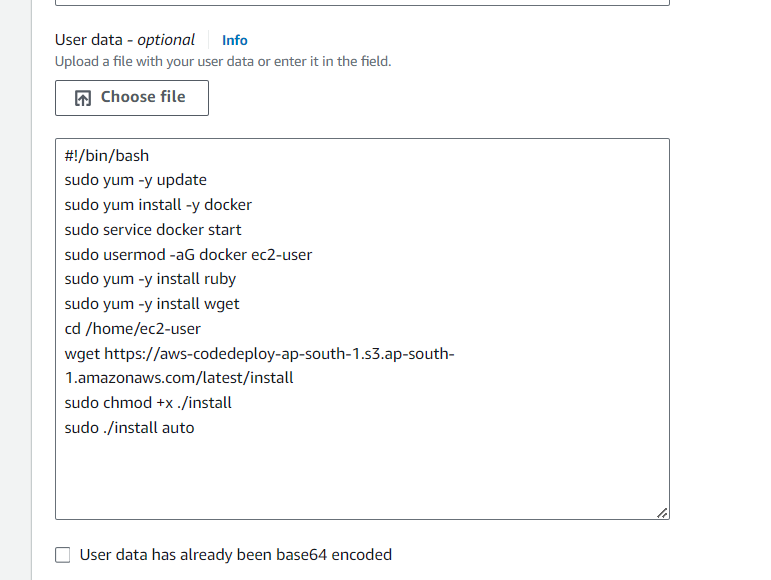
Add this Script to the User Data section.
-
Or Just run it manually.
-
For
Amazon Linux
#!/bin/bash
sudo yum -y update
sudo yum install -y docker
sudo service docker start
sudo usermod -aG docker ec2-user
sudo yum -y install ruby
sudo yum -y install wget
cd /home/ec2-user
wget https://aws-codedeploy-ap-south-1.s3.ap-south-1.amazonaws.com/latest/install
sudo chmod +x ./install
sudo ./install auto- For
Ubuntu
#!/bin/bash
sudo apt update
sudo install docker.io
sudo apt install ruby-full
wget cd /home/ubuntu wget https://aws-codedeploy-ap-south-1.s3.ap-south-1.amazonaws.com/latest/install
chmod +x ./install
sudo ./install auto
sudo service codedeploy-agent status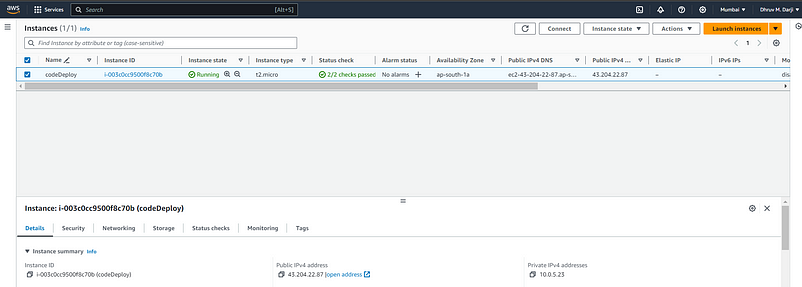
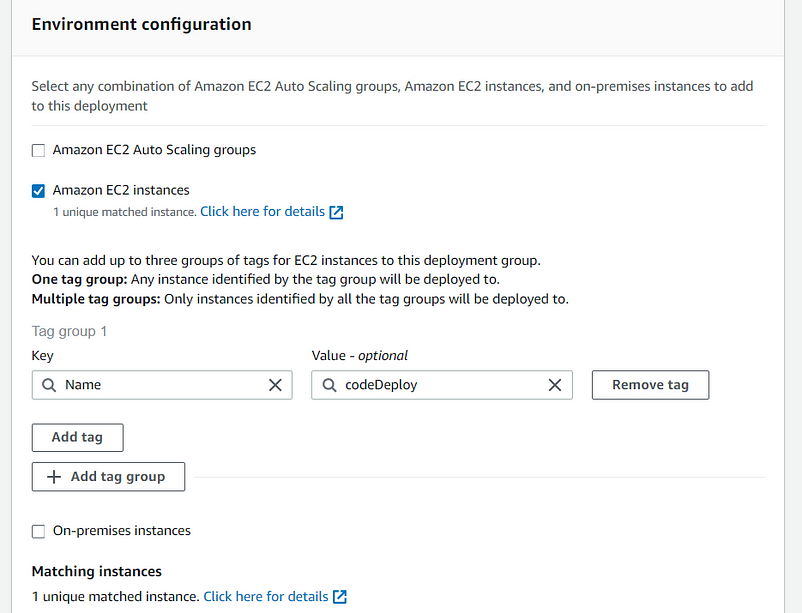
- Create a CodeDeploy Group using the following Steps.
-
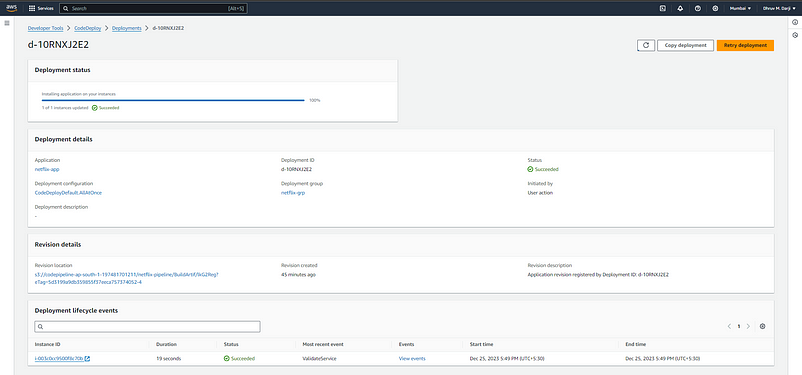
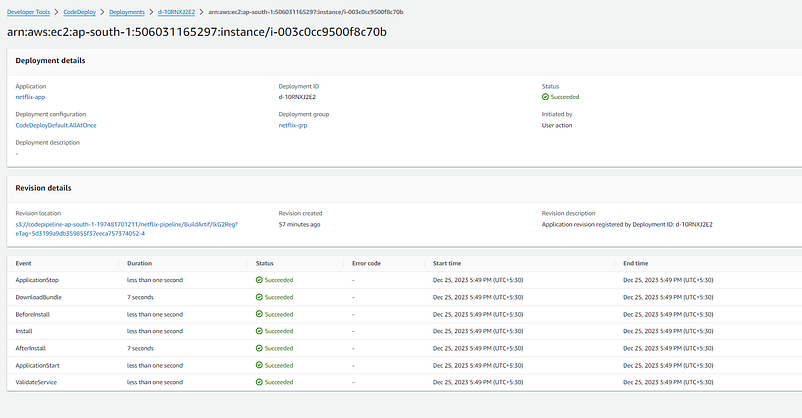
Click On
Create Deployment -
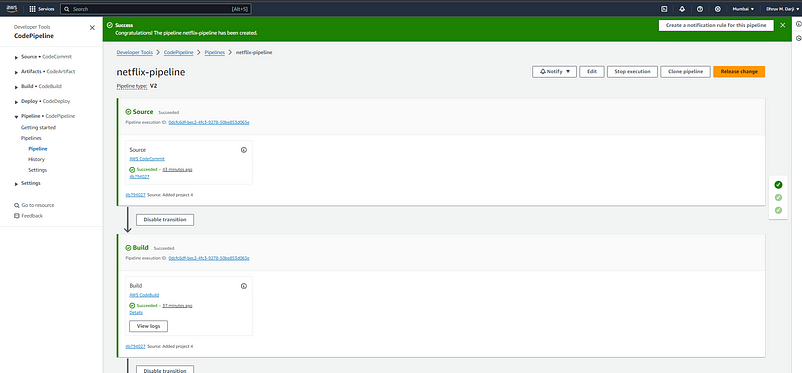
Start Deployment
-
Step 1: Choose pipeline setting -> PipelineName > Service role
-
Step 2: Add source stage -> CodeCommit > RepoName > BranchName > Select CodePipeline periodically for changes(For automation)
-
Step 3: Add build stage -> BuildProvider > Region > ProjectName > Single build
-
Step 4: Add deploy stage -> DeployProvider > Region > AppName > Deployment group
-
Step 5: Review
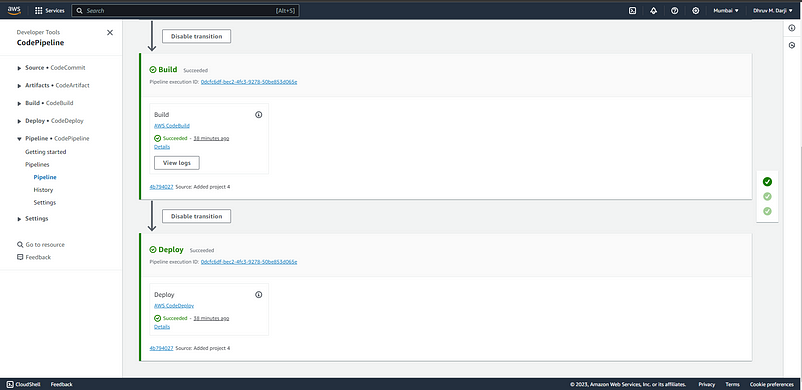
CodeDeploy
Thank you for taking the time to work on this tutorial/labs. Let me know what you thought!