DataFog Instructor is a Python SDK for named entity recognition (NER) using Ollama as the LLM backend. It provides an easy-to-use interface for detecting and classifying entities in text.
Check out this 20-second demo of DataFog Instructor in action:
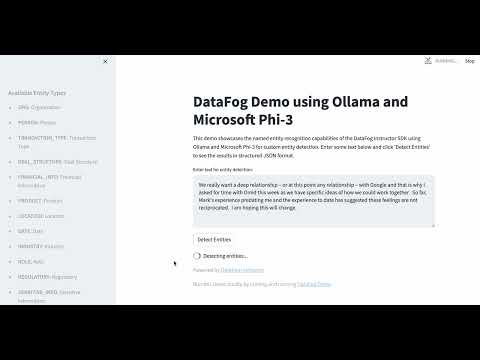
This code for this streamlit demo can be found at datafog-ollama-demo
pip install --pre datafog-instructor
Here's a simple example to get you started with DataFog Instructor:
from datafog_instructor import DataFog

# Initialize DataFog with default settings
datafog = DataFog()

# Detect entities in text
text = "Cisco acquires Hess for $20 billion"
result = datafog.detect_entities(text)

# Print results
for entity in result.entities:
print(f"Text: {entity.text}, Type: {entity.type.value}")You can customize the DataFog instance using environment variables:
DATAFOG_LLM_BACKEND: Currently only supports "ollama"DATAFOG_LLM_ENDPOINT: The host URL for the Ollama service (default: "http://localhost:11434")DATAFOG_LLM_MODEL: The model to use for entity detection (default: "phi3")
Example with custom settings:
import os
os.environ['DATAFOG_LLM_ENDPOINT'] = 'http://custom-ollama-host:11434'
os.environ['DATAFOG_LLM_MODEL'] = 'custom-model'

from datafog_instructor import DataFog

datafog = DataFog()Use the detect_entities method to identify and classify named entities in a given text:
text = "Apple Inc. reported $100 billion in revenue for Q4 2023"
result = datafog.detect_entities(text)

for entity in result.entities:
print(f"Text: {entity.text}, Type: {entity.type.value}")You can add or remove entity types dynamically:
# Add a new entity type
datafog.add_entity_type("CUSTOM", "Custom Entity")

# Remove an entity type
datafog.remove_entity_type("CUSTOM")

# Get all entity types
entity_types = datafog.get_entity_types()
print(entity_types)The SDK comes with an expanded list of predefined entity types, including:
- Organization Information: ORG, PERSON, TRANSACTION_TYPE, DEAL_STRUCTURE, FINANCIAL_INFO, PRODUCT, LOCATION, DATE, INDUSTRY, ROLE, REGULATORY, SENSITIVE_INFO, CONTACT, ID, STRATEGY, COMPANY, MONEY
- Personal Information: EMAIL, PHONE, SSN, CREDIT_CARD, IP_ADDRESS, URL, AGE, NATIONALITY, JOB_TITLE, EDUCATION
- Location Information: ADDRESS, CITY, STATE, ZIP, COUNTRY, REGION
The SDK includes error handling for various scenarios. If there's an issue with processing the response or an unexpected response format, it will raise a ValueError with details about the error.
For development purposes, you can install additional dependencies:
pip install datafog-instructor[dev]
This includes tools like pytest, black, flake8, and mypy for testing and code quality.
To build the documentation locally:
pip install datafog-instructor[docs]
cd docs
make html
The documentation will be available in the docs/_build/html directory.
Contributions to the DataFog Instructor SDK are welcome! Please feel free to submit a Pull Request.
This project is licensed under the MIT License.
If you encounter any problems or have any questions, please open an issue on the GitHub repository or join our Discord community at https://discord.gg/bzDth394R4.
- Homepage: https://datafog.ai
- Documentation: https://docs.datafog.ai
- Twitter: https://twitter.com/datafoginc
- GitHub: https://github.com/datafog/datafog-instructor
Welcome to the Entity Detection SDK! This powerful tool uses transformers and regex-constrained outputs to accurately identify entities in text. Follow this guide to get up and running quickly.
-
Clone the repository:
git clone https://github.com/your-username/entity-detection-sdk.git cd entity-detection-sdk -
Create a virtual environment (recommended):
python -m venv venv source venv/bin/activate # On Windows, use `venv\Scripts\activate` -
Install the required dependencies:
pip install -r requirements.txt
-
Initialize the SDK:
python -m entity_detection initThis will create a
fogprint.jsonfile with default settings. -
Verify the installation:
python -m entity_detection list-entitiesYou should see a list of default entity types: PERSON, COMPANY, LOCATION, and ORG.
python -m entity_detection detect-entities --prompt "Apple Inc. was founded by Steve Jobs in Cupertino, California."
This will output a table of detected entities, their positions, and types.
python -m entity_detection show-fogprint
This command will show you the current configuration stored in fogprint.json.
To change the default model or pattern:
- Edit the
fogprint.jsonfile directly, or - Use the
initcommand with the--forceflag:Follow the prompts to update your configuration.python -m entity_detection init --force
-
Adjust the maximum number of tokens generated:
python -m entity_detection detect-entities --prompt "Your text here" --max-new-tokens 100 -
For batch processing or integration into your Python projects, import the
EntityDetectorclass frommodels.py.
Exciting features are coming soon to enhance the SDK's capabilities:
- Regex Layer: We're working on adding a customizable regex layer for even more precise entity detection.
- Embeddings Layer: Future versions will incorporate an embeddings layer to improve entity recognition accuracy.
Stay tuned for updates!